


Threadless headsets are one of the single biggest improvements to bicycle design, they’re elegant and simple to use and adjust for perfectly smooth steering.
Our guide below shows you what we believe is the best method to adjust a threadless headset. We’ve included a list of the tools and materials that you will need to complete the job and in some cases where you can buy them. If there are others that you prefer then feel free to let everybody know in the comments.
Tools & Materials
The day the ubiquitous threadless headset was conceived and developed by American, John Rader in 1990 was a good day for all cyclists. Freeing bikes (and cyclists) from troublesome threaded steerer tubes, threaded cups, lock rings and spanners to effect bearing preload was a stroke of forehead slapping genius. Road.cc first met Rader and saw the prototype threadless headset at the world mountain bike championships in Italy back in 1991. We couldn’t have expected this simple method of pre-loading headset bearings to change the way we attach forks to frames forever, but it did.
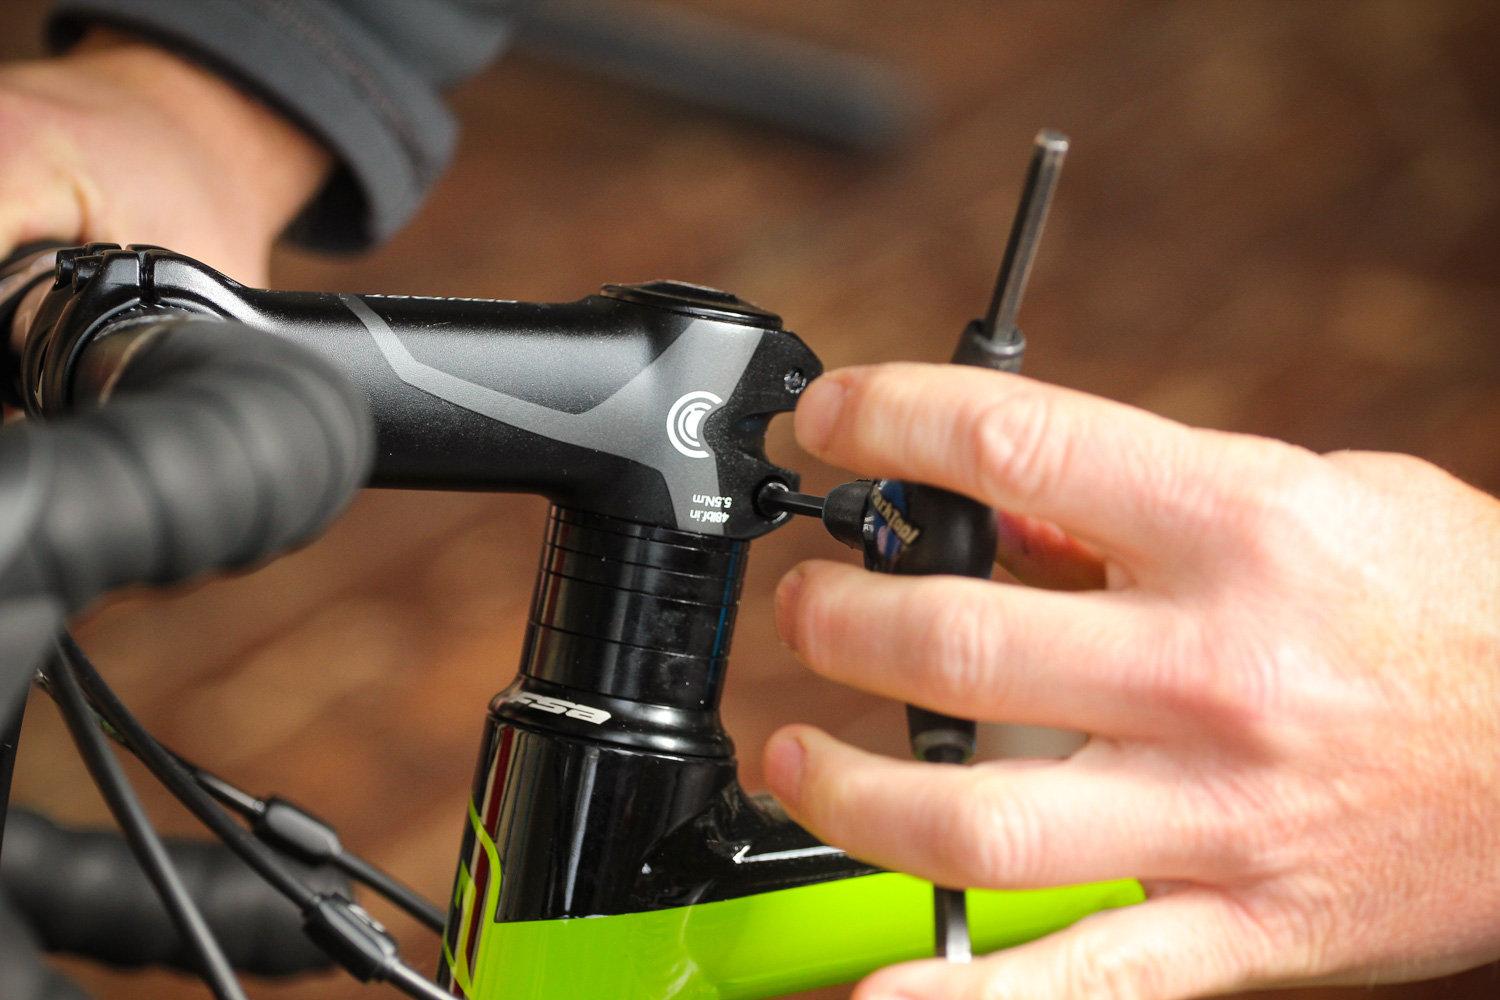
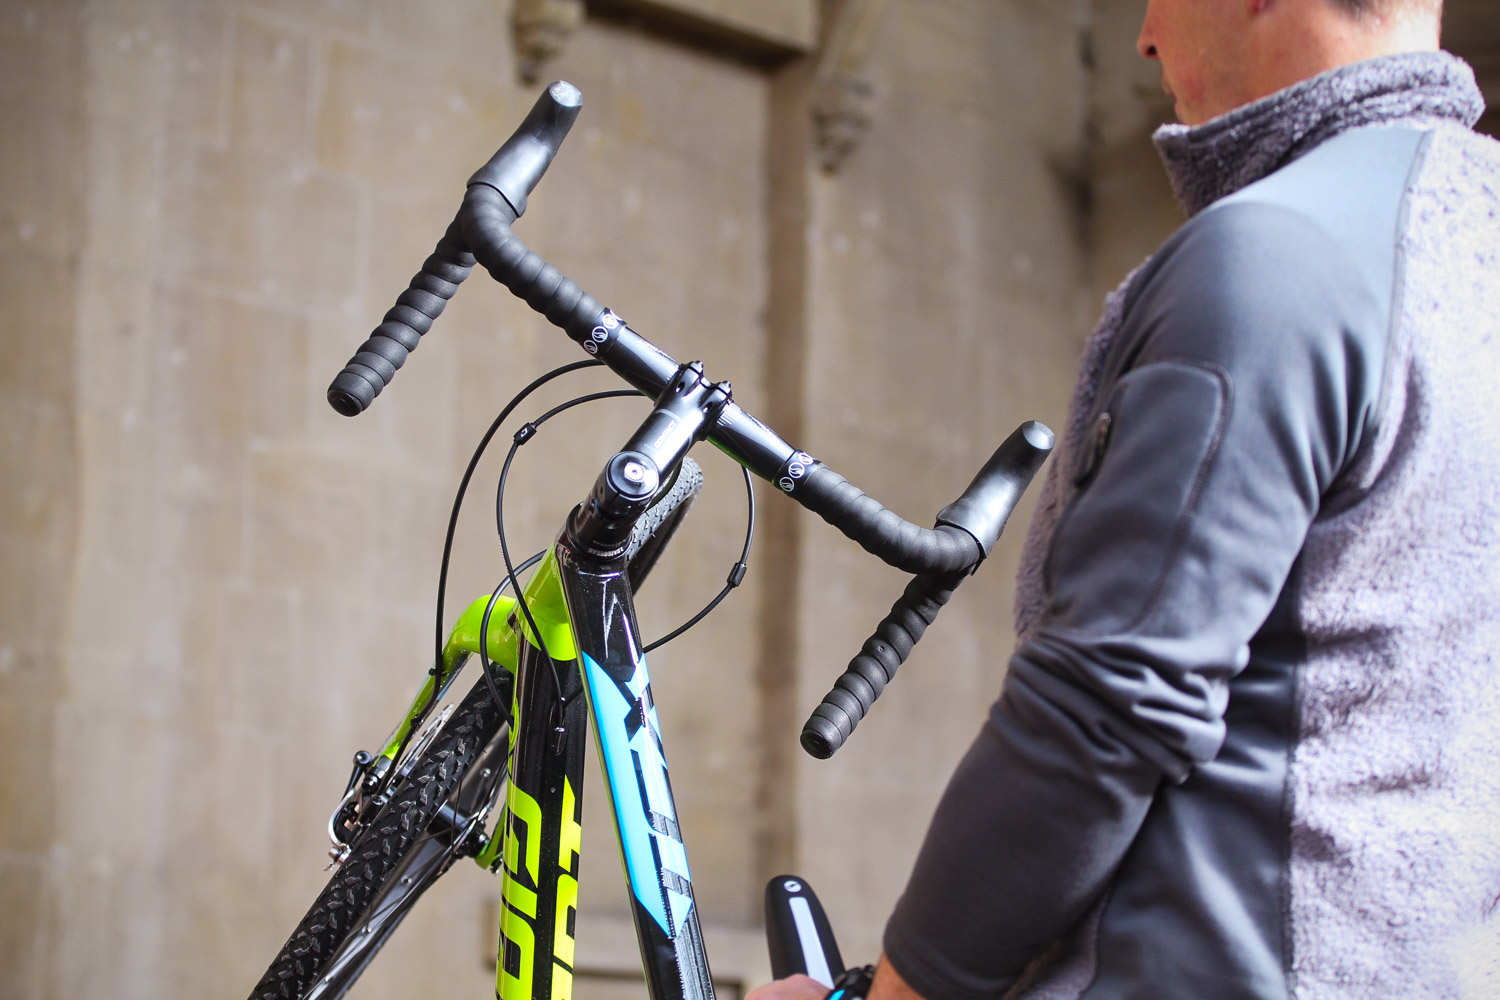
1. Loosen the stem bolts
The trick with threadless headsets is not to forget the to loosen the stem pinch bolts first. Without doing that you’ll get nowhere swinging on the top cap bolt for main bearing adjustment. Just back the pinch bolts off enough that the stem can be moved from side to side with light hand pressure. The beauty of the threadless headset is that we only need a 5mm Allen key to preload our headset bearings. You might also need a 4mm Allen key if your stem pinch bolts require it. There are no threads on the steerer tube to worry about, spanners or counter tightening.
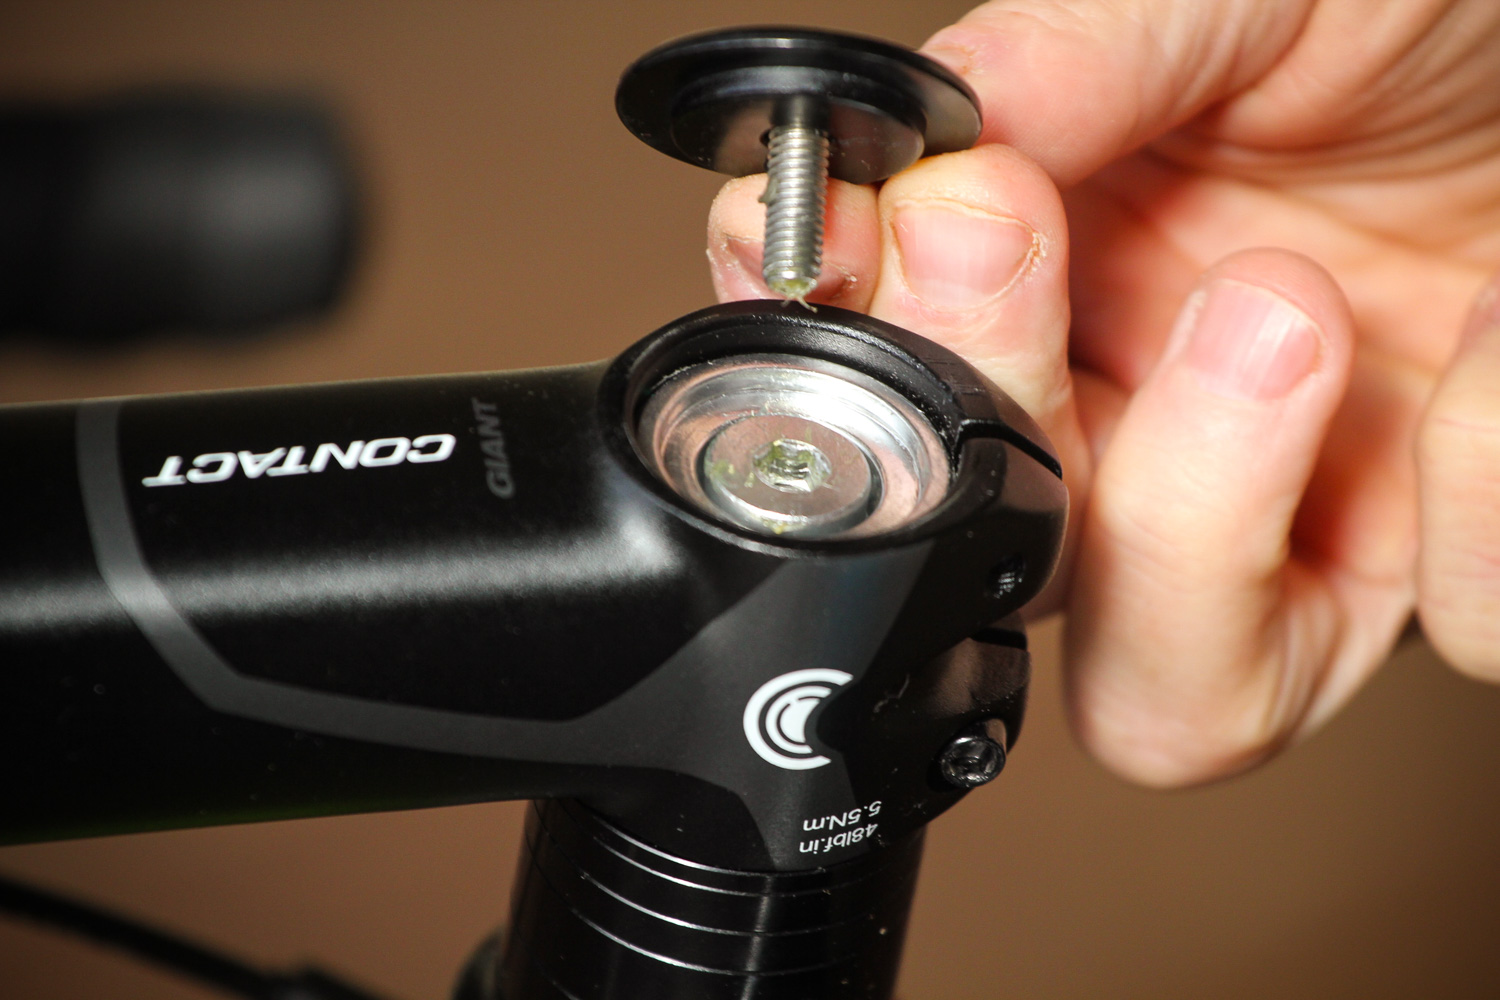
2. Check the clearance
We’ve undone the top cap and removed it, so you can see the star nut (in this particular case an expansion wedge). As you apply torque to the top cap bolt the bearing is loaded, effectively pulling the fork steerer upwards. You need to make sure that the top edge of your stem, or steerer spacer, is around 3mm proud of the top of the steerer tube.
If you have an aluminium steerer then it’s fine for the stem to be proud of the steerer. If the steerer is made from carbon fibre then we very strongly recommend you have a 5mm spacer above the stem so that the stem is entirely clamped round steerer and can’t crush the top.
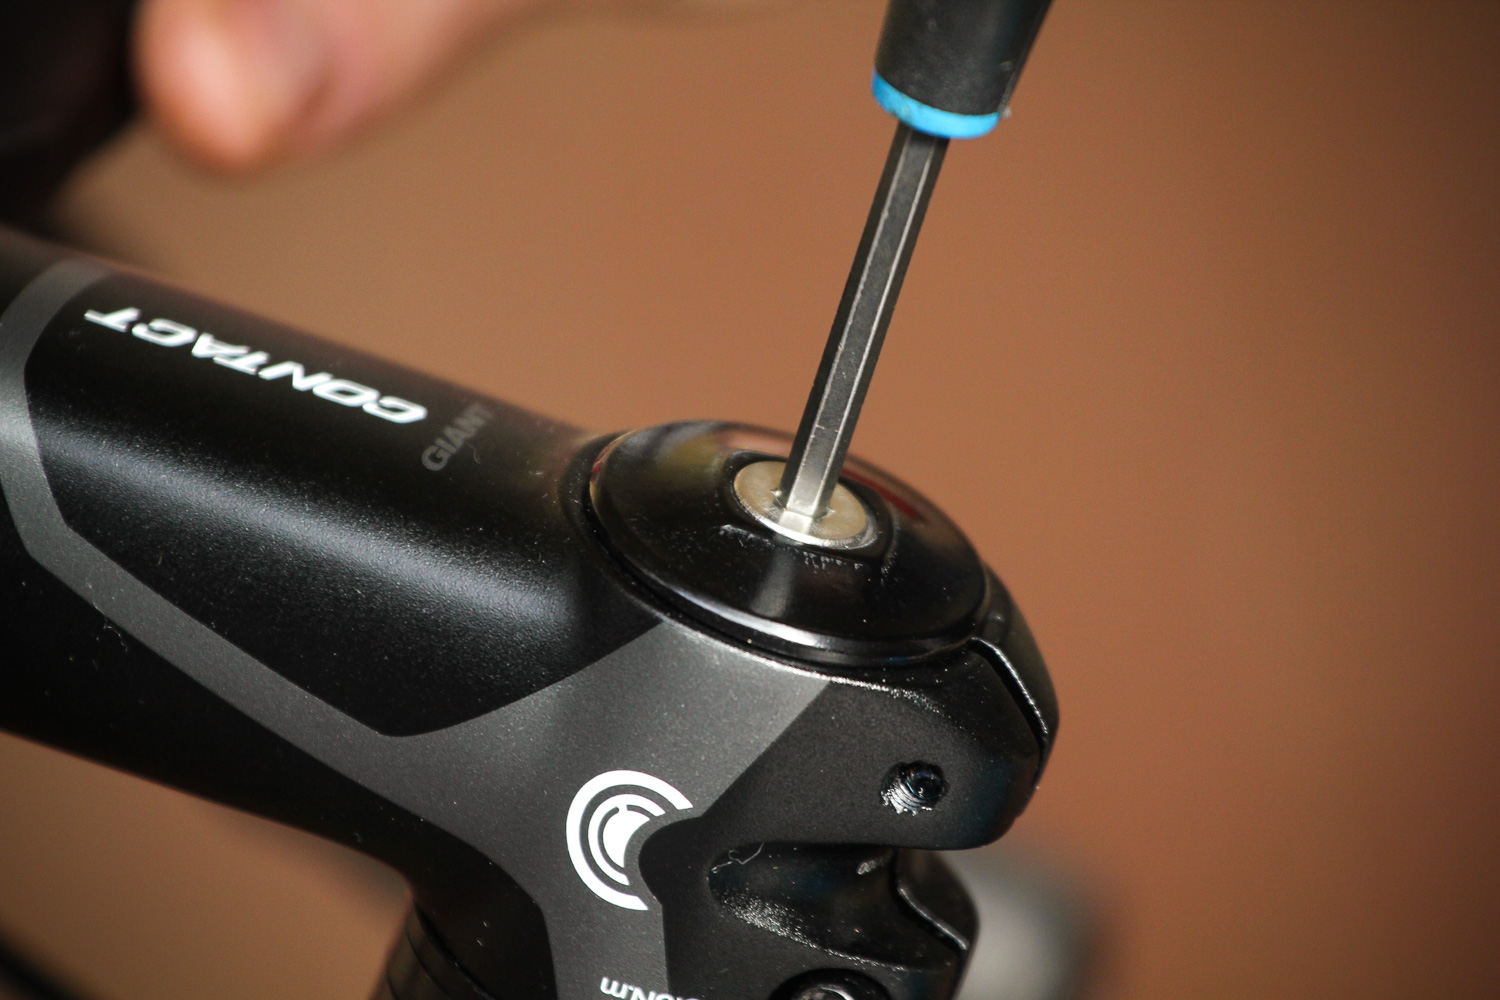
3. Adjust the bearing preload
Depending on how loose your headset bearing feels you can make adjustments to the bearing tension with the 5mm Allen bolt located in the top cap. Adding tension to the bolt will pull the threaded star nut (which is found wedged inside the steerer tube) upwards, moving the fork crown race bearing more tightly into the lower headset cup. Alternatively, reducing the tension on the bolt will back off the bearing preload, effectively loosening the bearing.
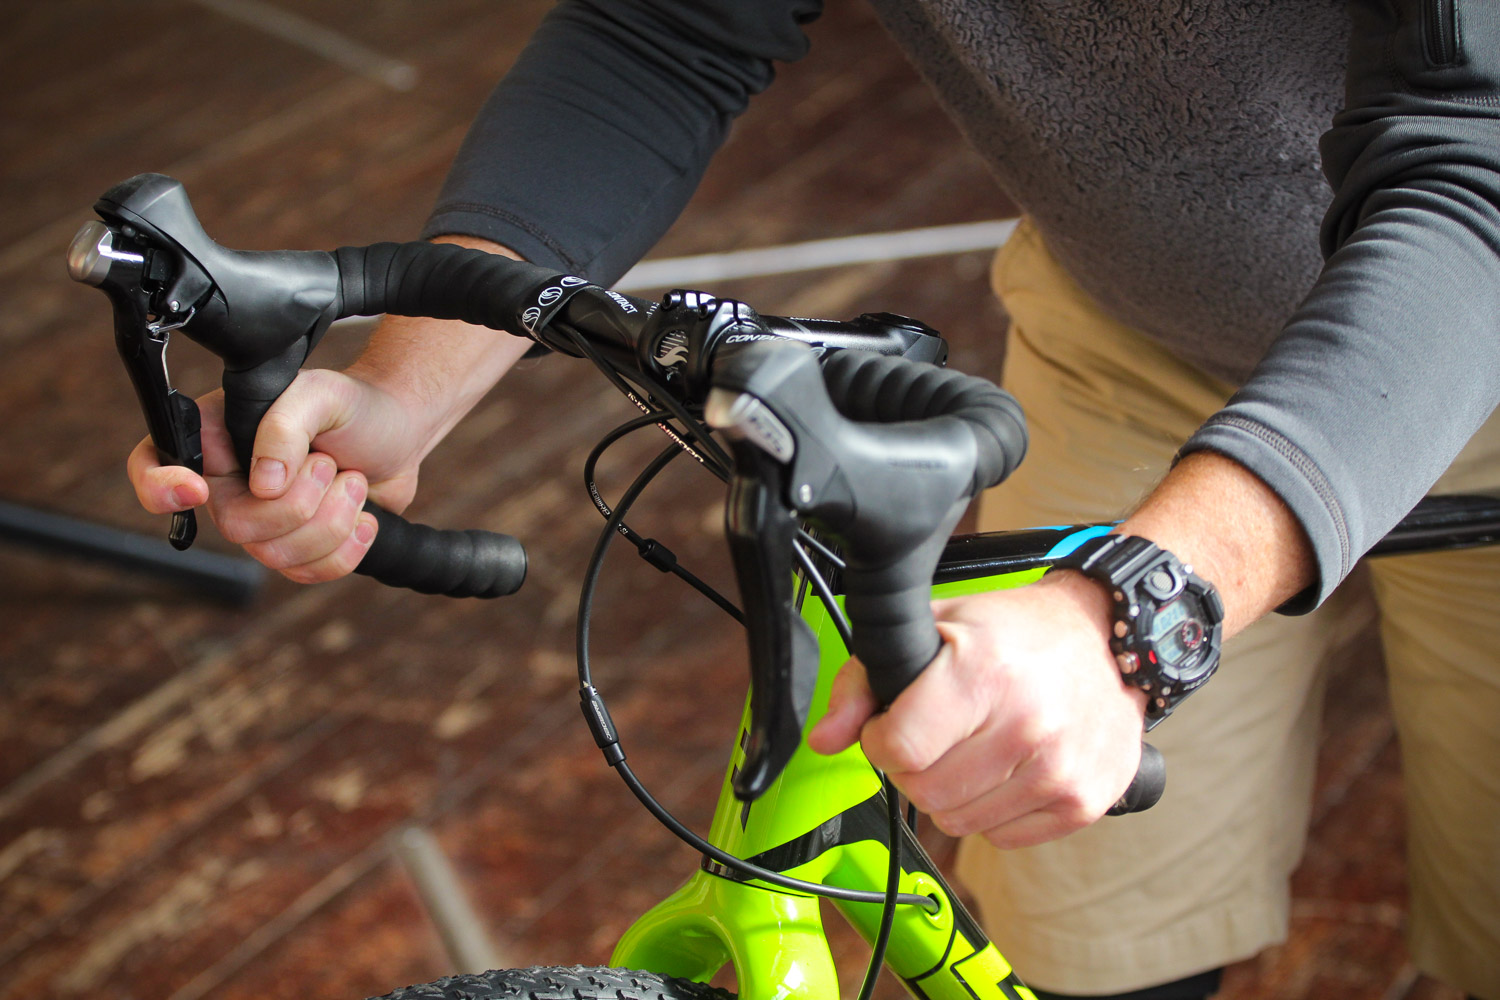
4. Check for looseness
When you’re happy that you have the bearing set to the correct level or preload, apply the front brake only. While holding the front brake on, rock the bike gently back and fore. If you feel any looseness – it’ll often feel like a feint knocking feeling – then add more preload tension to the bolt until the looseness stops.
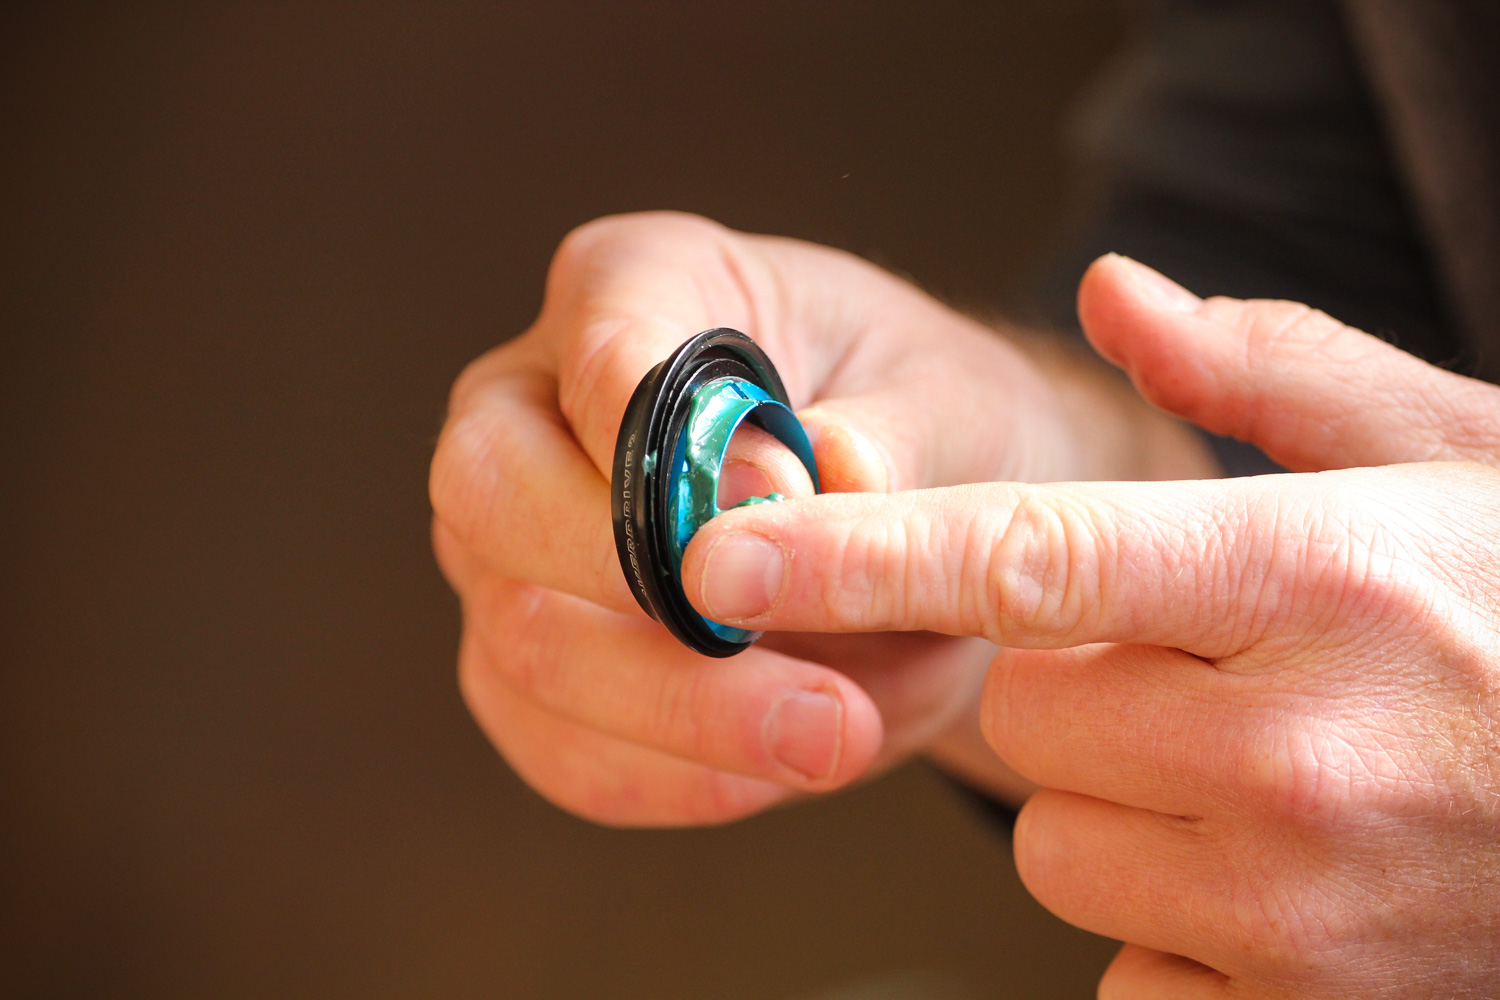
5. Make sure it’s not too tight
Cranking on too much preload tension can harm the steering sensitivity of your bike. You’ll feel this as a sensation of stiffness in the steering, and when ridden a bike with an over tight thread less headset will have a tendency to auto-steer off line. To check that you haven’t over preloaded the bearing, raise the front wheel off the ground, by lifting the front of the top tube, then gently rotate the handlebar through its normal range of movement from lock-to-lock. The bars should move freely with no sticking, binding or resistance on any kind. If the bar doesn’t rotate freely (as here where the steering is catching), then back off the preload tension until it moves freely without bearing play.
6. Straighten the bar and tighten the stem bolts
It only takes a seconds to make adjustments and check them, so you’ll zero in on the perfect adjustment in minutes. When you’re happy with the new headset bearing tension, align the stem and bar and do up the stem pinch bolts to the recommended torque.
7. Keep it greased
While it’s not strictly an adjustment, it just helps make adjustments easier if you periodically give the component parts of the threadless headset a light greasing, to ensure they snug down nicely and help keep water ingress at bay. The crown race bearing, the one which sits on the crown of the fork inside the lower end of the head tube is particularly prone to sitting in moisture and rusting or drying out. If you do grease your headset components, be sure not to get any on the steerer tube itself, as the stem needs to grip it tightly. Grease on the steerer will only mean you’re over tightening the stem bolts to gain suitable grip, potentially causing damage to the stem and the steerer tube.


21 thoughts on “Threadless headsets: get perfect adjustment in just 7 steps”
What I do after tightening
What I do after tightening the stem bolts down on the steerer is take off the tension in the top cap bolt, you know loosen off and then tighten to just enough, Don’t know if I am meant to do this, just seems the right thing to do.
ktache wrote:
I wouldn’t. One pothole later & your forks have potentially dangerous play. Says the man who’s BMC is away having non-faulty forks fitted after 2 years of caning it down Dales descents…
I do that too, ever since
I do that too, ever since reading the instruction on the ‘kapz’ website. You’d think there would be enough pressure on the stem bolts to keep it all together.
This is absolutely fine. Once
This is absolutely fine. Once the two stem bolts are torqued up correctly, you could in fact remove the top cap altogether. It is no longer serving any function other than looking pretty and stopping dirt from travelling down the inside of the steerer tube.. Just like you, I slacken mine off, align the graphics on the top cap (Scottish Lion Rampant!) properly and then just snug up by hand.
There is some very sloppy language in the article e.g. “will pull the threaded star nut (which is found wedged inside the steerer tube) upwards” – no it doesn’t! Tightening the top cap pushes the stem down onto the top bearing cap, thereby pre-loading the bearing. The pre-load is then locked in by tightening the stem bolts. The star nut doesn’t move (at least it shouldn’t if it’s functioning correctly!)
There is also no warning about the type of top cap shown in one of the first photos – the kind with a large step down in the middle. They can bottom out on the top of the expanding bung/start nut before enough preload is applied. I have known several friends that have been unable to eliminate the play in their headset and this has been the problem.
Also no mention of the need to make sure the expanding bung type of mechanism is properly tightened inside the steerer tube. If you don’t, every time you try to apply pre-load, all you end up doing is pulling the bung up the steerer.
mpdouglas wrote:
How can it do the one without doing the other (Newton’s 3rd law)?
Good point about the
Good point about the expanding bung type. Had exactly that problem on an Orbea Terra. Every couple of weeks, I could feel chatter from the fork. Tighten the top cap down, and repeat. Either my bearings were becoming wafer thin, or something else was amiss. Found the expanding bung was slowly pulling up the steerer tube.
Gotta be done, so you can get
Gotta be done, so you can get the graphics on the top cap the right way round.
Ineed. Mrs Srchar gave me a
Ineed. Mrs Srchar gave me a top cap with a family photo printed on it, just to keep bicycle-based risk taking down to a minimum. Can’t have that on the piss.
For a while, I used a top cap
For a while, I used a top cap mounting bracket for the Wahoo Elemnt Bolt, but the design meant that the top cap fixing bolt was concealed underneath the bracket bit. This meant at least an hour of fixing the bracket on top, seeing it was slightly askew, taking it off and adjusting the orientation a tiny bit, fix the bracket on top again, see that it’s still a tiny bit off…
After my last bollocks up –
After my last bollocks up – take to a shop !
Riders afflicted with the
Riders afflicted with the hateful Spesh ‘Future Shock’ can ignore all of this. Einstein, Brunel & Da Vinci would run screaming from the clear insanity of the proposed pre-load method…
Ahead stems aren’t ‘elegant’,
Ahead stems aren’t ‘elegant’, they look like a bit of scaffolding stuck on top of your steerer!
This is ‘elegant’:
The quill stem design separated height adjustment from bearing preload, so you could set the bearing load, tighten the locknut and forget it forever. Height adjustment was easy too – unless the alloy stem got stuck in the steel steerer (which often happened)
Ahead stems have one huge advantage over quill stems: you can change them over – as when you want a longer or shorter reach – without removing bar tape, shifters etc. That alone killed off the quill stem for racers. They are also much stiffer – great for sprinters, not so great for tourers and the rest of us.
Ahead stems have dangers that you should warn readers about:
1. over-tightening the bearing preload pulls the steerer out of the fork, leading to sudden failure
(https://road.cc/content/forum/240118-sudden-steerer-tube-failure-canyon-endurace)
2. over-tightening the clamp crushes the carbon steerer and weakens it, leading to sudden failure
(https://road.cc/content/blog/266665-tech-blog-stuff-breaks-sometimes)
I’m not trying to sound like an old grouch, but there are pluses and minuses of both systems.
matthewn5 wrote:
You can do that with a quill stem too. Not a traditionally clamped one as shown in your photo, but quill stems with removable faceplates exist. (e.g. https://velo-orange.com/collections/stems/products/quill-stem-with-removable-faceplate-31-8mm)
Hooray for this, I was
Hooray for this, I was beginning to wonder if I was the only person who thought that making it so difficult to separate bearing and height adjustment was bad engineering. The Ahead stem also seems wrong because the adjuster takes the load rather than a lock ring. The stem clamping onto the steerer is not likely to be pushed down hard enough to be holding the pre-load – which I think is why this has become a much more frequent adjustment.
Old fashioned bearing pre-load isn’t really that difficult and not limited to headsets: any cup and cone wheel or pedal bearing will need the same skill and a pair of spanners.
And thank you armb for the point about removable faceplates on quill stems – I am resurrecting my old steel bike and will need to experiment a bit with stem length as I seem to have developed rigor mortis in the last 20 years.
TheBillder wrote:
The force of the stem being pushed down (hence the steerer being pulled up) [b]is[/b] the pre-load on the bearings. Of course, if the stem’s grip on the steerer subsequently relaxes a little then pre-load will be compromised.
Overall I think it’s a system fraught with danger for those whose mechanical curiosity exceeds their competence. Whereas the old system might have been a bitch, there was nothing you could do wrong that might unexpectedly kill you after months of trouble free riding.
Sriracha wrote:
Just to play devil’s advocate, it’s possible to push a quill stem too far down and thus tighten it against the butted part (or bulged section if someone has over-tightened the stem previously). This could then lead to sudden unexpected loosening which should be avoided.
Nice diagram! (Did you do
Nice diagram! (Did you do that or did you, er, dig it up from somewhere?)
I had not thought of that. But then again, was “slamming” the stem a thing back then?
Sorry, I stole that from
Sorry, I stole that from Sheldon Brown: https://sheldonbrown.com/handsup.html
The thing about threaded
The thing about threaded headsets is the need for dedicated headset spanners, or at least one, remembering that the adjustable spanner will hurt ehe top ring. Whereas the threadless only needs a few hex keys. And I find that threadless are difficult to over tighten,
I always found that the sdjustment of cup and cone in wheel and pedal spindles was much easier to do by twisting in the fingers, and is much easier to get the opposing torque needed to properly lock.
And because of this torque, my headsets used to loosen off more, much less once I gave up on the adjustable spanner mentioned earlier and spent on a good second headset spanner.
I have recently discovered that any notchiness on my threaded (XT) headset is not some weird self tightening but a sign that the filth has wormed it’s way into the lower race and needs removal, cleaning and regreasing, preferably before I destroy the bearing surfaces. My threadless are Chris King’s and those things are just worth the expense for the seals, the bling is just a bonus.
I remember when Aheadsets
I remember when Aheadsets first hit the scene. At the time, a pre-load screw torque rating of 10 inch-lbs (1.3 Nm) was suggested. If all the spacers move freely on the steerer, I still use this number as a starting point. It almost always takes up the slack in the bearing and I back off from there.
My Canyon has a strange way
My Canyon has a strange way of adjustment. A screw in the top cap of the headset turns and forces the cap upwards putting pressure on the bottom of the stem and the top of the headset. This does away with any type of star nut/expander bung in the steerer tube.