

With more road bikes now being fitted with hydraulic disc brakes, sooner or later you’re going to need to trim their hoses to length or understand how to disconnect and reconnect one if you’re also using internally routed hoses and cables. It’s really no more complicated than looking after traditional wire cable brakes. Here’s how.
Tools and material
Trimming hydraulic brake hoses
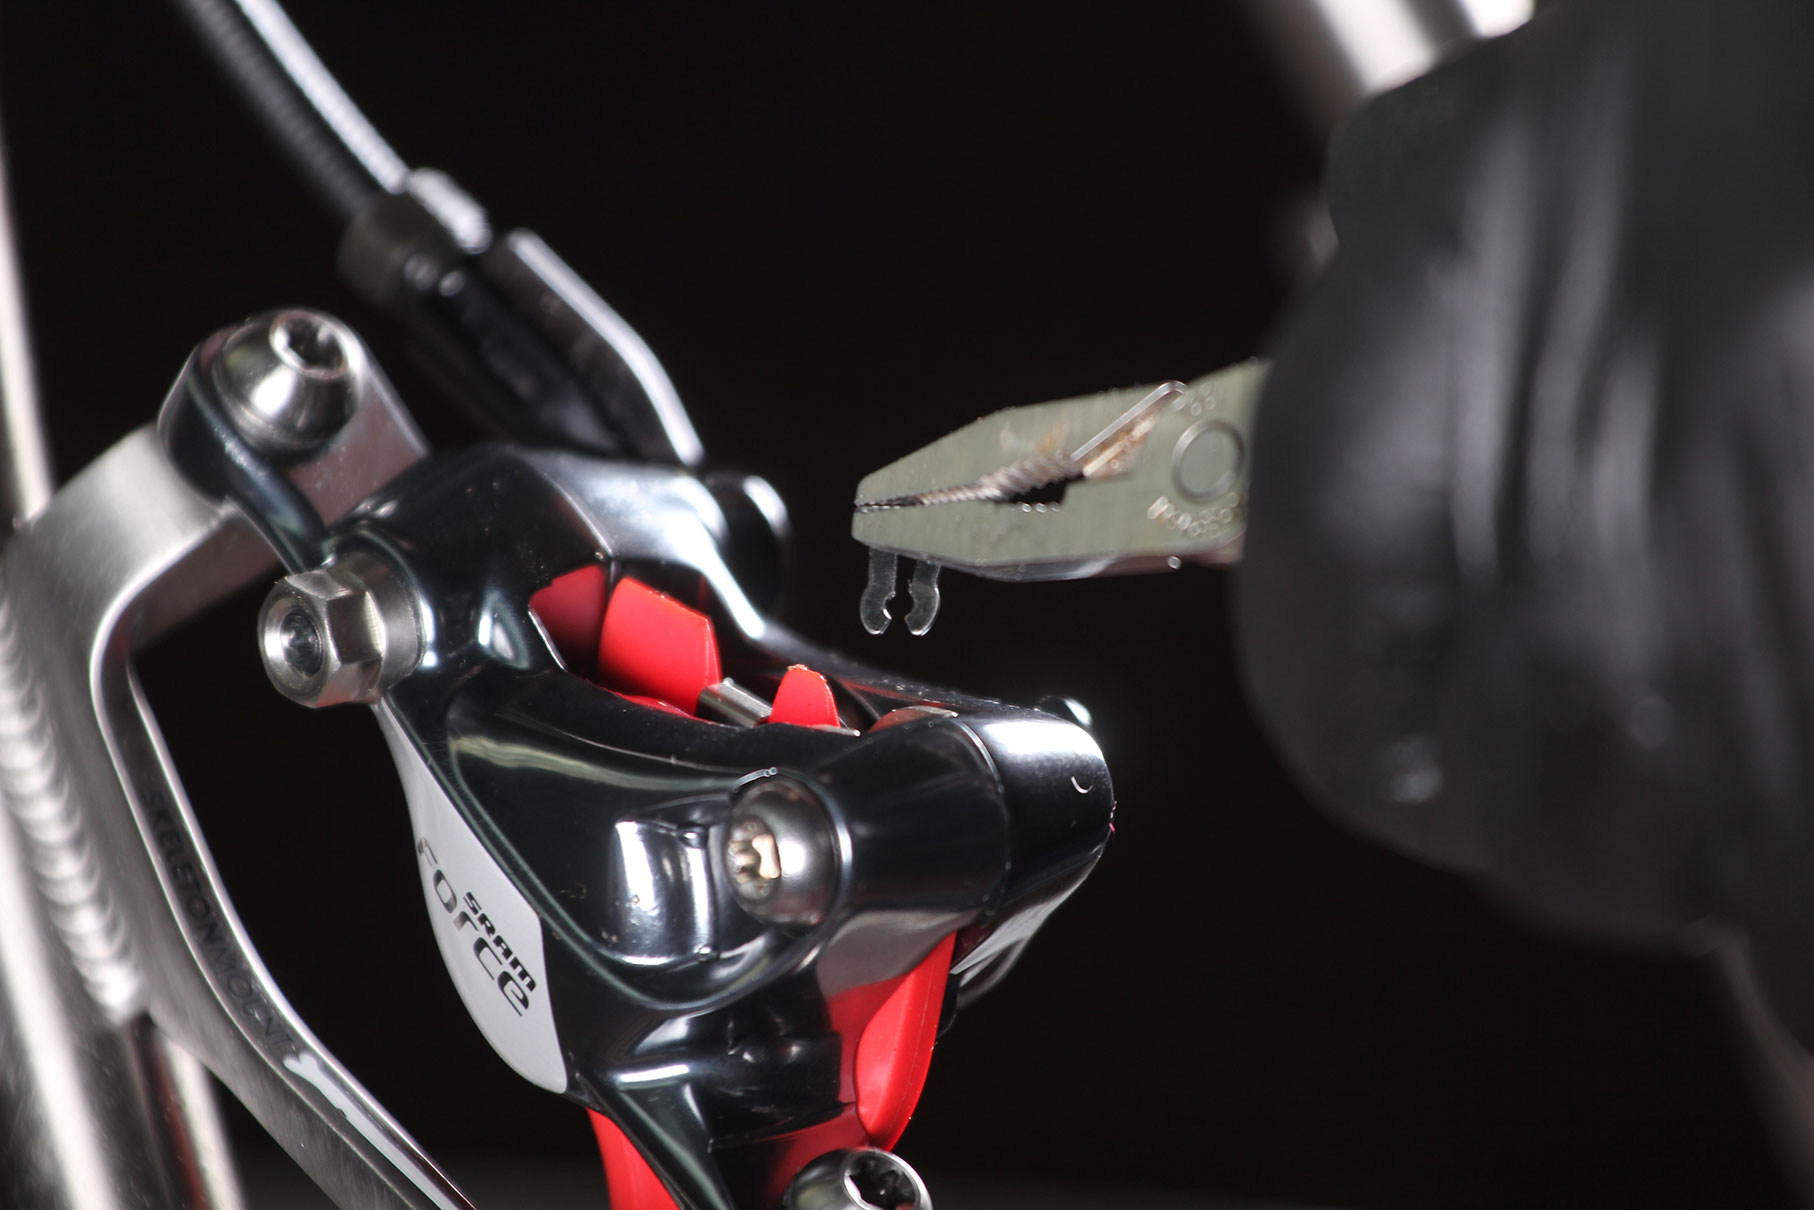
1 Remove the safety circlip. You might need some small pliers for this. Be aware that if you prise it off, circlips have a habit of heading directly under the fridge, succumbing to Stevenson’s Law of Fridge Suck.
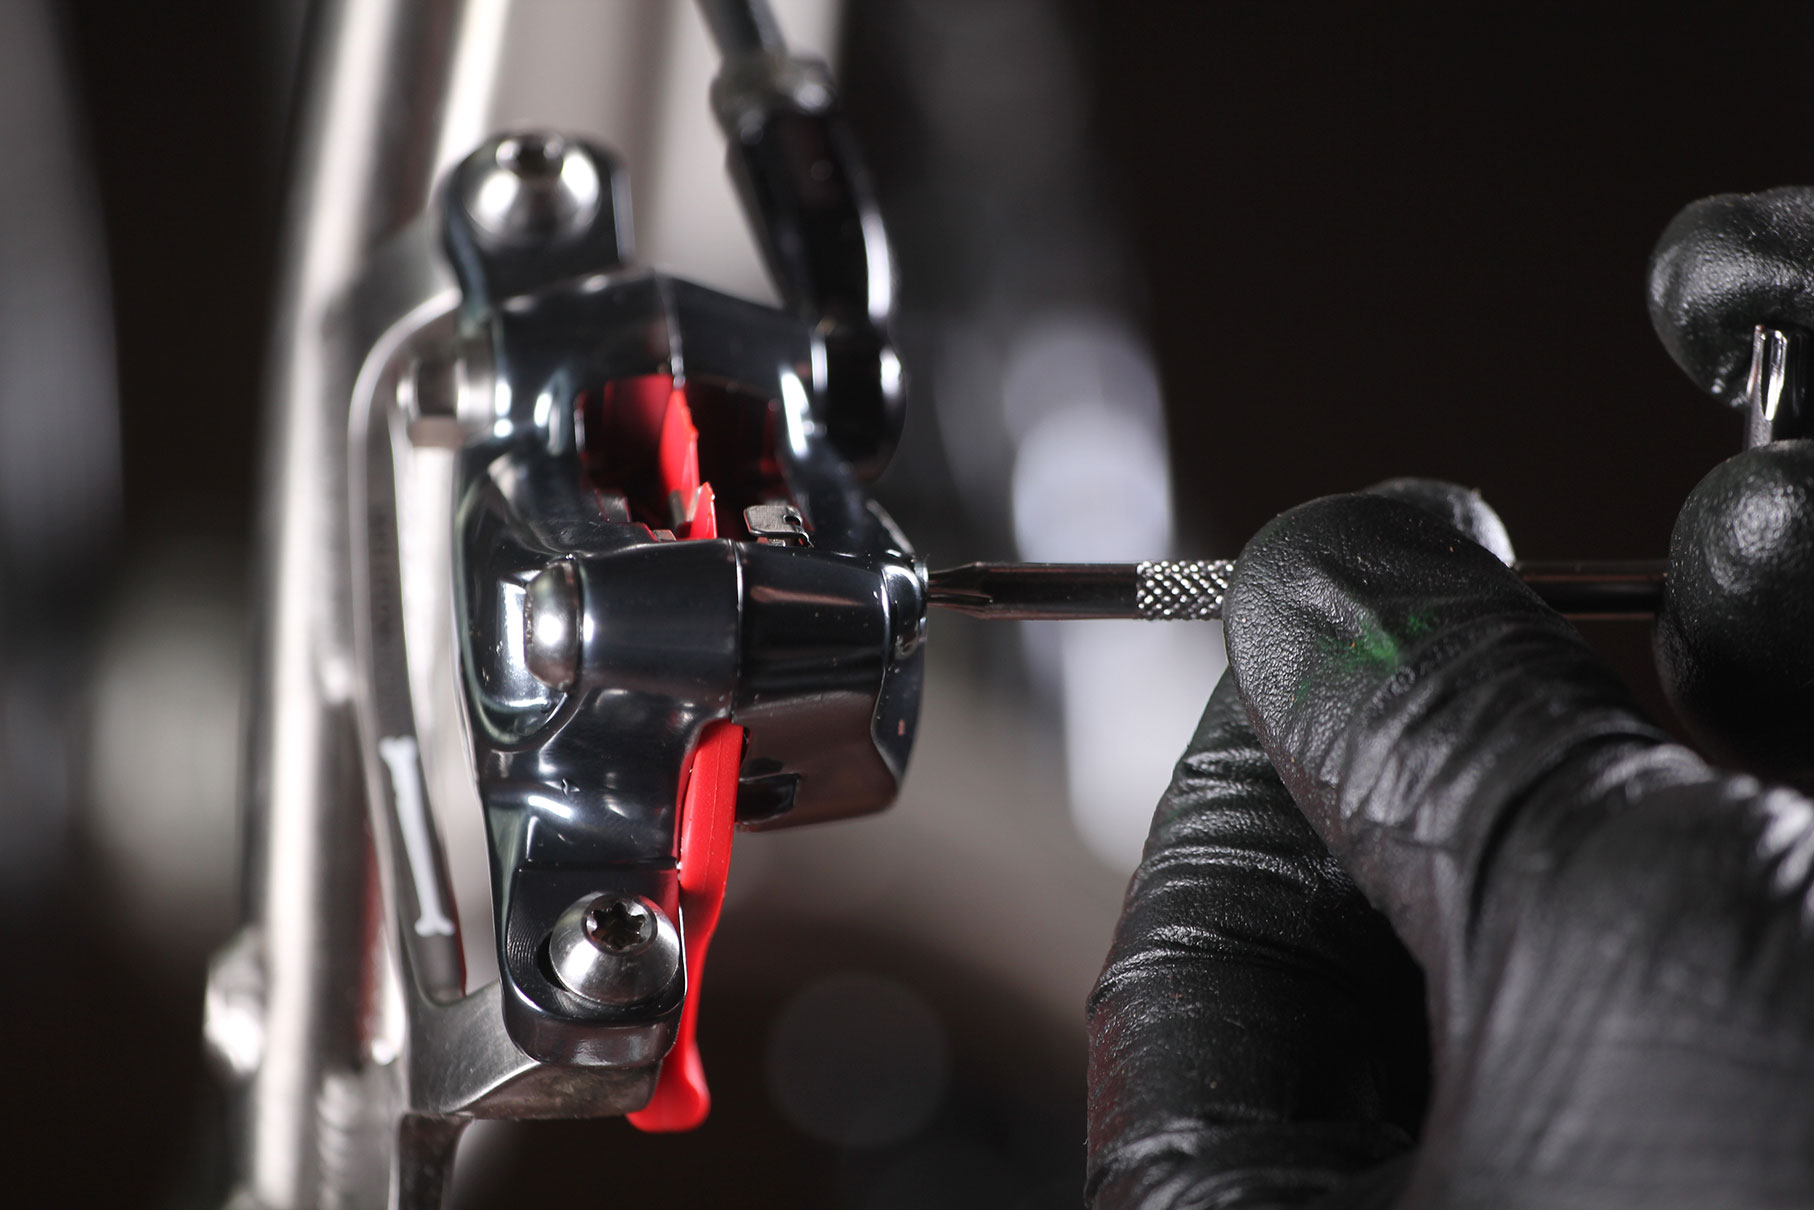
2 Unscrew the pad carrier bolt.
3 Remove the brake pads and their carrier spring. Put these somewhere well away from the bike as contamination with brake fluid kills brake pads rendering them ineffective.
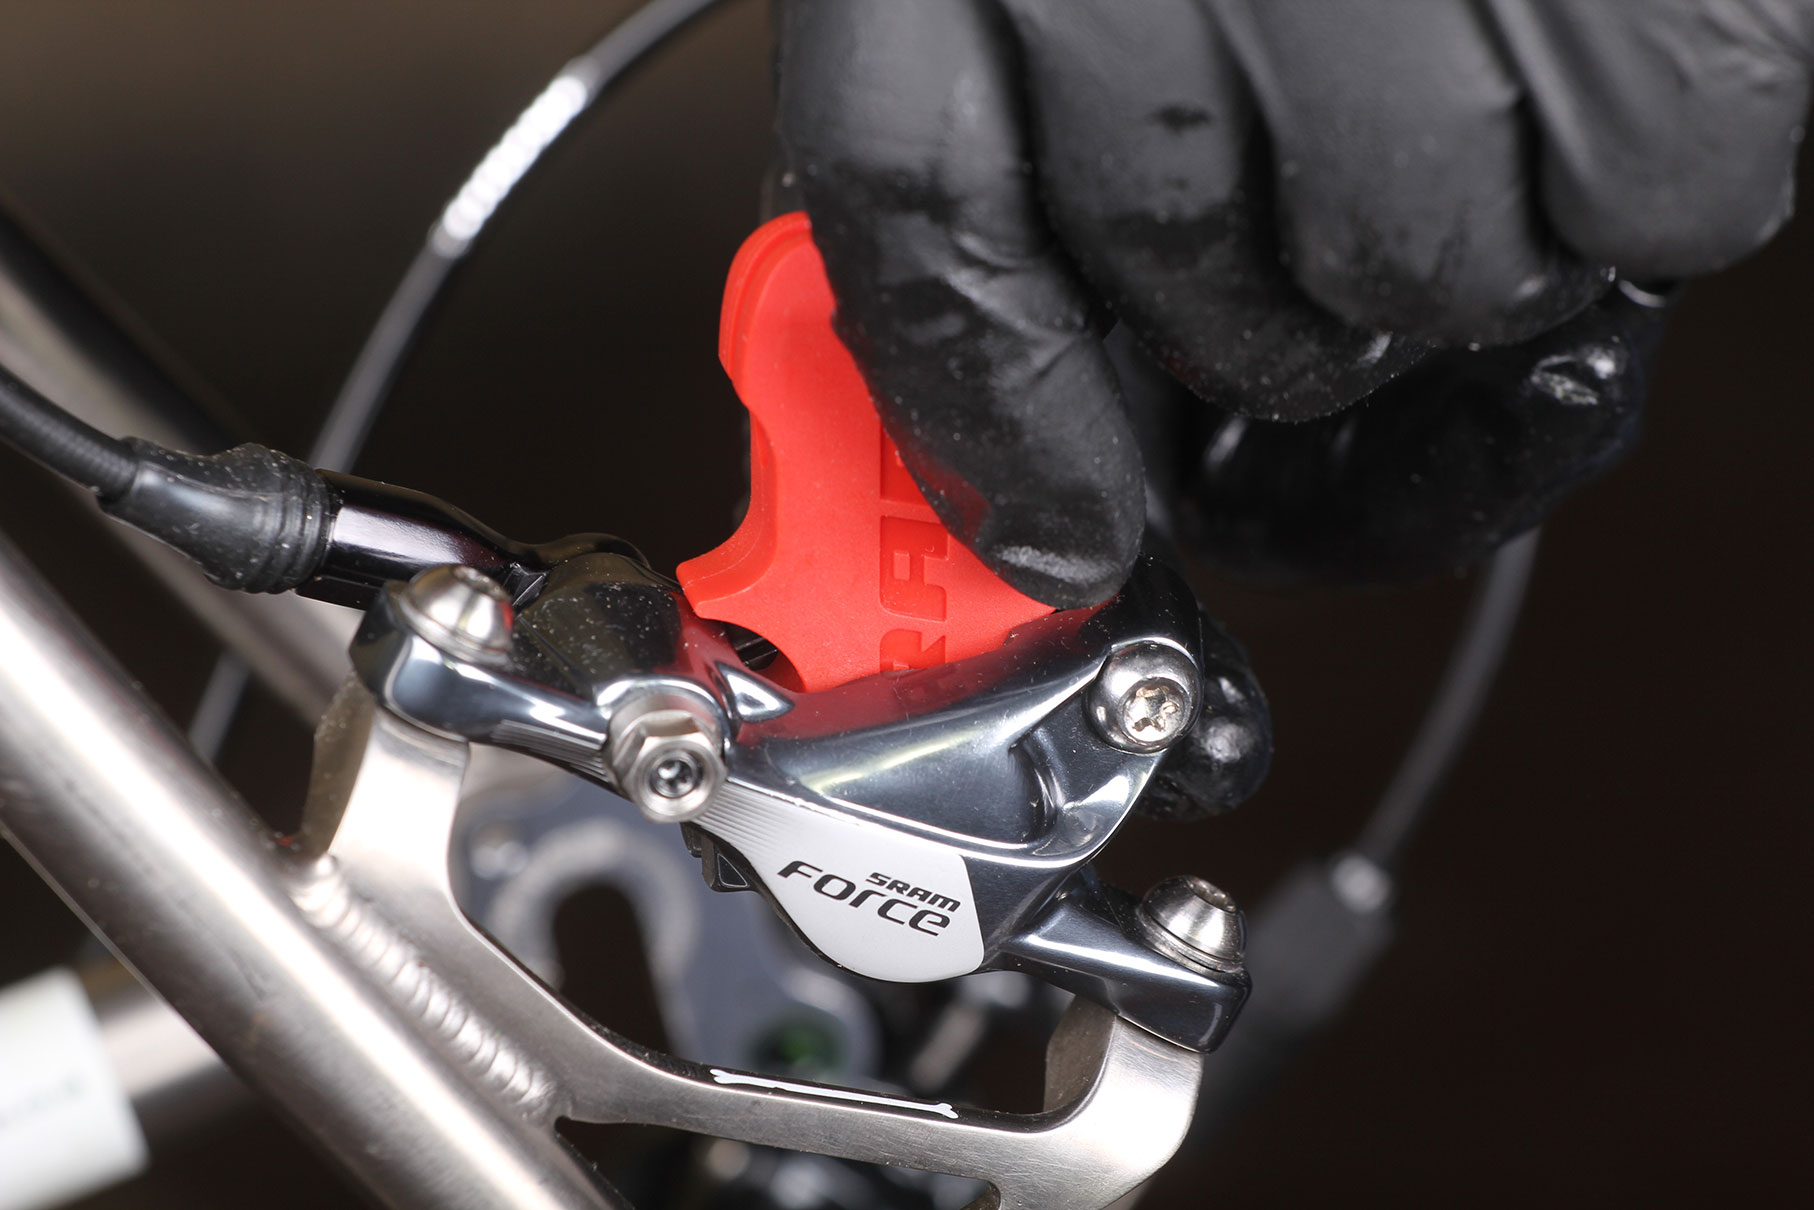
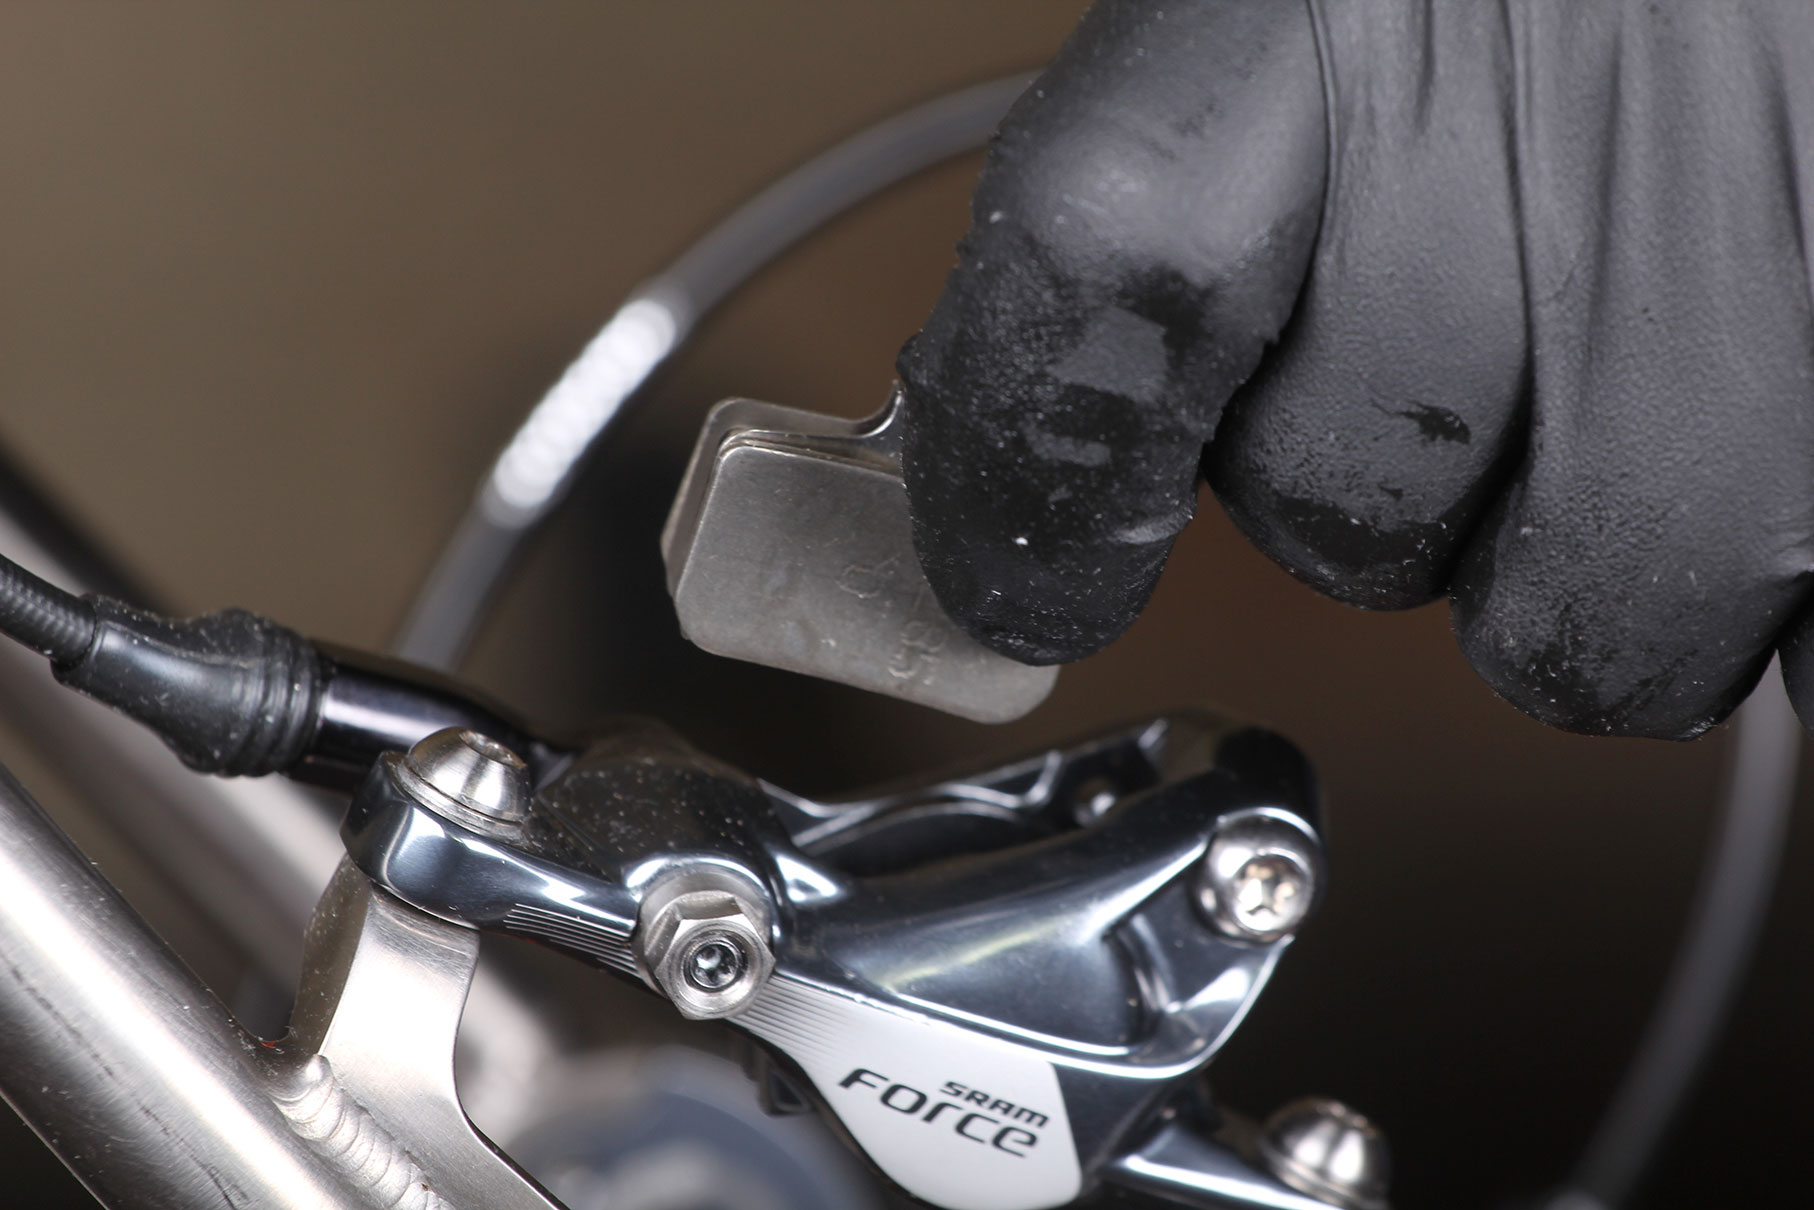
4 Fit the full width caliper bleed block to keep the pistons fully retracted.
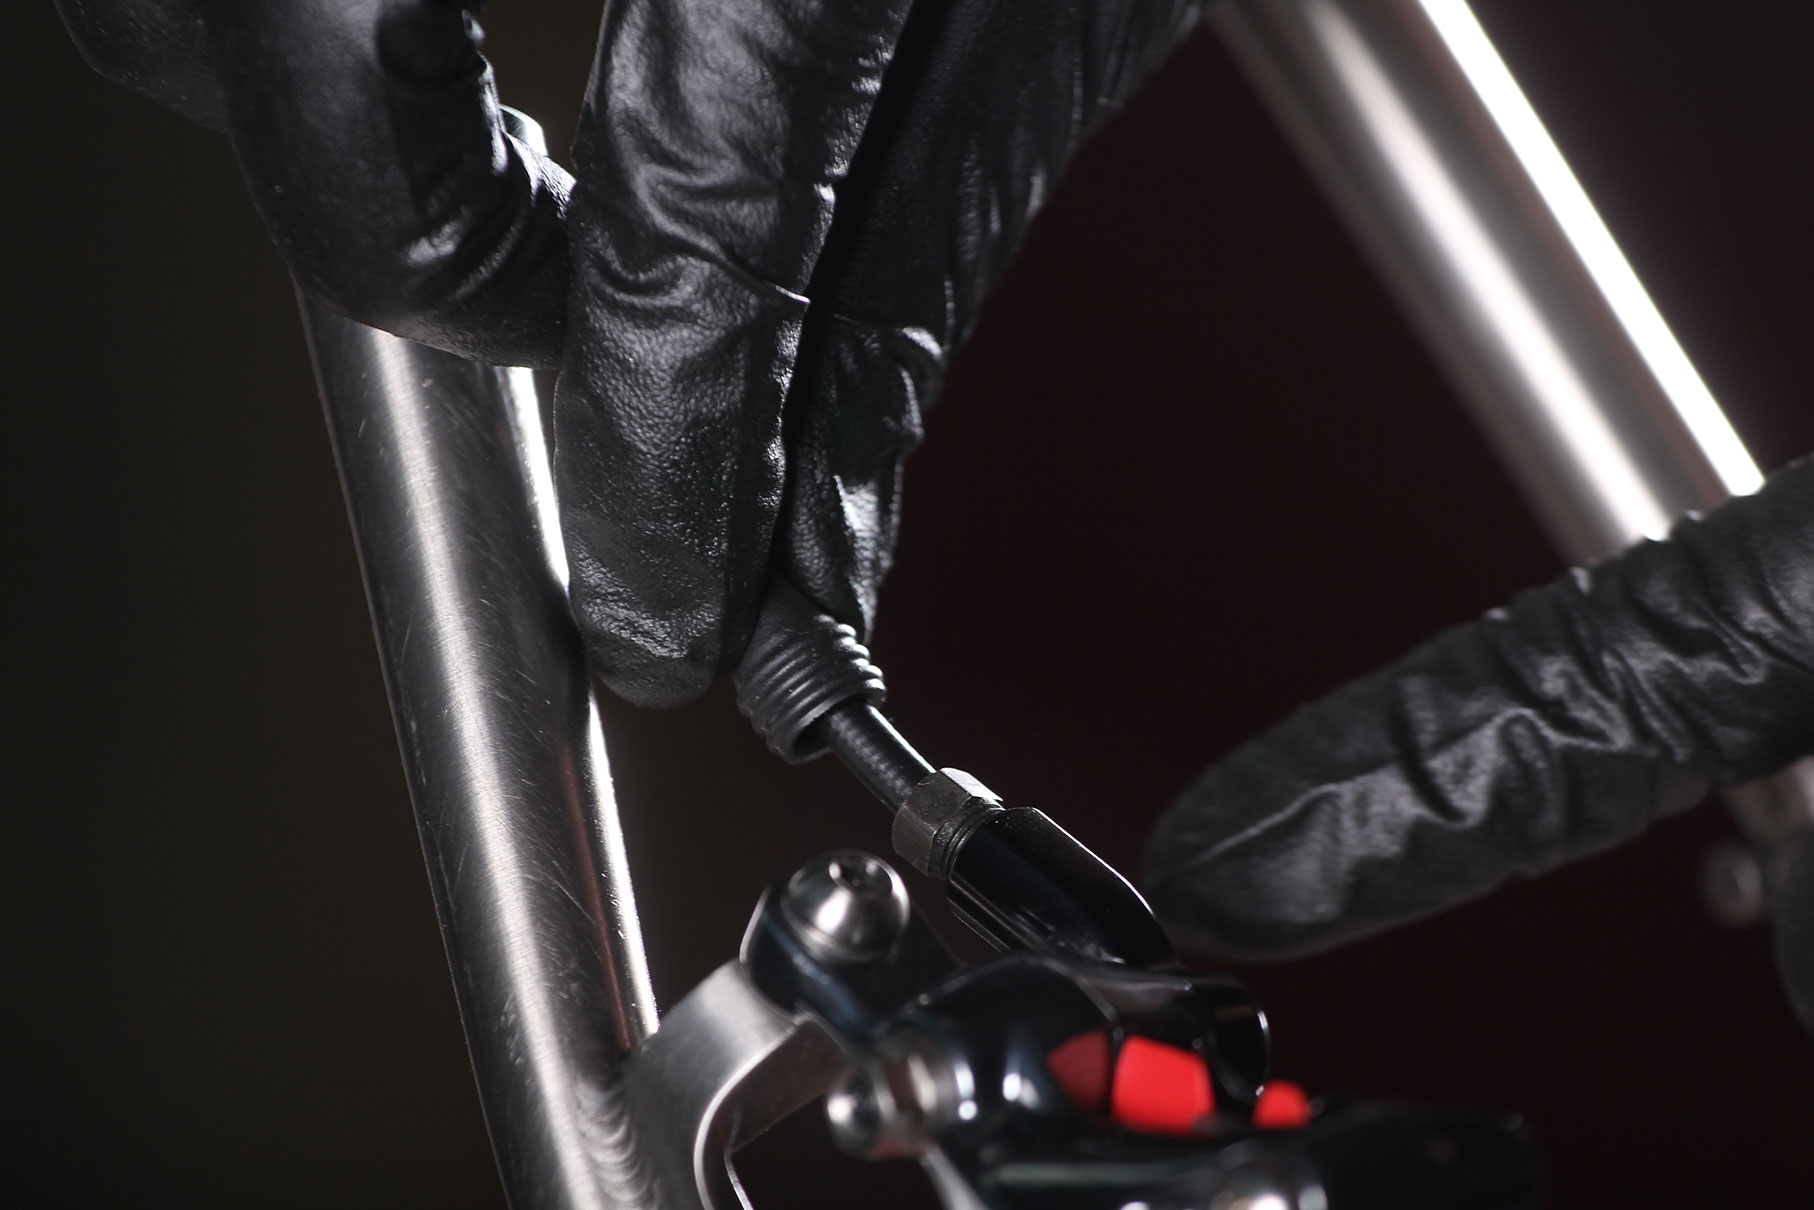
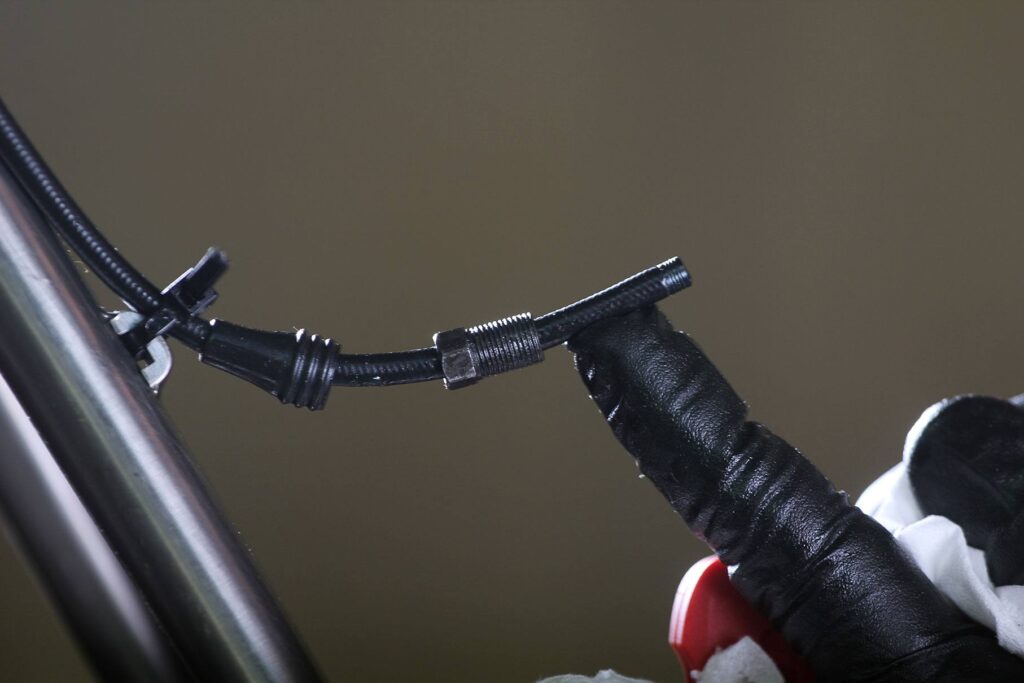
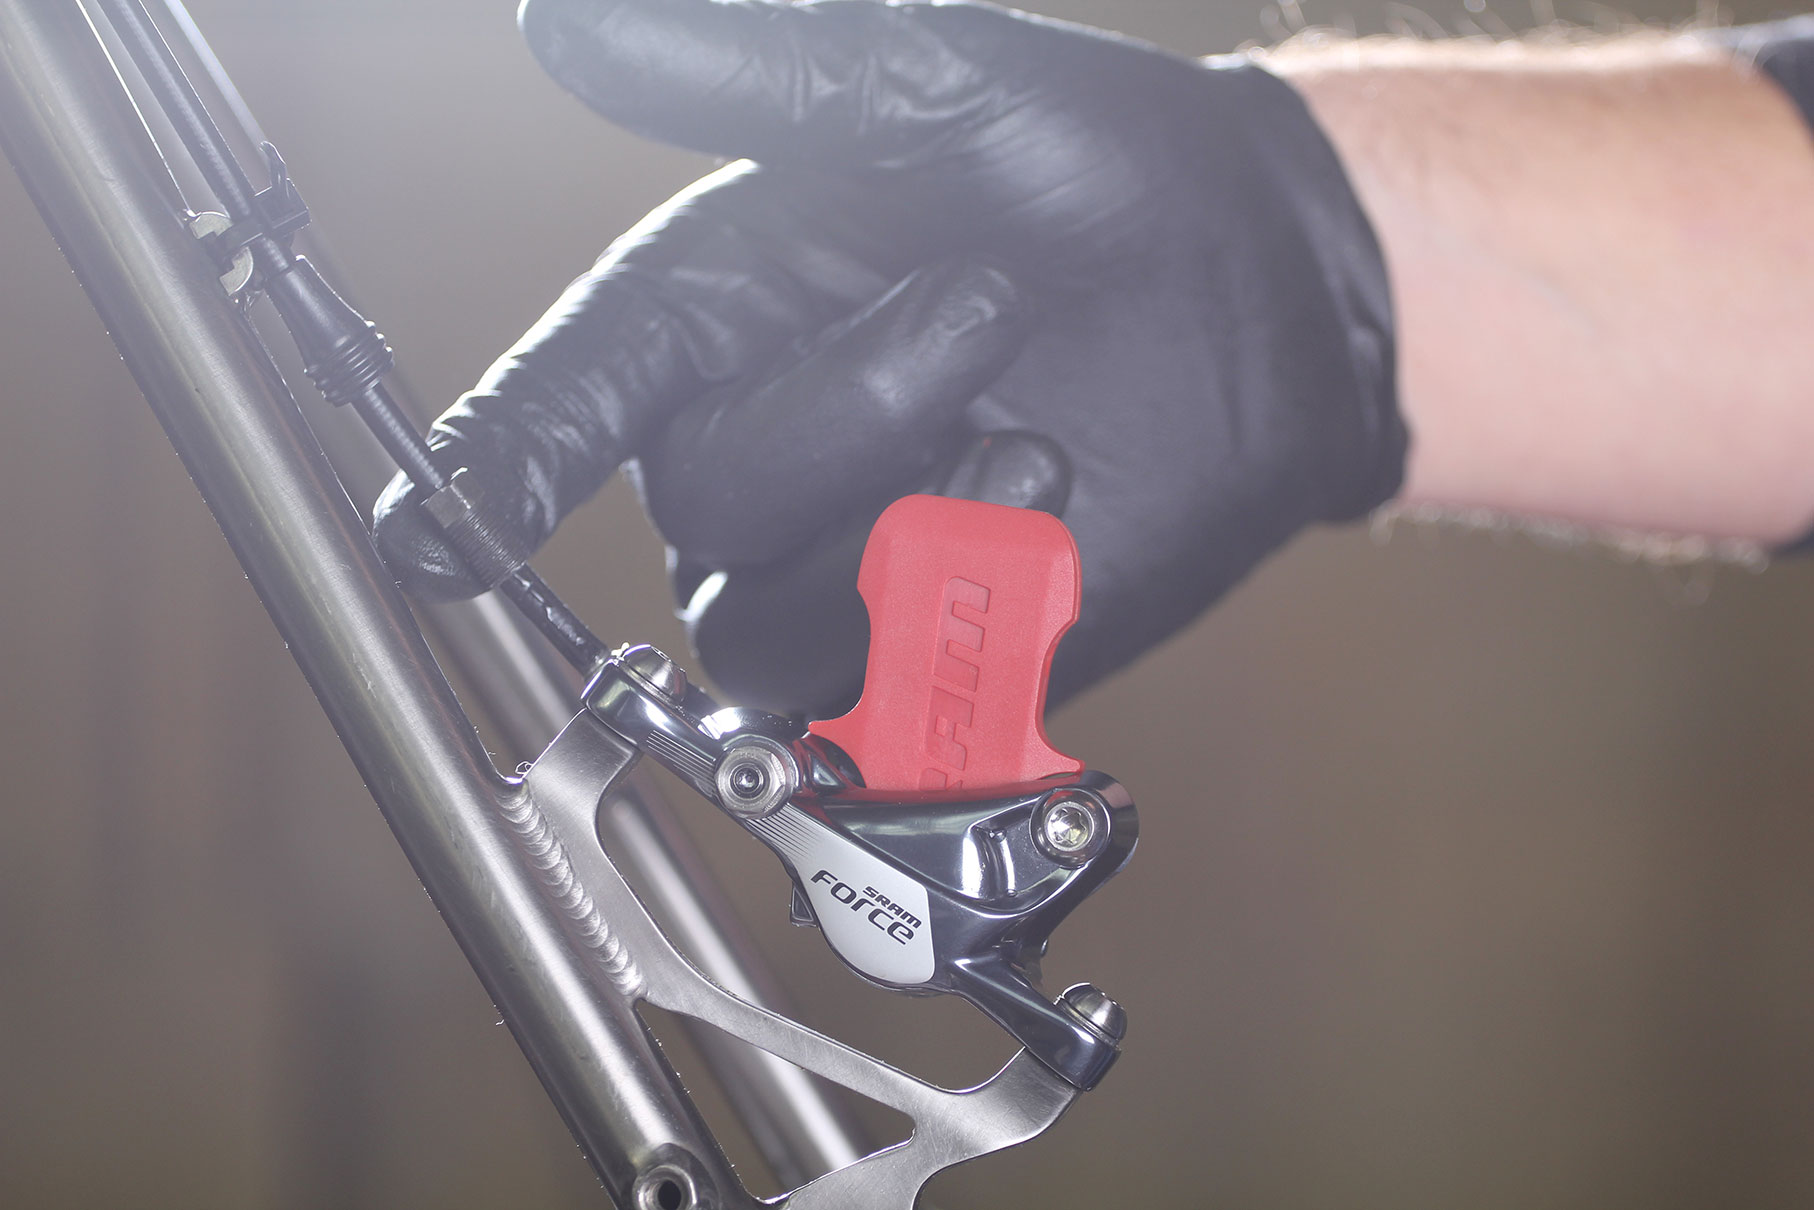
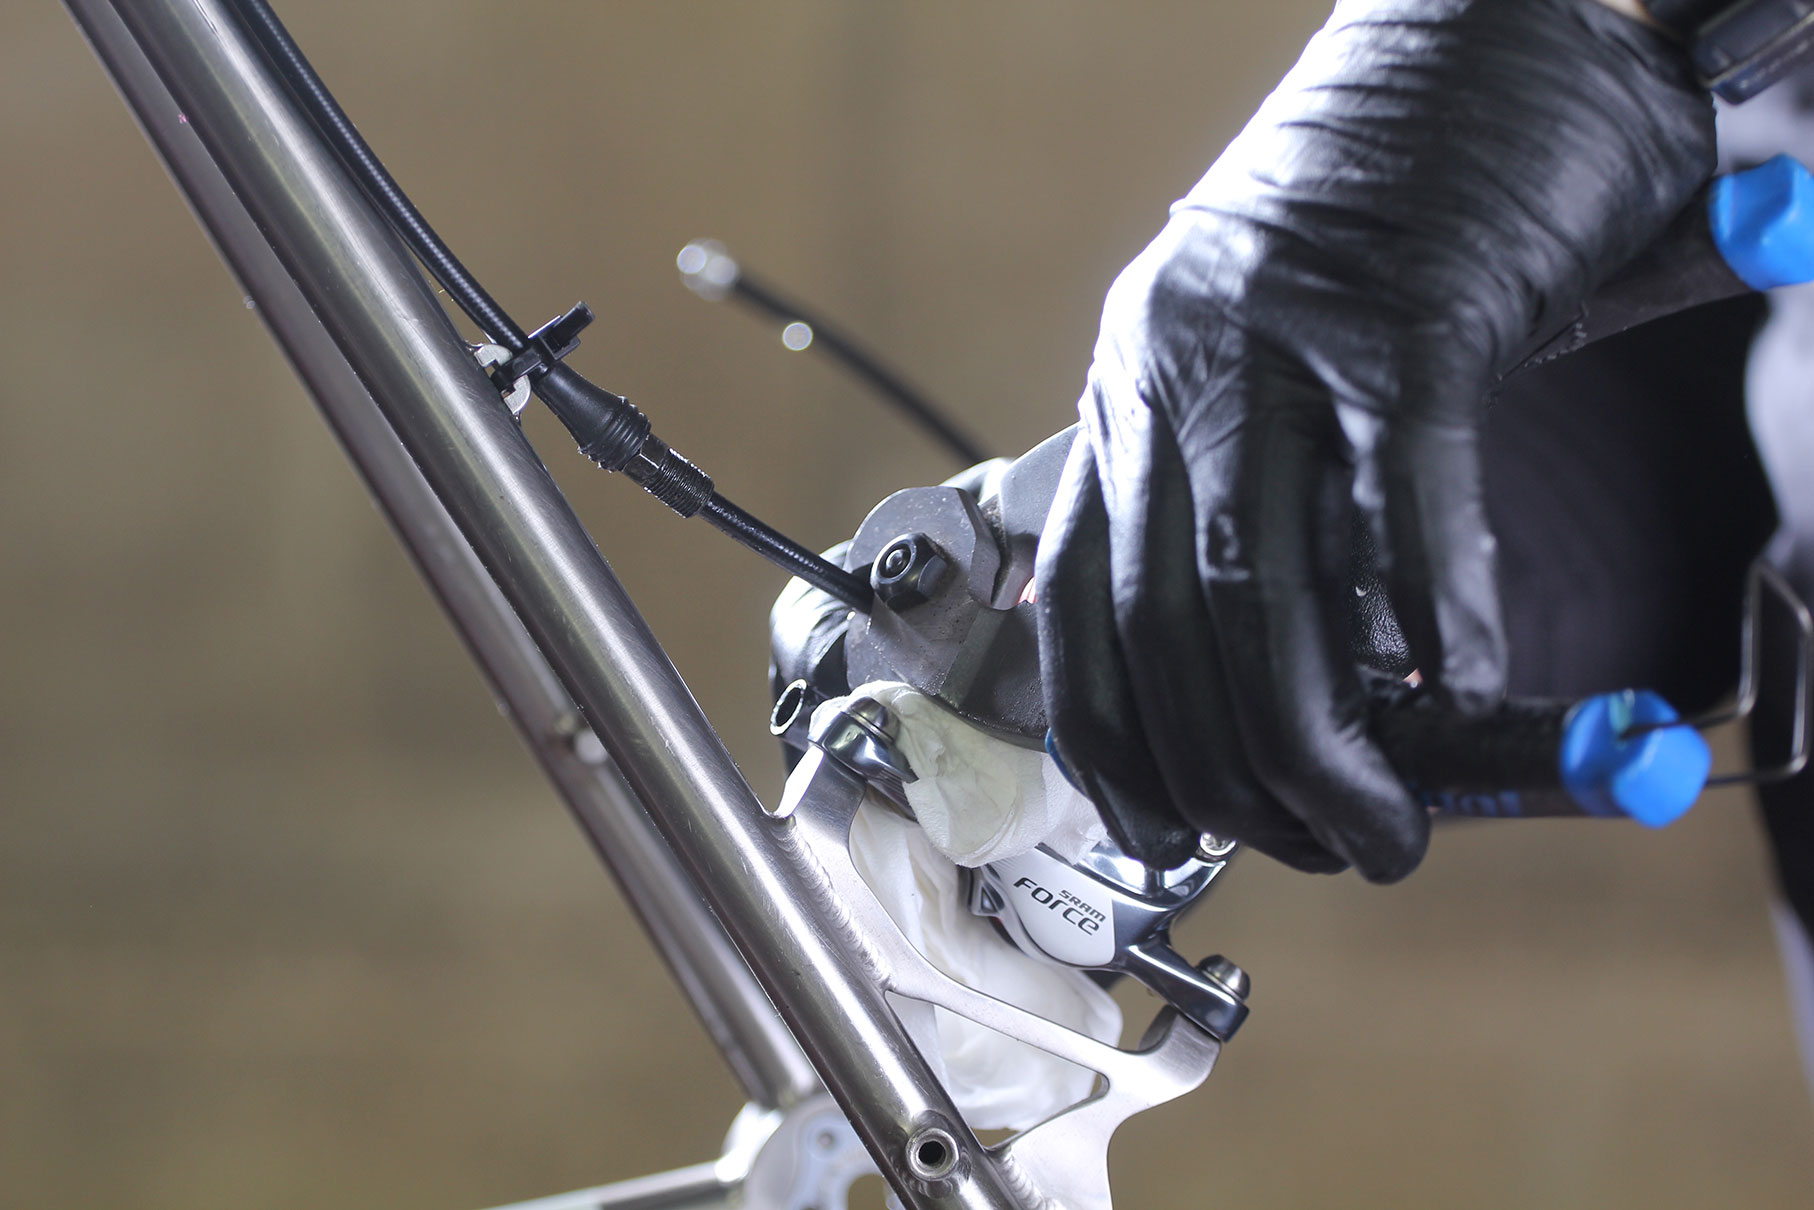
5 Slide the small rubber hood that covers the hose lock nut up the hose, away from the lock nut.
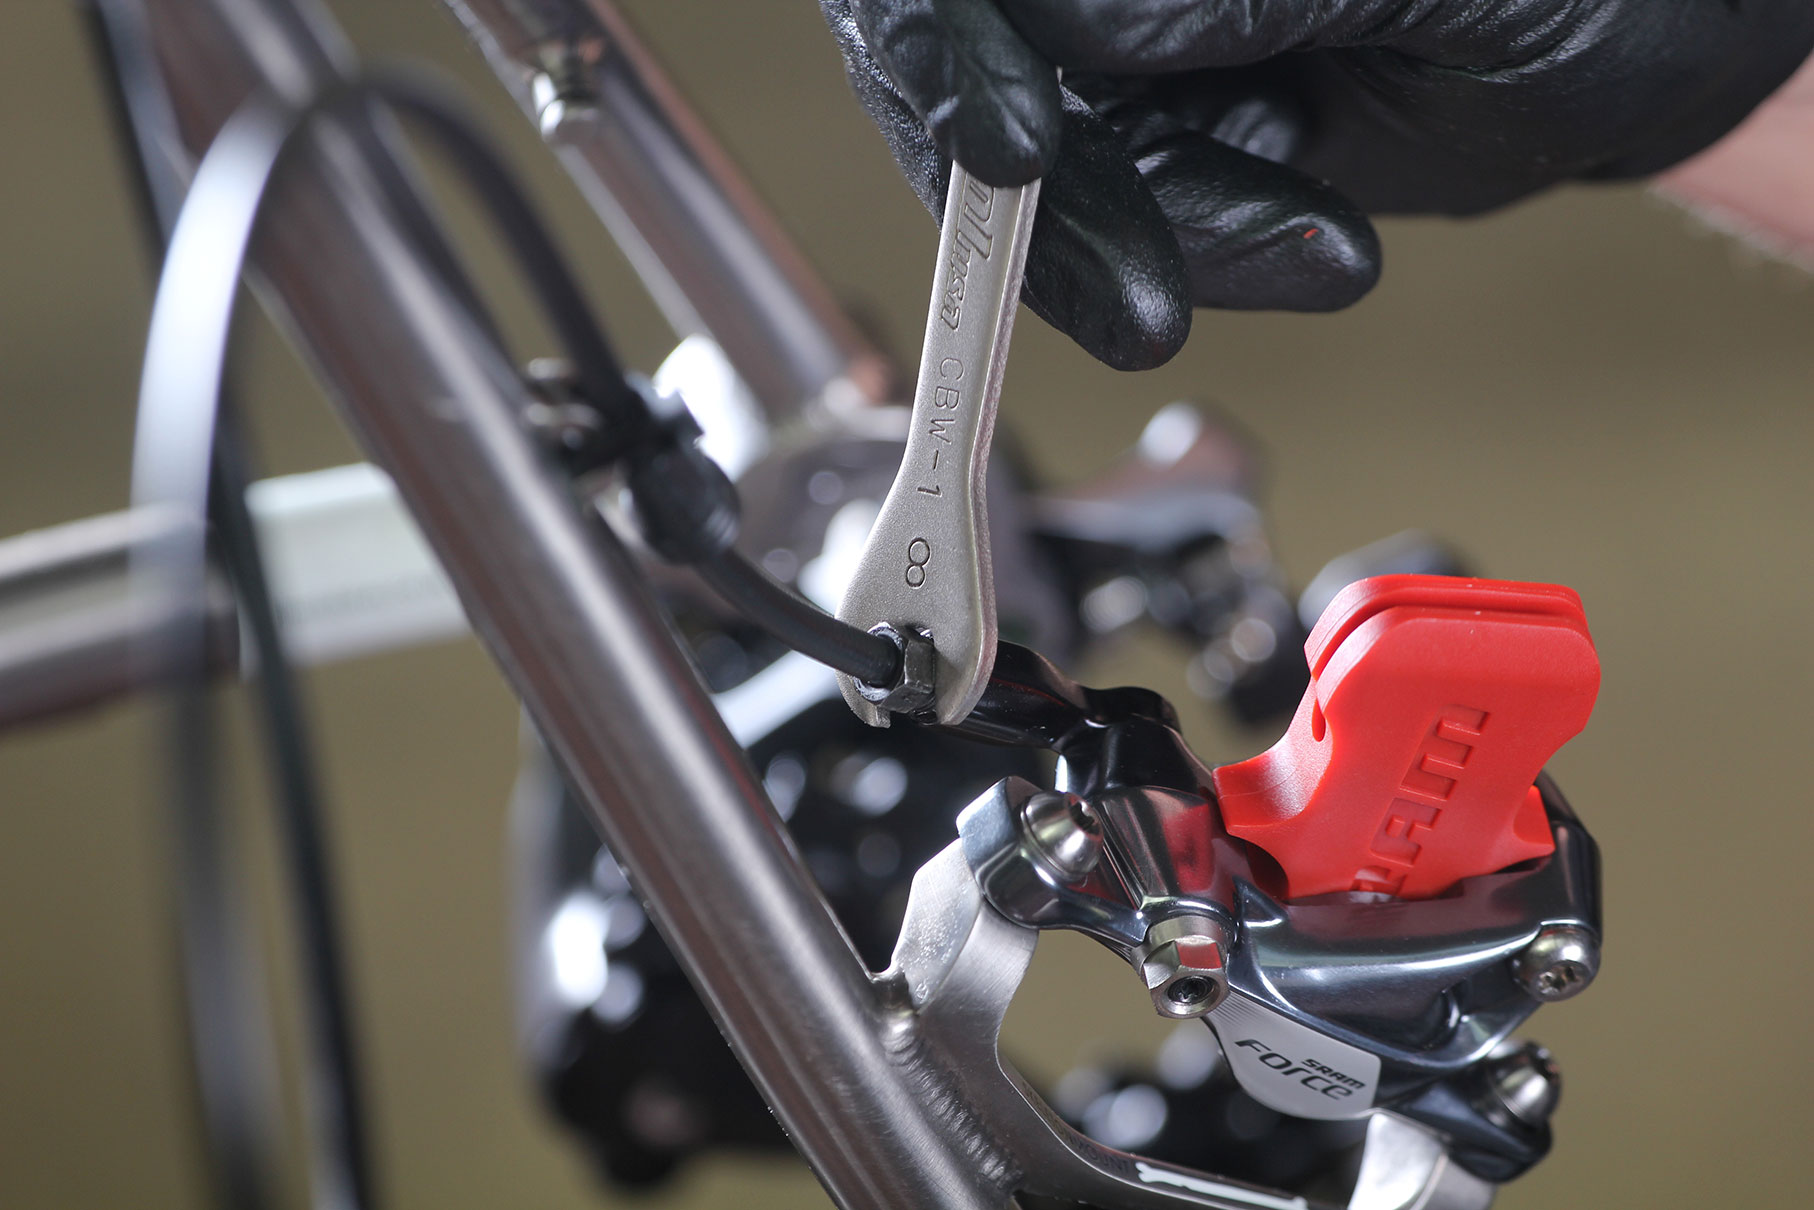
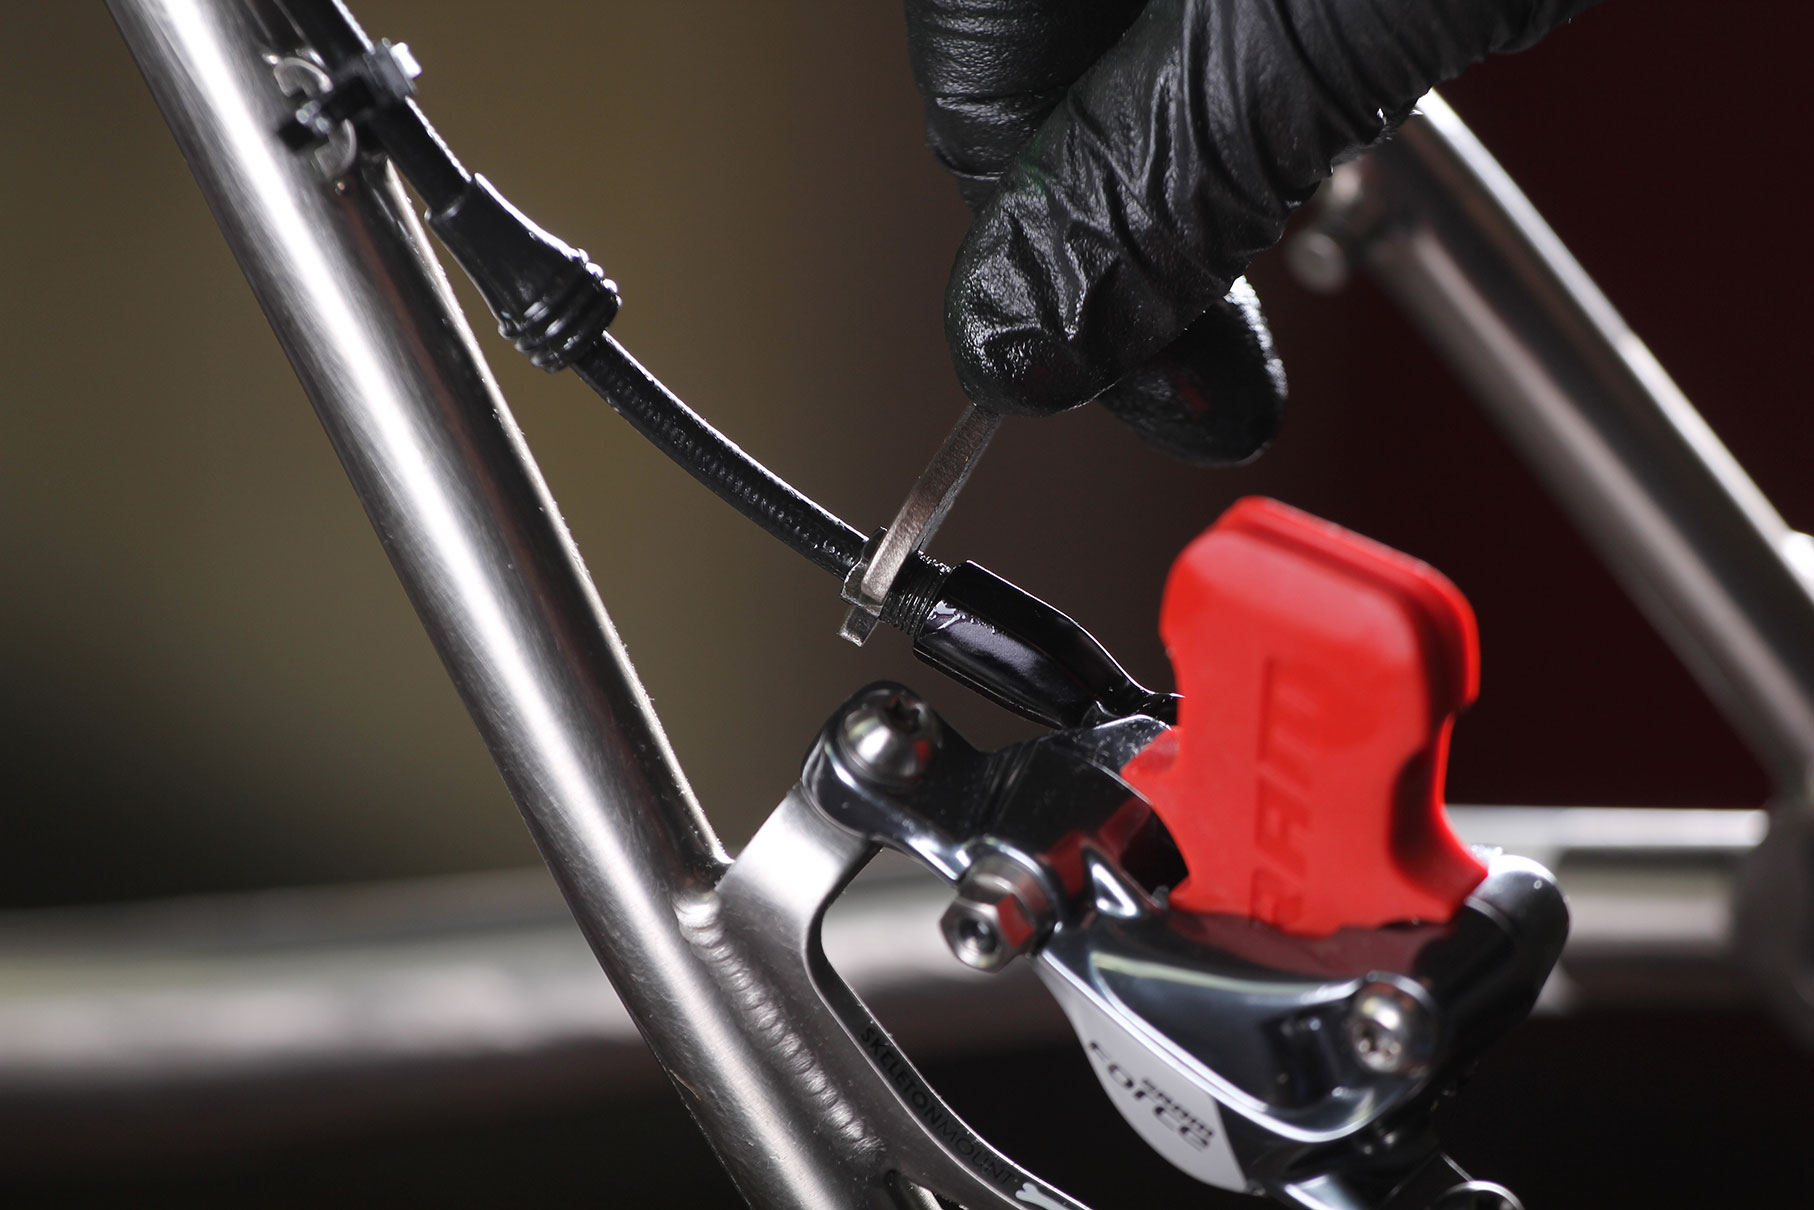
6 Undo the hose lock nut with an 8mm open ended spanner. These can be quite stiff when new. The thread is fine and once the nut loosens you should be able to undo it with your fingers.
7 Slide the lock nut up the hose out of the way. We’re going to be reusing it.
8 Mark the hose and make the cut after you’ve measured, checked and re-measured the length you’re looking for. It is essential that the cut is clean and precise. These Park Tools cable cutters do the job brilliantly, thanks to their sharp jaws and wide opening. There are specific hose cutters available too; they’re not expensive and worth adding to the workshop.
9 You’re going to need a replacement hose barb. This is the hollow tube with a barbed exterior, it forms the flat union between the hose end and the calliper. They’re often fitted dry, though SRAM recommend a dab of light grease, so as this is a SRAM brake, we’re greasing this one.
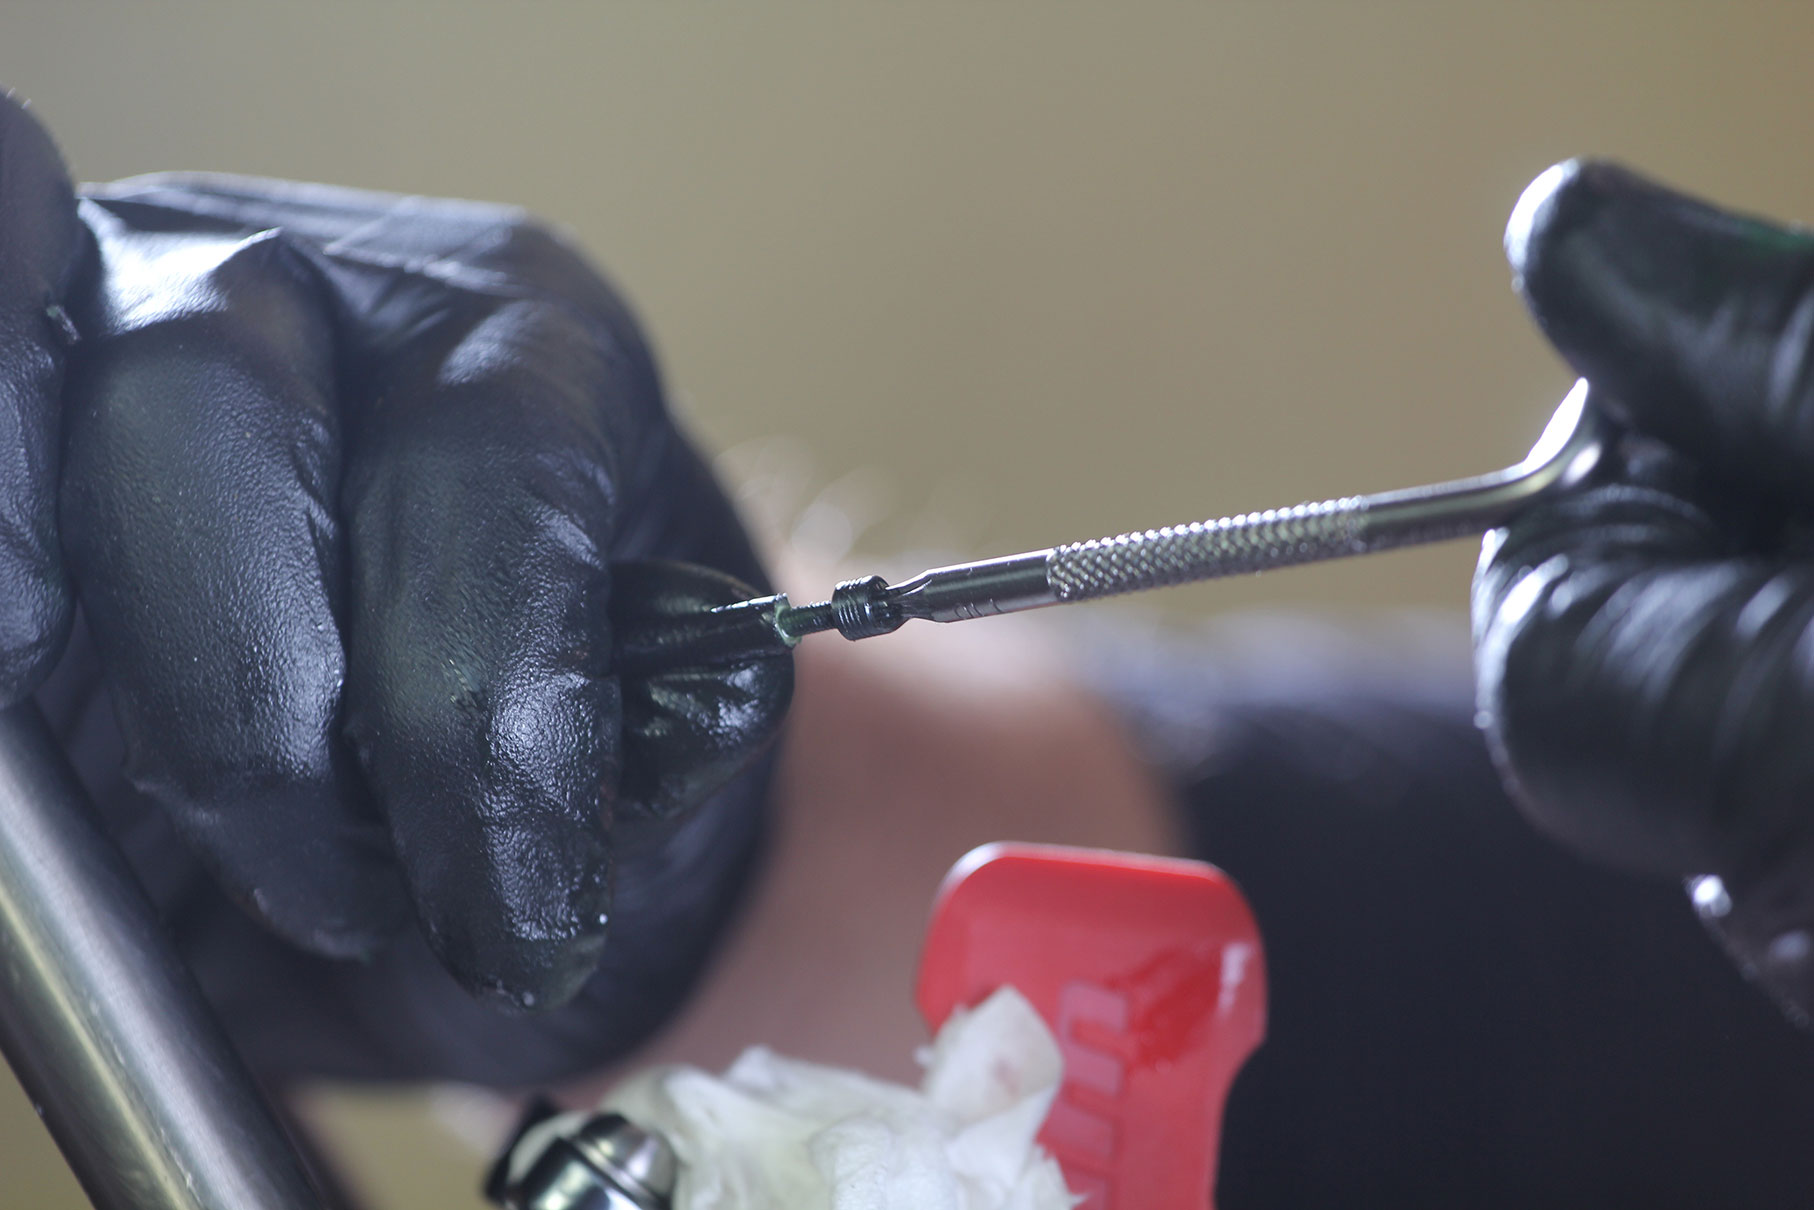
10 Fit the hose barb. SRAM thread their replacement barbs, meaning they screw into the end of the hose, which is much, much easier to do than the Shimano style barbs which have to be driven in.

11 With the boot slid back, the hose lock nut ready and the new hose barb fitted the trimmed hose will look like this. It’s not ready for be refitted yet as it requires a new olive to form the seal between the hose assembly and the calliper.
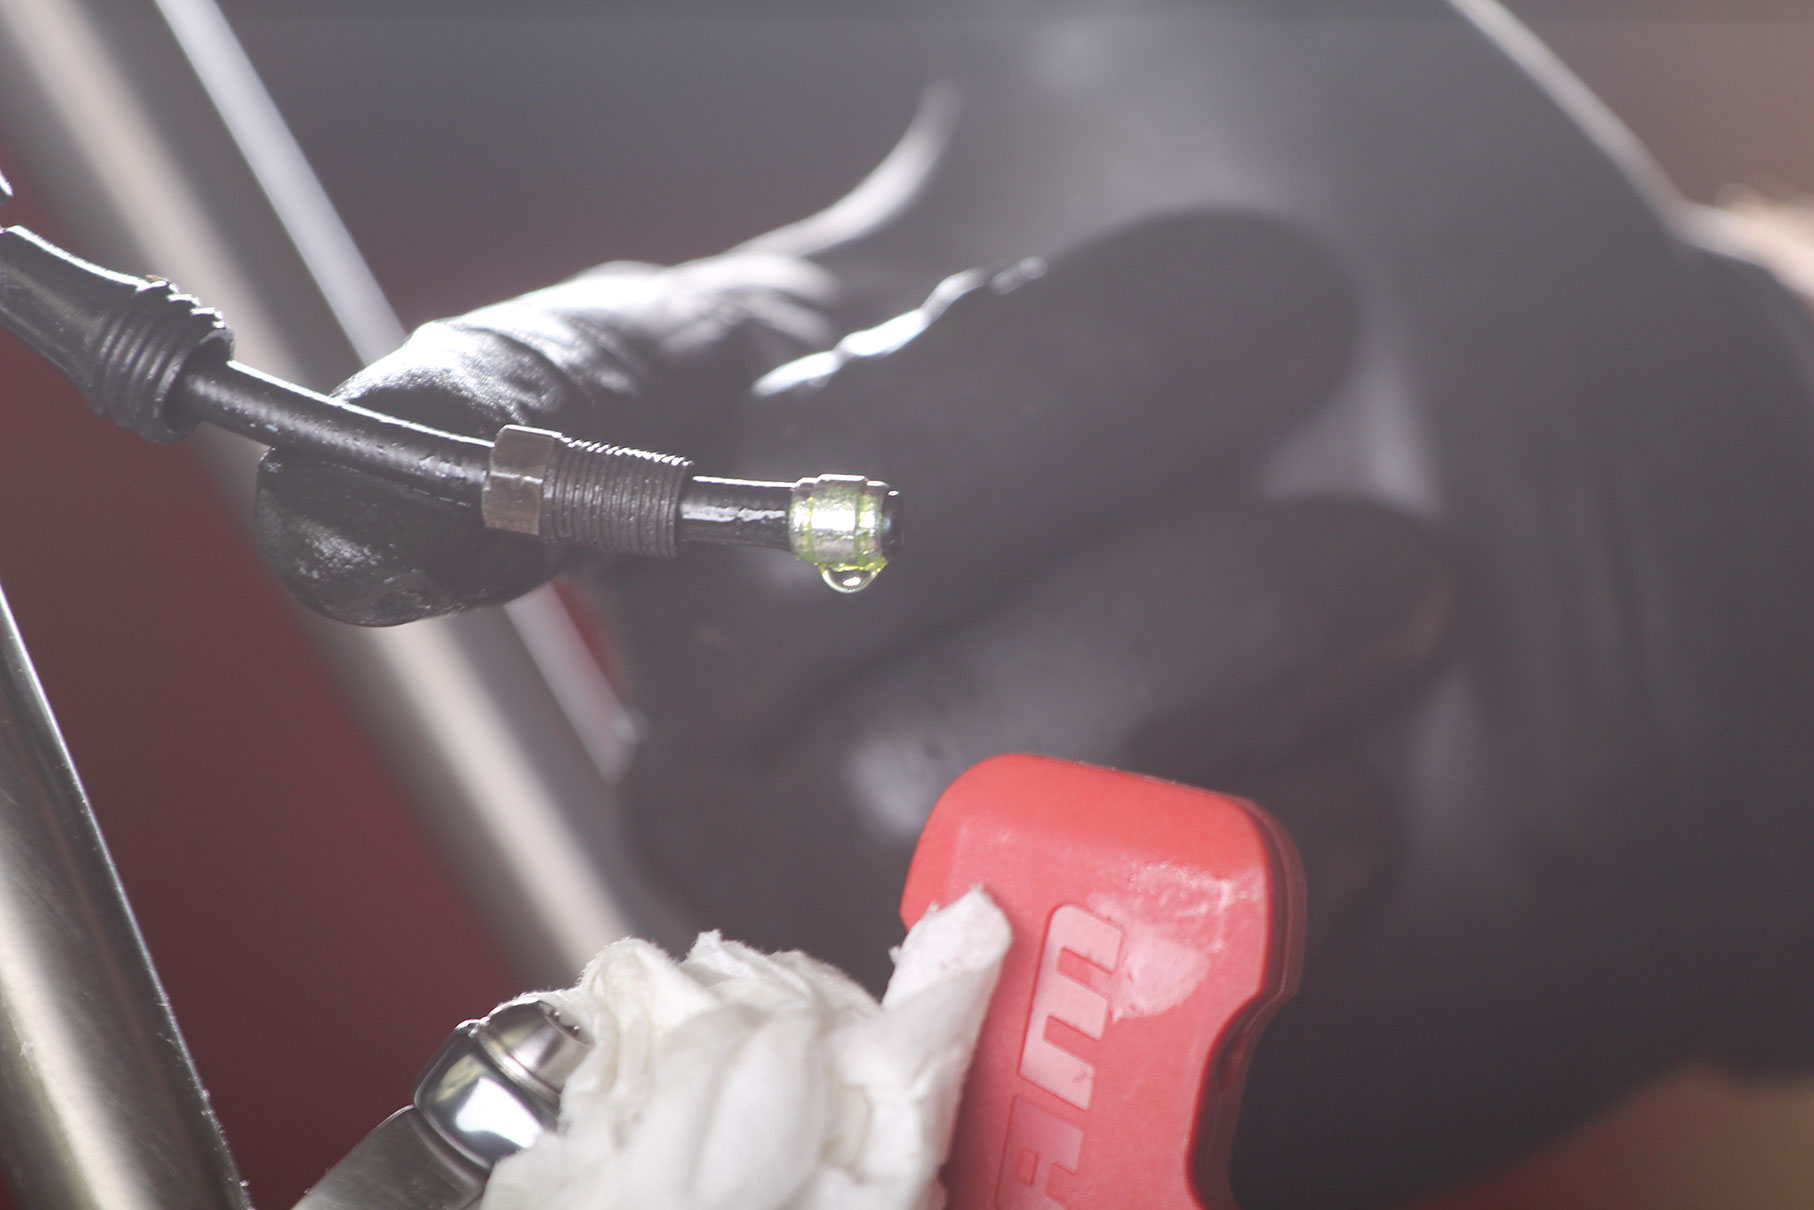
12 Fit the olive. It’s a soft metal ring and should slide fairly easily on to the hose end. The act of tightening the locknut down on top of it will squeeze it tightly on to the hose and render them a single item. Olives can’t be reused, so don’t try. A drop or two of brake fluid escaping isn’t a problem, usually you can shorten a hose without a full re-bleed of the fluid.
13 Add a small amount of grease to the thread of the lock nut and insert the end of the hose back into the calliper. Push the hose fully in, while turning the lock nut by hand. When you can ‘t screw it in any further, use the 8mm spanner. It needs to be fairly tight as it needs to stop leaks and also prevent the hose from pulling out in case of a hose snagging on something.
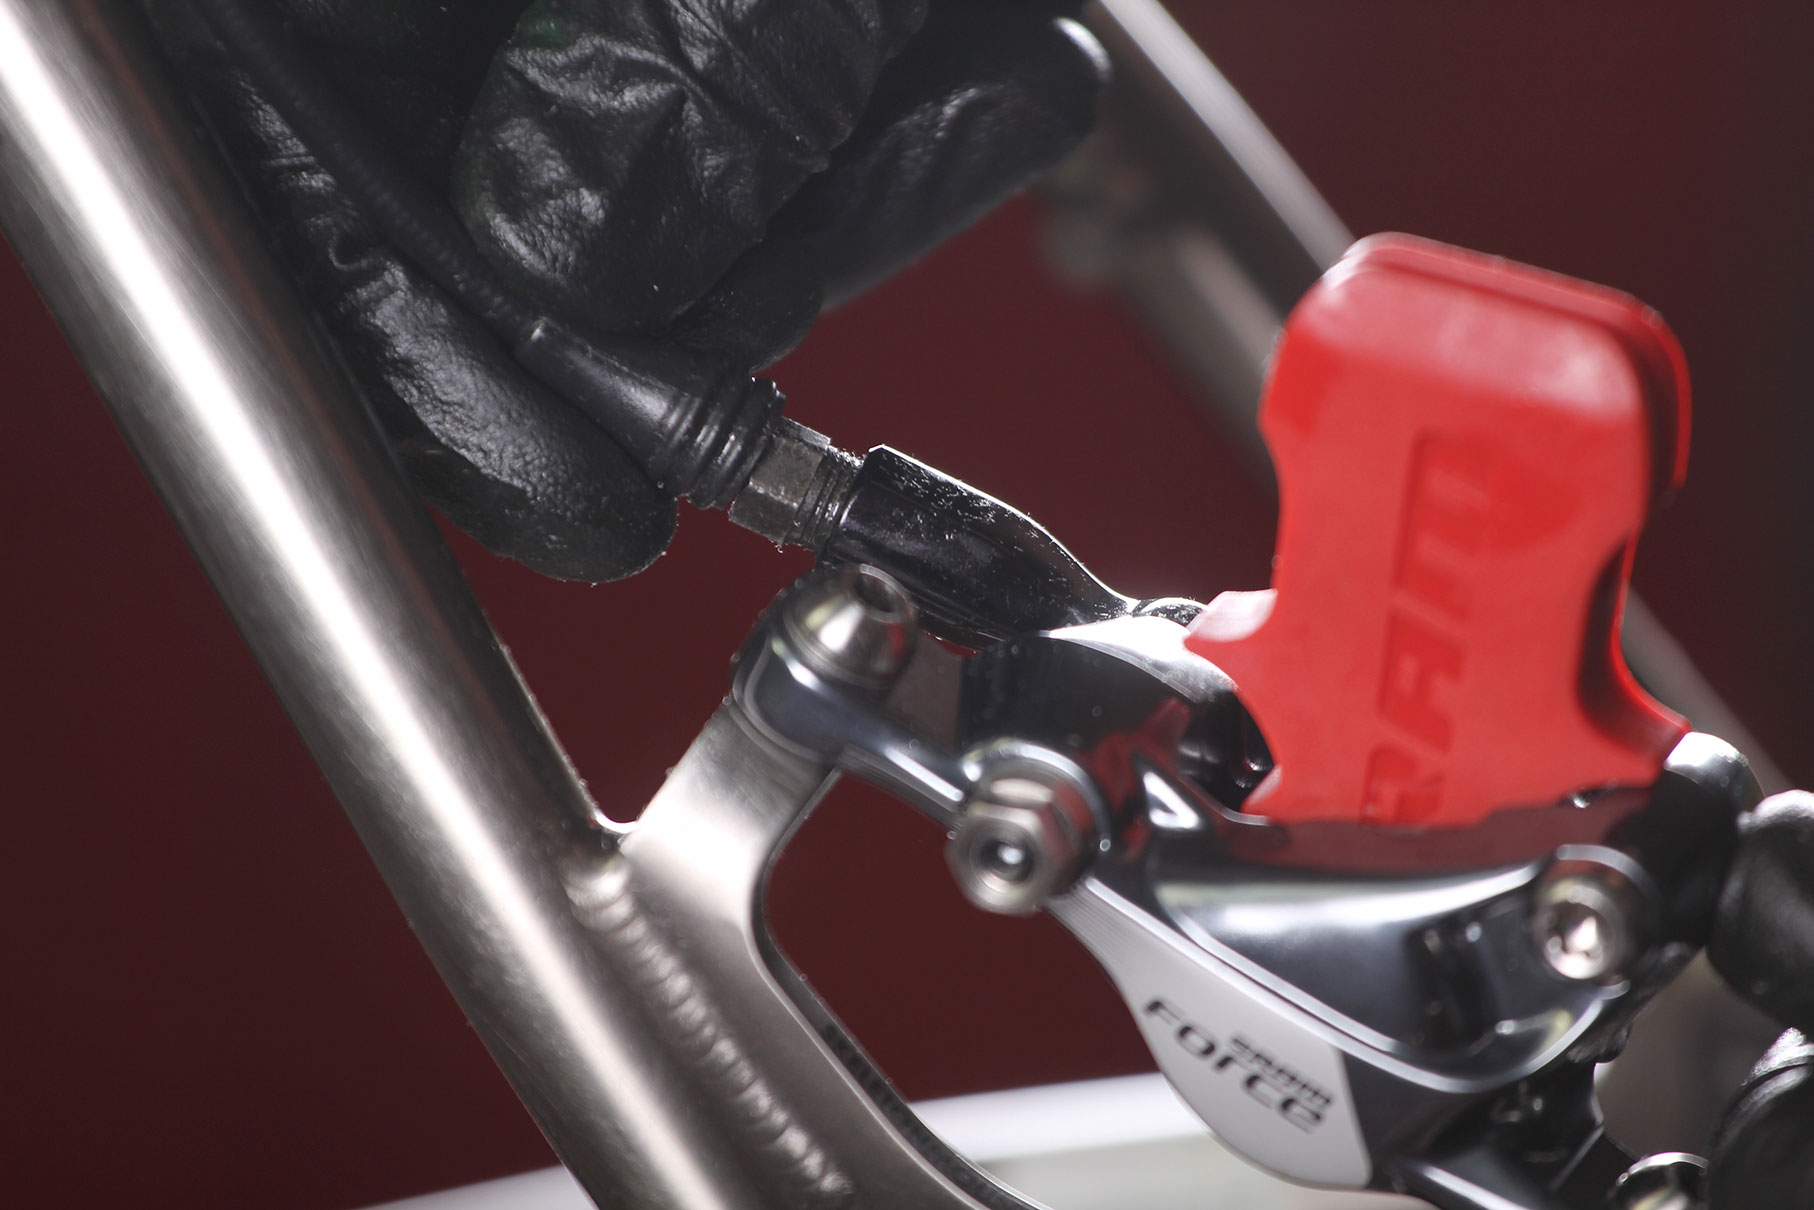
14 Push the rubber lock nut boot back into position. The job is done. You’ll need to remove the bleed black from the calliper, replace the pads, carrier bolt and the circlip. Give the brakes a check and look for any signs of a leak. There should be none.


")


, Portland’s world record ambitions, another e-bike brand goes pop + more")


11 thoughts on “How to trim hydraulic hoses — get them the right length in 14 easy steps”
And then the most interesting
And then the most interesting part starts: bleeding! 🙂
never saw those hose cutters, been always using conventional cable-cutters, is there significant difference?
“With more road bikes now
“With more road bikes now being fitted with hydraulic disc brakes, sooner or later you’re going to need to rim one”
Do what, now ?! lol
“It’s really no more
“It’s really no more complicated than looking after traditional wire cable brakes.”
Really? Having read the article, I have to disagree!
One of the brakes on my touring tandem is a hydraulic disc brake, and having recently done some maintenance on it (after getting back from a tour) I wouldn’t be keen to do so out in the countryside!
Robert
Quote:
If this article didn’t have some Bristolian, I’d have struggled to understand it.
After shortening a hose, make sure that it is fitted tightly enough – pump the brakes at least 10 times and give the lever a good hard squeeze. I mistakenly didn’t tighten up the joint enough and saw the hose suddenly disconnect – you don’t want that to happen when riding.
You can use a spanner with a
You can use a spanner with a torque wrench if you’re not sure how tight you’re supposed to go…fit the open end of the spanner on the locknut, and use an 8mm driver on a torque wrench at the other end. As long as the torque wrench is at right angles to the spanner, the torque reading on the wrench is the torque at the bolt.
Do you know the recommended
Do you know the recommended torque? I’ve just gone by feel and I aim for bloody tight. I’d rather have them jammed permanently than disconnect suddenly.
hawkinspeter wrote:
Bloody tight will probably be fine…the torque depends on the manufacturer but they’re all in the 6-8 Nm range, I think.
https://si.shimano.com/pdfs/dm/DM-R8050-04-ENG.pdf
The Ultegra stuff is 5-6 Nm at the hood and 5-7 Nm at the caliper (pages 76-77). Knowing Shimano the other calipers will be different.
I’ve used more than 7Nm on
I’ve used more than 7Nm on the connecting thing joining the two hose segments so that should be fine. I’m liking the look of that special Shimano hose cutting tool – I’m using some cheap plastic thing with a blade in the middle but it seems to do a good job.
“With more road bikes now
“With more road bikes now being fitted with hydraulic disc brakes, sooner or later you’re going to need to trim one to length or understand how to disconnect and reconnect one if you’re also using internally routed hoses and cables. It’s really no more complicated than looking after traditional wire cable brakes.”
Have both types of brakes. It’s never occurred to me to trim either cables or hoses and I’m not sure when / why I would need to. I’m thinking maybe this article’s not for me and I should keep on going to a shop for my servicing…
quiff wrote:
I had to do my hoses when I changed my handlebar and wanted to put the hoses through the new one. I was nervous about doing it as I’d never tried it before and to be fair I managed to do it wrong a couple of times before getting it right.
I’ve been building my own
I’ve been building my own bikes for years. The last two have had hydraulic disc brakes. This statement:
…is nonsense.
Tools to install and maintain cable rim brakes: 2 or 3 allen keys, cable cutter, cable crimper.
Tools to install and maintain hydraulic disc brakes: 3 or 4 allen keys, hose cutter, barb press, bleed kit consisting of one or more syringes, brake fluid, bleed block, mini strut nut socket (that’s how I torque my hose bolts), brake cleaner.
Yes, I know that it’s easier to replace a brake disc than a wheel rim. But in many decades of cycling, I’ve replaced precisely zero worn wheel rims (although I did chuck a front Zonda in the bin)