


Setting up a tubeless tyre isn’t as simple as fitting an inner tube, and it can get a bit messy – but it’s well worth the effort. Whether it’s your first attempt or you’re looking to refine your technique, here’s how to make the process as smooth and straightforward as possible.


Tubeless is arguably the biggest advance in bike tyre technology this century. As the name suggests, tubeless wheel and tyre combinations have allowed cyclists to eliminate the need for inner tubes. Some cyclists say this offers improved road feel, and when used in conjunction with tyre sealant, fewer punctures.
As advantageous as tubeless is, we have to level with you and concede that the system isn’t as clean or easy to set up as using inner tubes; but the long-term benefits to the quality of your riding could be well worth the added investment in time and money. Once you get the hang of it, setting up and maintaining tubeless becomes routine.
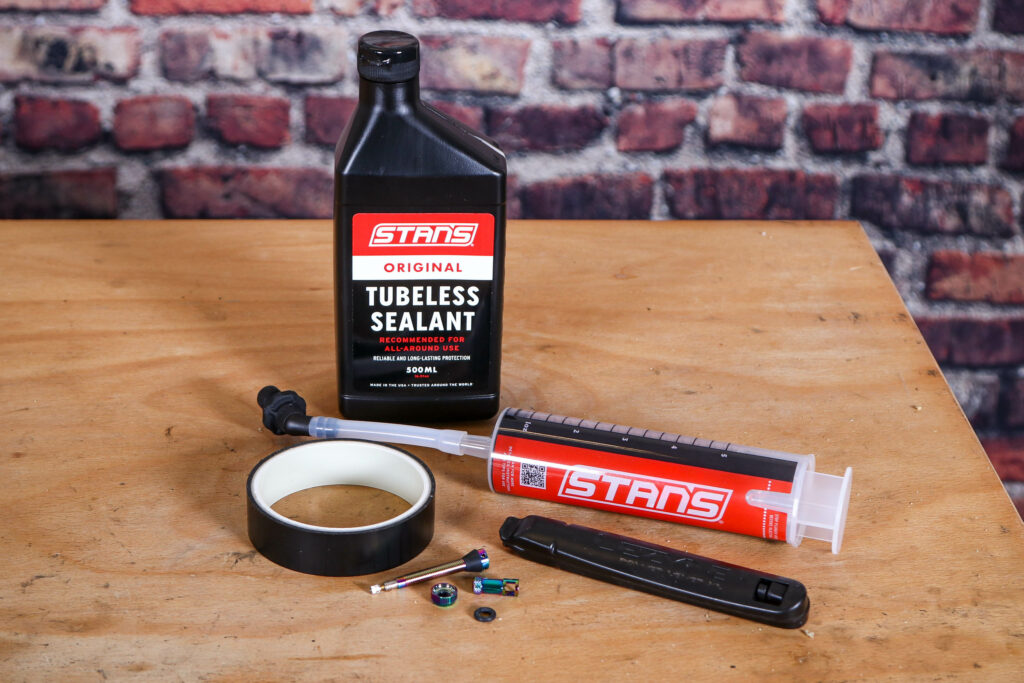
What tools and materials do you need to set up tubeless tyres?
> A beginner’s guide to building your first bike tool set
- Tubeless ready wheels and tyres
- Tubeless valves
- Tyre sealant
- Tubeless rim tape (unless your wheels have a solid rim bed)
- Track pump or air compressor
- Tyre levers (optional)
- Rag or towel
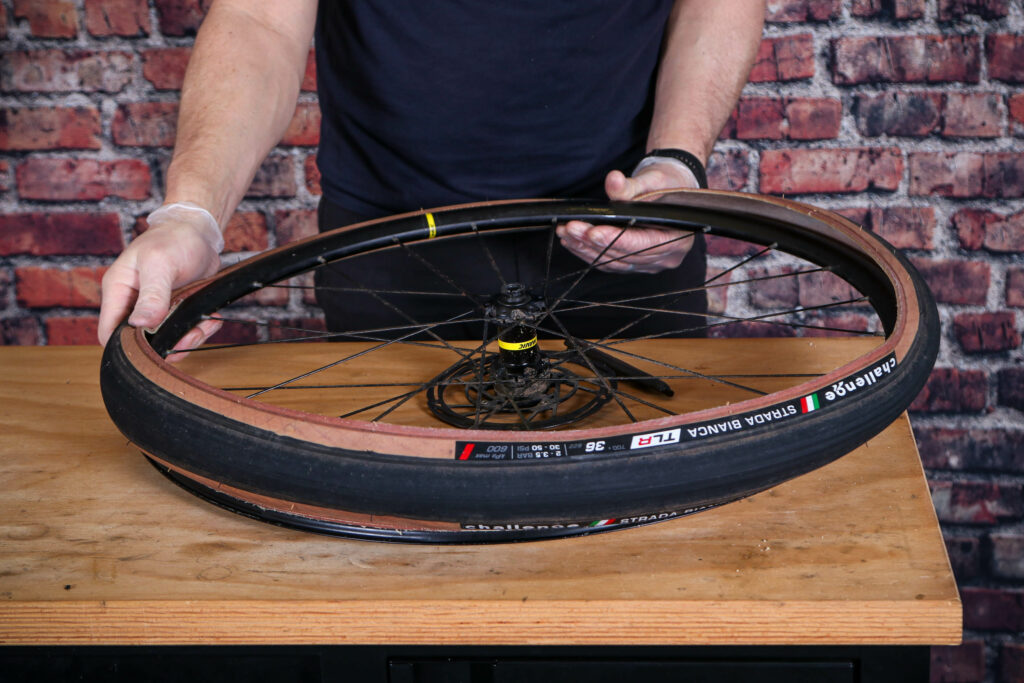
Step 1: Preparing your wheels
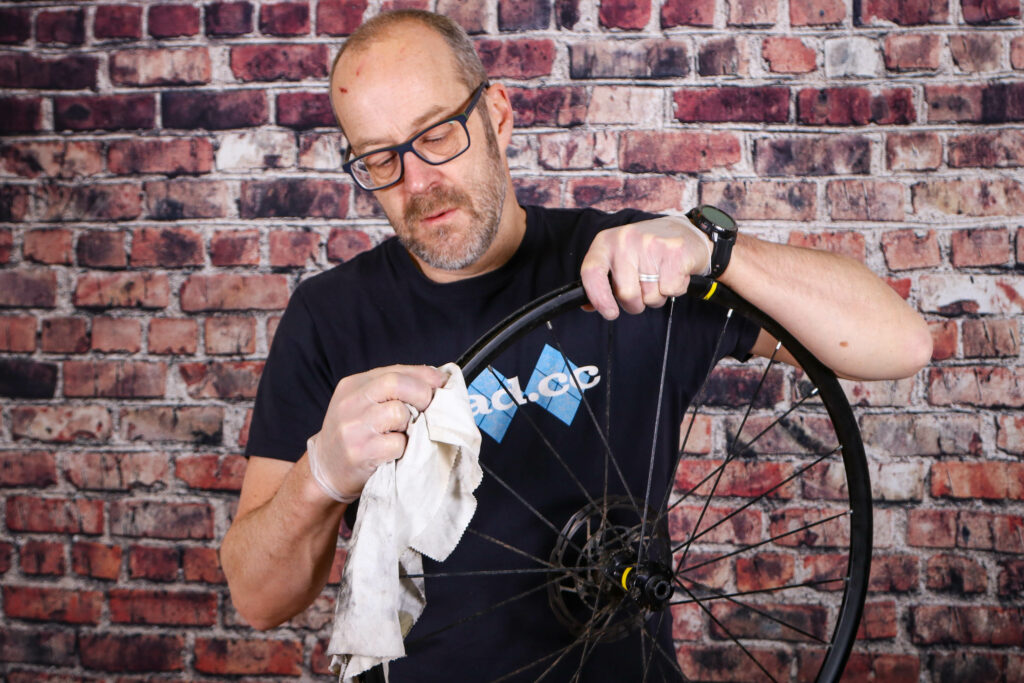
Before going anywhere near any sealant you need to ensure that your rims are both tubeless compatible and up to the job of holding air. Often this will involve using tubeless specific rim tape to seal the valve holes, unless you’re lucky enough to have wheels that have a solid rim bed construction. These are becoming more common, and an increasing number of brands ship wheels with tubeless tape already fitted too.
Give the rim bed a thorough clean with alcohol or label remover and allow it to dry completely.
Step 2: Applying tubeless rim tape
In order for a tubeless tyre to work, the rim must be made air tight. Your wheels may already have tubeless tape fitted, but if not, you will need to apply an adhesive tubeless tape to the rim bed.
Line the tape up in the rim bed to one side of the valve hole, and covering the valve hole work around the rim applying the tape evening into the centre of the rim bed. Keep good tension on the tape as you go, as you’re looking for a nice sung fit, with no ripples, folds or creases.
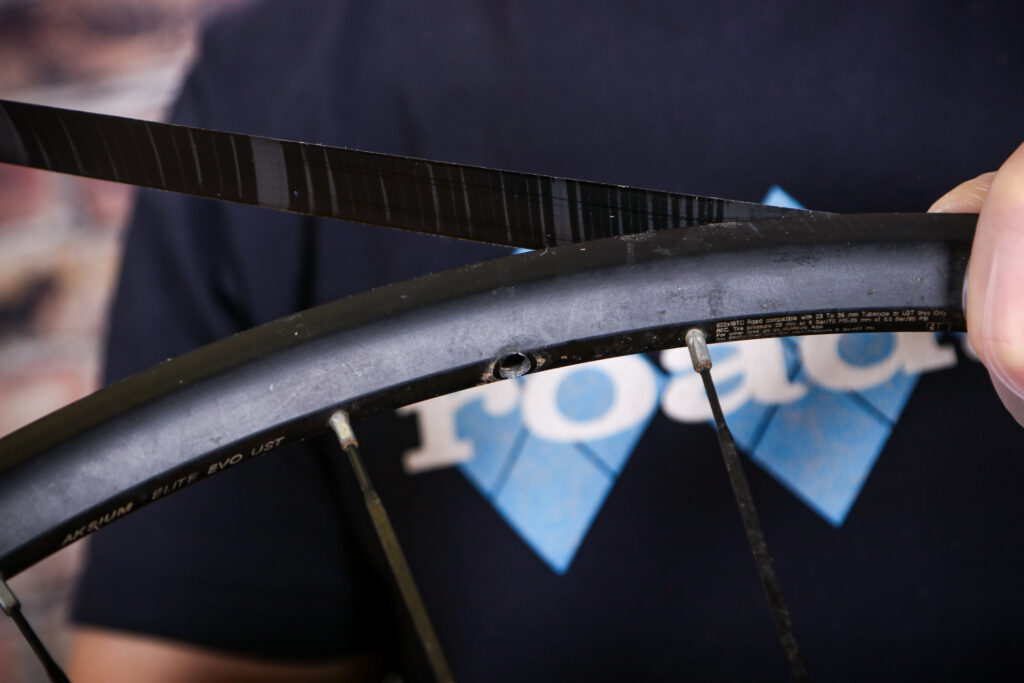
Make sure the tape is perfectly centred as it is laid down inside the rim well. This will help ensure an air tight seal of the rim bed and help the tyre bead ‘find’ the inner sidewall of the rim faster as you inflate. This is especially important if you’re using a regular track or hand pump.
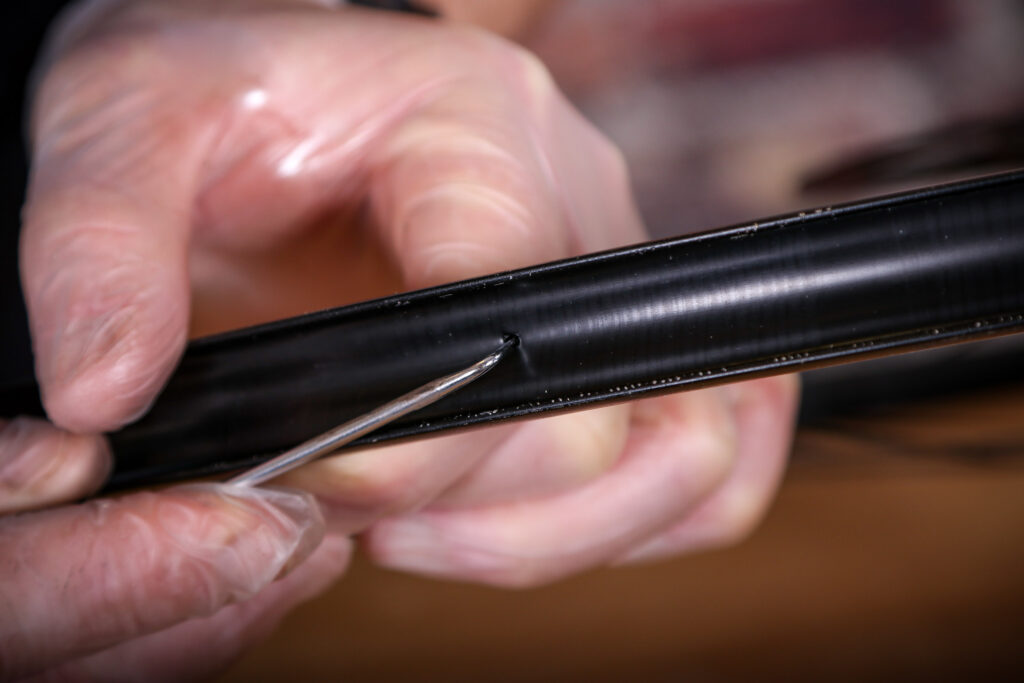
As you bring the tape around to the valve hole, where you began, make a neat trim to butt the two ends of the tape up to each other. Use a sharp point to pierce a small, neat hole through the tubeless tape through the valve hole – from inside the rim bed in the same direction as the valve will be fitted, otherwise you will lift the tape off the rim bed and risk ruining the air tight seal.
When the tape is installed, go around the rim checking it’s fully seated with no ripples, tucks, folds or creases where air can leak. Take a few minutes to get this right. Use your fingers or the rounded end of a small screwdriver handle to push the tape right down hard. If, after attempting to pressurise the tyre, the fit between the tyre and rim is too loose, you might want to add another wrap (or two) of tape to build up the rim bed depth and create a tighter and more effective seal between the two items.
As we’ve mentioned already, disregard this step if your wheels already come fitted with tape or the rims are tubeless-ready. You can just skip straight to step 3…
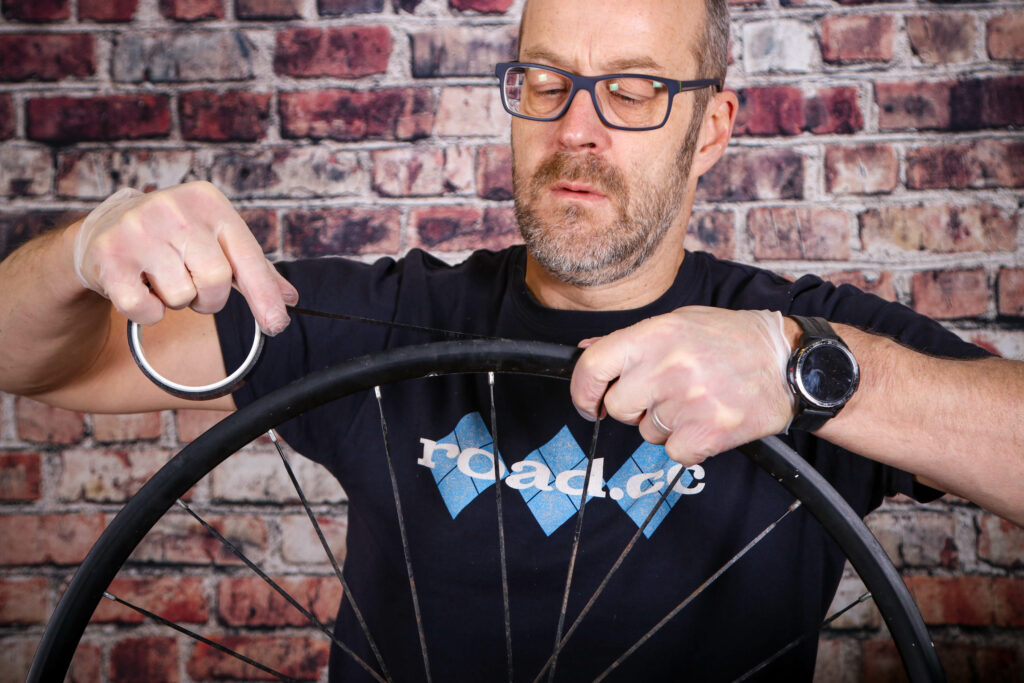
Step 3: Seat a bead
The next step is to fit the tyre and get the bead to snap into place. Pre-inflate the tyre without sealant to seat the beads without spraying sealant everywhere. This means you halve the job air pressure alone will have to do. Once the tyre is seated, let it back down.
Tubeless tyres can sometimes be stiffer making them harder to put on, but this is something that has improved over time. With a really tight rim/bead combo you may struggle to get the final bead over without tyre levers so you can use these to put the tyre back on as you don’t risk pinching an inner tube.
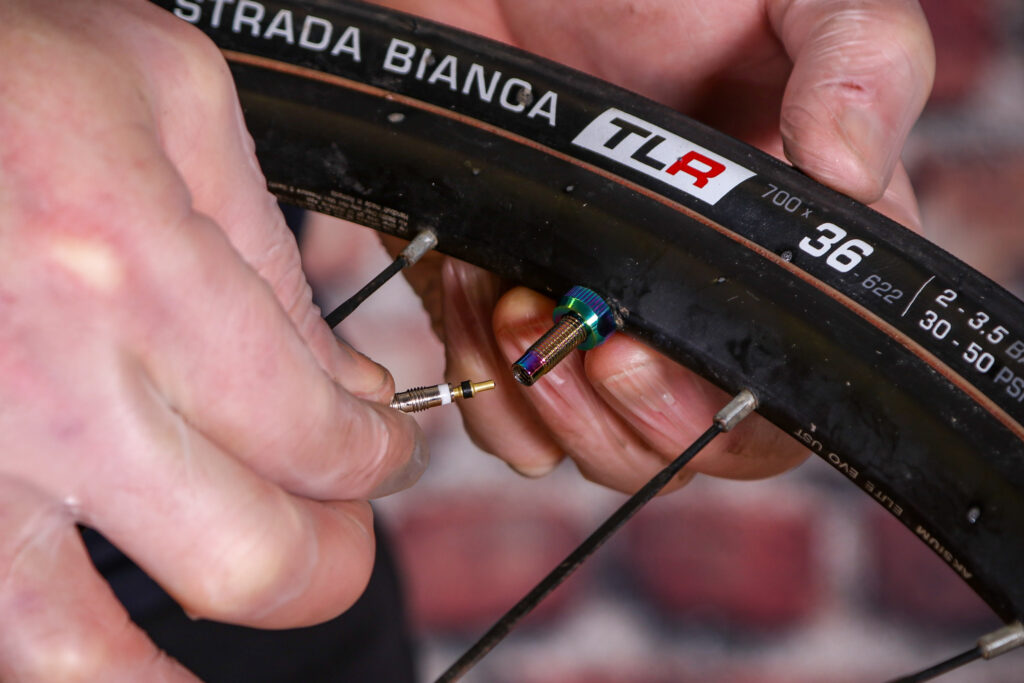
Step 4: Fit the tubeless valve
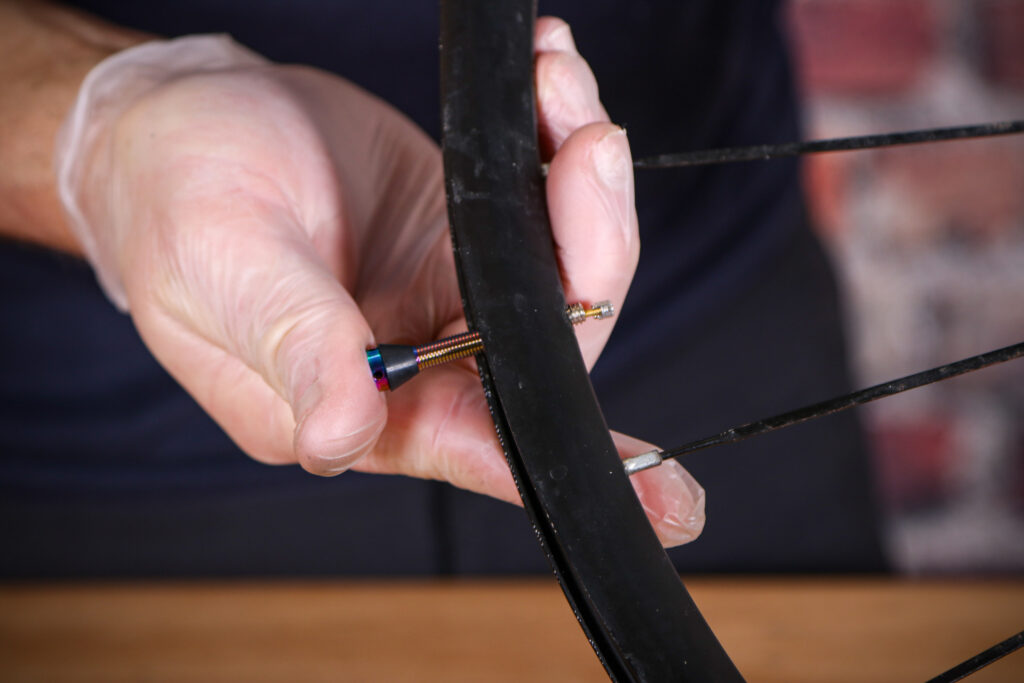
Ensure the valve’s rubber foot is properly seated into the rim well. Often they’re shaped and only fit to make an effective air tight seal one way. Add the necessary rubber O ring seals (if your valve uses them) and threaded lock rings and snug them down tight to make the valve assembly air tight. Remove the valve core.
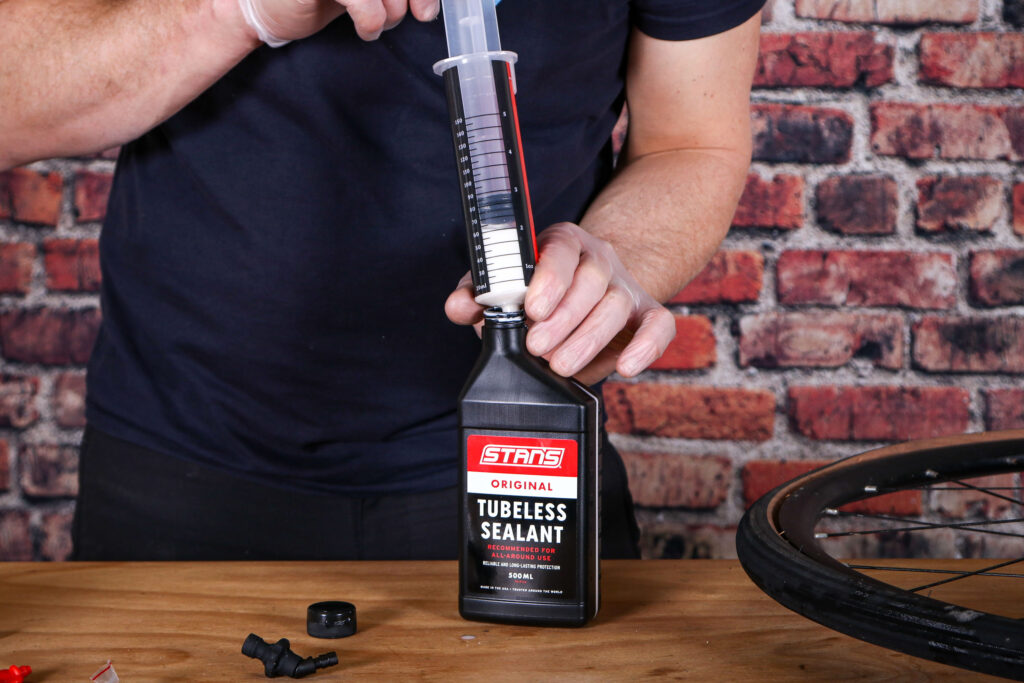
Step 5: Adding sealant
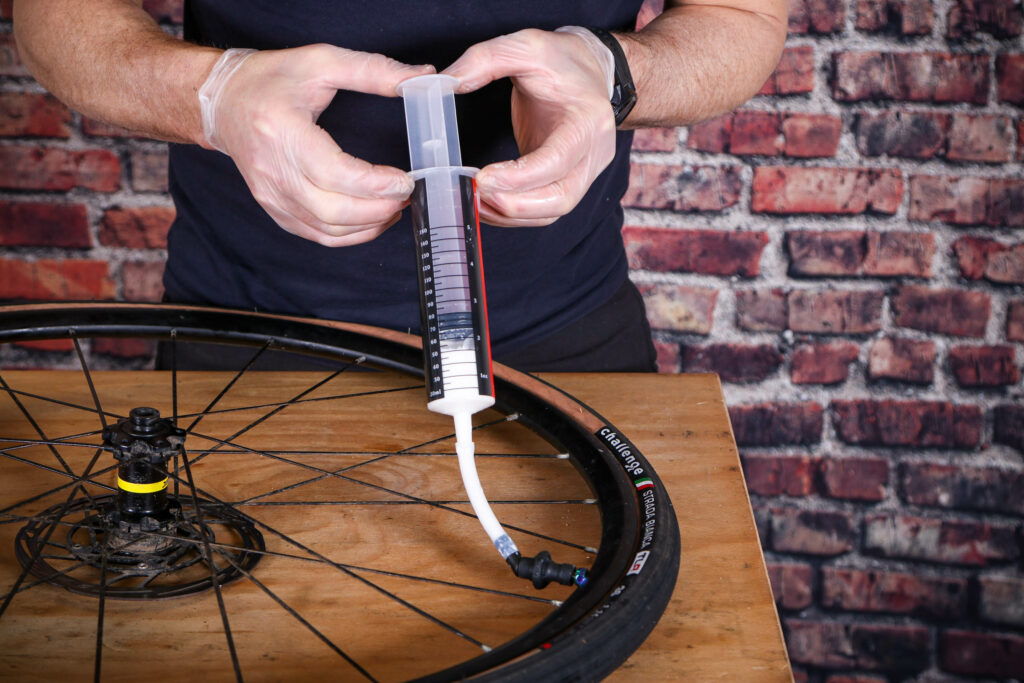
To prepare the sealant, draw it into a syringe fitted with a flexible rubber hose. This will fit over the valve stem and allow direct insertion into the tyre.
> What happens when a Tour de France rider punctures?
With the rubber hose fitted over the valve stem (the threaded outer will grip the inner surface and stop fluid leaking out) you can push the fluid into the tyre.
There will be some mess at this stage! Some sealant will seep out of the bead during the fluid insertion and tyre fitting inflation process, which is normal and necessary for the sealant to fill the gaps between the tyre and rim. Wipe it away as soon as you’ve made the seal and got the tyre to pressure. The sealant is sticky and can leave stains on your frame, tyres and rims. Refit the valve core.
It’s worth mentioning that some innovative brands have been making efforts to make insertion more efficient and less messy in recent years, one being Reserve with its excellent Fillmore valves designed to prioritise high flow rate and prevent clogging; although these and valves like them are considerably more expensive than basic ones.
Step 6: Spread the sealant
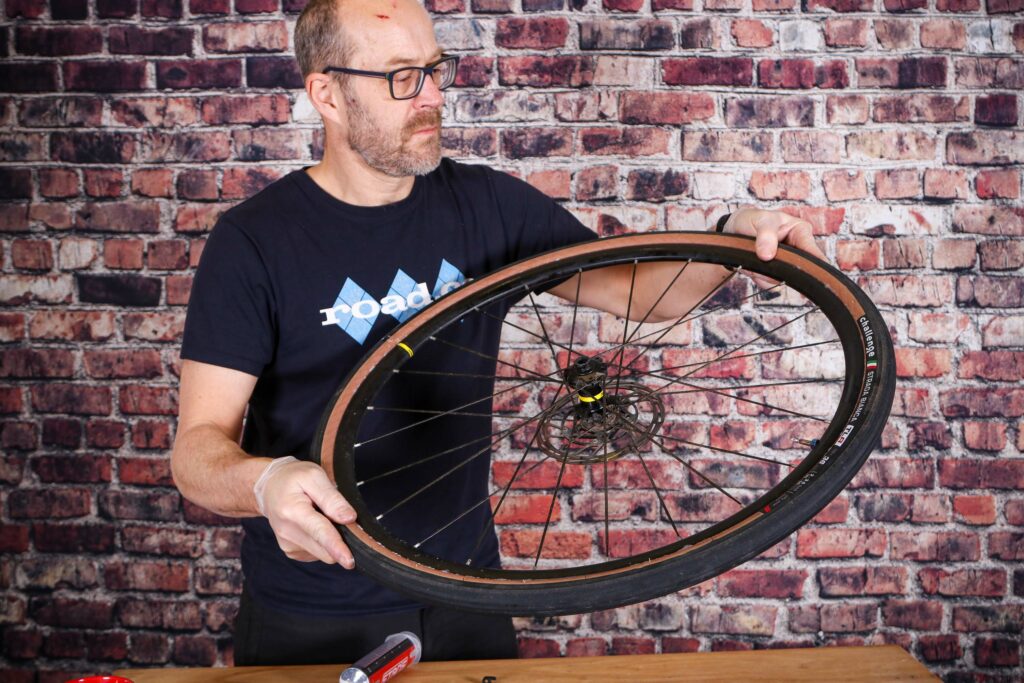
You can help the sealing process by giving the tyre and wheel, once prepped with sealant, a good jiggle. This moves the sealant around the entirety of the inner surface of the tyre. You can repeat this process once the tyre is inflated as well to help with the final sealing.
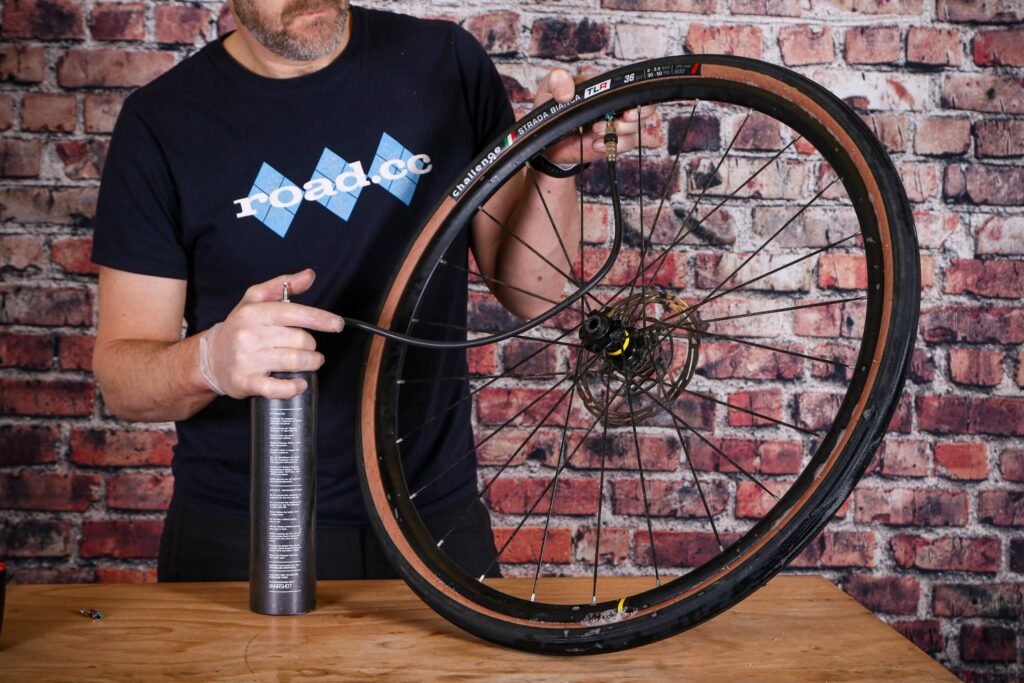
Step 7: Inflate the tyre
Most of the frustration of tubeless setups comes at this stage, so a good pump is key here. Ideally, you want to get a lot of air into the tyre as quickly as possible to blow the beads into the rim quicker than air is able to escape.
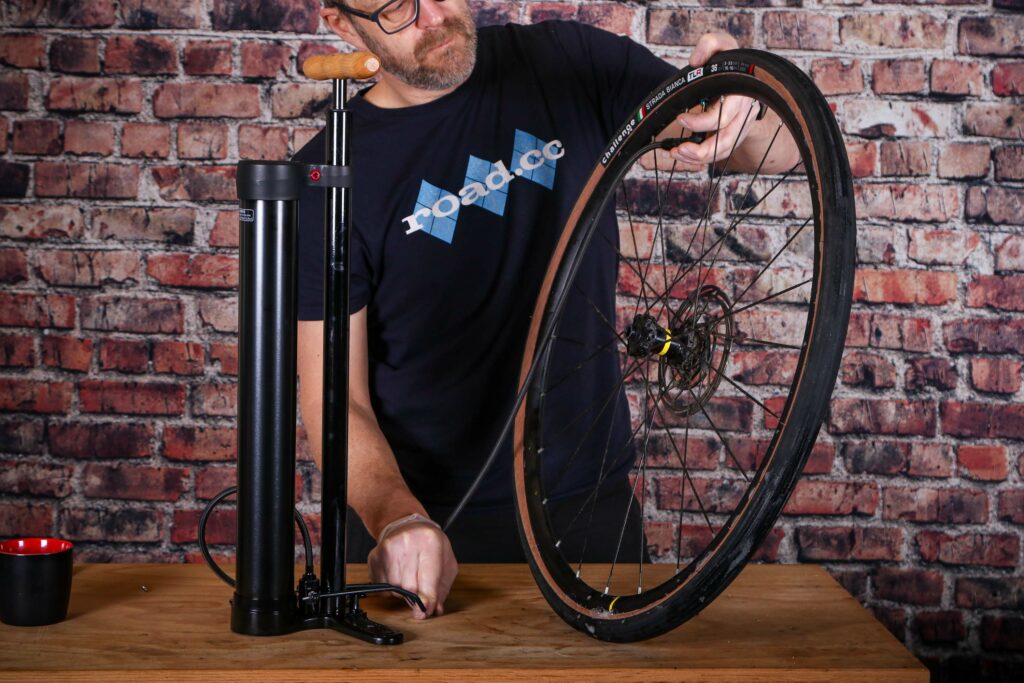
This is most easily achieved with a home compressor, or one of the newer breeds of tubeless-specific track pumps that can be pre-loaded with a high-pressure blast of air. A standard track pump will usually work (though it’s slightly more effort), and if you’ve set up the system well and chosen your tubeless tyre and rim combination wisely, even a hand pump can make the magic happen.
How much air should you put in your tyres? For road tyres this is usually measured in psi (pounds per square inch), and most wheel manufacturers will provide a recommended psi for their wheels with various tyre sizes.
Tubeless tyres typically run best at lower pressures than standard clincher tyres with tubes, so expect to be pumping yours to well below 100 psi like the days of old on 23mm tyres. To give one example, using Giant’s tyre pressure calculator for its hookless wheels, it recommends that a 75kg rider using 28mm tyres on a 22.4mm-wide rim should inflate to 61 psi (4.2 bar).
Step 8: Check the pressure
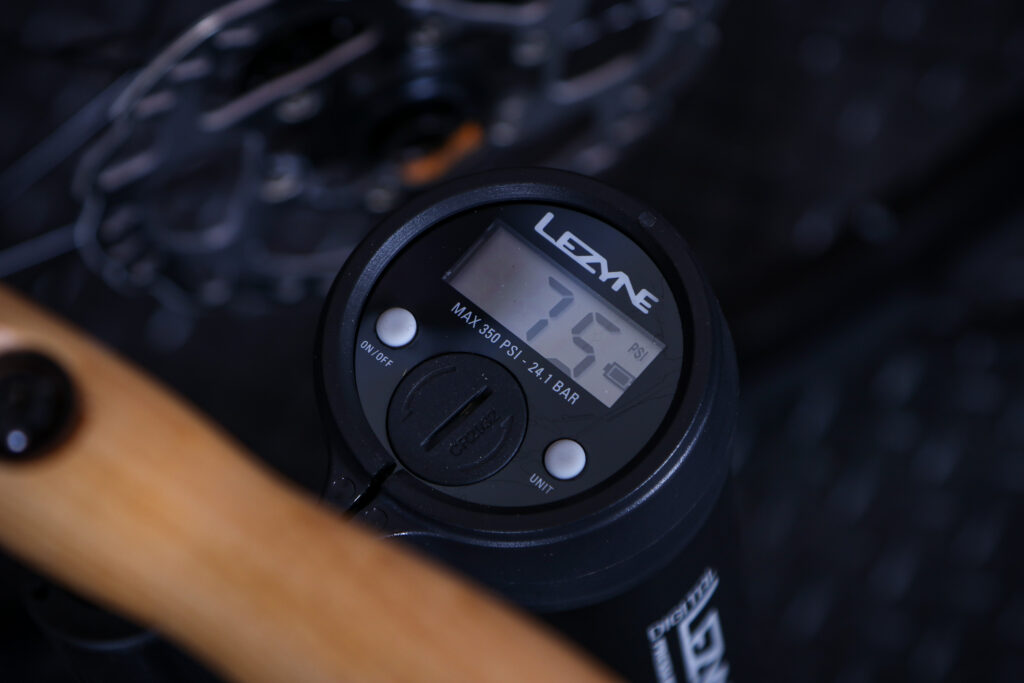
It’s not uncommon for tubeless systems to lose a few psi after installation, as the sealant works to plug all the microscopic holes in the carcass and union between tyre and rim. Top up any deficit and ride; that also helps finalise the sealing process. Doing this whole process indoors, in the warm, also helps. You should find the tyre holds pressure consistently after 24 hours.
>> Read more: The full archive of road.cc maintenance articles
Do you have any tips or tricks for setting up tubeless tyres? Let us know in the comments section below.


")
")


, Portland’s world record ambitions, another e-bike brand goes pop + more")


33 thoughts on “How to fit tubeless tyres — everything you need to know in this step-by-step guide”
This seems like an awful faff
This seems like an awful faff. Any reason manufacturers don’t produce a hybrid tyre-tube? ie one piece tyre tread for the road-side surface, welded to inner-tube material on the wheel-side? It would be lighter and potentiall fit any wheel?
see attached
dafyddp wrote:
Not sure if they still make it but Tufo used to make a Tubular Clincher that was similar to this. Tubular profile that had ‘wings’ that fitted into the hooks on a standard rim.
dafyddp wrote:
..and yet it really isn’t in general.
No idea if its easy to make,
@ dafyddp: No idea if its easy to make, or would have operational problems, but the tyre/tube combo would probably be more expensive. With ‘conventional’ tubeless the rim tape and valves are fitted only once, whereas every single tyre-tube would have to include these, and it would probably not be simple to make either, especially if the tyre/tube use different rubber compounds etc.
The bit I don’t get with
The bit I don’t get with tubeless is, what happens if you DO get a puncture? Are you just SOL?
sergius wrote:
You can usually just put a usual inner tube in to get home. Of course, you then lose the advantages of tubeless and you have to remember to have a usable inner tube with you.
sergius wrote:
The liquid sealant will stop any small punctures by blocking the hole and then setting, so glass, wire, nails, etc shouldn’t cause a ride-ending puncture. If you get a big cut in the sidewall or something that the sealant can’t fix, you still need to carry a spare tube and tire boot.
Steezysix wrote:
For large-ish cuts you can also use the push-in fabric patches – although they’re more usually seen off-road.
For a sidewall cut, all you
For a sidewall cut, all you need is to carry a patch about 2cm round cut from an old tyre (not from an inner tube) and one of those tiny tubes of super glue gel, the ones that come in packs of 3. Glue the patch on the outside over the cut, reinflate and ride home. Of course this only works if the cut is in an area that is smooth, no thick tread, but it works fine, at least for me.
Is tubeless worth it? Well I have been using them exclusively for 3 years and will never go back (roadie). It can seem like a load of trouble to set up, but it’s more a question of learning new skills, and a huge amount of the hassle melts away if you are lucky enough to have tubeless ready wheels, which is slowly becoming the norm.
You can use some product from
You can use some product from Dynaplug to plug larger holes that the sealant can’t seal. Then pump the tire and you’ll be good to go.
Flaff with a capital F.
Flaff with a capital F.
Two things:
Two things:
1. Pre-inflate without sealant to seat the beads without spraying sealant everywhere if it doesn’t pop… Once it’s “on”, it’s trivial to let it back down, inject sealant, refit valve core and inflate.
with a *really* tight rim/bead combo (which is desireable for security of fit in the face of tyre squirm, especially after a puncture) – you may struggle to get the final bead over without using tyre levers – and i found it awfully easy to pinch the tube doing that …
2. Fairy liquid (other washing up liquid brands are available). A dilute (or if the tyre/rim combo is a real pig, semi-neat) application will ease the bead into place before you do (1). Can be “flushed” out by hosing the whole thing down and pulling the hose (or the syringe full of water) onto the valve, sloshing it around and then pumping it out by setting the wheel ~ vertical with the valve stem at the bottom and pushing on the tyre either side of the valve until it stops squirting foamy water out.
Both of these things. These
Both of these things. These tips may stop you from going a bit mad. (And very messy)
Though I used as little of the slightly diluted washing up liquid and didn’t wash it out. It didn’t seem to affect the gunk too much, I suppose only time will tell.
I see you are not a regular poster, but do you (or indeed anyone else for that matter) have any tips for getting the bead away from the rim, apart from brute finger/hand strength and occasional standing on the sidewall. The better half seemed to find it all so amusing. I don’t want to use a vice or molegrips.
I carry a spare tube, just in case, but trying to get the bead moved off it’s seal to fit it out on the trail, especially in the cold and wet fills me with particular dread.
I’m glad I got the Topeak
I’m glad I got the Topeak Turbibooster X, (just had to go Topeak, such good pumps) as it has the tube, the standard doesn’t. It means that when I’ve charged , connected and flicked the lever, I can run away, the noise of the bead going onto the rim terrifies me.
ktache wrote:
I vaguely remember someone asking this before and the best solution was to lay the wheel down on a pavement or step so that the rim is supported and the tyre/sidewall isn’t. You could then kneel on one side of the wheel and use both hands and your body weight on the tyre to get it to separate. I’ve had a couple of tyres that were a little bit stuck but never had to use the above technique.
Ta, I can see the kerb/step
Ta, I can see the kerb/step thing adding the required ooomph.
Wow. Looking at that whole
Wow. Looking at that whole palava, anyone would think that inner tubes came along to save us from all the hassle. But you say it’s actually the other way about?
Well…
Well…
I’m not going to convert my other bikes into ghetto tubeless, but, when I was cleaning the dried gunk off the drier weather tyres before fitting them (yes, another faff) I found another 5 or more thorns that I’d not noticed before, just in the rear, all capable of puncturing a tube and ruining a ride. I don’t know if these tyres were thorn magnets, but I reckon I’ve pulled 20 or more from each one, never had such a thorny problem before, these were a bit lightweight, if any 3 inch tyre could ever be called lightweight, or if my present daily route is particularly thorny. I did a lot of farm track riding in the late summer too. All sealed, with many not even being noticable. And a big sharks tooth flint that required (quite excitingly) an anchovie. Most of those would have meant a trailside tube repacement and a later repair, some maybe multiple tubes needed, the flint on a very wet day. There is a certain smugness when you pull out an inchsworth of thorn and see the hole seal all by itself.
Well,
Well,
A. Once you’re used to it, setting up and maintaining tubeless becomes routine, and
B. If you want faff, how about swapping an inner tube on a rear wheel in cold and rain. Hell, on many a clubrun in fine weather I’ve seen people make a total hash of that. Tubeless saves you from almost all of those stops.
Don’t know why this has
Don’t know why this has popped up.
I came across 2 tips on this
Where you can’t get the tire to inflate, you can use a luggage strap or roof rack strap around the tyre to get downward pressure (and also score a try) so that the air is forced sideways to push the bead on the rim.
Use silicon around the valve before seating it (although I’m not clear what the exact product is).
Very easy to do after your
Very easy to do after your first one but the pump is key a crap pump will result in frustration. I made a ghetto inflator after an hour of frustration and have since bought a real one.
The jury was out after that first experience but since then the additional comfort (=faster) and puncture protection have won me over. My first puncture was a thorn branch I stopped pulled it out and was greeted with a blast of air. Oh s#&t that will never seal but I rotated the tyre to the bottom and it instantly stopped I was riding again in 30-45 seconds.
Surely Step 4 has to come
Surely Step 4 has to come before Step 3? How do you inflate the tyre to seat the bead before you’ve fitted the valve?
destabilised wrote:
Blow into it really hard?
I find it helps particularly
I find it helps particularly with a brand new tyre that retains it’s folded shape to seat it with an inner tube and leave for a while. You can then leave one bead seated when removing the tube and it’s much easier to reseat the other afterwards.
Never seen butting the rim
Never seen butting the rim tape before. I’ve always overlapped by a couple of cm.
I agree, I always overlap by
I agree, I always overlap by several cms, mainly because the tape sticks to itself better than it sticks to the rim, so overlapping it means that the end is well stuck down.
In my experience road
In my experience road tubeless rarely holds air consistently. Losing a few psi per week is the norm with some much worse than that. I have one set of Hunts that consistently leak 10psi a day even though I’ve replaced both the tape, the valves and the tyres.
And when you decide to change
And when you decide to change the tyres for a summer option you then have the ridiculous job of cleaning all the sealant off the rim, good luck with that.
If you’re not so interested
If you’re not so interested in chasing the latest fashions then you can make your life a LOT simpler by just using standard tyres and tubes. If you’re not having problems with frequent punctures, then don’t look for a messy and sometimes complex solution to a problem you don’t have. I know a LOT of people who’ve tried tubeless on road bikes for a couple of years and reverted to tubes because the extra hassle just isn’t worth it. Spend the time riding your bike instead.
I’m a pro’ bike mechanic, so I know exactly how to do tubeless setups, but I wouldn’t use it on my own bikes and I discourage my clients from using it on their road bikes unless they have a special situation.
Chris RideFar wrote:
What I like about road tubeless is that you can choose to do the “messy” bit at your leisure when you’re topping up sealant or changing tyres etc. With an inner tube, you don’t get to choose when to stop riding and have to take off the tyre to change the tube and in my experience it’s often when it’s raining. i.e. tubeless helps me to spend my riding time actually riding rather than fixing stuff.
Or just do yourself a massive
Or just do yourself a massive favour and ignore the relentless hype being shoved down our throats, throw it all in the bin and buy some TPU tubes.
More people have pinched a
More people have pinched a tube with a tyre lever than have had tubeless set up issues. Prove me wrong 😉
#usererror
Thank you for a very
Thank you for a very informative article, but I’m afraid everything I read about tubeless makes it sound like an awful lot of arseache just to avoid fixing the occasional puncture. I mean, it takes me perhaps ten minutes to remove the wheel, pull the tyre, fit a new tube and put it all back together again. I think I’ve had to do this maybe once a year for the last five or six years of riding. Given that a lot of riders on tubeless setups still carry a spare tube, tyre levers and a pump “just in case”, the advantages seem to dwindle to almost nothing. TPU tubes for the win.