


Sooner or later you’ll need to replace your rim brake pads, because they’ve worn out, because you’re switching to carbon fibre rims or because you just want to upgrade for better stopping. Here’s how to replace rim brake pads.
Your brakes work by using friction between the pads and the rim to slow the wheel and therefore the whole bike. The process gradually erodes the pads. One of the challenges for brake designers is finding pad materials that wear slowly while still generating high friction, and performing well in both wet and dry conditions.
Pad wear varies with the conditions. If it’s wet and muddy, they’ll vanish quicker. There’s usually a wear indicator on the pad. When that’s reached it’s time to replace them. Don’t delay. Some pads are moulded around a metal core and if the pad material is completely worn out, the metal core will dig grooves in your rim.
Our guide below shows you what we believe is the best method to replace road bike brake pads. We’ve included a list of the tools and materials that you will need to complete the job and in some cases where you can buy them. If there are others that you prefer then feel free to let everybody know in the comments.
Tools & Materials
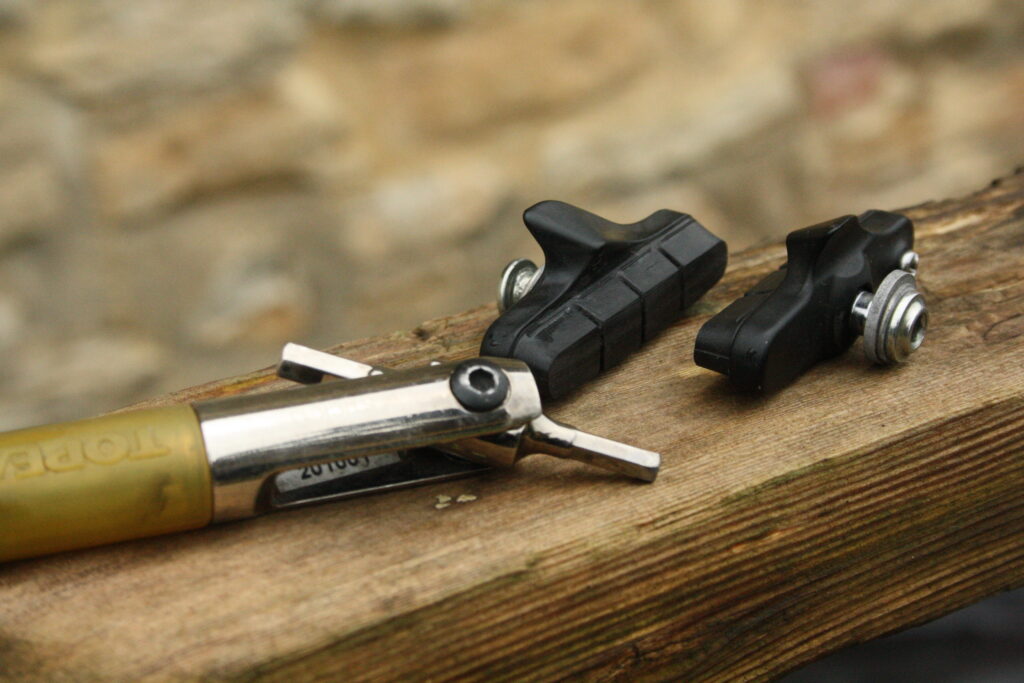
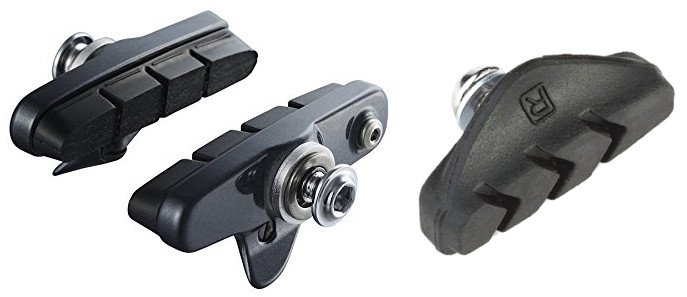
Brake pads are constructed in two ways. Cheaper ones are moulded around a metal core, as mentioned above, while more expensive pads have a separate pad and shoe. The pad slides into the shoe and is held in place by a screw. The latter design makes it easy to replace the pads if your brakes are already well set up. There’s no need to remove the alloy carrier from the calliper and ruin the adjustment. If that’s what you want to do, then simply follow the process without removing the existing alloy pad carrier.
Brake pads need to be set up with a small amount of ‘toe in’, where the leading edge of the brake pad contacts the rim fractionally before the trailing edge. This allows the rotation of the wheel to drag the heel of the pad into the rim for improved modulation. Toe in also help reduce brake squeal.
If you don’t have a great calliper adjustment or your brakes squeal at the first sign of water, then now is a good time to have the alloy carrier out, replace the pad, and refit the whole shooting match from scratch. If you have all-in-one pads, then it’s a good idea to replace them with two-piece units as they usually provide better braking thanks to stiffer constriction and better rubber.
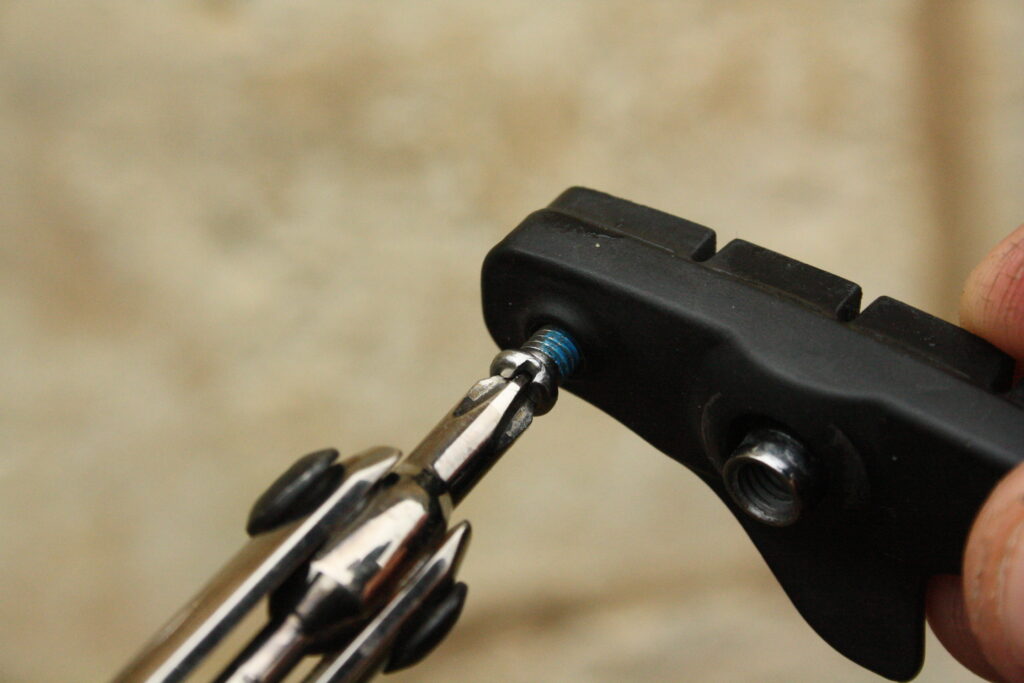
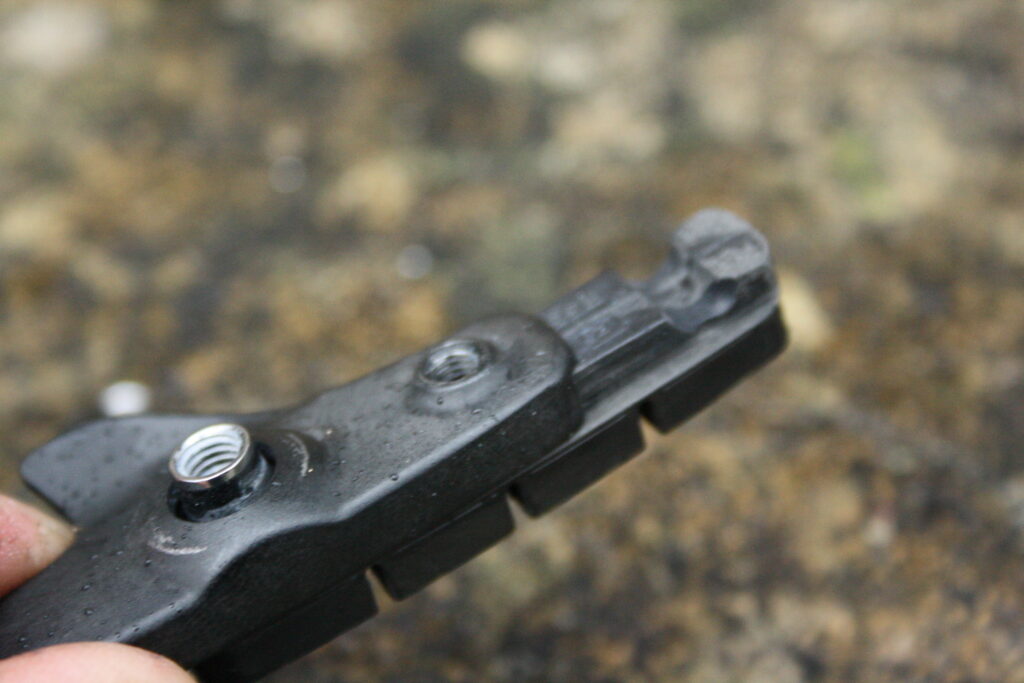
1 Undo the retaining screw To replace the rubber pad in an existing pad carrier, unbolt the carrier from the calliper, remove the curved washer which sits on the domed central part of the alloy carrier (with the round threaded receiver nut through it’s middle). Then unscrew the pad security screw with a cross head screwdriver. It ‘s a small screw, so don’t lose it.
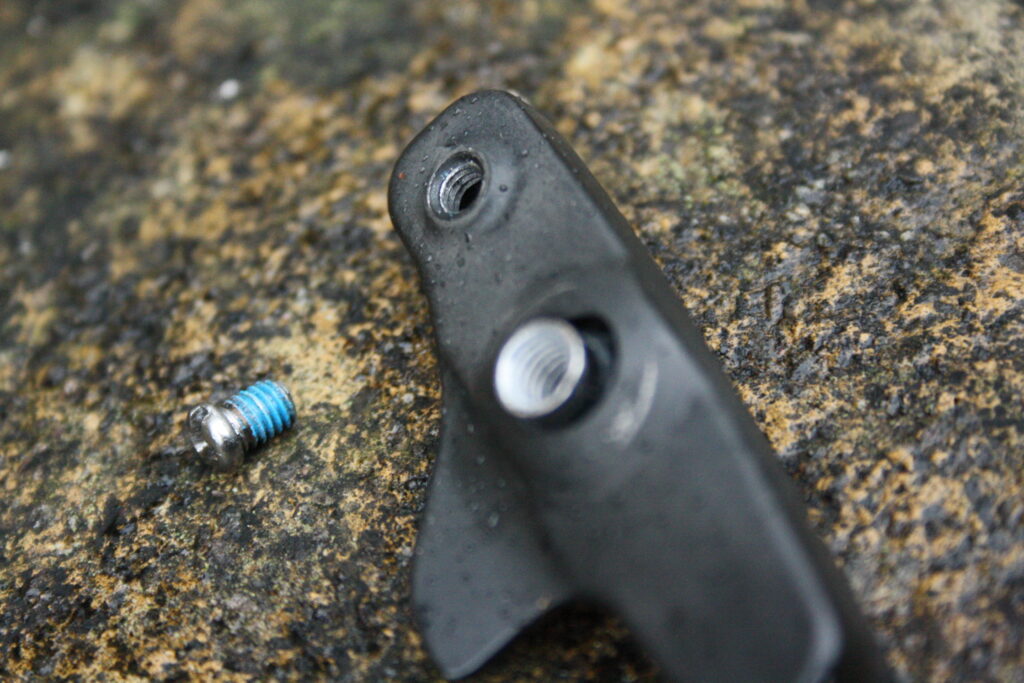
2 The retaining screw This small screw has blue thread locking compound on its thread. The screw, when tightened into the alloy pad carrier, locks the rubber pad and the carrier together so that the pad itself cannot work its way out of its slot fitting.
3 Slide out the pad. With the retaining screw removed you can slide the pad out of the alloy carrier. Sometimes the old pads can be extremely reluctant to move. We have occasionally used the edge of a worktop or similar to push on the stop end of the pad while we push the carrier in the opposite direction, just to get the pad to break free.
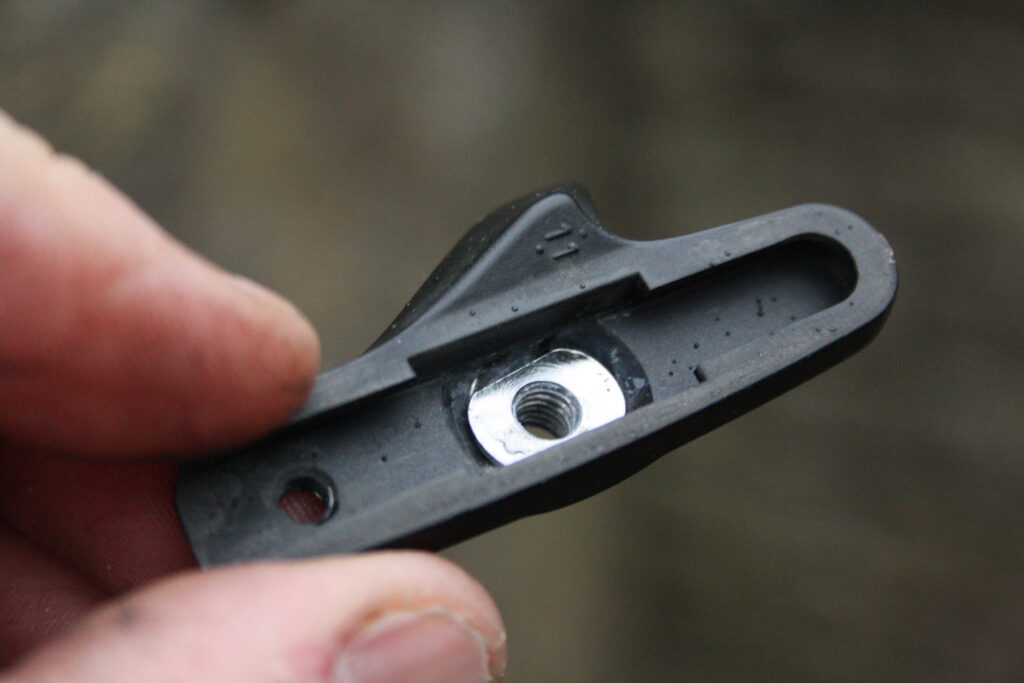
4 The shoe. When the pad had been removed from the alloy carrier be sure not to lose the small alloy threaded nut ( the silver bit shown here) which the calliper attachment bolt screws into. They’re a loose fit in the carrier and can fall out if you’re not on guard.
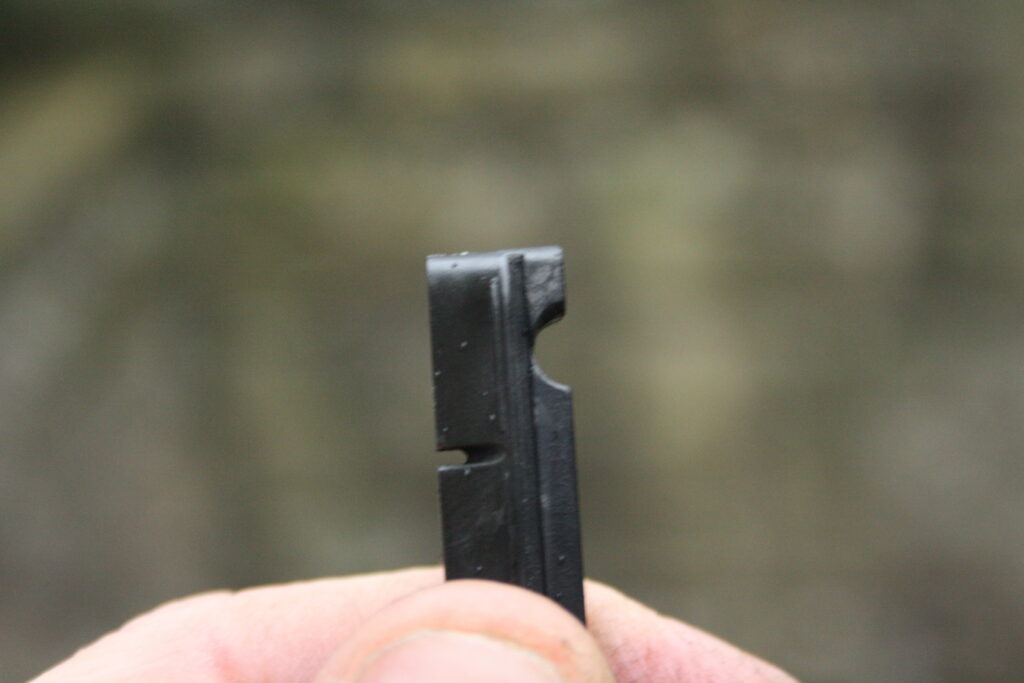
5 Check the wear. If you look at the edge of the brake pad you can see two things. Firstly this pad has plenty of wear remaining as you can still see the wear indicator slots on the face of the pad on the left side in this shot.On the right side of the pad there is a semi-circular cut out on one end. This is the space where the retaining screw sits and stops the pad from sliding out of its carrier slots.
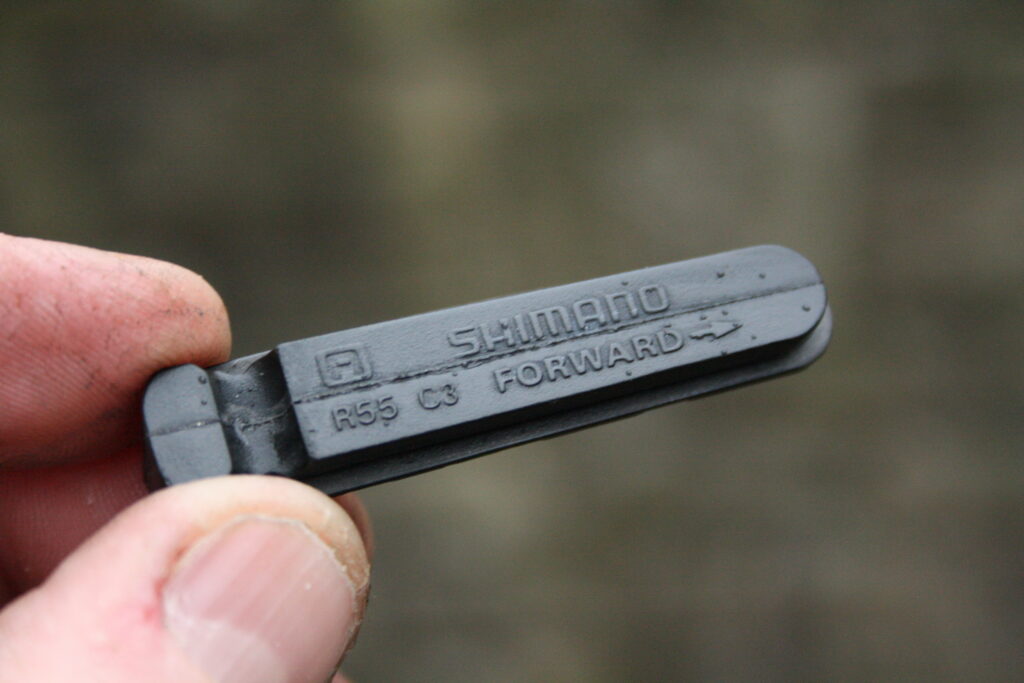
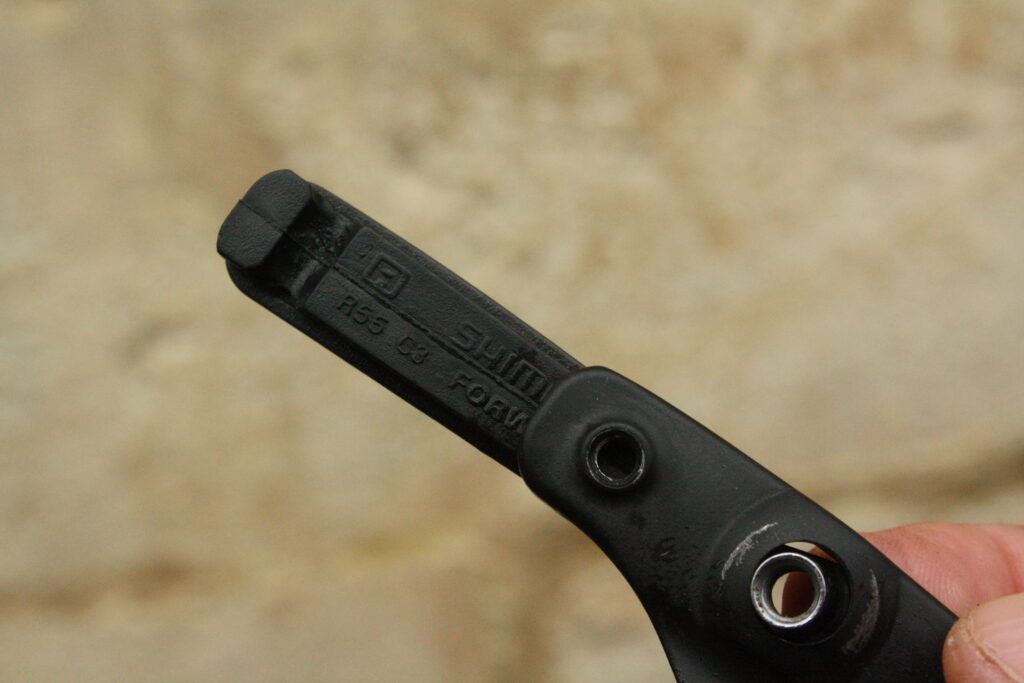
6 Get the direction right It’s also important to note that pads have specific sides, their tapered shape will only fit in one side of the calliper. In the top left of the pad in the shot you can see and R in a square border. This means it will only fit in the right hand side pad carrier. The arrow and ‘Forward’ mark should point towards the front of the bike when installed correctly.
7 Fit the pad Slide the new pad into the alloy pad carrier. It should slide in fairly easily. You can see that the retaining screw hole in the carrier will line up with the slot in the pad when fully home.
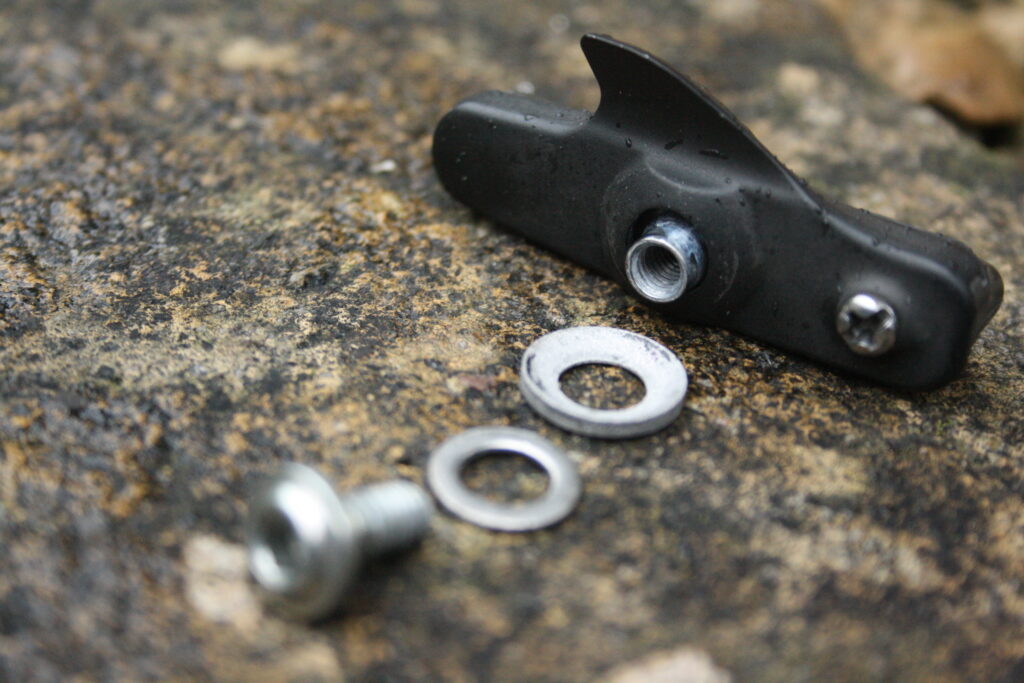
8 Replace the washers With the pad retaining screw reinstalled, you can now replace the washers, taking care to observe the correct order, otherwise you won’t be able to correctly adjust the pad in the calliper arm.

9 The first washer The first element is the concave washer. Ensure the convex domed portion of the carrier body fits into the concave washer. You can’t fit the other flat washer yet (seen here on the thread of the attachment bolt) because it goes on the other side of the calliper arm.
10 Position the pad Slide the carrier with its attached pad and security screw and the concave washer behind the calliper arm. Locate the small protruding end of the threaded nut into the calliper slot, as shown.
11 Fit the mounting bolt Taking care not to let the pad and washer drop out of the slot, bring the attachment bolt and flat washer up and screw them into the carrier nut. Don’t go mad tightening them right up yet because we’ve still got some adjustments to make.
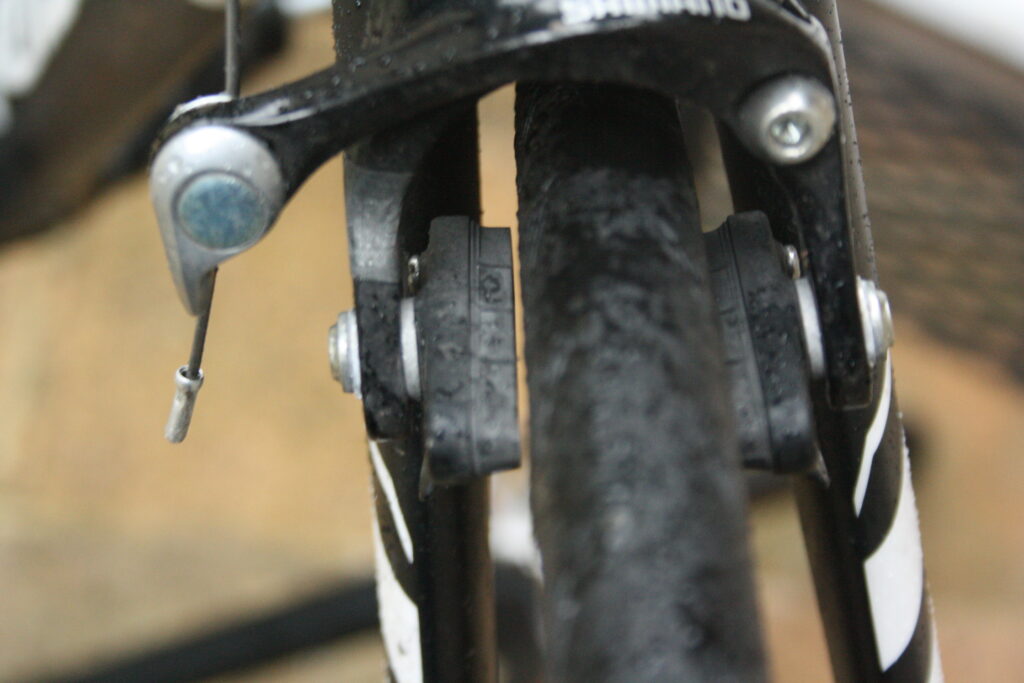
12 Pads in place The pads are in, but the calliper isn’t centred and the pads aren’t adjusted for toe-in, some thing we’ll need to do. That is, unless you decided to maintain your original adjustments and left the alloy pad carriers in position and just un-did the security screws and pushed the pads out.
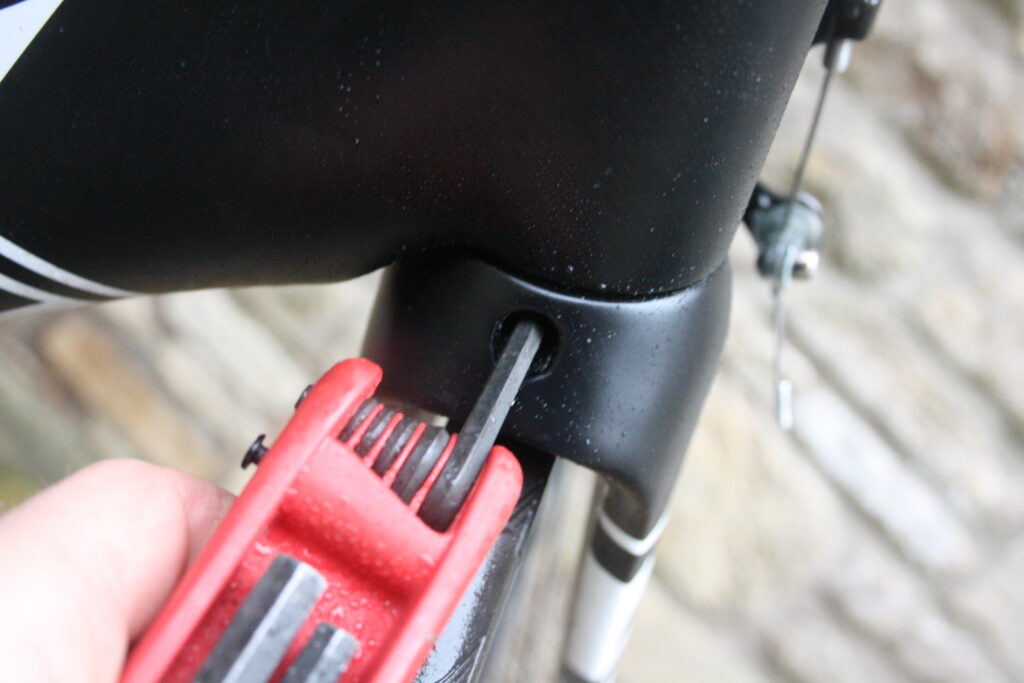
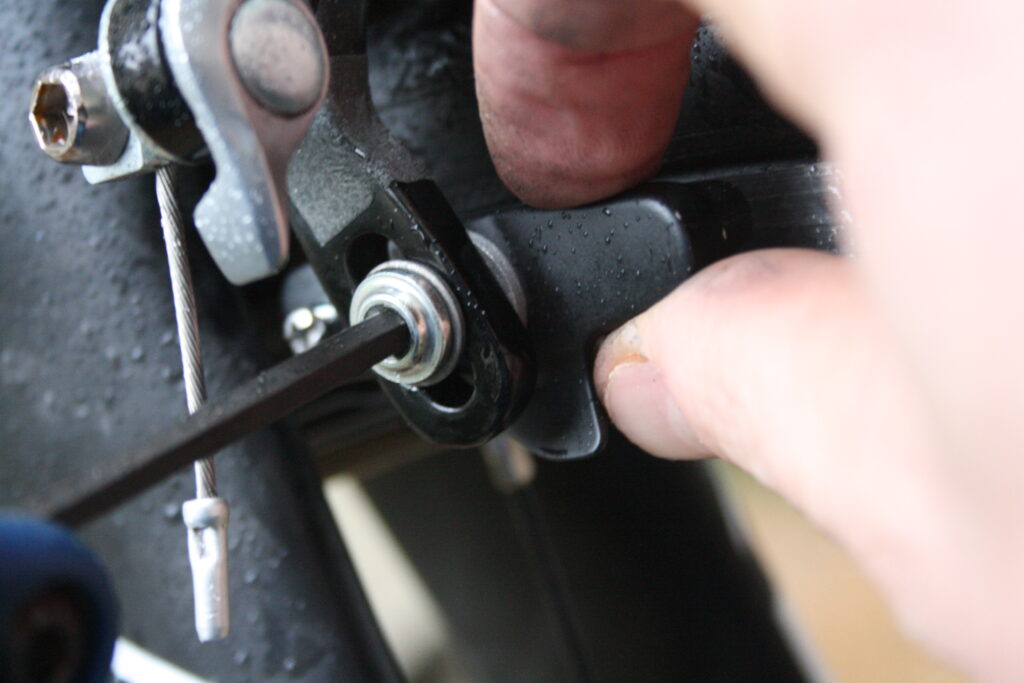
13 Centre the brake You can centre the calliper with a 5mm Allen key. Access the calliper pivot bolt via the hole in the rear face of the fork crown. On a deep section carbon fork like this Ridley one here, the bolt will be quite deep inside. Hold the calliper so that it is centred evenly over the wheel – check to see that broadly the calliper arms and pads are the same distance from the wheel rim. When you’re happy, nip it up tight and the calliper will remain in that position. You can always tweak the position again after the toe-in procedure.
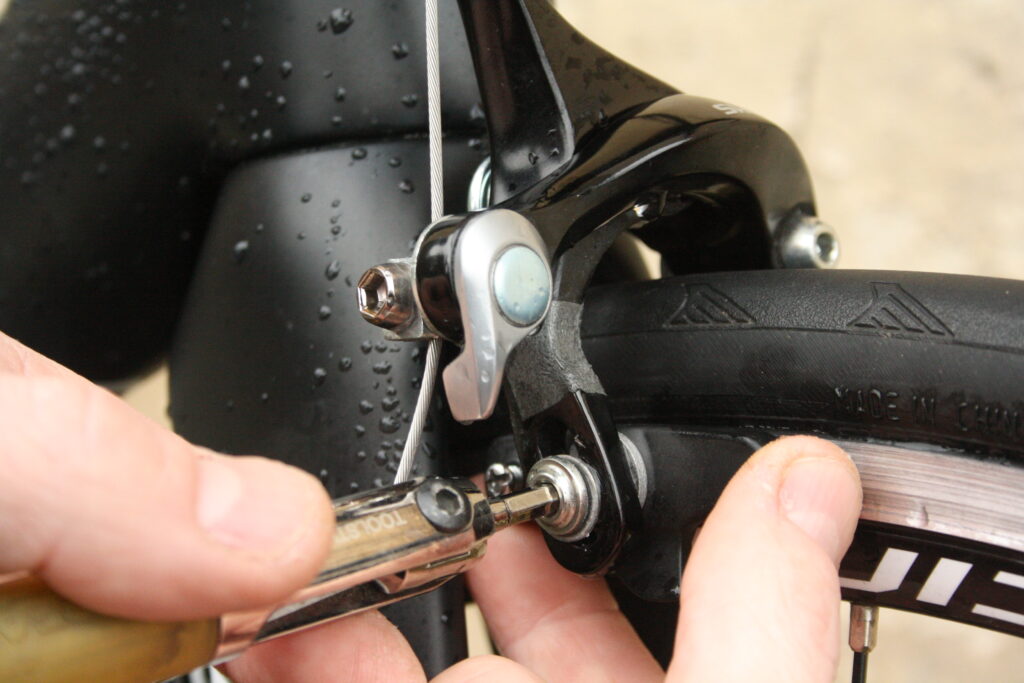
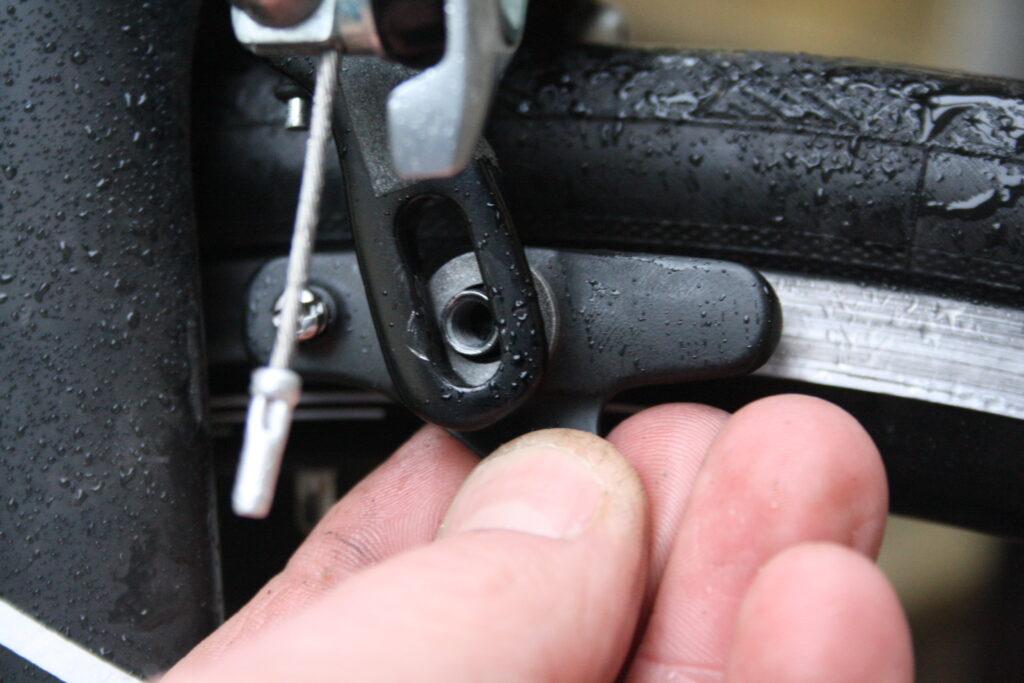
14 Set the pad position When you begin the fitting process for the pad, pay attention to the position of the pad relative to the braking surface. You want the pad face to be some where between the centre and two thirds of the way up the track (as seen here). Also make sure the pad is lined up parallel to the brake track and not with heel of the pad sticking up or down.
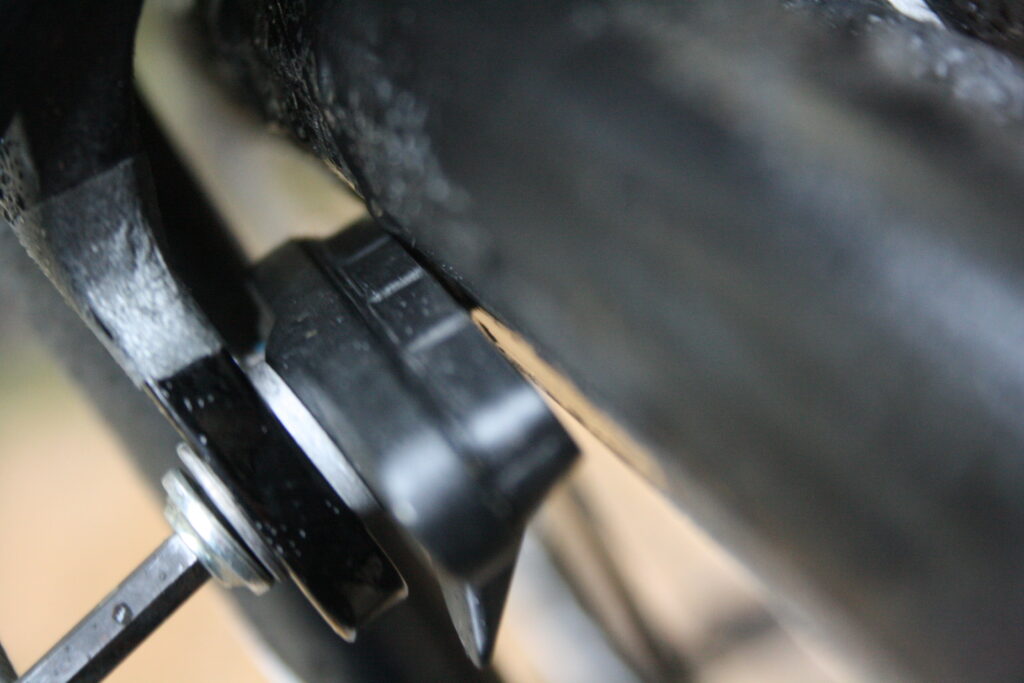
15 Set the toe-in You’re looking for the front (leading) edge of the brake pad to touch the rim first as the brake is applied. This not only cleans the rim of water, dust and dirt, but also allows the rotational movement of the wheel to grab the pads and twist the calliper arms slightly as the rear portion of the pad is draw to the rim. This is called toe-in. It also reduces brake squeal and judder while also improving brake feel and modulation. In this picture the pad is badly adjusted, with the heel of the pad rubbing on the rim and the toe of the pad sticking out. This will deliver low braking force and poor lever feel as well as being noisy.
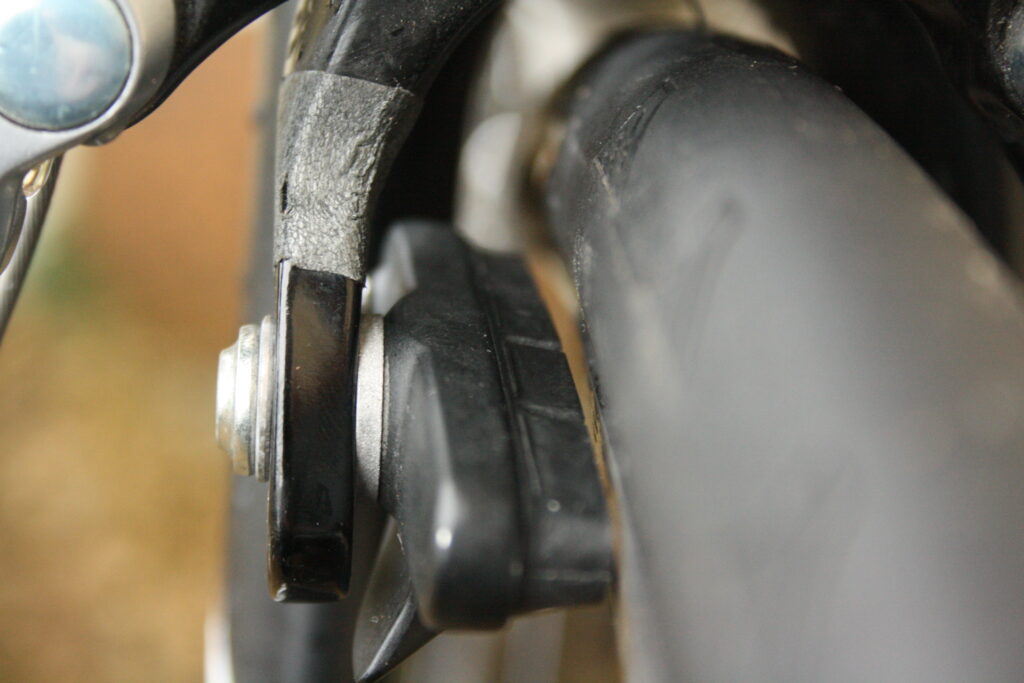
16 Too much toe-in This pad has a front edge toed-in, but almost too much. The leading edge is right on the rim and heel is well clear of the rim (you can see the gap). Too much toe-in will wear pads unevenly and lead to a mushy feel at the lever.

17 Goldilocks toe-in This pad is well adjusted. The toe of the pad is fractionally closer to the rim than the heel, and consequently will touch first and utilize the rotation of the wheel to induce full pad contact with good modulation and low noise. We have seem people use a piece of card, about the thickness of a posh business card positioned under the heel of the pad to dictate a suitable pad angle.
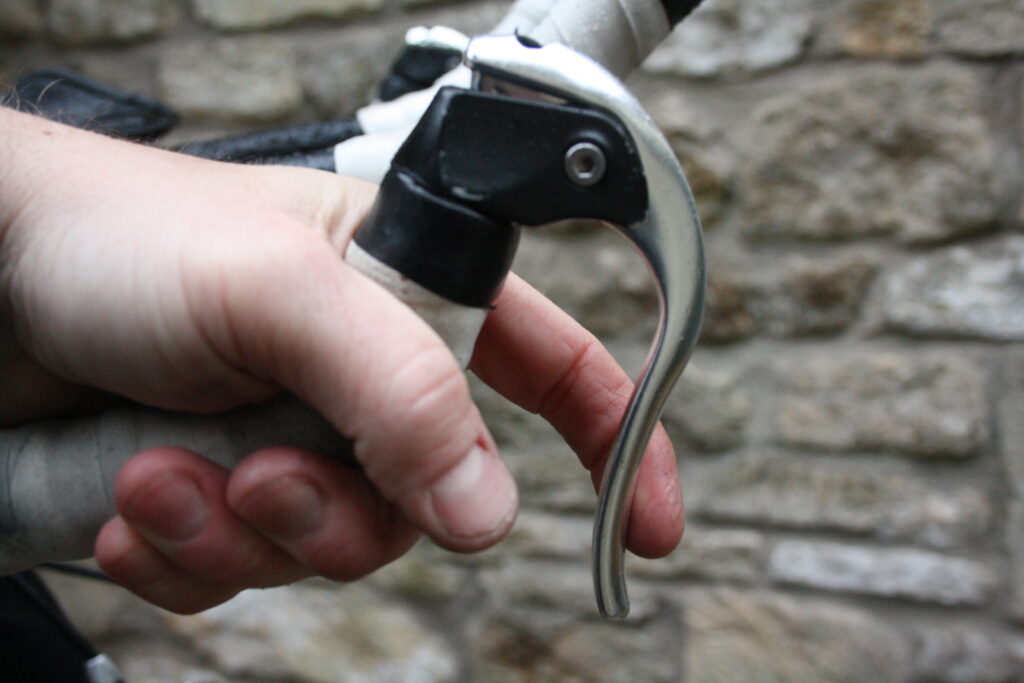
18 Check the feel Naturally, adjustments made at the calliper will have an effect on the feel of the braking at the lever. This is the most important bit, so keep checking that your toe-in adjustment not only feels ‘right’ when you squeeze the lever when the bike is static, but also when you’re riding it.
>>Read more: The full archive of road.cc maintenance articles


16 thoughts on “How to replace your road bike’s rim brake pads”
Campag brakes don’t have the
Campag brakes don’t have the stupid fiddly screw to lose. Never known why it’s needed, I tend not to ride my bike in reverse.
me wrote:
Ah yes, the screw that rusts and seizes after a while leaving you to destroy the pad in order to get it off!
Why do pads never ever slide on easily for me?
The best trick I’ve seen for
The best trick I’ve seen for toeing the pads is to wrap a small elastic band around the rear end of the pads, then gently squeeze the brakes closed. This forces the front to be a little closer to the braking surface than the back, tighten up the bolt, and boom, instant perfect toe in.
I believe Tacx even make a dedicated toeing tool that basically does the same thing.
giobox wrote:
I forget where I read it, Sheldon maybe, but you can achieve a similar result by putting a thin coin between the pad and the rim. I think the article I read was American and suggested a nickel, which is very thin, thinner than any of our coins. Dig up an old ha’penny or look through the coins you’ve got left from your holidays.
giobox wrote:
I have the tacx tool and it makes servicing brakes much easier. Jagwire do one too.
Why in the article does it
Why in the article does it suggest centering the brake by lossening the main fixing bolt, centering by eye and then tightning it? Fine for initial set-up but very hit and miss for fine tuning.
Why is there no mention of the little centering screw found on most caliper brakes? Much better way of fine tuning.
Do people actually do the
Do people actually do the whole toe-in thing? If so, does it really make a positive difference to you?
I prefer the instant bite of a square aligned pad, and, touch wood, have not suffered with any noise or judder on any of my road bikes.
I feel that toe’d in pads feel mushy and lack ultimate power, which I think is too much of a sacrifice for the additional modulation.
Also, am i the only one that will centre a caliper by pulling the caliper in whatever direction that it needs to go? Generally they will yield when pushed, and it means you are not fiddling with allen bolts. This does require checking the bolt tension from time to time however, as you wouldn’t want those bolts coming loose!
If I recall correctly,
If I recall correctly, Koolstop specifically tell you not to toe their pads in.
The toe in is incorrect in
The toe in is incorrect in this article, surely. If that’s a front brake, the front of the pad hits the moving rim behind the rear of the pad, so you ought to toe it in by making the rear touch first. That way the cleaning effect of the toe in actually has an effect.
Maybe that’s why my pads squeal like a b*******.
I will try toe in the other way, and suffer the grinding of the rim in the wet.
Toe-in is the same for both
Toe-in is the same for both wheels – the front touches first regardless whether its front or rear brake.
The bit about clearing water, dirt, dust etc I think is a bit of a red herring as the wheels are going the wrong way for the front edge to touch first. It just stops them from squealing and might give marginally better modulation.
I usually just squeeze the brake lever with the pads roughly in position, position them with the lever held tight and then tighten.
For toeing in the pads I
For toeing in the pads I loosely fit them, then place a thin piece of card or folded paper between the trailing edge and rim, squeeze the lever and tighten in place.
I never bother with that toe
I never bother with that toe-in bollox and have never had squealing rim-brakes. Picture 15 is misleading as it shows the pad in a toe-out position yet the description starts with “set the toe-in” and there’s no way a toe’d-in pad could clean the rim as it follows the leading edge. There does seem to be some confusion over the terms leading and trailing edge. If you make a mark on the rim, the leading edge of the pad is the one the mark reaches first (if the bike is travelling in a forward direction) .
Toe-in is a load of rubbish,
Toe-in is a load of rubbish, yet another of the old myths passed down on club runs and internet forums. Really folk, it is not necessary, don’t you think that if it was then manufacturers would build it in? Also, think about what happens after a few rides and the pads have worn so they make contact along their full length at the same time, where is this critical toe-in then? Do you re-adjust your pads after every ride? Probably not which just goes to show that it is all (as Bristol Bullet says) bollocks.
Minor technical issue here
Minor technical issue here obviously cuased by lack of experience. These are blocks that are being fitted not pads. Twas ever was. Modern trends and terminology brought about by ignorance and trendiness mean nowt.
The only thing that bothers
The only thing that bothers me about this article, is the state of the guy’s finger nails in the photos……stop biting those nails so badly you filthy so and so!