

Cable-operated side-pull caliper brakes are still very common on road bikes, despite recent inroads from discs. But they’re not all created equal. You can significantly improve your braking by upgrading them as more expensive brakes have stiffer bodies and better pads. Here’s how to fit new ones.
Our guide below shows you what we believe is the best method to fit side-pull rim brakes. We’ve included a list of the tools and materials that you will need to complete the job and in some cases where you can buy them. If there are others that you prefer then feel free to let everybody know in the comments.
Tools & Materials
How to fit side-pull rim brakes
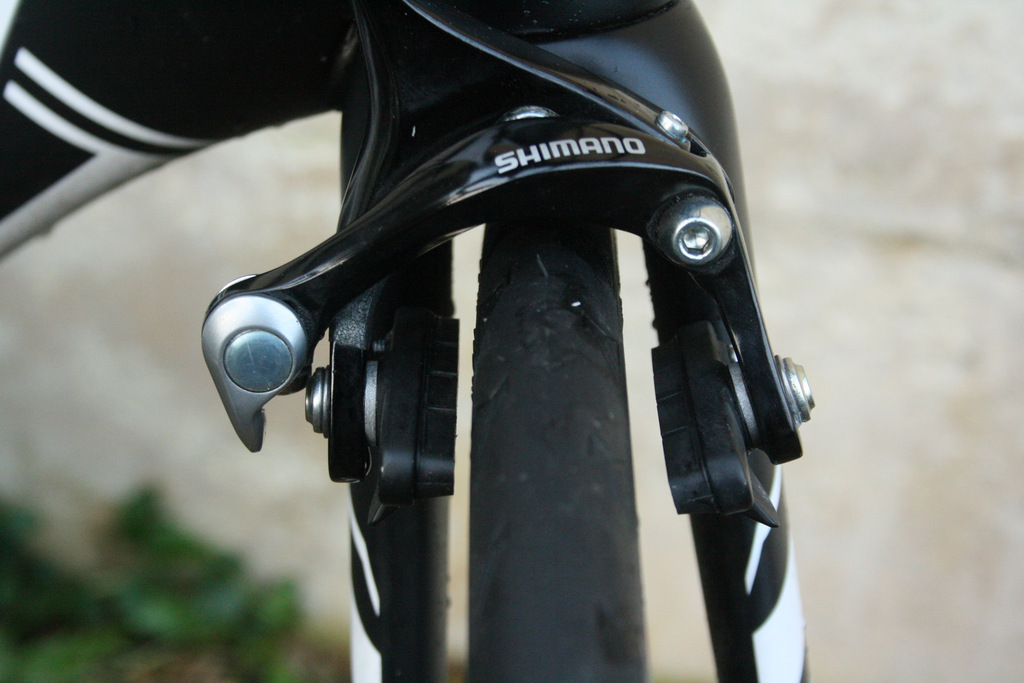
Side-pull brakes are pretty simple. They use a steel cable to pull on a light alloy arm, which is linked to a second arm via a steel spring. Squeezing the lever pulls the cable, which pulls one arm and activates the other. The arms hold the brake pads, which pivot inwards to the rim’s braking surface where they rub the rim causing friction which slows or stops you.
Modern side-pull brake calipers usually have an extra pivot compared to brakes of yore, and much better bearings so they move smoothly and stay that way.
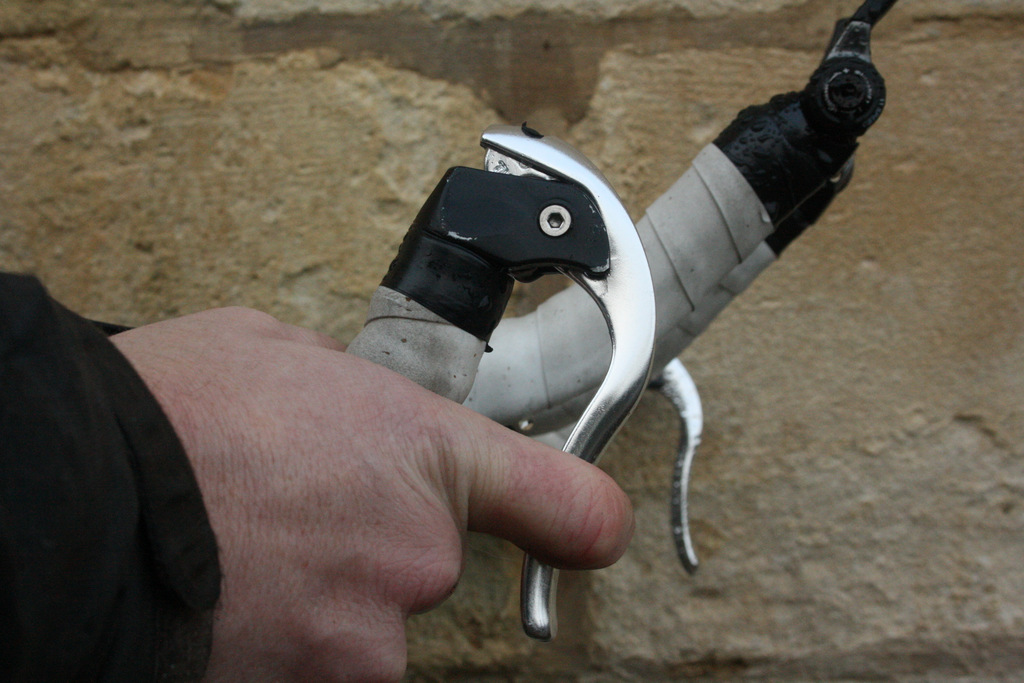
1 Fit the cable in the lever and housing We’re changing the brakes on this triathlon bike. To remove the old brake, undo the cable clamp bolt and frame mounting bolts, and pull off the cable end cap. It’s the opposite of the fitting process we’re about to deal with, so if you’re unsure, read this whole article first and reverse the steps!
Thread the brake cable back into the lever if you’re fitting a new one or you’d pulled out the old. A cable in good condition can be re-used if the end isn’t frayed or is long enough to be trimmed.
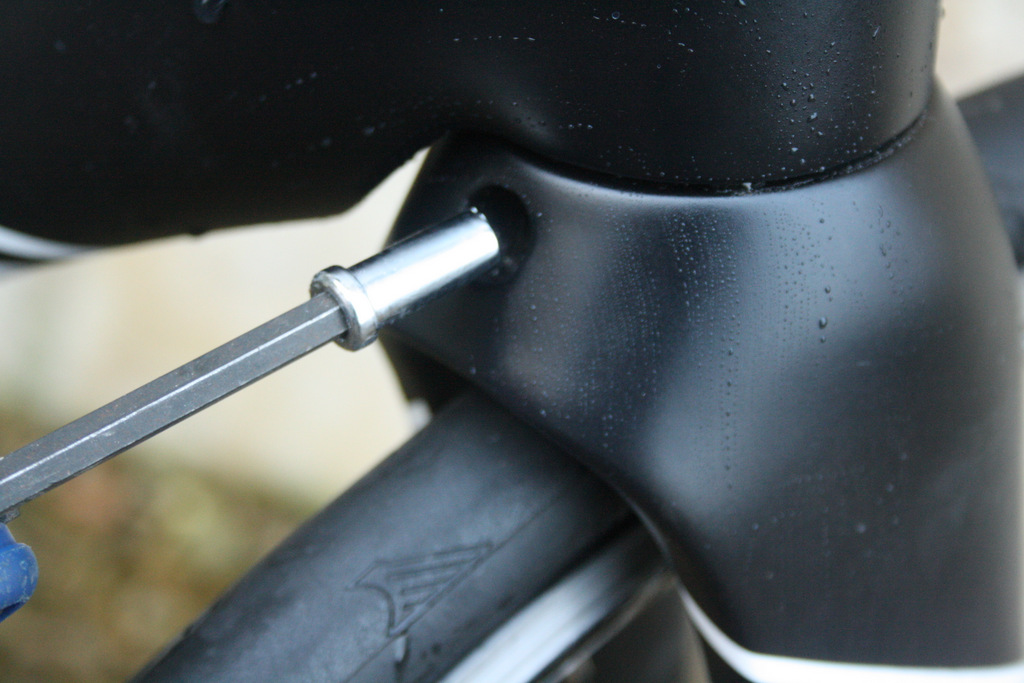
2 Put the retaining nut in place Fit the caliper retaining nut onto the end of a long(ish) 5mm Allen key. Carbon forks like this Ridley Aero number have quite deep crown recesses and sometimes stubby multi tools struggle without grazing paintwork.
3 Push the nut fully home into the rear of the fork crown.
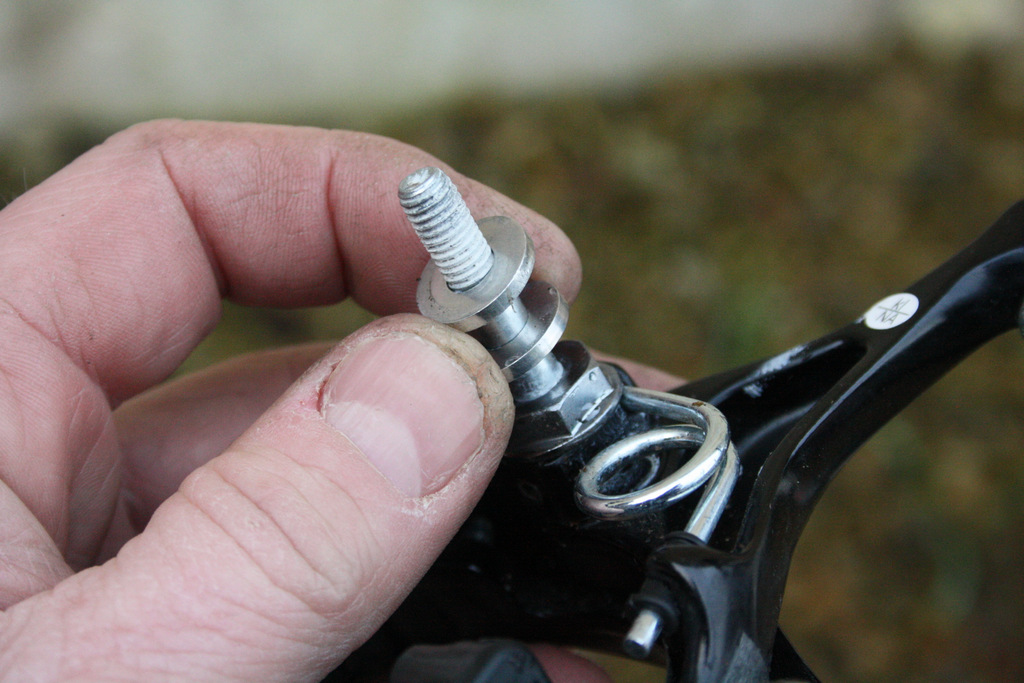
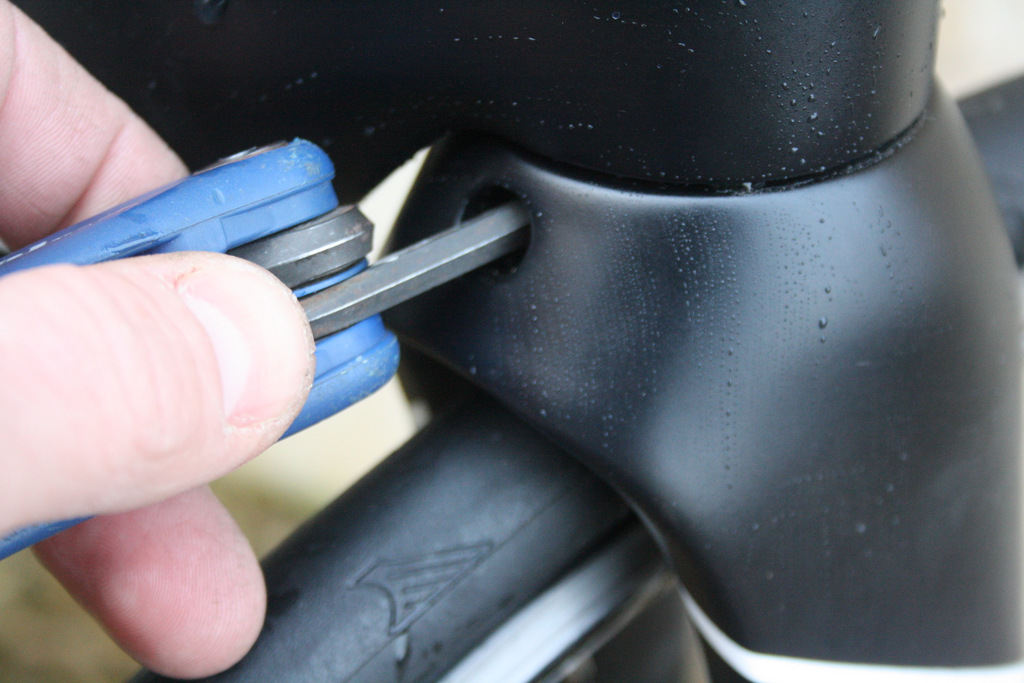
4 Fit spacers Put a pair of 2mm spacers on the caliper’s mounting bolt. These will keep the rear of the brake from contacting the fork crown and head tube. They also ensure the caliper can be full opened without the heel of the brake pads from fitting the inside leading edges of the fork blades (or seat stays if working on the rear of the bike). The mounting bolt is usually already coated with thread locking compound, the white stuff you can see on teh threads here.
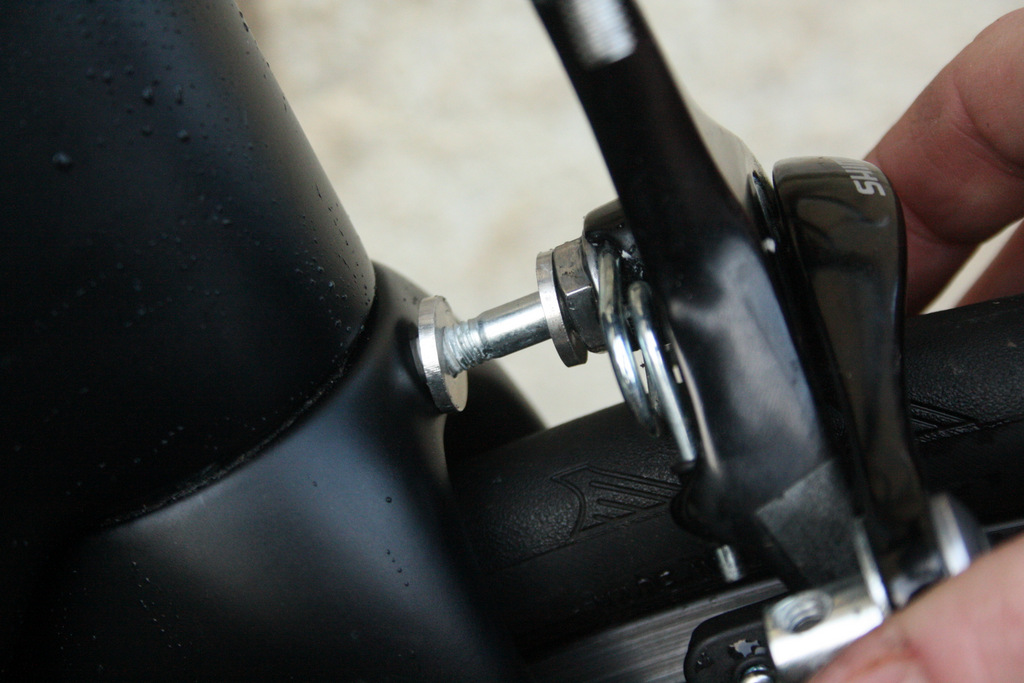
5 Put the caliper in the hole. It should slide straight in.
6 The caliper in place With the brake fully into its final position, you can see the two spacers and the effect they have on its position.
7 Tighten the mounting nut. Don’t fully tighten it at this point, as that will make subsequent adjustments harder. Snug it down just enough to take the slop out.
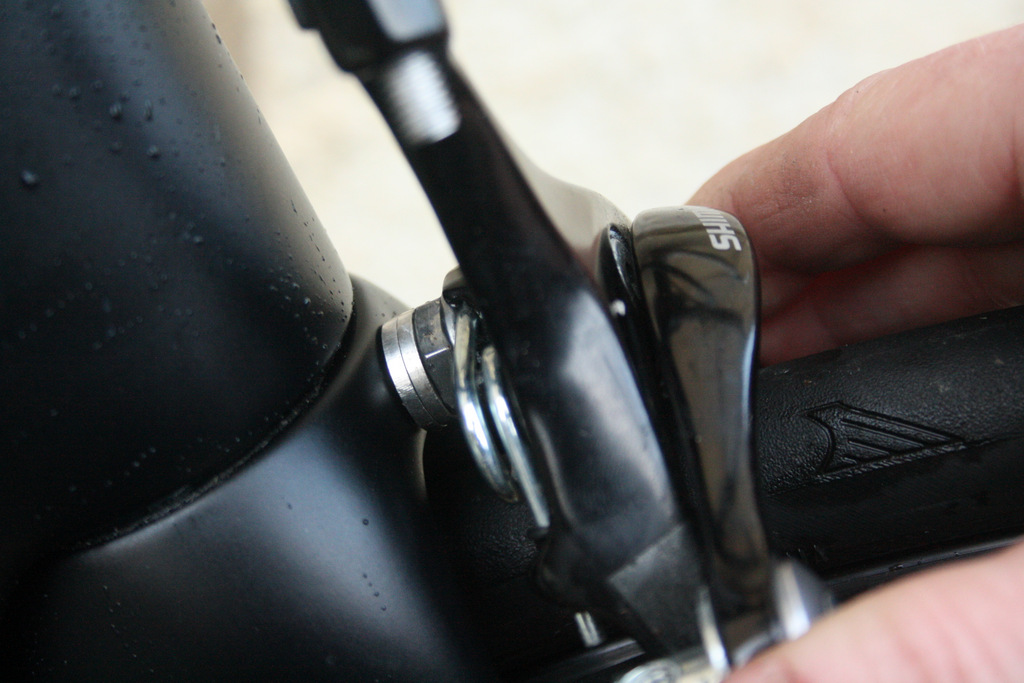
8 The brake in place The new caliper will look like this. It’s not centred yet, because we’ve not fitted the cable.
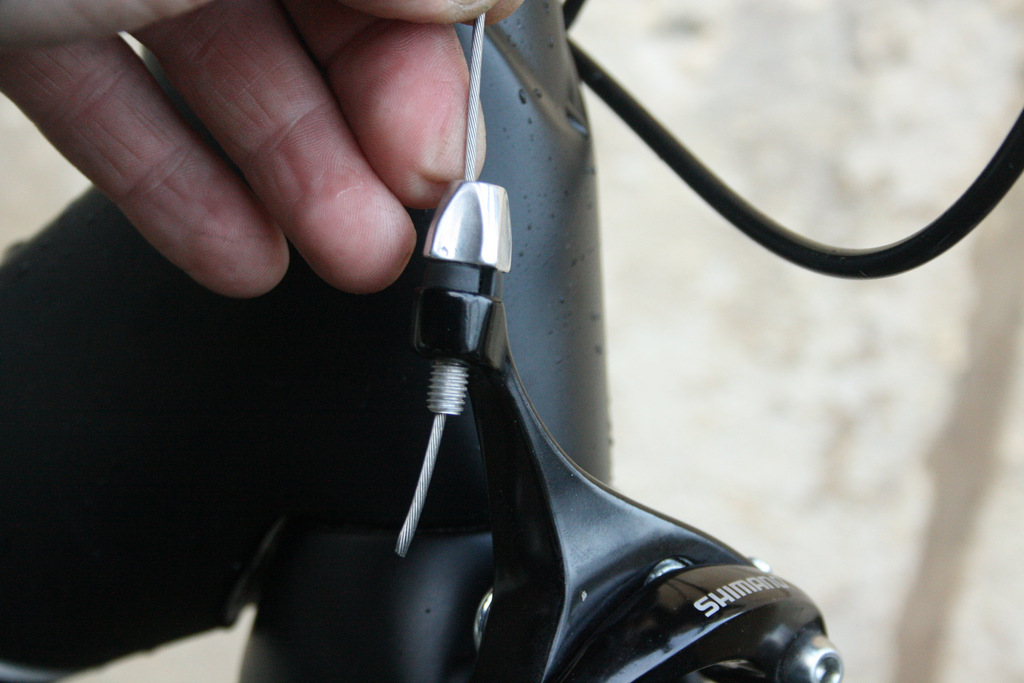
9 So let’s fit the cable Slide the brake cable through housing and into the barrel adjuster on the brake arm.
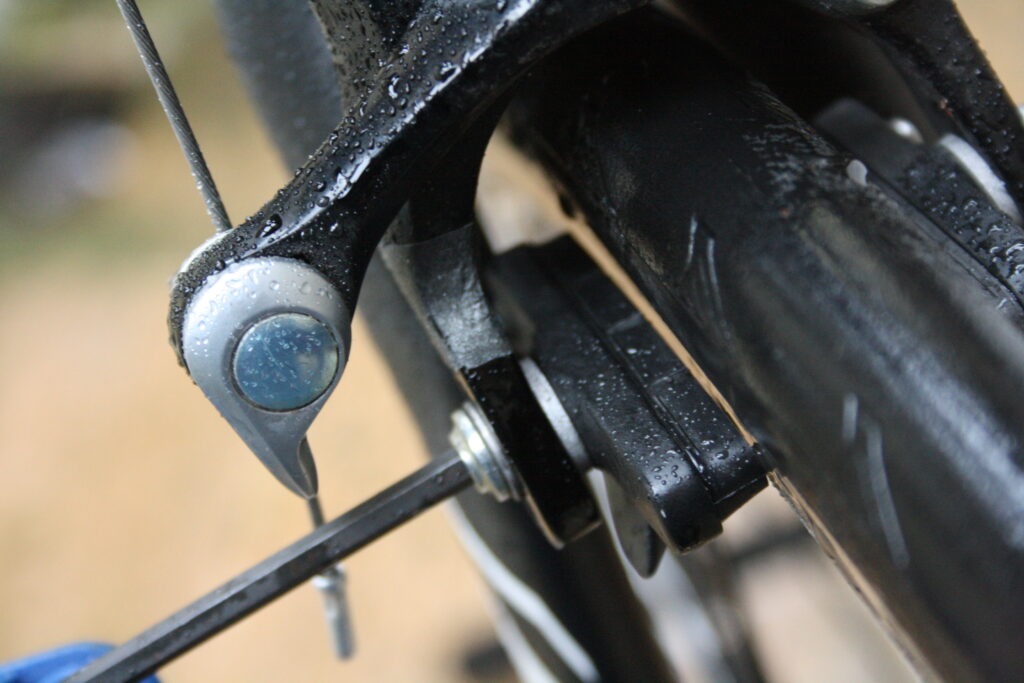
10 Fit the cable into the clamp Pass the end of the cable through the cable pinch plates. You’ll see a small groove in the inner faces of the plates; this is where the cable goes and is shaped so as to not mash the cable. Make sure your cable uses it. Put enough tension on the bolt to hold the cable in position so you can still slide it through the pinch plates by hand (with some force).
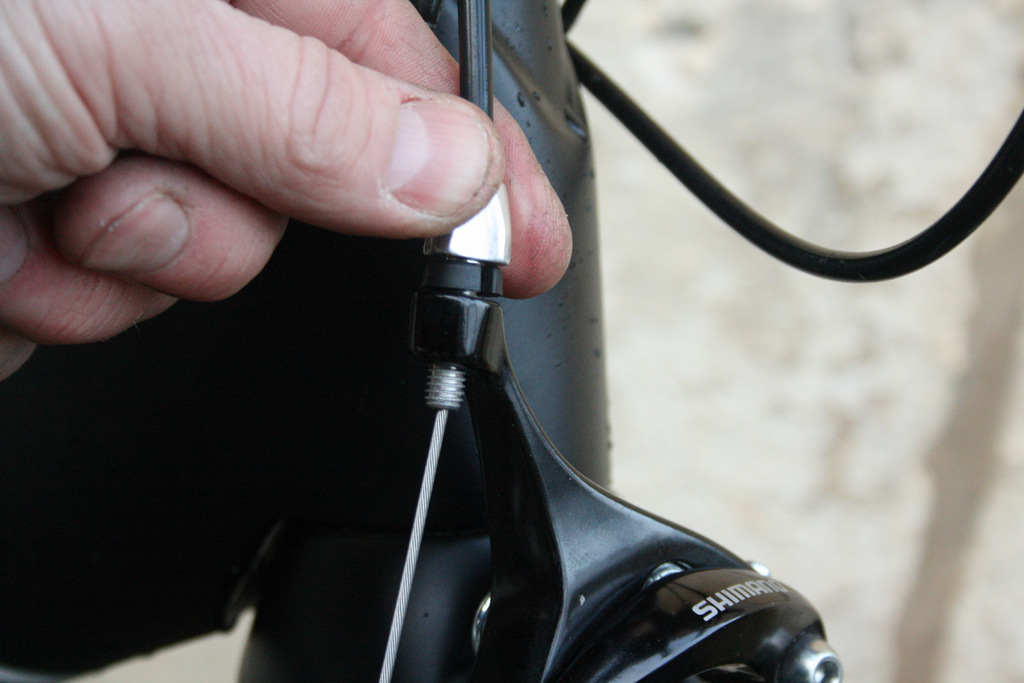
11 Set the adjuster Wind the barrel adjuster fully in, then wind it two full turns out. This will give you the right amount of spare lever travel once you finished.
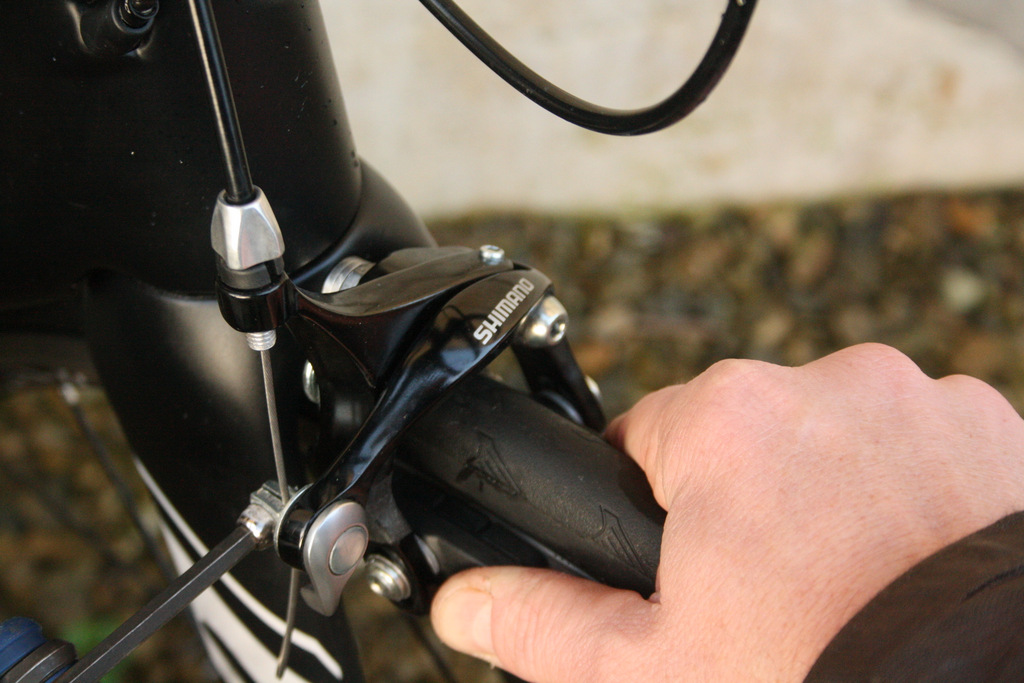
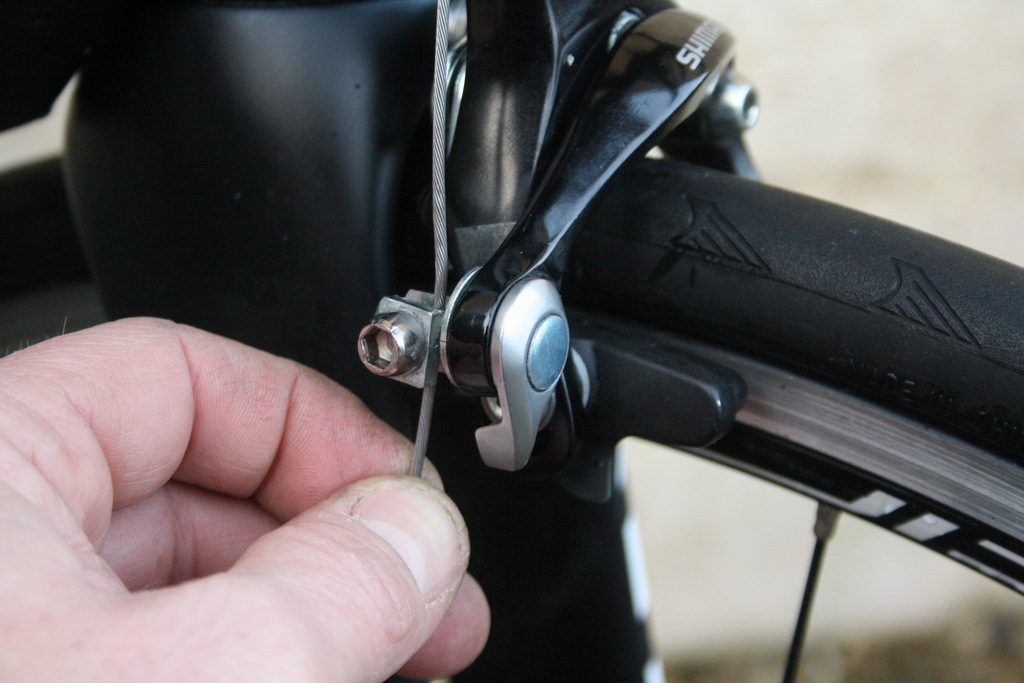
12 Tighten the cable Squeeze the brake blocks against the rim, and pull through any remaining slack cable with your fingers. Because you’ve already partially-tightened the pinch bolt the cable will remain in place while you tighten the bolt. Alternatively, you can use a cable-puller tool.

13 Wind in the barrel Wind in the two full turns of the barrel adjuster. This will give just enough pad clearance on the rim without rubbing, assuming your wheels are true.
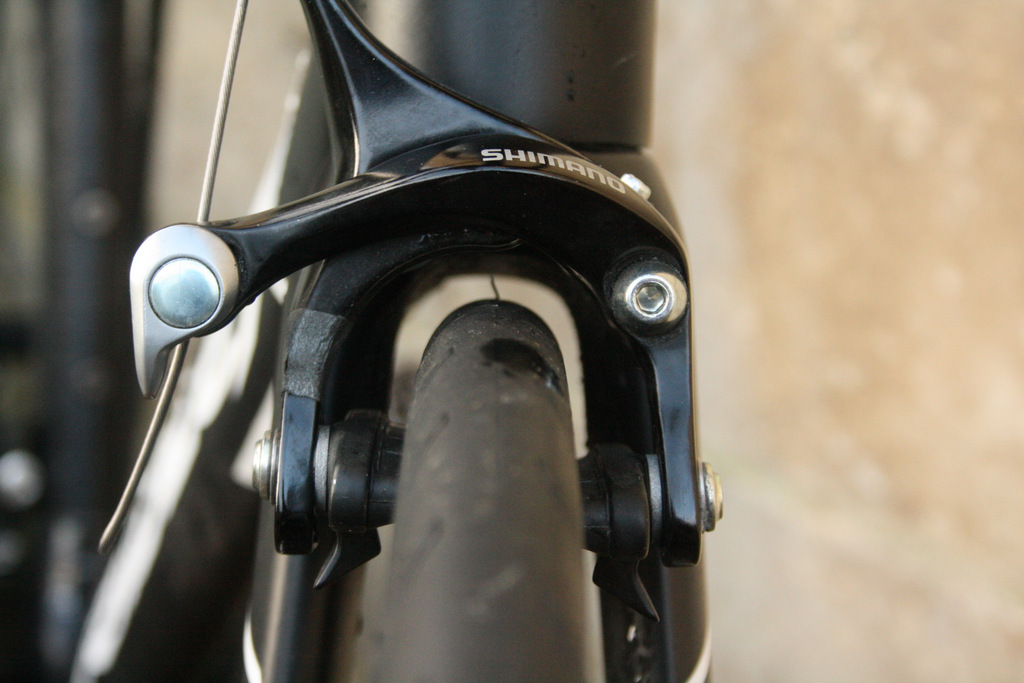
14 The cable in placeThe caliper will now look like this; nearly ready to ride.

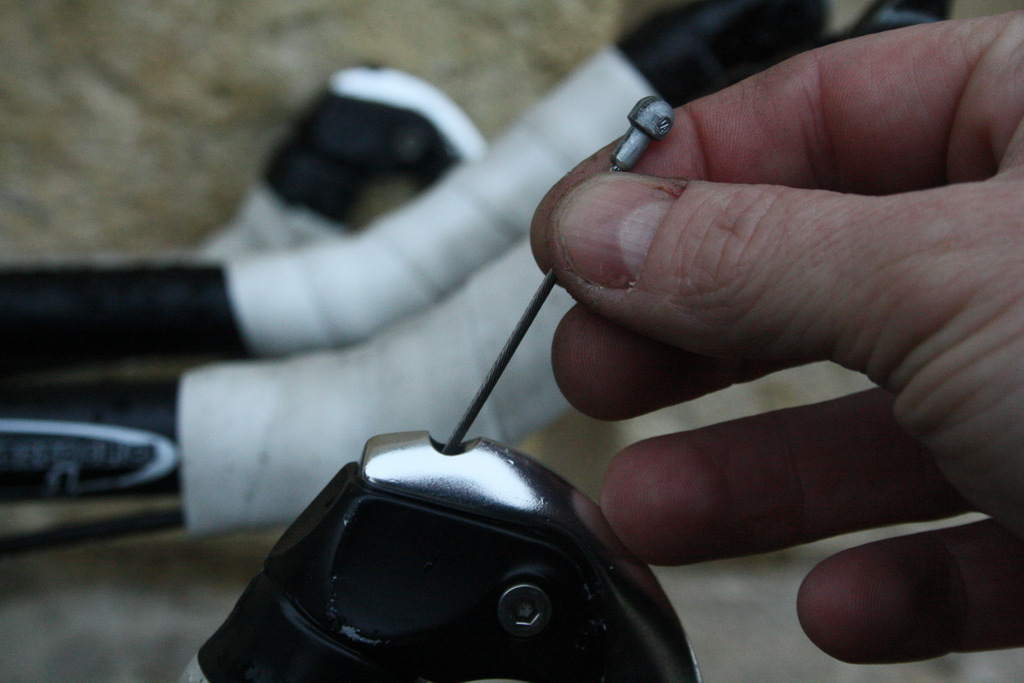
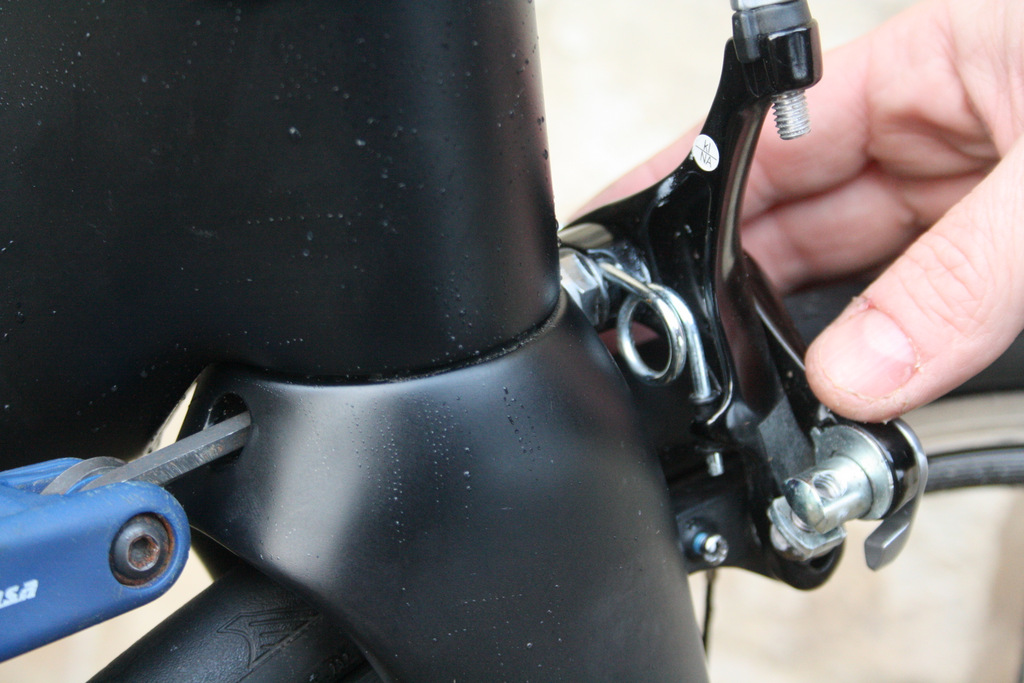
15 Fit an end cap Add the cable end cap and crimp it firmly into place.
16 Fully tighten the mounting nut
17 Test Check the lever action for a snappy, solid feel.
If you need to make specific adjustments to the brake pads in order to dial in better brake feel and performance follow these instructions.


")


, Portland’s world record ambitions, another e-bike brand goes pop + more")


12 thoughts on “Side-pull brakes: find out how to fit them the easy way”
The critical safety bit here
The critical safety bit here is the tightening of the cable pinch bolt. It should be 6-8Nm for Shimano brakes. That’s ‘pretty tight’.
Given the brake cable pinch bolt is the most essential thing between you and certain death, pay attention to it. You should own a 7Nm torque tool (they are £10 for individual ones like the excellent Presta Torqkeys) – use it. (anyone who thinks they can torque correctly by hand alone is wrong, this has been proven at trade shows where world-tour pro mechanics couldn’t do better than guess correct torque).
Once torqued, pull really, really, stupidly hard on the brakes, repeatedly, to check the cable will not slip under panicked/hard braking.
Make sure each end of the cable outer is fully seated in the brake lever, frame cable stops, and brake arm. It’s really easy for the cable outer to be sitting on the edge of the cable stop and not fully home, and you can’t see the one in the lever end. Later on if it then sits home your brakes will cease to work due to the extra slack this shift in the outer will give the inner cable.
KiwiMike wrote:
I own several torque wrenches, but I wouldn’t bother to use one on a brake cable pinch bolt. I can’t feel 7Nm exactly, but I can feel “tight enough for it not to slip, but don’t crush the cable”, as evidenced by the fact I’m here to type this post.
I’d be amazed if a £10 torque key is accurate to a single Nm.
Could do with further
Could do with further guidance on where you need ferrules and where you don’t, and also a section on centering.
Also the number of people
Also the number of people that don’t seem to know what a brake quick release is for astounds me – riding with it open all the time.
alan sherman wrote:
I set a number of riders up with “open” brakes, for the simple fact that they ride wide rims and neutral service or even some team wheels aren’t that wide, so we set them up open, in the event, they get a narrower wheel, it can be closed to allow the brakes to function
Gkam84 wrote:
And in the world of not pro cycling? I see plenty of bikes in the bike racks at work with the brakes open. No neutral service for them.
When did we start calling
When did we start calling caliper brakes/rim brakes/v brakes ‘side pull brakes’ …I’ve never heard the term before?
Are we making new stuff up? Because I’m pretty sure top tubes should be called knacker knockers.
V brakes and side pull brakes
V brakes and side pull brakes are different things, but both are calipers operating on the rim. So caliper & rim brake are interchangeable terms, but V and side pull are two different types of brake.
I haven’t heard the term side
I haven’t heard the term side pull brakes for a couple of decades. It’s what brakes used to be called in the good old (bad old) days and the Puch my dad bought for me in 1975 had them. 🙂
And I thought they were
And I thought they were always called side pull brakes until cantis came along followed by V-brakes.
peted76 wrote:
From memory it went:
Rod brakes
Sidepull brakes
Centrepull brakes (as distinct from cantilever brakes – can’t remember where in the timeline they fitted)
V brakes
Dual pivot sidepull brakes
and then all the modern jazz
And then of course disc
And then of course disc brakes, which everyone knows are the best (retires to corner with tin hat). ?