

The bottom bracket is one of the hardest working bearings on your bike. They’re responsible for keeping your pedalling smooth while taking the brunt of any impact as you ride over uneven terrain. But, as with any bearings, your bottom bracket can and will wear out over time, especially if you ride predominantly in the wet. Here’s how to maintain and replace your threaded bottom bracket.
- How to bleed SRAM, Hayes and Magura brakes
- How to install a mountain bike fork
- Mountain bike fitness – how to improve your MTB performance
How do I know when to replace my bottom bracket?
There are three signs you need to replace your bottom bracket, which all stems from wear. The earliest sign of your bottom bracket beginning to give up is a clear grinding sound as you turn the cranks. At this point, it’s likely that the bearings also feel rough.
Things get a little more sinister when play occurs as you push and pull your cranks laterally. If there’s even a little wiggle or a clunking sound here, it’s time to replace your bottom bracket. If left for too long, your bike will feel nasty to ride and the excess play could cause permanent damage to your frame.
The most obvious is creaking. A worn bottom bracket can begin to creak; you’ll know about it when it does. All of these symptoms are relevant to both press fit and threaded bottom brackets but as the latter is most common on mountain and gravel bikes and is far easier to work with at home, we’ll focus on threaded BBs from now on. Press-fit BBs require more special tools, too.
How do I know which bottom bracket I need?
Identifying your bottom bracket can be half of the battle as the industry is plagued with different bottom bracket standards. The easiest way of finding out which bottom bracket you need is to go to your bike brand’s customer service team, or the bike’s product page on the website and you’ll likely find it there. Many bottom brackets also have the type printed on them somewhere.
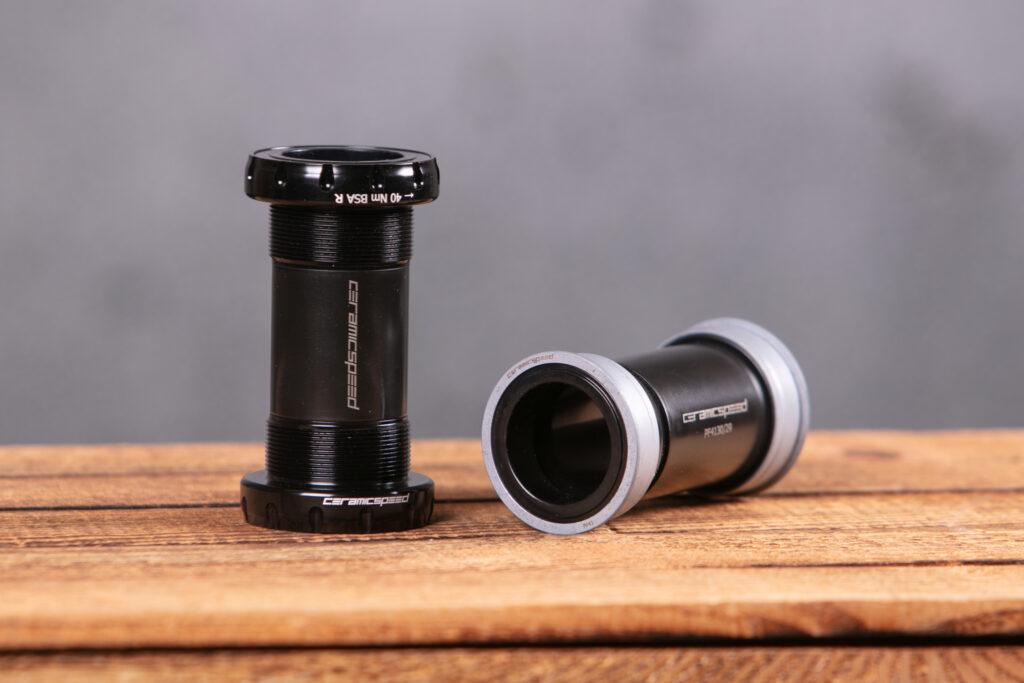
Most external threaded bottom brackets are BSA 34.7x24mm. Many gravel and road bikes are now adopting T47 bottom brackets which are installed in the same way.
The tools you’ll need to replace your bottom bracket
You’ll only need the correct bottom bracket wrench or tool. If you run a Shimano crankset or any that uses the same two-bolt fitment, you’ll also need a crank installation tool for Shimano Hollowtech II. These can be picked up for a couple of pounds and often come attached to a bottom bracket wrench. Others that use a self-extracting attachment require the correct size Allen key.
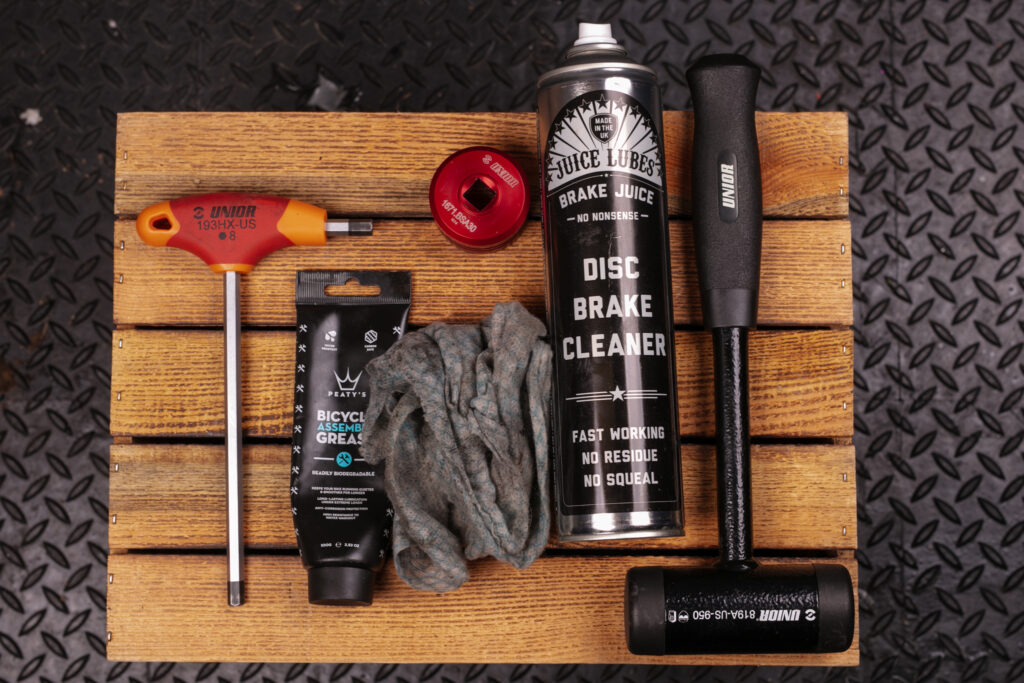
Other tools you’ll need are as follows:
- Assembly grease
- A 2mm Allen (if using self-extracting crank)
- Bottom bracket tool that’s compatible with your bottom bracket
- A torque wrench that can reach 40Nm+
- Rags
- Degreaser
- Tooth brush
- Soft face mallet
- PTFE tape (optional)
- A bike stand
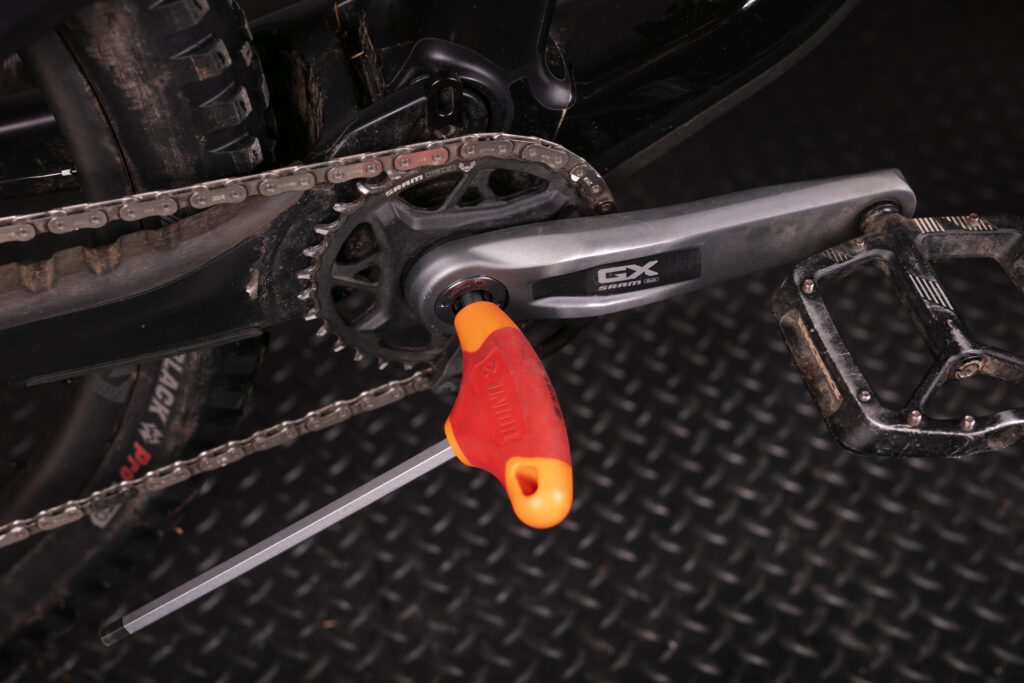
Remove your crank
To get to the bottom bracket, you’ll need to get the crank out of the way, so remove any bolts and unwrap the chain from the chainring. Note: self-extracting bolts can be hard to undo and a breaker bar may be required.
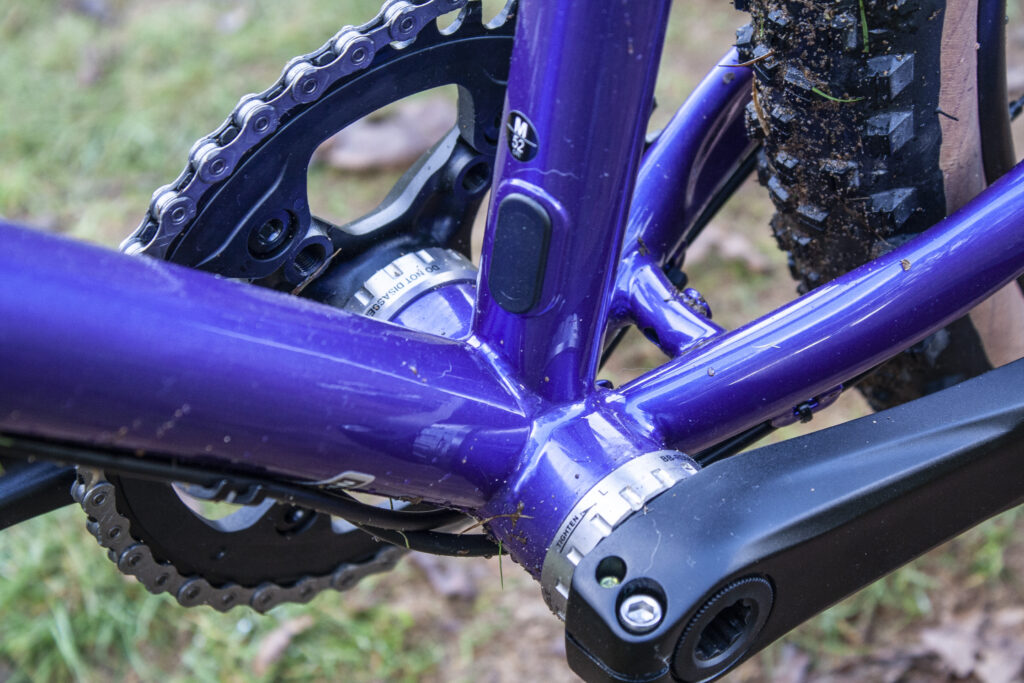
Once everything’s unbolted, remove the free crank and tap the crank through the bottom bracket using a soft-faced mallet. Before doing so, note the number of spacers on both sides of the BB on the crank spindle. You’ll need to replace these in the right arrangement for the proper chain line.
Remove the old BB
Now we get wrenching but first, if the BB’s interface is gummed up with mud, give it a quick clean to ensure proper engagement between the bottom bracket tool and the bottom bracket itself. This will reduce any chance of the tool slipping and potentially make a straightforward replacement much more serious.
It’s essential to remember that both sides of the bike use BB threads that go in a different direction. On the non-drive side, it’s the usual ‘lefty-loosey, righty-tighty’ but, on the drive side, it’s a reverse thread so when unscrewing this side of the BB, it’s ‘righty-loosey’ – don’t forget that!
Clean the BB shell
You will be surprised at how much gunk finds its way into the bottom bracket shell. This makes for the best opportunity to give your bike a clean.
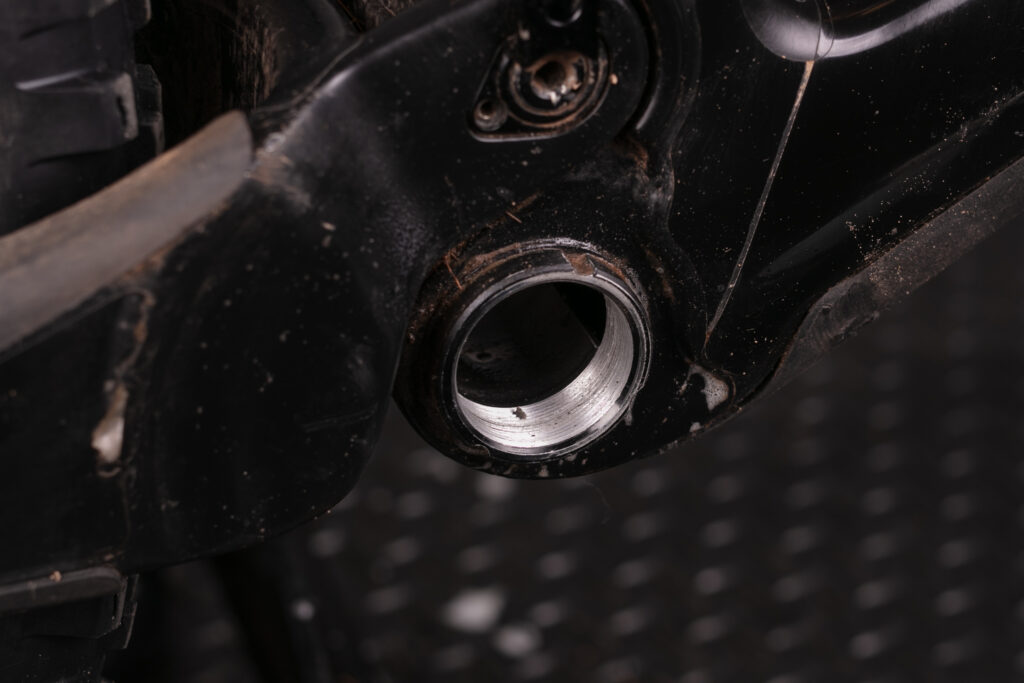
However, it’s not just for self-satisfaction, we need to make sure that the treads are completely free of any dirt. Here is where a toothbrush comes in handy.
Once clean, make sure the area is as dry.
Grease the threads
Before winding the BB into its shell, apply a liberal coating of grease to the threads on the bottom bracket shell and the bottom bracket itself. Not doing so can lead to it ceasing in the frame.
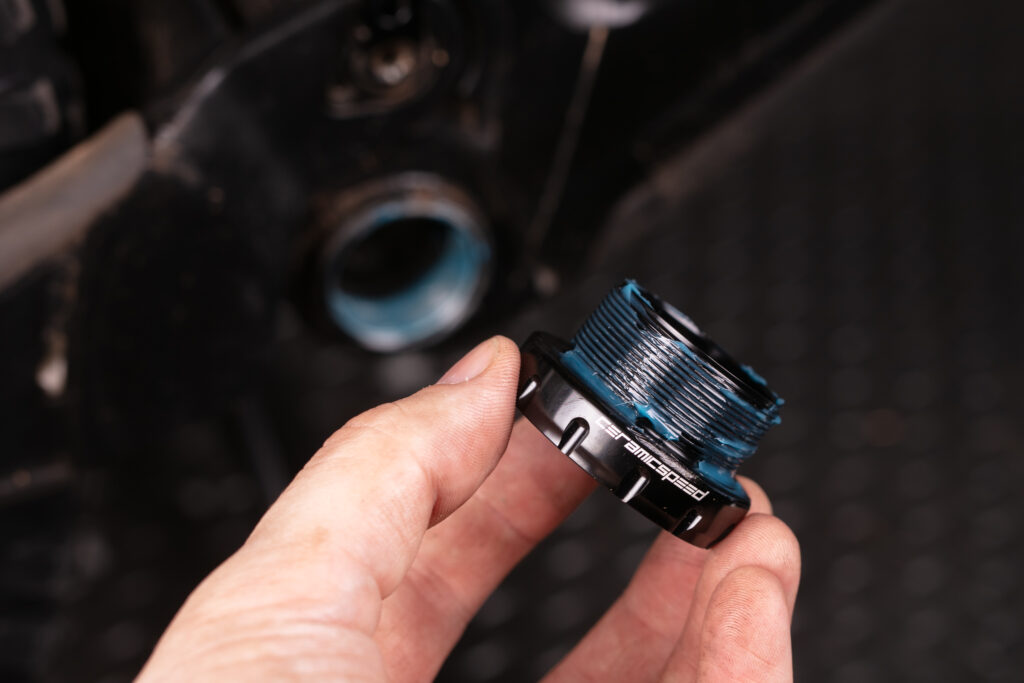
Some prefer to apply a film of Teflon tape around the bottom bracket’s thread, which gives a couple of advantages. It helps create a seal against water ingress in between the threads and helps prevent creaking and cross-threading.
Install the new bottom bracket
It’s best to screw the bottom bracket in place slowly and patiently as cross-threading the BB shell will spell the end of your expensive bike frame. Do it by hand and if there’s any resistance as you’re turning it in place, stop, unwind the BB and give the threads another clean.
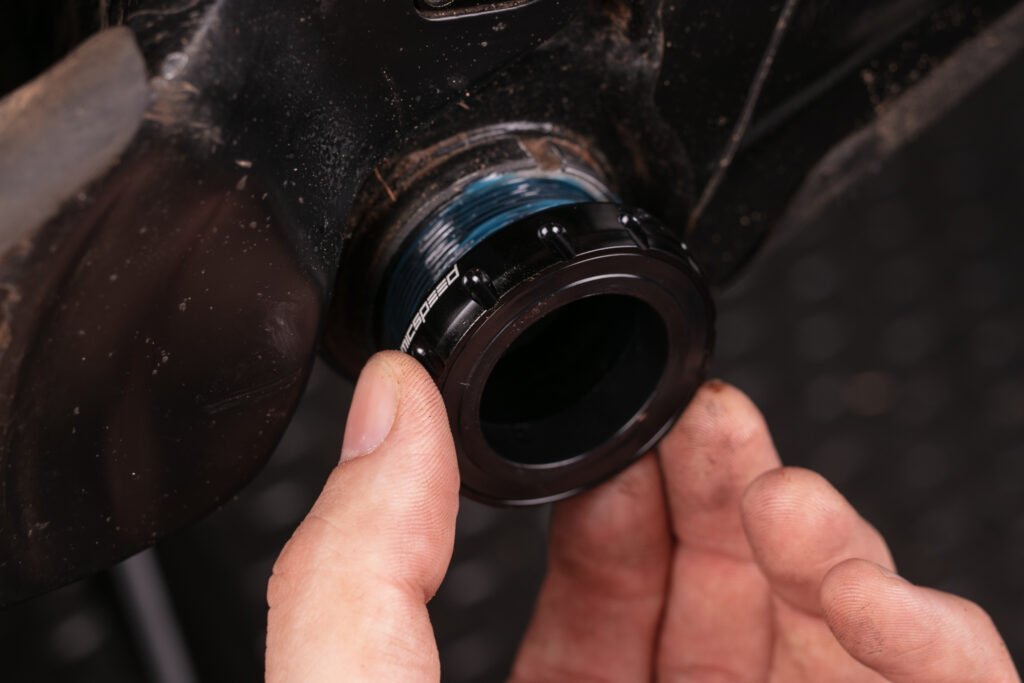
Remember that the drive side of the BB needs to be turned anti-clockwise for it to tighten. If you get confused, all external bottom brackets will have little arrows to remind you.
With one side in place done up finger tight, screw in the second side with the plastic centre sleeve attached (it only pushes on).
Once both sides are threaded home, torque both sides up to spec with a torque wrench. Generally, BBs require 40Nm+ of torque so make sure your wrench can read that high and remember to check your particular BB requirements.
With the BB in place, remove any excess grease.
Reinstall the crank
Now’s the time to reassemble your crank after lightly greasing the spindle. Make sure you install the bottom bracket spacers correctly. (Earlier, we suggested taking stock of how many were used on each side).
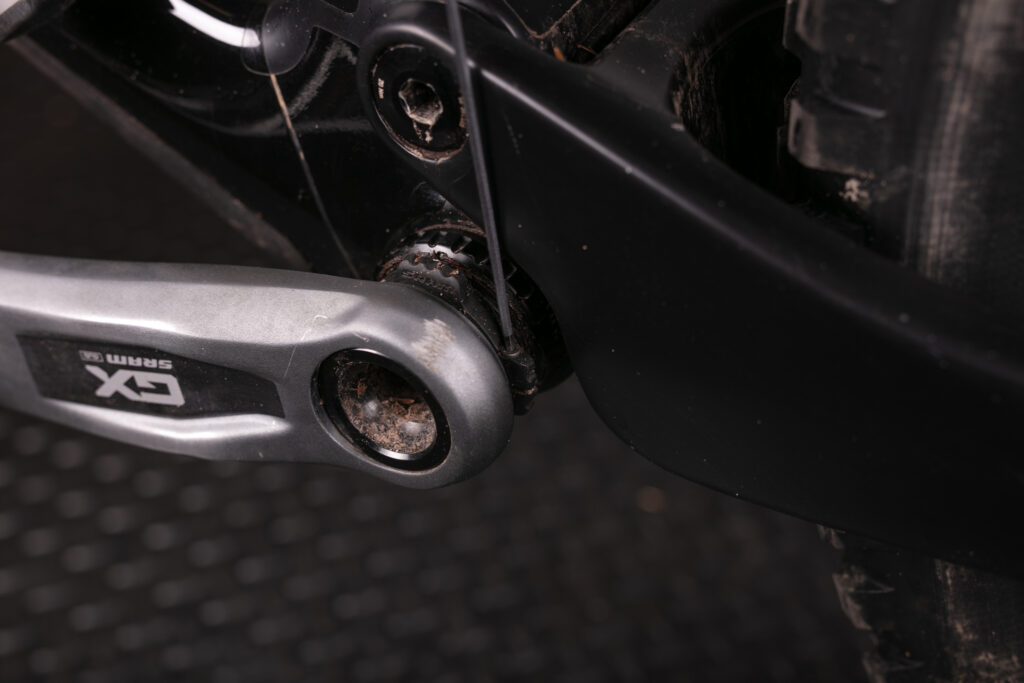
Ensure everything is torqued to spec and any pre-load is lightly applied. For self-extracting cranks, wind in the preload washer so it’s finger-tight. That’s the same for the pre-load cap on Shimano Hollowtech cranks, too.


")


, Portland’s world record ambitions, another e-bike brand goes pop + more")


