


The HoverAir X1 ProMax is the top-end follow drone from HoverAir and it’s an excellent companion if you like to film your adventures – especially if you’re on your own. It’s hugely impressive as a standalone unit and there are controller options now that make it into much more of an all-round performer. It’s expensive, and you may, like me, feel like the slightly lower spec X1 Pro is a better contender for your money.
> Buy now: £639 from HoverAir GB
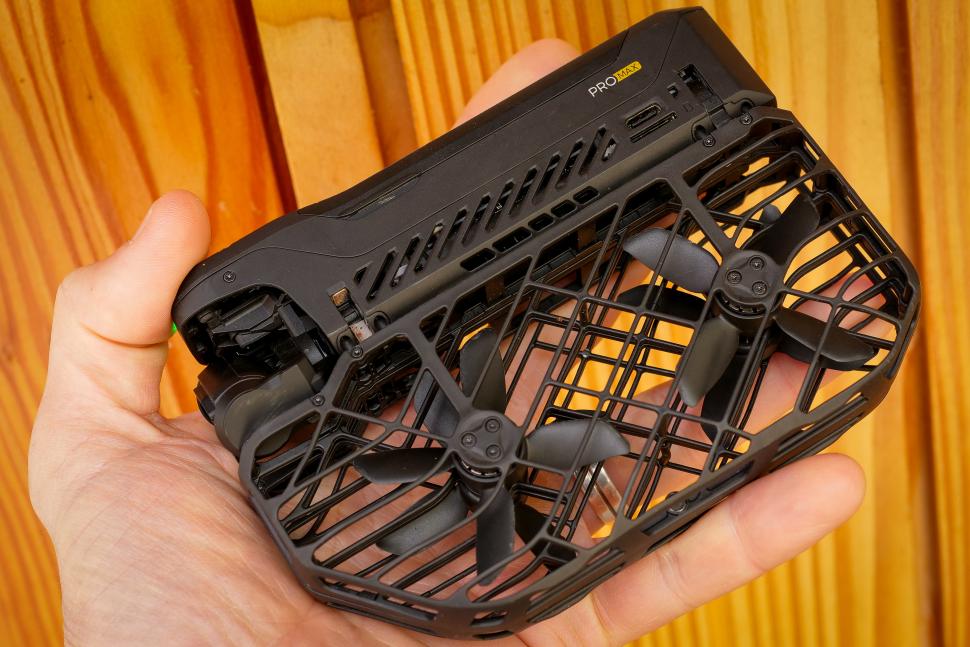
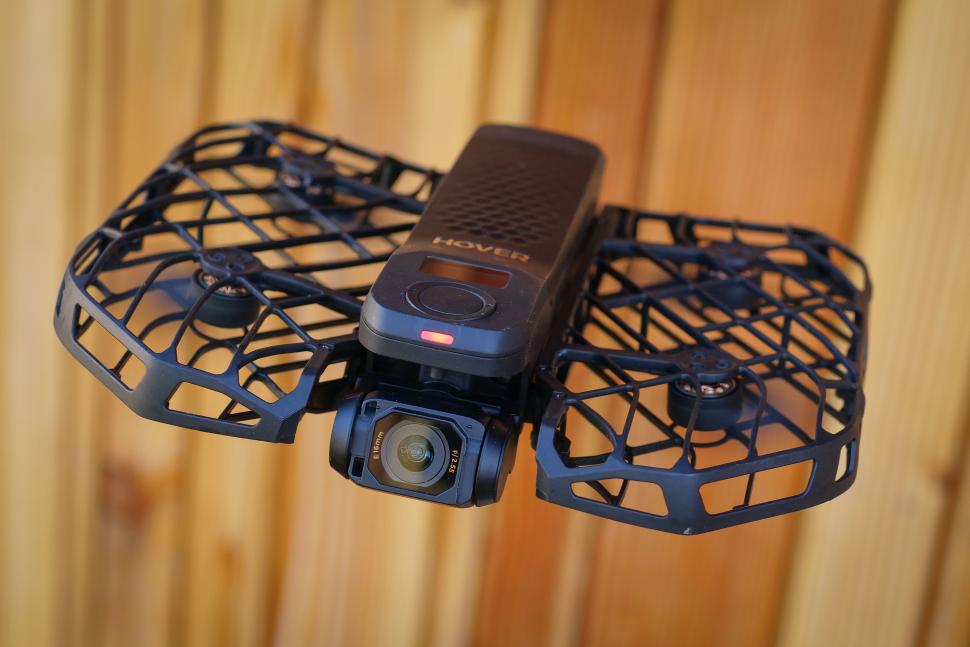
At its heart the HoverAir X1 ProMax is designed to be a standalone camera that you can sling in your pocket and use to record your ride. Or hike, or ski run, whatever. It’s more than that in this incarnation, for reasons I’ll come to later, but the idea is you can sling this drone in your jersey pocket or your frame bag and with just the drone you’ll be able to get a range of shots.
It’ll follow you, dolly track (fly backwards in front of you) and side track, all while you’re riding along. And it has a number of more static modes too: An orbit, where it’ll fly round you at a set distance, a bird’s eye view where it’ll head straight up, a zoom out for a nice cinematic selfie, and more. It has dedicated cycling and skiing modes too.
Using the HoverAir X1 ProMax
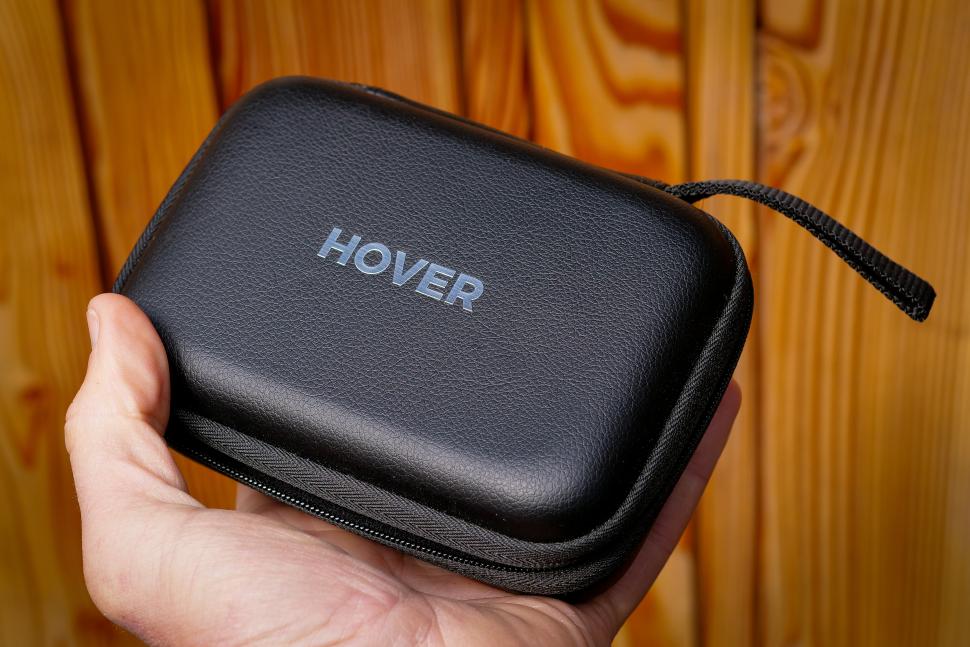
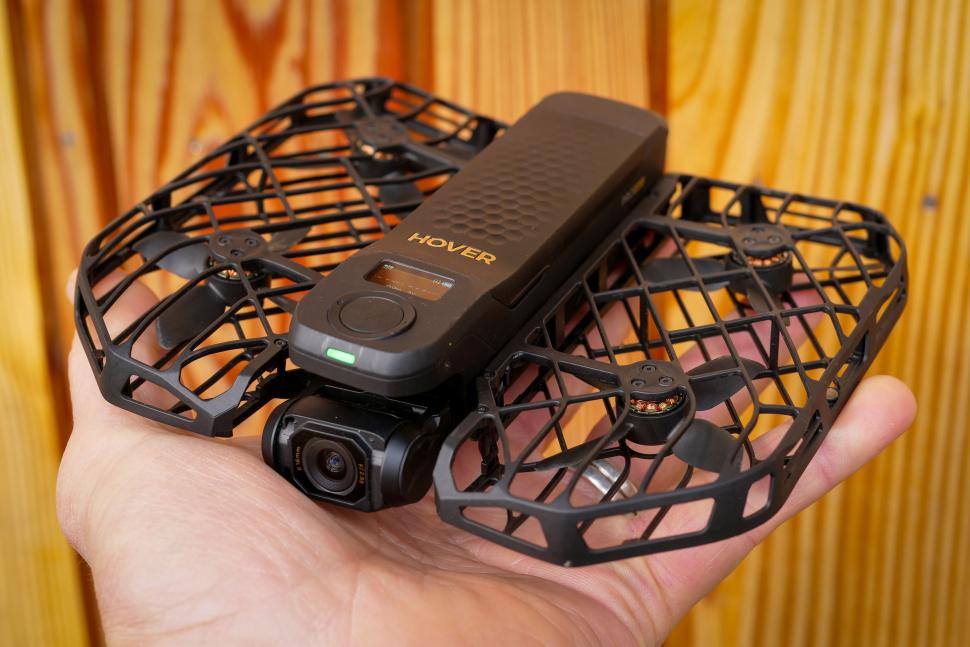
I mostly did use the camera on its own, in one of the predefined modes. At just 192g and with a folded form factor that makes it easy to slip into a jersey pocket – HoverAir provides a bag to stop it getting too sweaty in there – it’s a very easy thing to carry around with you on your rides. If you fancy a bit of filming along the way then that’s also easy: Power the drone on with the big button, select the mode you want, hit the button again and it’ll take off from your hand and do what you told it to do, then return to you. Stick your hand underneath the drone and it’ll land there, and power down the rotors ready to slip back into your pocket.
Sounds easy? It is, mostly. For a static mode like the Bird’s Eye, Orbit or Zoom Out shots all you need to do is stand there. You launch the X1 ProMax at eye level, and once it’s got a fix on you it’ll just crack on. It’s the same with the moving modes: Once you’ve made eye contact and the drone knows what it’s tracking, the LED on the front will turn red to indicate it’s recording, and you can start riding. Once you’re done, you can just stop; obviously in some modes like Dolly Track and Side Track you can’t move towards the drone, because it’s programmed to keep a certain distance away from you. But if you stand still for three seconds or make a cross gesture with your arms, the HoverAir will come back to you so you can land it and carry on with your ride.
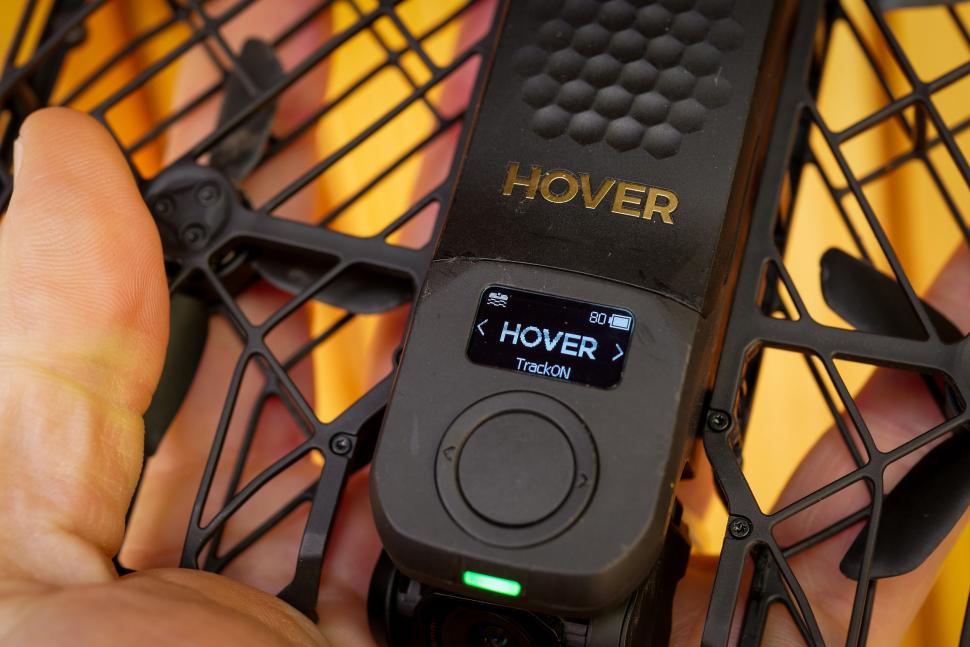
All of that requires nothing other than the drone. The X1 ProMax has a small LCD screen showing the mode and some basic parameters. Around the main power button is what looks like a ring control but in reality it’s just two more buttons; hold one of those down and you can change the parameters of the mode. Usually what you can change on the drone is how far away it’s going to be, and how high it’s going to be relative to you; limited options, but they’re sensible ones and the things you’re most likely to want to change.

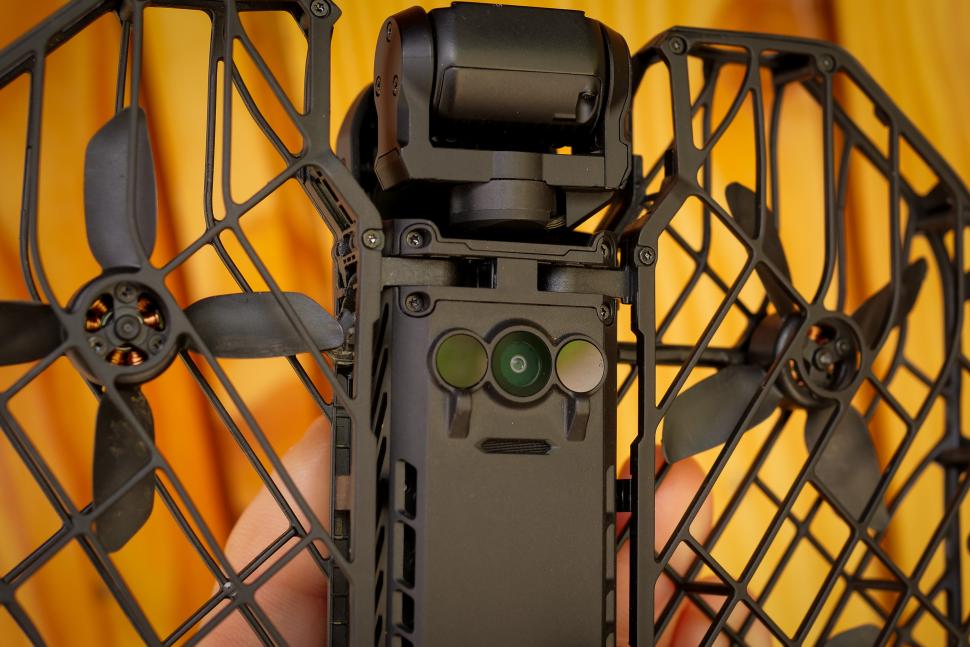
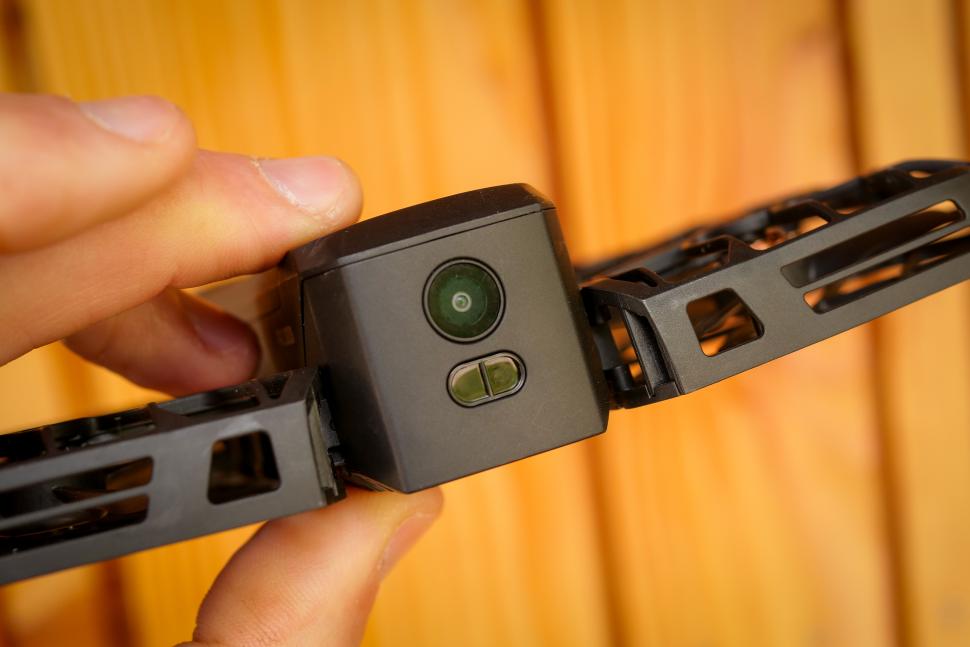
One of the main issues with the original X1, at least in a cycling context, was that it just wasn’t quick enough. The X1 Pro Max claims to be able to follow indefinitely (well, for the life of the battery anyway) at speeds of up to 42km/h, and it can do bursts of up to 60km/h. That’s a huge jump – about twice the follow speed of the first drone – and my testing on a long, straight descent up on the Mendips confirmed that somewhere between 40km/h and 50km/h is as much as you’ll get. So if you’re tearing off the top of a huge mountain it’s going to struggle, but for most riding it’ll keep up fine. The same speed limit applies for dolly shots and side tracking but in all honesty I wouldn’t use either of those at speed unless I was in a really controlled environment. The X1 ProMax has both visual and proximity sensors on the rear but I didn’t find them that effective, and most of the crashing I managed during the review period was in that mode when >the drone failed to notice things. In side track mode it’s up to you to choose a safe environment: there are no side collision sensors at all.
The X1 ProMax has a specific cycling mode, which is follow mode with an extra parameter which affects how the drone tracks you. What the X1 mostly attempts to do is work out where you’ve been using its cameras and sensors, and go there: the logic is that if you rode through a space, flying through a space should be okay. The Cycling mode allows you to choose either narrow space or open space mode; the former works like normal follow, and the latter makes more of a beeline for you to get a smoother shot. There’s a skiing mode too, which similarly has a low sensitivity follow option because you tend to be switching direction a lot as you turn. Or I do, anyway. The ski mode is also optimised for use over snow, something (along with flying over water) that the original drone couldn’t cope with. If you’re flying it over snow or water you need to wait for the OmniTerrain symbol to light up on the X1’s display; that means you’re good to go over more difficult surfaces.
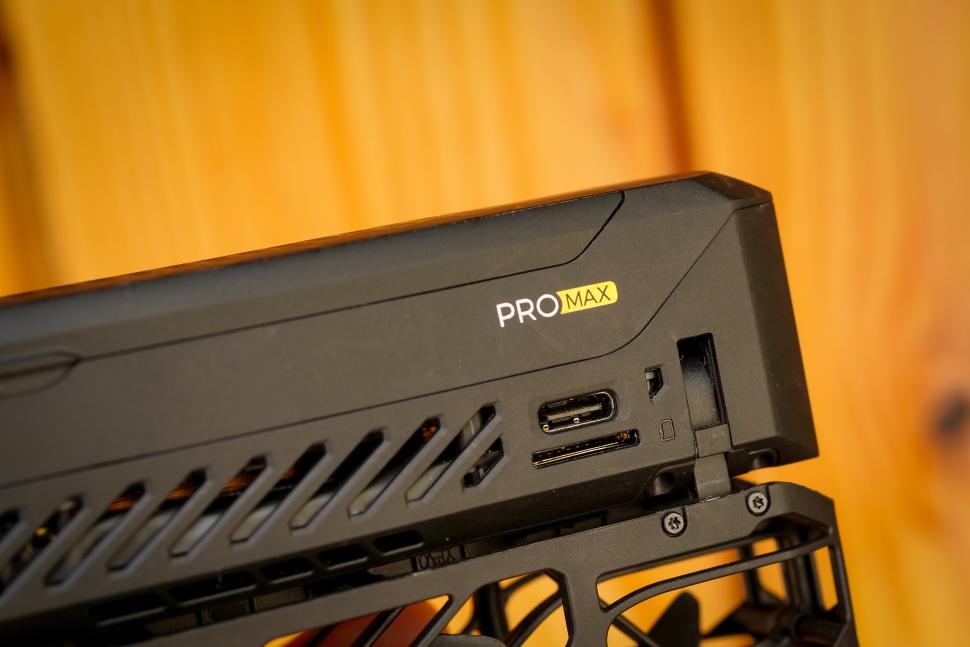
The X1 Pro and ProMax both have internal storage (32Gb and 64Gb respectively), but unlike the original X1 that’s expandable: there’s an SD card slot which supports cards up to 1Tb, which is a lot of footage even at 8K. I also find it easier to use an SD card than plugging the drone in each time I want to access the files.
When can you actually use the HoverAir X1 ProMax autonomously?
This is a bit of a thorny issue for me: some use cases are clearly better than others and some that HoverAir really push don’t work out in real life. Take skiing, for example. Okay it’s fun to have for some zoom-out shots or an orbit at the top of a lift, but I don’t think you can really deploy something like this on an open piste and have it follow you around. I tried once, first thing in the morning on a basically deserted run, just to check it would work, but realistically your options are limited. Similarly, anywhere busy – be that a sportive, or an urban centre, or a festival – is out, really: it doesn’t feel like the done thing to have it buzzing over the heads of any kind of crowd. Not because it’s dangerous: at less than 200g and with fully enclosed rotors it’s very unlikely to do anyone any damage. It’s just a bit antisocial.
If you’re on your own – riding in the lanes, bikepacking, touring, hiking, ski-touring, whatever – then I can’t see an issue, really. The X1 is never far from you and it’s not going to inconvenience anyone. And, really, the most compelling use case for a drone like this is for solo riders: you can get a bunch of shots that you’d have no hope of getting any other way. It is like having someone with you to film. If you actually have someone with you that could film, then it’s a lot less compelling. A lot of the follow/dolly track shots can be replicated with an action camera on a pole if you have someone to hold it.
HoverAir X1 ProMax image quality
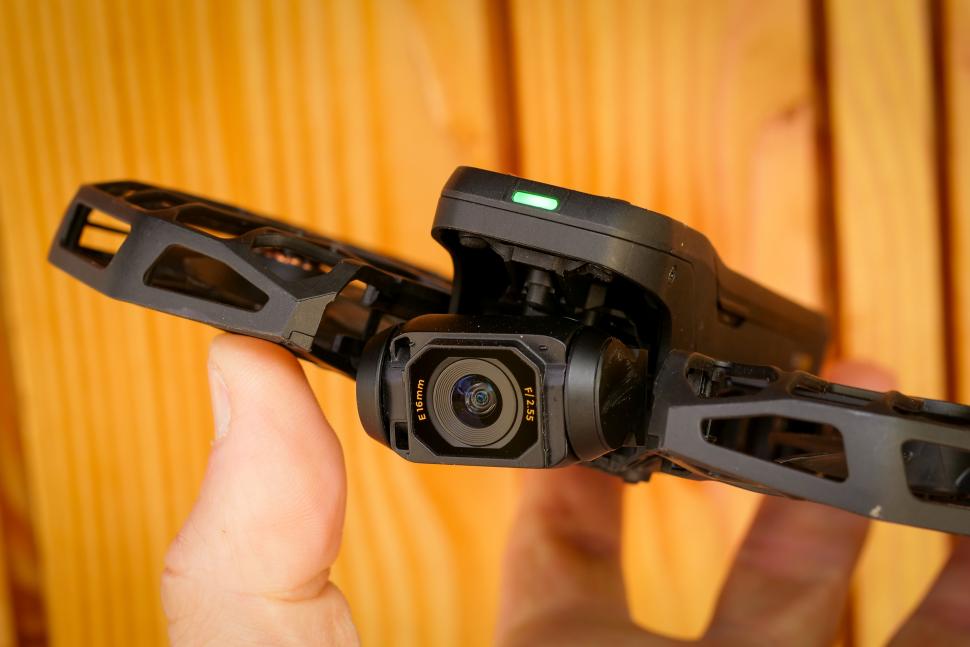
The X1 Pro and X1 ProMax both use a 1/1.3-inch CMOS sensor, the same size you’ll find in top-end action cameras like the DJI Osmo Action 5 Pro (https://road.cc/content/review/dji-osmo-action-5-pro-camera-adventure-combo-313089) and the Insta360 Ace Pro 2. In all likelihood it’s the same sensor, and it’s capable of shooting in 8K resolution at up to 30 frames per second. The X1 Pro maxes out at 4K/60. My experience with the Insta360 Ace Pro 2 was that the 8K footage was a nice thing to stick on the box but for the most part I neither needed it, nor was able to use it very easily. 8K footage is enormously unwieldy, and editing it on my normal work machine (an M1 Macbook Pro) was a bit of an ordeal, involving a lot of time creating proxy files that would actually work in the edit timeline. You can rule out doing much with 8K files on your phone, unless you have a /really/ good phone. One thing I’d like to see is a 2x digital zoom on the X1 ProMax when you’re in manual control; that’s a nice extra to have and you should be able to shoot 4K footage that looks pretty good from an 8K sensor. The Insta360 Ace Pro 2 does that and it’s genuinely usable. It could certainly be added because the latest autonomous shot is a dolly zoom (think Jaws, or the Severance lift) which zooms into the shot as it moves away, to keep you the same size.
I mostly shot in 4K, and at that resolution you can have up to 60 fps in standard video and 120 fps in slo-mo. 4K/60 was my default shooting mode as that allows a slowed-down shot (to about 40% speed on a 25fps timeline) without having to remember to actually switch to slo-mo. The drone remembers the settings for each mode and they’re all held separately, so if there’s a particular type of shot you like to have in slo-mo then you can just change the settings for that. The X1 ProMax will also shoot natively in vertical format, in up to 4K/30. The camera doesn’t re-align so that’s a crop into the sensor, and 4K is definitely pushing it; I stayed at 2.7K which is more in line with the actual sensor’s resolution, and also offers faster frame rates and HDR. If you’re doing a lot of stuff for socials then the ability to shoot vertical straight out of the camera is a big plus over the cheaper X1.
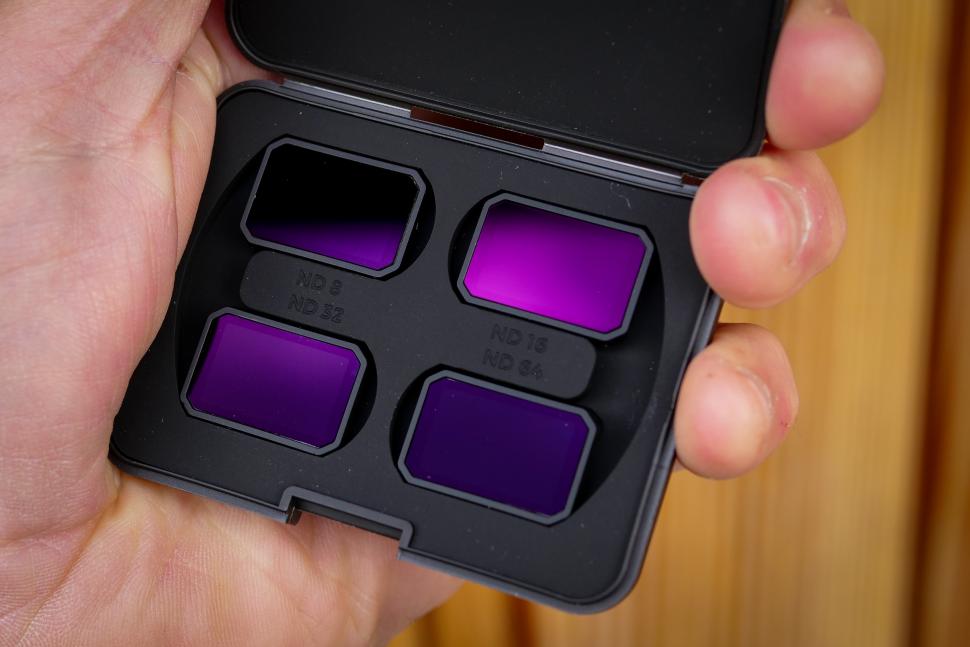
The footage is, for the most part, very good. At 8K/30 the X1 ProMax has a 160Mbps bitrate, so it’s capturing a lot of information. The X1 Pro tops out at 100Mbps which is presumably for 4K/60 footage; again, that’s pretty good and there is lots of detail in the shots. The fixed focus lens keeps everything sharp: you’re never shooting up close with a drone, so being too close to the lens isn’t an issue. The lens itself is very good at coping with varied conditions, and there is very little lens flare when you’re shooting into the sun. HoverAir offers a set of neutral density filters that clip over the lens for bright conditions, which can help to keep the shutter speed down for smoother movement. You can tell the drone an ND filter has been fitted in the app, and it will adjust the shooting parameters to get the best footage. Exposure is set through the lens, though, so it’s not the end of the world if you forget.
Image stabilisation is via a combination of a 2-axis mechanical gimbal and electronic image stabilisation, and it’s really good. Sometimes when it was really windy and the drone was having to work hard and fly at odd angles I’d wonder whether I’d be getting any usable footage, and every time the resulting shots were absolutely fine.
This dolly track shot was taken in heavy crosswinds, gusting to probably 20mph, more or less the limit of what the X1 ProMax is capable of coping with, and certainly not conditions when you’d actually get it out if you’d spent your own money on it. As you can see, its ability to track a subject while also coping with heavy, gusting wind is pretty impressive.
HoverAir X1 ProMax battery life
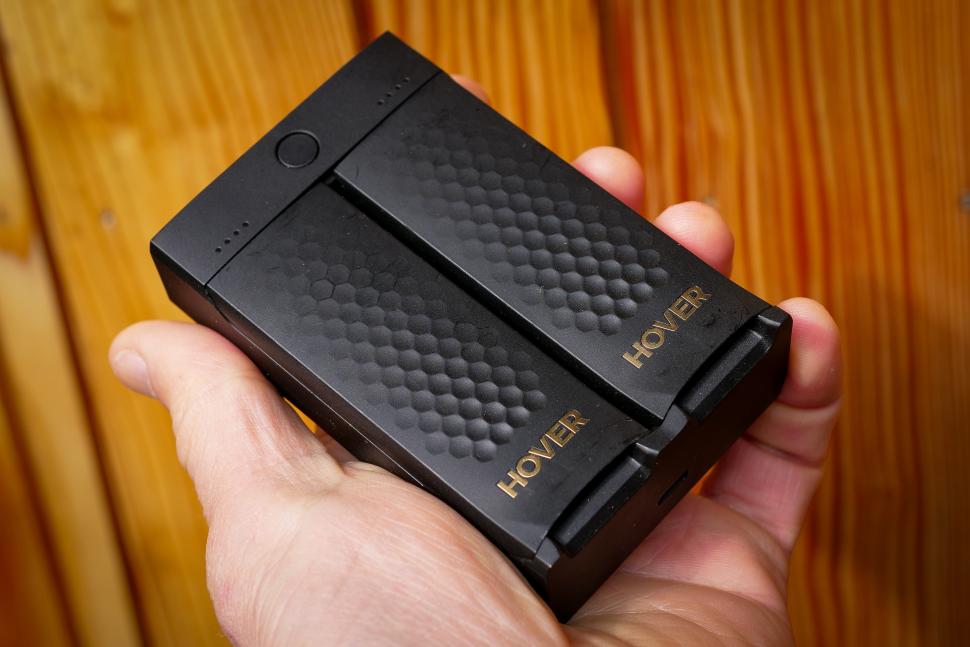
The 1,920mAh battery in the X1 ProMax is good for a claimed 16 minutes of flight, and I found that in calm and warmer conditions that was about right. If it’s windy then the drone has to work much harder to stay on course and that affects the flight time; similarly when it’s cold you never get quite as many minutes in the air. There’s a Thermo battery with the same capacity, which extends the operating temperature range down to -20°C; the standard battery is good down to -5°C which will be fine for nearly any UK filming. You can get a two-battery charging station, which is good if a bit slow, and also a Power Case which you can stick your drone in while you’re not filming and it’ll automatically charge up ready for the next flight from an internal battery. It’s an adequate battery life rather than a generous one; if you’re mostly using the drone in its autonomous modes then you’ll get a good number of shots out of a single battery. If you’re flying the drone manually a lot then you’ll probably find that it doesn’t really feel like enough, and a spare battery or batteries will be something to factor in. And while we’re talking about manual control let’s dive into that, because it’s another of the big changes from the original X1 drone.
HoverAir X1 ProMax manual control
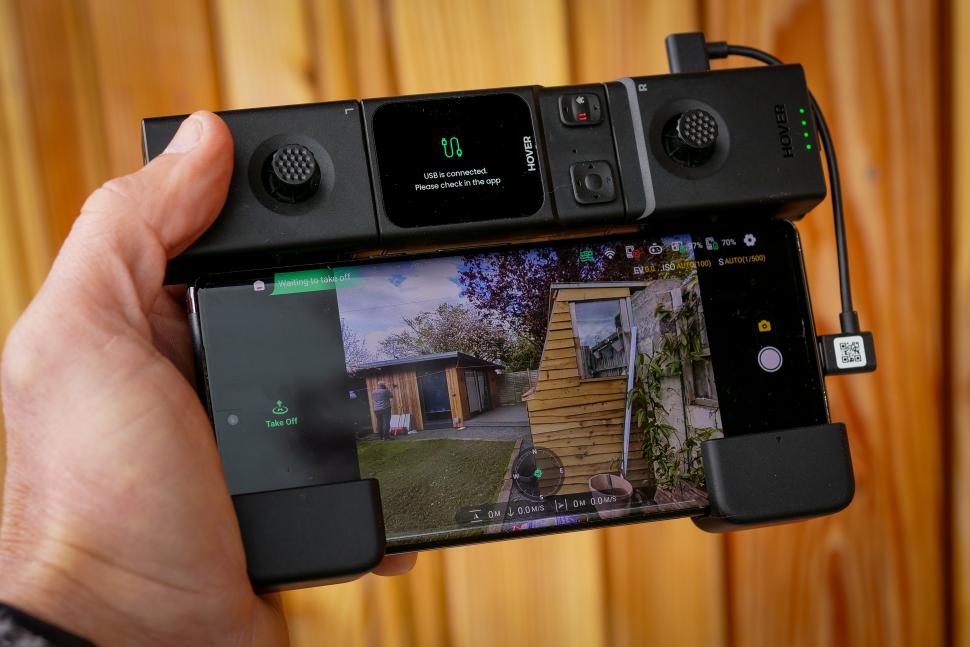
There are lots of manual control options for the HoverAir X1 ProMax. You don’t necessarily need any additional equipment either: you can just use the smartphone app. I’ll dive into the app’s other functions a bit more further down but manual control on the phone is pretty good: you get two virtual joysticks to control everything, and a full-screen feed of what the camera is seeing. You an adjust the gimbal angle too, and also change the exposure. Some of the buttons are a bit fiddly but overall it works well. One of the main updates to manual control over the time I’ve been using the X1 ProMax is that you can now pilot the drone at full speed if you want to. Manual control on the original X1 was a terribly pedestrian affair, and that was true of this drone too originally, but now there’s a page of sliders where you can set how fast you want the drone to be able to move and turn, which has vastly improved it.
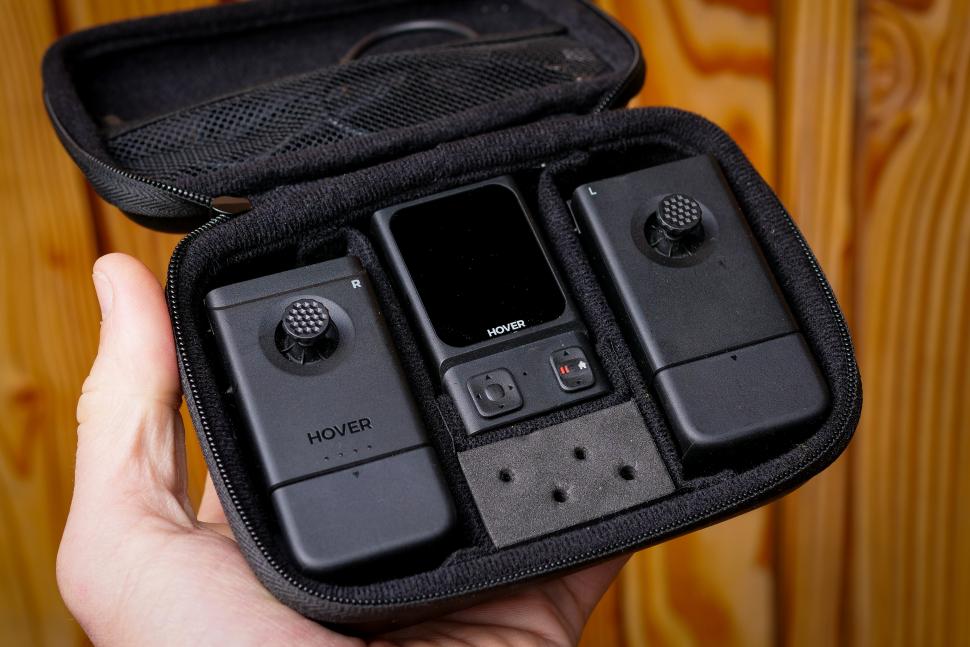
If you’re going to be using the drone manually for a lot of your shots then there’s also a modular controller, that comes in three parts, and you can buy as many parts of it as you think you’ll need.
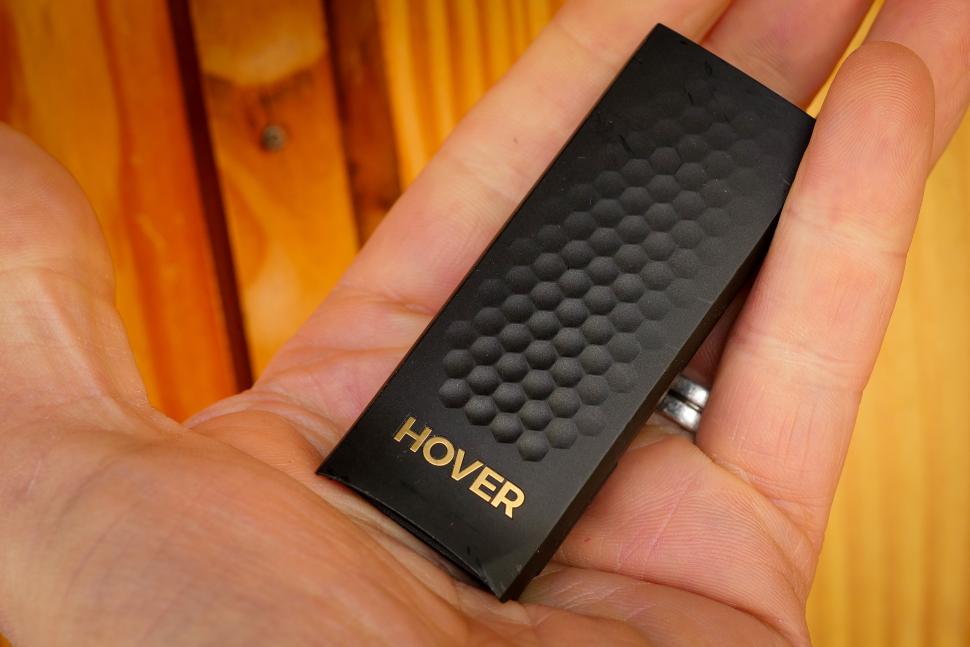
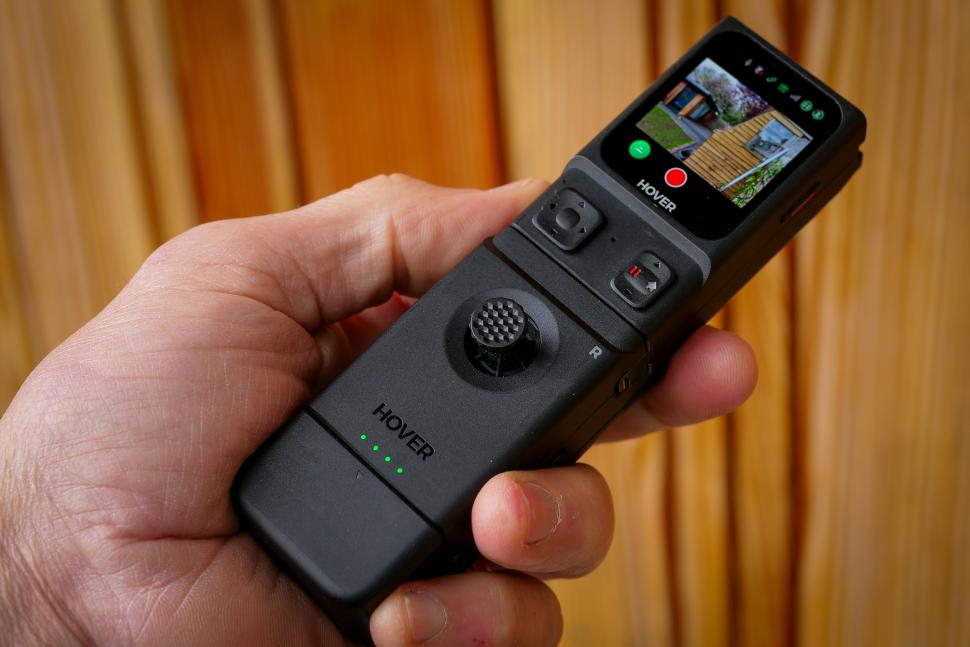
The base section is called the Beacon. This has a small-but-bright OLED display and a couple of small control buttons. It pairs with the X1 ProMax via Bluetooth (quite slowly) and allows you to see a live feed of what the drone’s seeing, which is very useful if you’re riding in follow mode and you want to make sure you haven’t lost it; there’s a bike mount with a silicone strap that makes it simple to add it to your handlebars. You can also manually control the X1 ProMax from the Beacon using the tiny joystick and up/down buttons, and you can take over manual control when you’re in an autonomous mode if you manage to get the drone into trouble somehow. The manual control is fiddly, and slow, and without two full joysticks it’s not full manual, but it’ll work in a pinch. You can also switch modes using the Beacon, although it’s just as easy to do it with the buttons on the X1 ProMax itself. The beacon also acts as, well, a beacon: it claims to improve follow accuracy (I can’t really say that I noticed), and you can ask the drone to return to the beacon too.
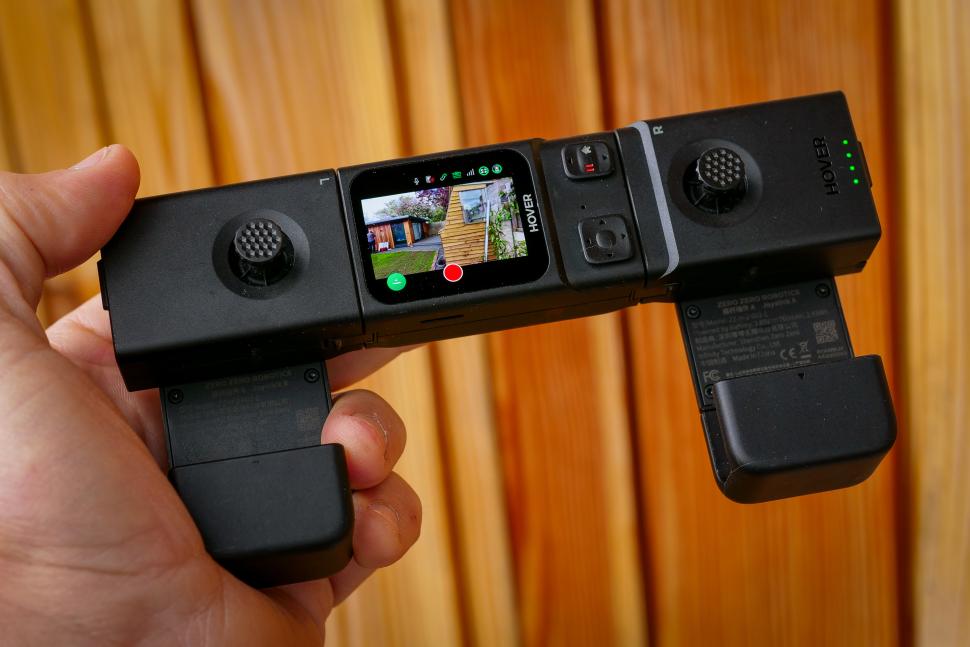
You can add two joysticks, one on either side, to make the Beacon into a full controller. If you want you can just add one, and if you do that then the Beacon transforms into a sort of Nintendo-Wii-style magic wand controller and uses accelerometers to move the drone as you waft it about. I wasn’t a fan of this, really, but it might float your boat. With both sticks added and the sides folded down it’s ergonomically pretty good, and the screen though small is nice and bright, and very usable.
If you want a bigger screen you can add your smartphone into the lower section and connect it via USB, and then you’ll get your live camera feed on that. I found that my Google Pixel 6 Pro automatically switched to using the phone screen with no issues. USB-C and Lightning cables are included. If you buy the full controller you get a case with a slot for each bit and a net for the cables, as well as two sets of sticks for the joysticks, which is good because they’re easy to lose. I’m down to three.
The other thing the Beacon bit contains is a microphone. Sound isn’t normally a feature of drone photography because a drone’s often far away and it makes a racket, so adding a microphone isn’t all that helpful. But if you’re synced to the beacon (or the phone app) then you’ll be recording sound, and at the end of recording the audio will be pushed to the drone’s storage. If you then download the clip, the phone app will automatically sync the audio and video, and use an AI isolation tool to get rid of the drone noise.
I’m not a great fan of the audio recording for a number of reasons. Firstly and foremostly the app doesn’t generally sync it up correctly; the test footage here had to be resynced in my editing program as it was a few frames out, and that was my general experience. HoverAir clearly knows this, as there’s a ‘what if my sound is out of sync?’ link that pops up in the app, which takes you some tools to fix it. But if you’re going to be syncing audio anyway you might as well record it on a better mic: the Beacon’s mic is ok, but it’s no better than that, and if you want sound as you’re riding you’re going to need something with a wind baffle to get usable audio. There are dozens of free AI noise reduction tools online which will remove the drone noise for you, and the quality will be better.
HoverAir X1 ProMax app
The app is functional and everything it includes works pretty well, with the exception of the ‘Find your device’ screen which doesn’t seem to include native mapping and I haven’t found to be very accurate, possibly because there’s no GPS in the drone itself. It’s simple to change modes, and all the different parameters for all of the modes are easily configurable. You can have a smart preview of automated flight (which also gives you access to manual exposure control), and there’s full manual control which I talked about earlier. Firmware updates also get pushed through the app. You can browse the files on the device and download them to your phone (with sound, if it’s available). There’s no editing functionality though, so you can’t sling a sick edit together like you can with most action cam apps, which is a shame.
HoverAir X1 ProMax: value and overall
Ain’t no doubt: over £600 for the base package of the X1 ProMax is a lot of money to chucking at filming your rides, and if you want extras like the Beacon and the ND filters, and an extra battery, then the Cycling Combo, which bundles all those things together, is over a grand. And full manual control with the joysticks is a £200 hike as well. It’s a premium bit of kit. Looking at the specs, and how I used the X1 ProMax, I’d have to say that although it’s nice to have the top-of-the-range one, if it was my own money I’d probably go for the X1 Pro if I decided I wanted to go down this route. At £459 it’s nearly £200 cheaper, and it carries over the things I really want: the ability to track at speed and shoot in 4K. Most of the specs – weight, size, flight time, gimbal, maximum speed – are the same. You lose 8K capability but I didn’t really use that anyway, and the 32Gb internal storage isn’t big enough but a 128Gb SD card costs about a tenner these days. You lose out on an optical sensor at the rear, but obstacle avoidance flying backwards isn’t the X1’s strongest suit anyway, so I’d always use it with caution. Probably the only thing I’d actually miss is the 4K/120 slomo footage, and I reckon I could make my peace with that.
You could get the much cheaper X1, and you could look at the DJI Neo which is even cheaper than that. We haven’t done a full review on either here at road.cc but they’re both very capable units. Depending on what type of riding you’re trying to film, either might work out for you, but for road riding the maximum tracking speed is always going to be a drawback. If you’re touring, or bikepacking, that might not be as much of an issue. Is the X1 ProMax worth the money? Not for me, over its 4K-capable sibling, and even with that camera you’re going to have to be doing plenty of filming to really justify it. But if you want a quality follow drone to act as your cameraman on your solo adventures, this is probably as good as it gets right now.
Verdict
The best autonomous follow drone right now, with 8K capability and good manual control options
All the deals displayed on our review pages are pulled from a constantly updating database feed of the best affiliate deals available. The criteria for deciding on what are the best deals is who is offering the lowest, delivered price. In most cases we will be showing the very best deal available online, but sometimes you may be able to find an item cheaper. If you can please feel free to post a link in the comments box below. To find out more about affiliate links on road.cc click here.
road.cc test report
Make and model: HoverAir X1 ProMax drone
Size tested: n/a
Tell us what the product is for and who it’s aimed at. What do the manufacturers say about it? How does that compare to your own feelings about it?
The HoverAir X1 ProMax is a compact, foldable, and lightweight (around 192g) flying camera designed for autonomous and easy-to-use aerial photography and videography. Here’s a summary of its key features:
Camera Capabilities:
High-Resolution Video: Up to 8K at 30fps and 4K at up to 120fps for slow-motion. It also offers 4K 10-bit HLG at 60fps for richer colors.
High-Resolution Photos: Can capture still photos at 12MP and 48MP. Supports both JPG and RAW (DNG) formats.
Gimbal and EIS: Features a 2-axis gimbal with Electronic Image Stabilization (EIS) and Horizon Leveling for smooth and stable footage.
Wide-Angle Lens: Incorporates a 1/1.3-inch CMOS sensor with a 16mm equivalent lens and a 107° field of view. Offers up to 2x digital zoom.
Vertical Video: Dedicated vertical video recording modes up to 4K at 30fps, ideal for social media content.
Built-in Microphone: Captures clear audio during recordings.
Autonomous Flight Modes:
Offers 10+ intelligent flight modes, including:
Dynamic Modes: Zoom Out, Orbit, Bird’s Eye, Hover.
Action Modes: Follow, Side Follow, Dolly Track.
Other Modes: Snapshot, Smart Control, Manual.
AI Tracking: Uses facial and body recognition and motion prediction for reliable subject tracking at speeds up to 42 km/h, with bursts up to 60 km/h.
Palm Takeoff and Landing: Can be launched and landed from the palm of your hand for easy, controller-free operation.
OmniTerrain System: Enhanced positioning for reliable flight over various terrains, including water and snow (with specific height and mode considerations).
Safety and Durability:
Foldable Protective Cage: Propellers are enclosed in a sturdy polycarbonate cage for safer operation and portability.
Rear Collision Detection: Vision-based rear active collision detection system with proximity sensors to help avoid obstacles when moving backward or in manual control.
Battery and Power:
Battery Life: Up to 16 minutes of flight time with the included 1920 mAh smart battery. Thermo batteries are available separately for cold weather operation.
Charging: Charged via USB-C. Optional charging hub and power case are available for charging multiple batteries and on-the-go charging.
Connectivity and Storage:
Wi-Fi: For connecting to the mobile app for flight control, parameter adjustments, and media transfer.
Internal Storage: 64GB of internal storage for saving photos and videos.
Expandable Storage: Supports microSD cards up to 1TB for additional storage.
Optional Beacon: A separate accessory with an OLED screen that extends the control range up to 1 km and provides a live video feed.
Other Features:
Compact and Portable: Weighs only 192.5 grams and folds down to a pocket-sized form factor.
Easy to Use: Designed for intuitive operation with button controls on the device and a user-friendly mobile app.
App Control: Offers additional functionality through the HOVERAir X1 app, including flight mode configuration, content download and sharing, and manual control.
High Altitude and Wind Resistance: Can fly at altitudes up to 5500 meters and withstand Level 5 wind speeds (up to 10.7 m/s or 24 mph).
The camera and acessories are all nicely made
Great as a follow drone, good at a lot of other stuff
Drones need to be light and it’s possible to crash them, so they’re a bit fragile
Super lightweight
Hard to rate: it doesn’t really have any direct competition. It’s an expensive thing though
Tell us how the product performed overall when used for its designed purpose
Really well in a lot of situations and quite well in most others
Tell us what you particularly liked about the product
Follow capabilities are excellent and it takes really high quality video
Tell us what you particularly disliked about the product
Some modes work better than others
How does the price compare to that of similar products in the market, including ones recently tested on road.cc?
It’s top dollar for a follow drone but it’s a small market
Did you enjoy using the product? Yes
Would you consider buying the product? I’d probably get the next one down
Would you recommend the product to a friend? Yes
Use this box to explain your overall score
Scoring it an 8 because as a follow drone it’s excellent, and it’s the best one you can get right now. It could be improved though in some ways
About the tester
Age: 52 Height: 189cm Weight: 99kg
I usually ride: whatever I’m testing… My best bike is: Lauf Úthald, Kinesis Tripster ATR, Dward Design fixed
I’ve been riding for: Over 20 years I ride: Every day I would class myself as: Expert
I regularly do the following types of riding: commuting, touring, club rides, general fitness riding, fixed/singlespeed, Mountain Bike Bog Snorkelling, track


9 thoughts on “HoverAir X1 ProMax drone”
Those knees need to bend a
Those knees need to bend a lot more in the skiing shots. In order to turn it’s weight up and down, to load and unload the edges, not wiggle your jacksie around like a moto gp rider. You’re on a piste, not Donington Park!
as long as i can slide to the
as long as i can slide to the next place that serves strudel i’m all good, but it’s nice that you care
Unfortunately, this will only
Unfortunately, this will only be legal to use in empty areas as UK law specifies: do not fly over congested areas and never fly within 50m of a person, vehicle or building not under your control
hawkinspeter wrote:
It’s under 250g so one can fly it closer to people than 50m, and over them, provided they’re not in crowds. Still need a flyer ID though, and as it has a camera, an operator ID from the CAA. However, the rules say that the operator must maintain visual line of sight when flying, this would be difficult if it’s following you.
mark1a wrote:
You’re right – I hadn’t spotted the <250g rules.
Yep, it’s got a camera so
Yep, it’s got a camera so does need registration, but that’s so cheap and easy, you can also get Part 61 authority by joining a flying club for about £10 per year which gives insurance and handily allows >250g craft flights up to the boundary of a built up area and flights closer to uninvolved people (still can’t fly over crowds)
I’ve an X1 pro and he is my go to drone for most things, (Inspire 2 is such a faff! But a bit cool!) especially little bits of biking, compactness and no need for a controller are it’s high points I cycle mostly off road so it’s just us, the few people we do pass are quite intrigued at the little drone following.
the software has gotten better and better, on release the thing couldn’t be trusted to follow down a bridalway, but now it mostly keeps pace through medium speed forest trails. Its design also means when it does hit something (and it will), it’s pretty resilient.
I have owned the original X1
I have owned the original X1 for a year now and I use it all the time. My DJI is collecting dust. The ability to carry it in a jersey pocket, launch in under 30 seconds and recover it in 10 seconds makes it perfect for grabbing ride shots.
One thing the review doesn’t mention is that it is designed to survive crashes. My DJI flew into a tree and cost me $80 to repair. The X1 flys into things and I just pick it up and launch it again.
The only reason I haven’t bought a Pro is the X1 is good enough for now.
Did anyone else at first
Did anyone else at first think ‘Excellent. A loyal drone to follow me around and carry stuff’?
Guess I will have to stick with Lydia.
My first thought was, Shit,
My first thought was, Shit, man, were living in the future…