


In the last few years more and more bikes have come with bottom bracket bearings that simply push into the frame. Here’s how to get them out.
If your press-fit bottom bracket bearings have gotten worn or damaged by corrosion, you’ll need to get them out. As the name suggests, these bearings are not held in place by threads in the frame, but are pushed into place and held by friction.
That sometimes doesn’t work very well, and and press-fit bottom brackets have gained a reputation for creaking. To fix that, you can replace them and use a mild thread-locker to hold them in place, as long as you have an aluminium frame.
First you’ll have to get them out, which is actually pretty straightforward as long as you have teh right tools.
Our guide below shows you what we believe is the best method to remove. We’ve included a threadless press-fit bottom bracket cups. We list of the tools and materials that you will need to complete the job and in some cases where you can buy them. If there are others that you prefer then feel free to let everybody know in the comments.
Tools & Materials
Press-fit bottom bracket bearing removal tool
How to remove press-fit bottom bracket bearings
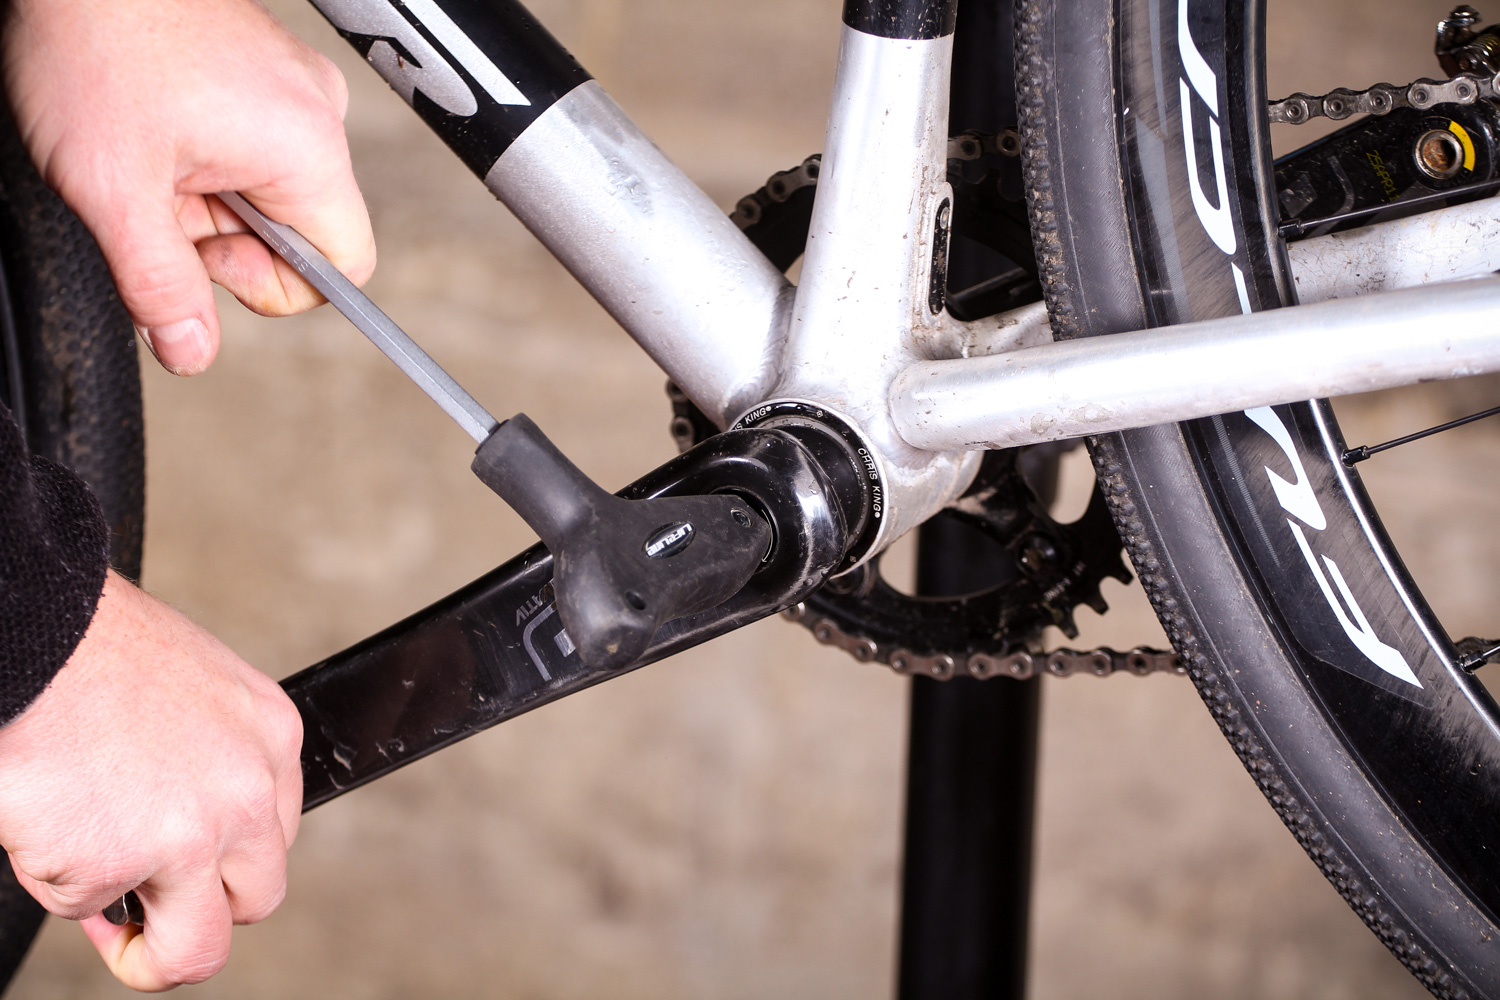
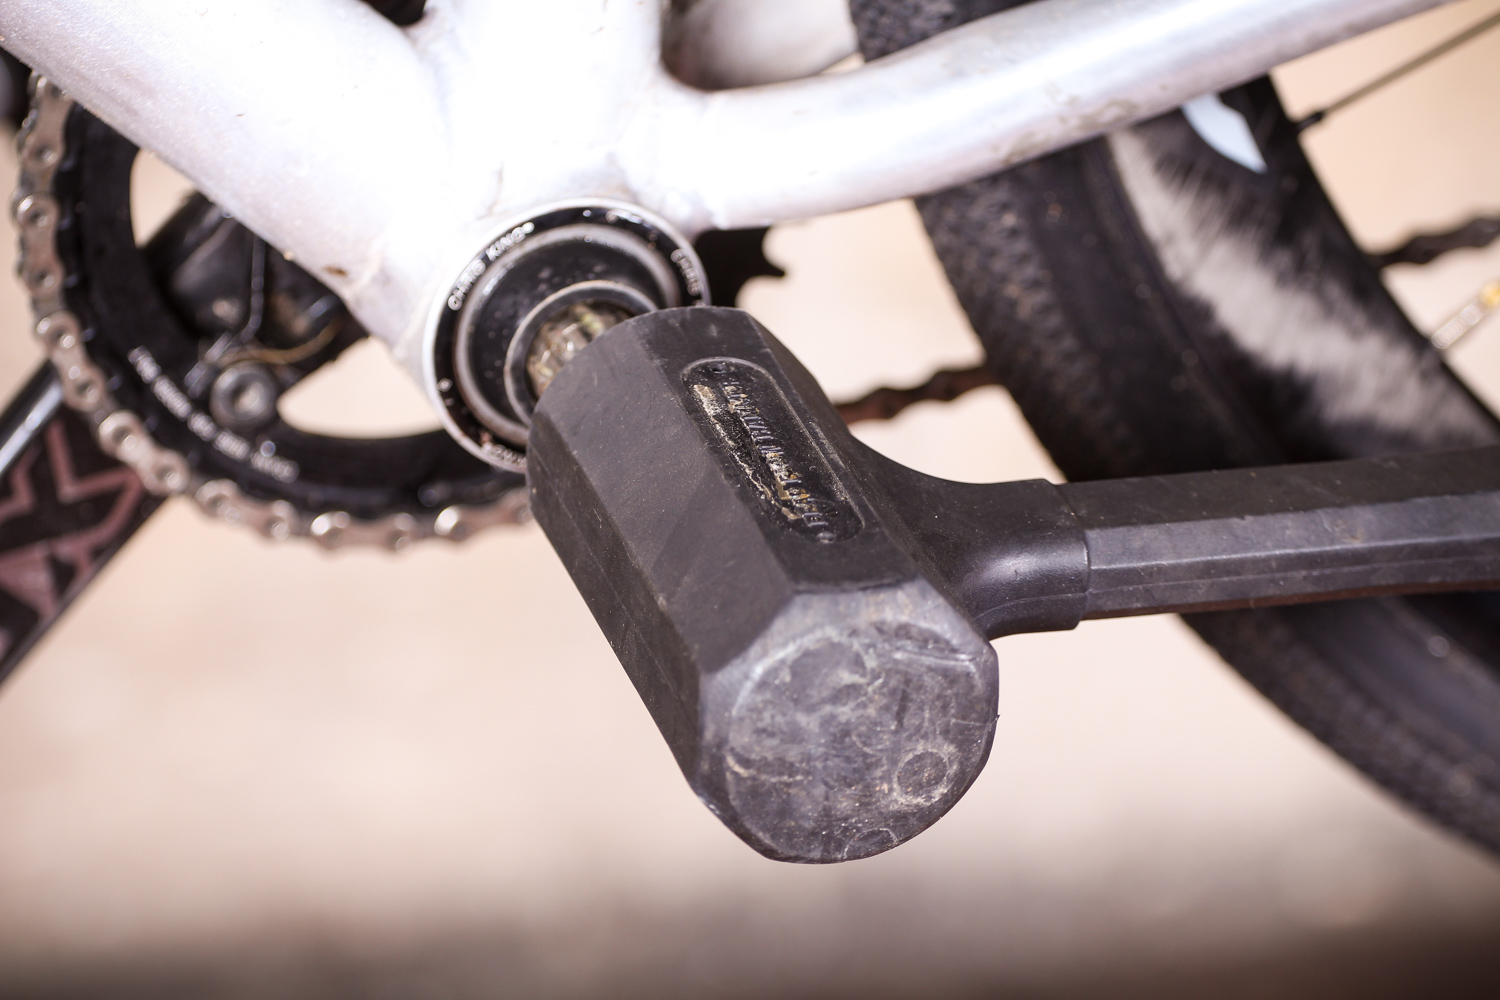
1 Remove the cranks You’ll need to remove the cranks. With a SRAM crank that means undoing the 8mm Allen key bolt in the left hand (non drive side) crank arm. It unscrews anti-clockwise, so with the crank arm pointing towards the front of the bike you fit the Allen key so the handle points forward (as pictured above) and press down on the Allen key.
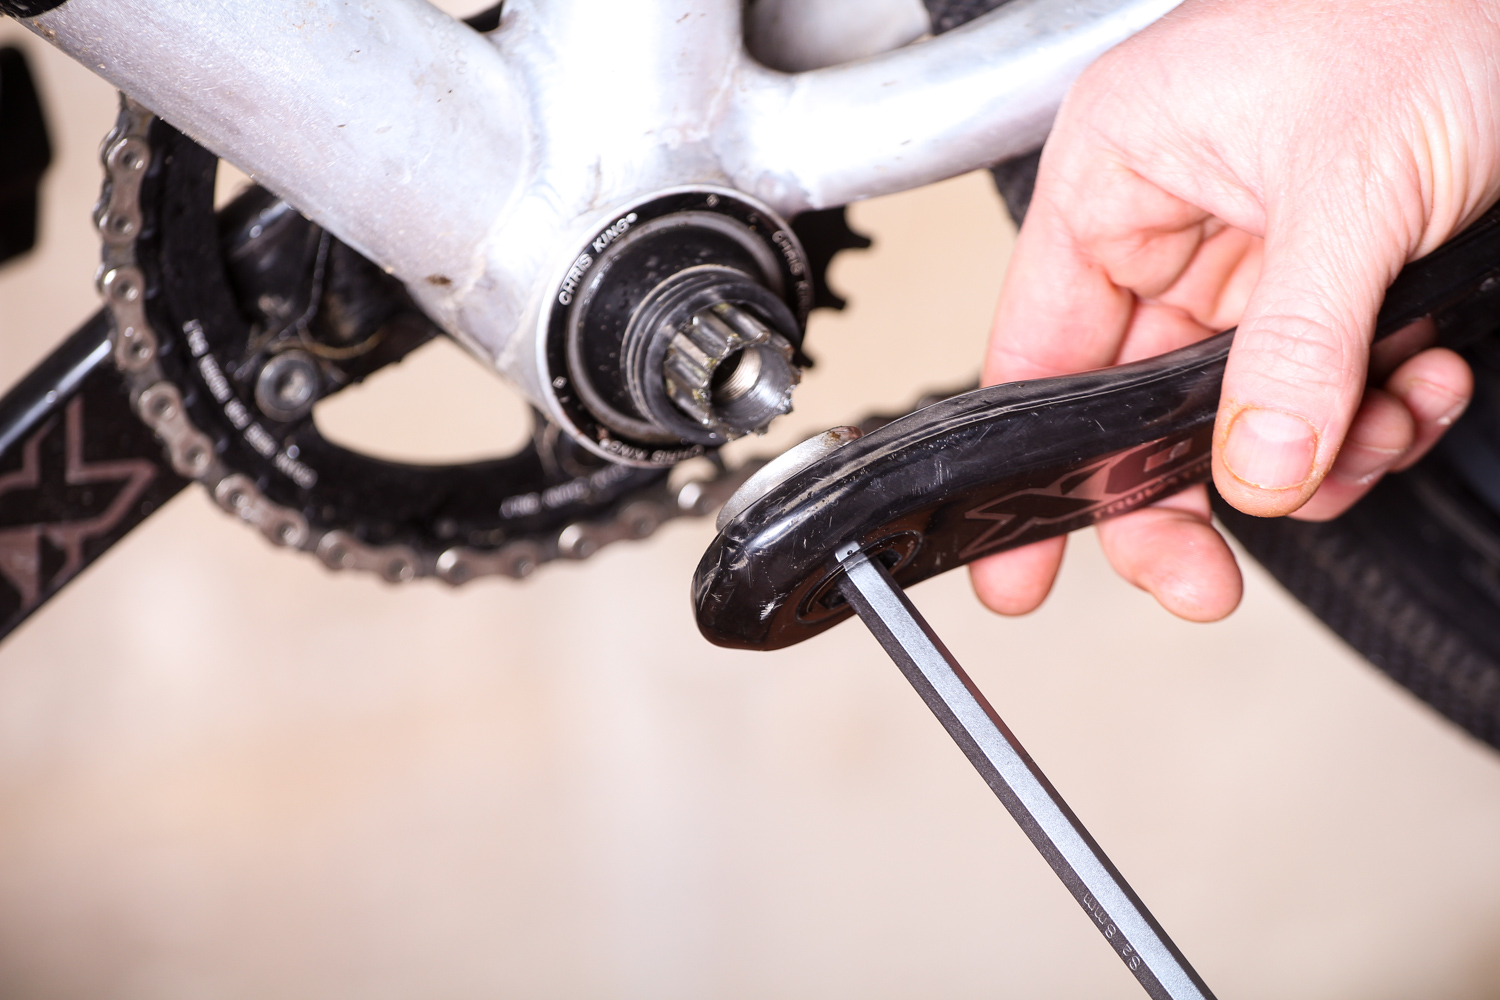
2 The bare axle With the crank arm released from the splined axle you’ll be able to access the left hand bottom bracket cup. Before you can though there are a few small bits to remove.
3 Slide off any spacers Make a note of how many there are and what order the spacers need to go back in. It’s always handy to have a sheet of paper on which you can place the little bits in the order and orientation in which you remove them. Taking photos with your phone as you disassemble the parts can often be handy too.
4 Take out the right hand crank Sometimes the right hand (drive side) crank and axle will just slide out. Other times the fit will be tight. In that case use a rubber or wooden mallet to give the exposed left hand axle stub a sharp tap. This will just break the friction fit and allow you to slide the drive side out. Remember you’ll have to unship the chain for the crank to slide completely out.
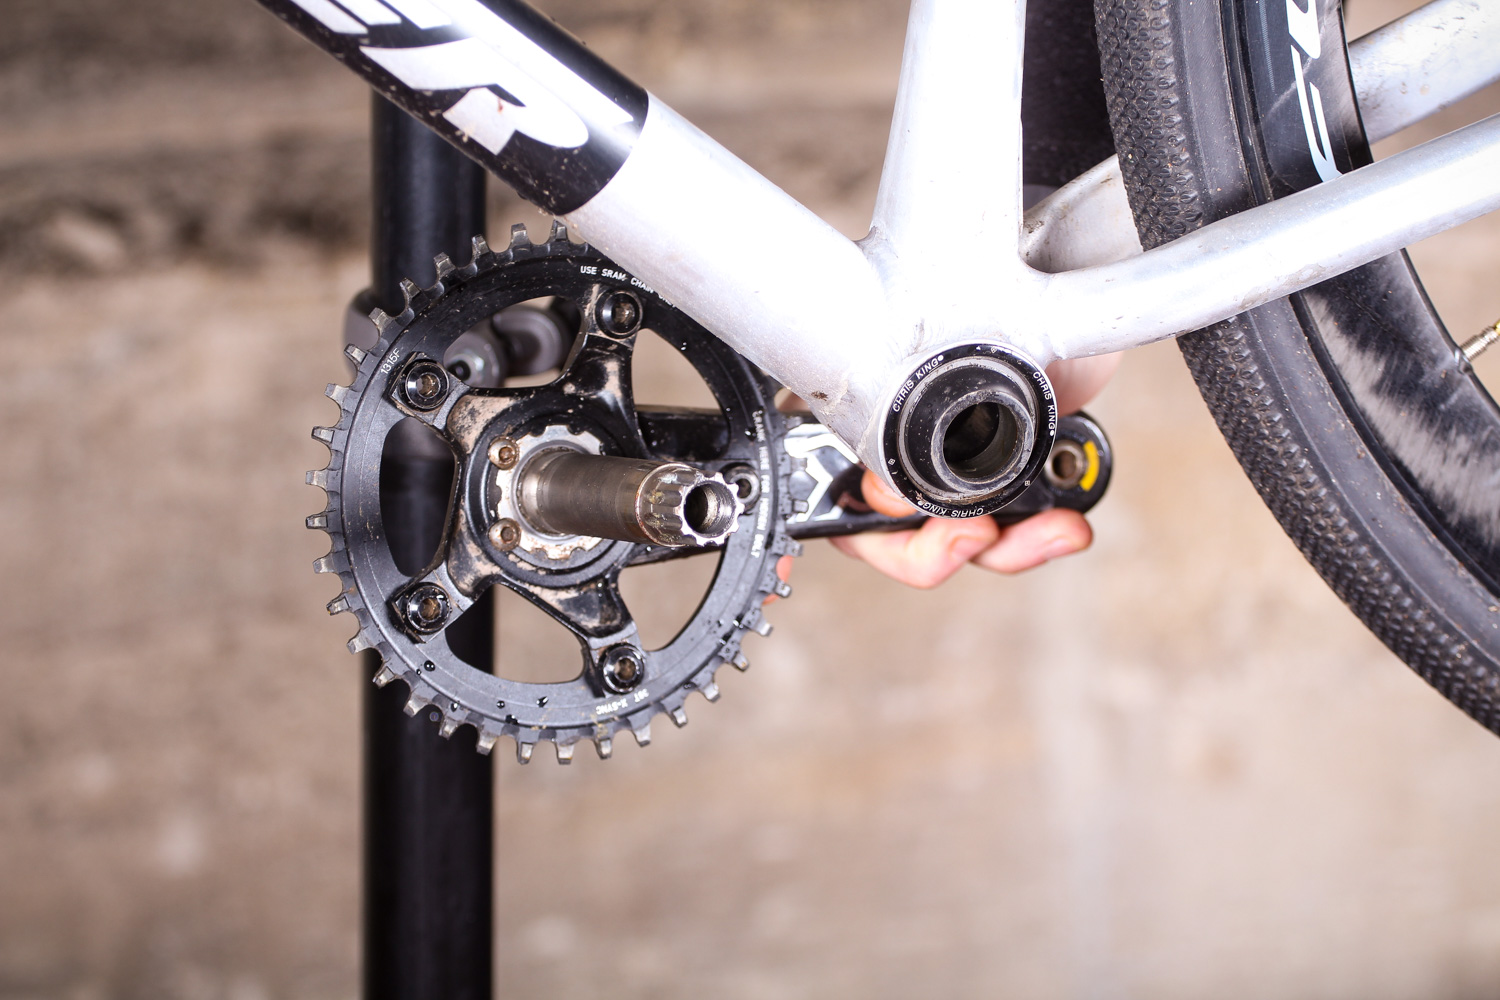
5 The bare bottom bracket With the cranks now removed, there are only the dust caps on the bearings to remove before the action begins.
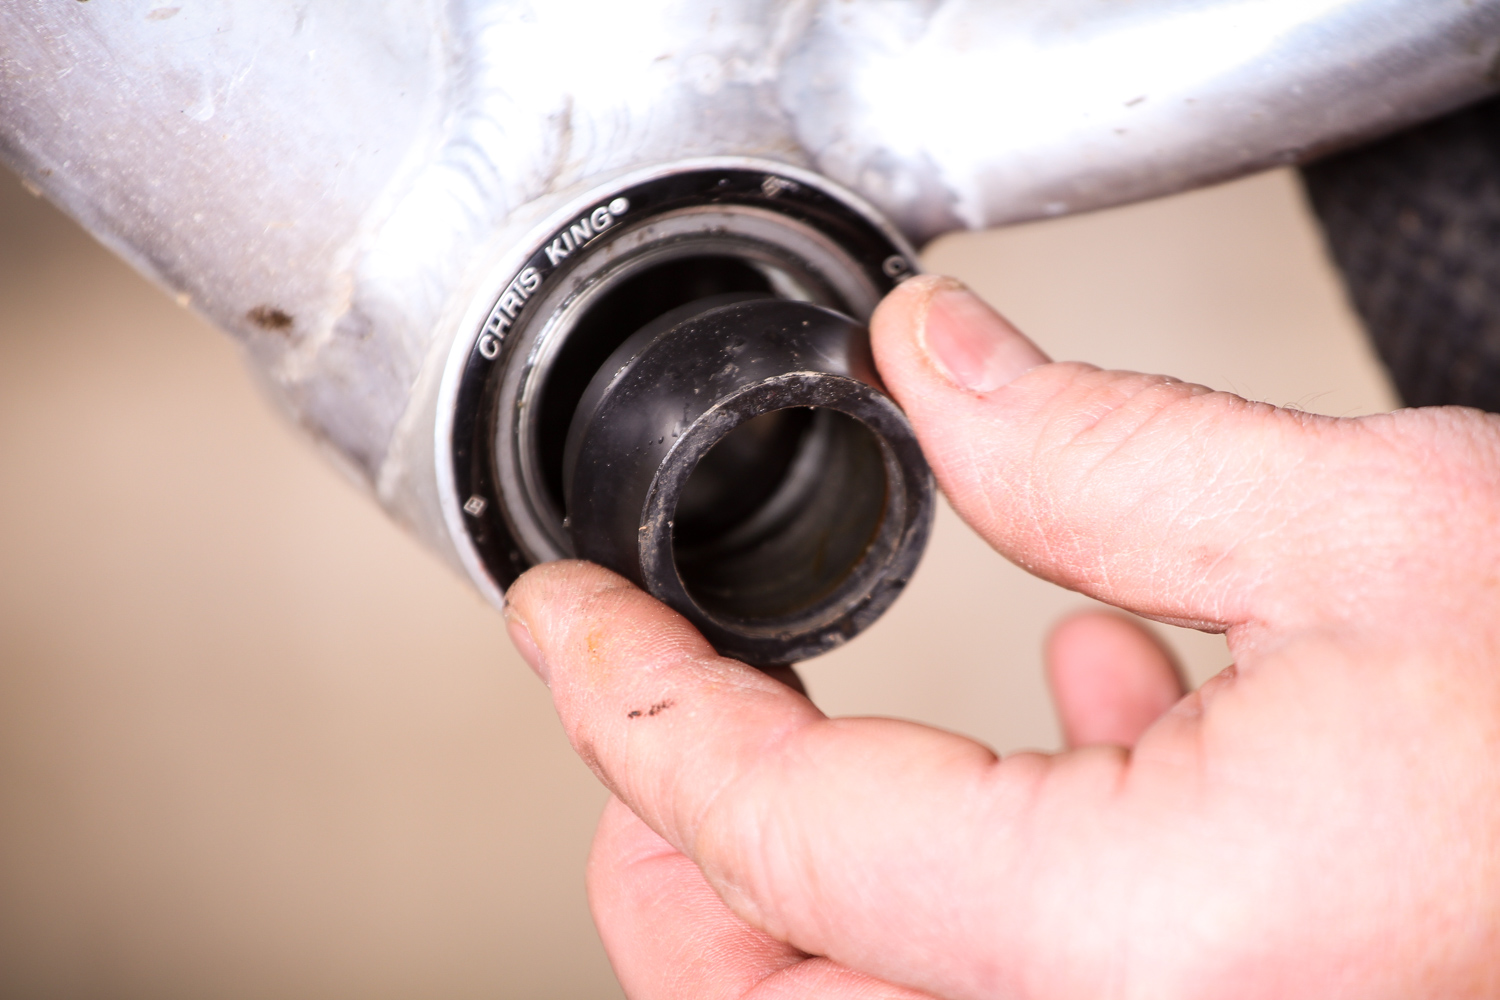
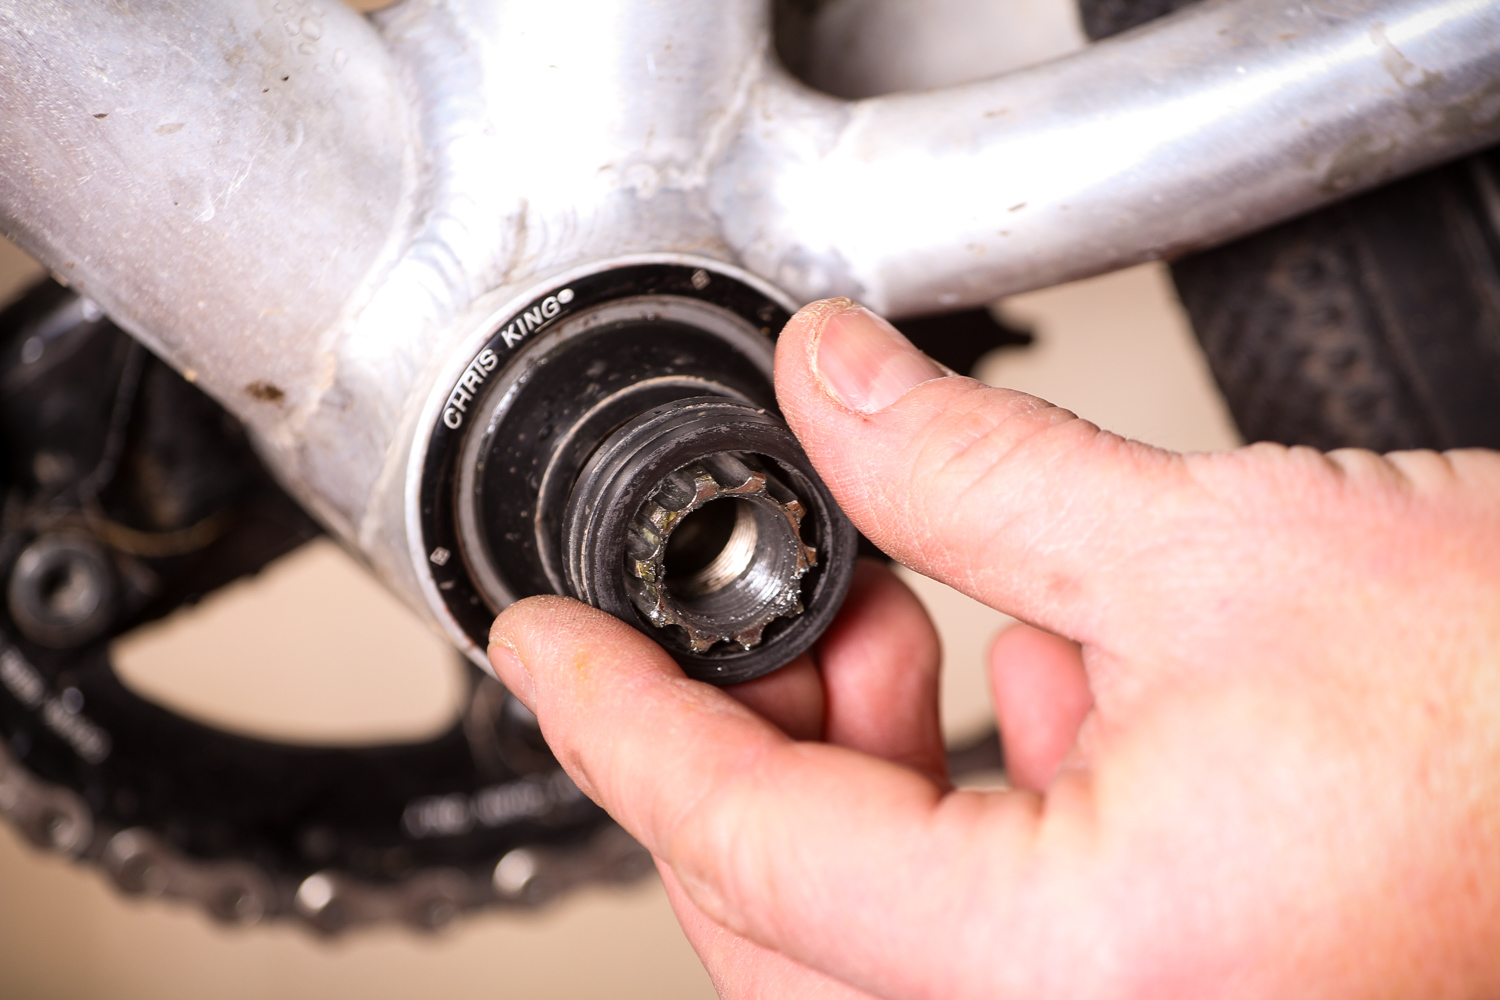
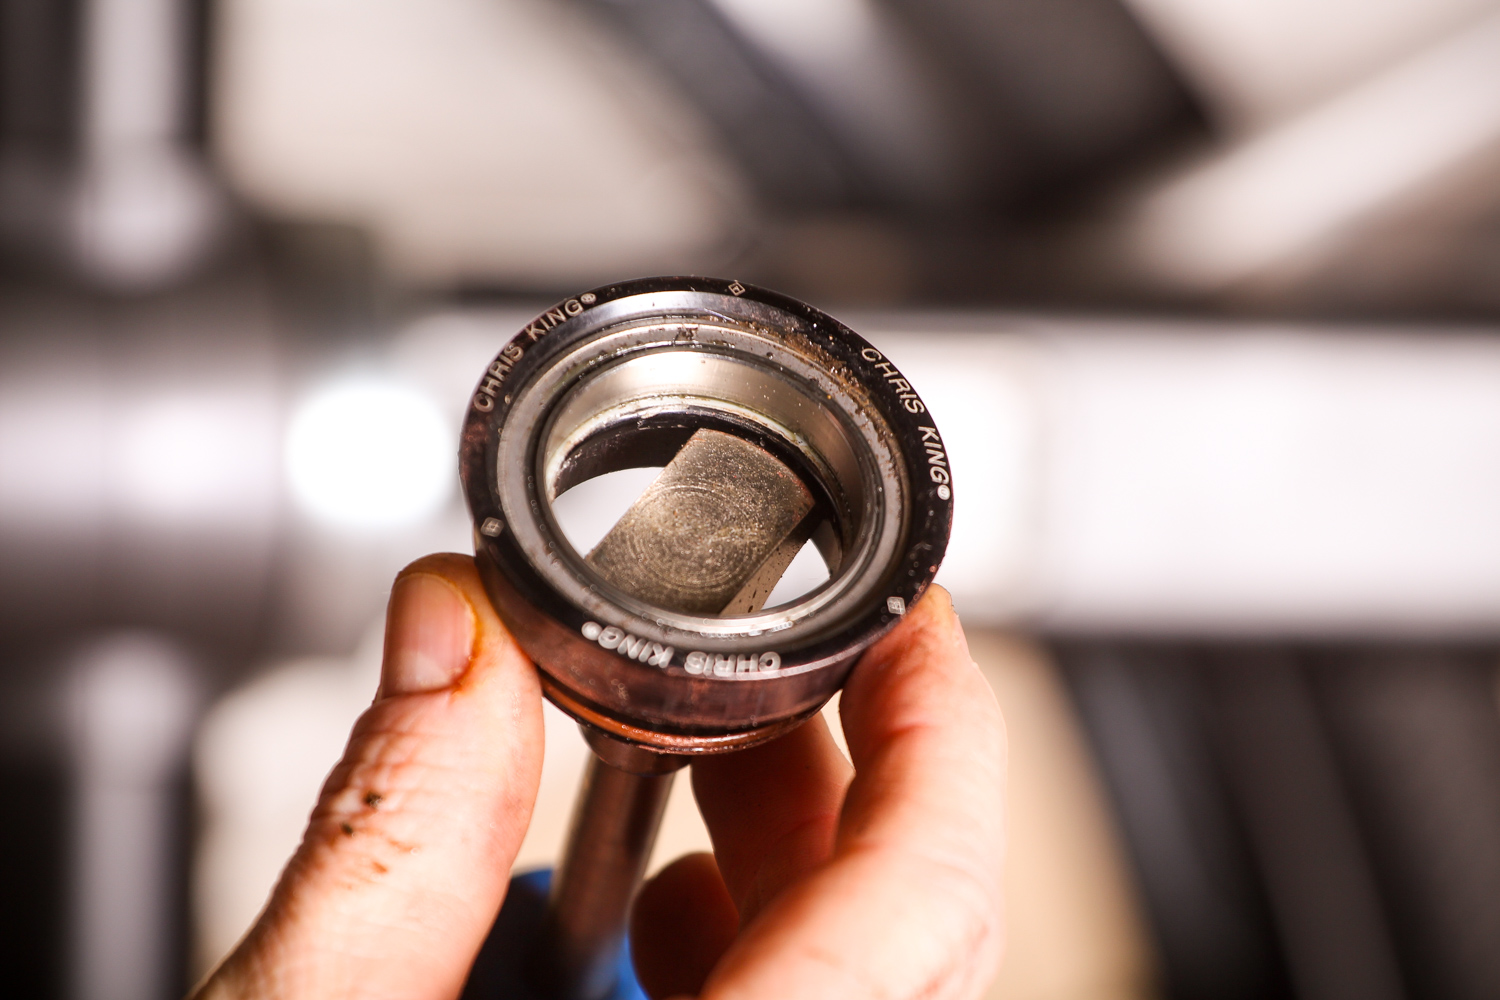
6 Remove dust caps With the spacers removed you can now remove any dust caps. These will fit directly next to the bearing seals. This Chris King model uses a BB30 to 24mm step down adaptor which doubles as a dust cap. Other models may use flatter, more traditional-looking dust covers.
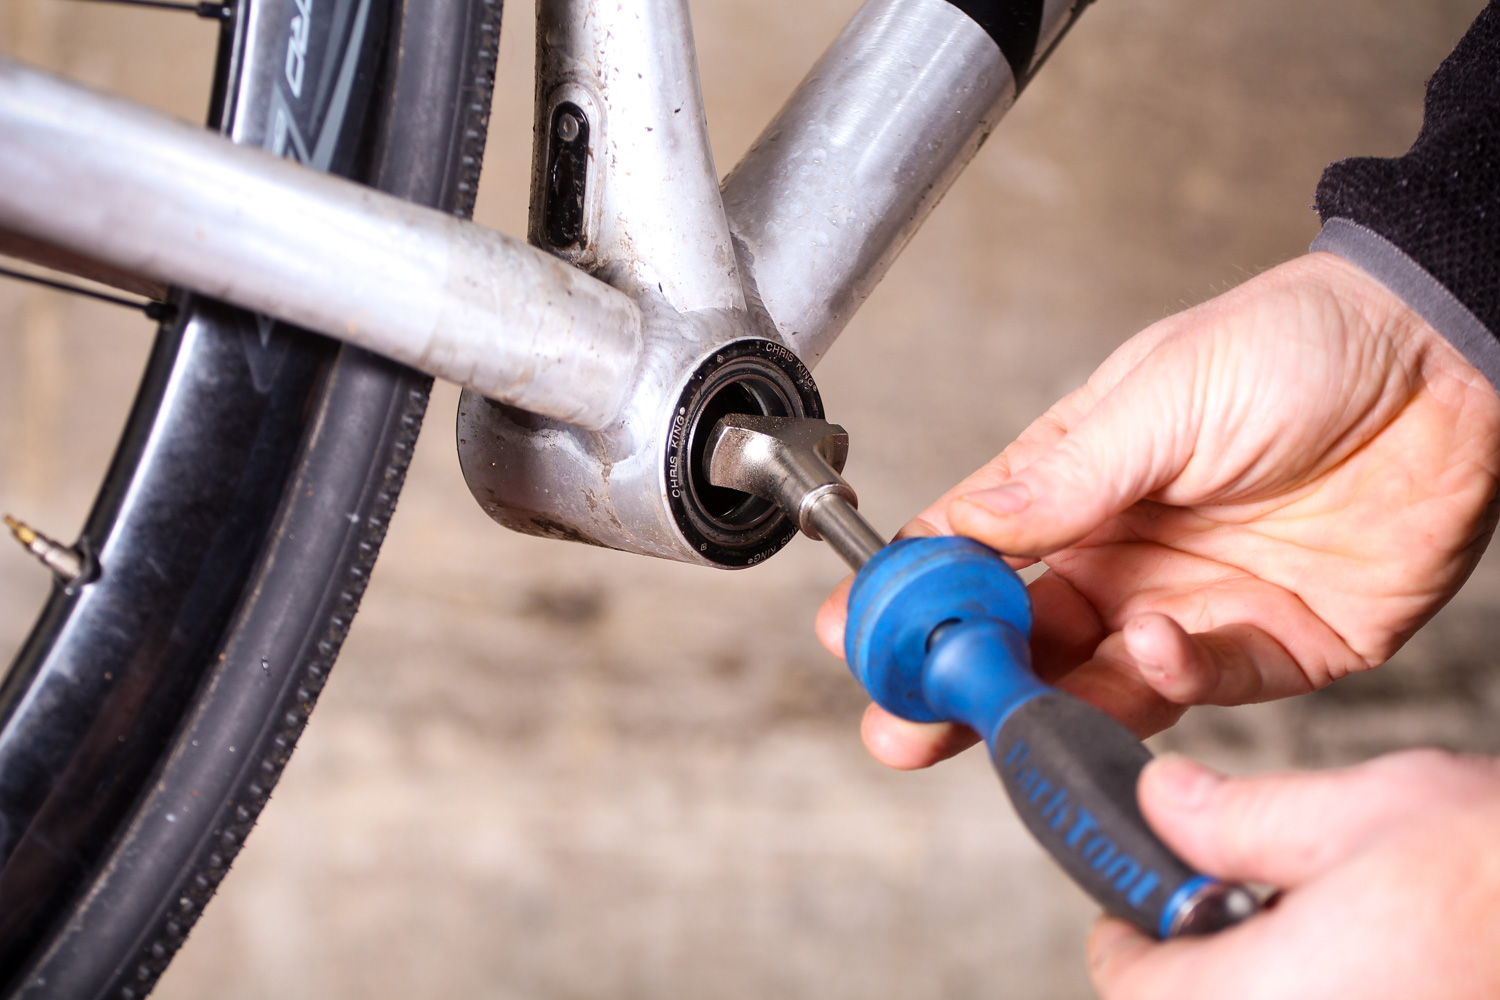
7 Using the bearing remover It might not be immediately obvious how you use the Park Tool BBT-30.3. The metal hammer end is introduced through one side of the bottom bracket (you can start with either side). The head is wider than the hole in the bearing so you’ll have to go at an angle, get the first side of the head in, as shown, then straighten up the tool and repeat to get the other side of the head inside the bearing.
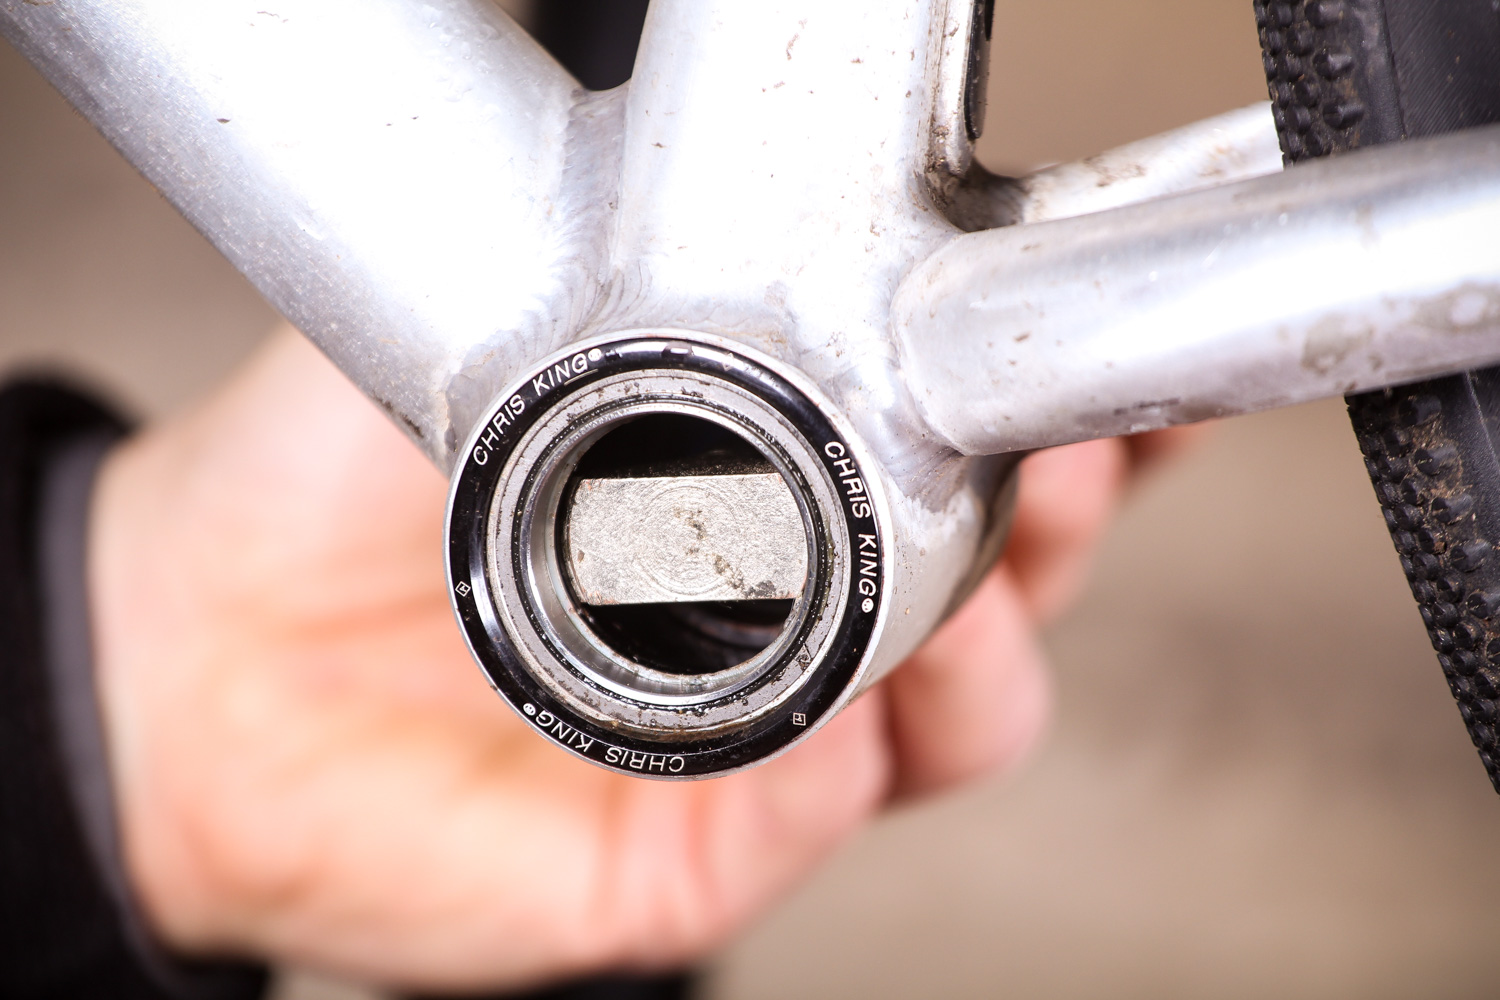
8 Locate the tool against the bearing When you’ve got the tool inside the bottom bracket shell, position the head so that the steps cast into the head of the tool fit against the inside edges of the bearing. With the handle of the tool lined up dead centre of the bottom bracket shell, you should feel both sides of the tool head firmly seated on the backside of the bearing. The pic above is how it should look.
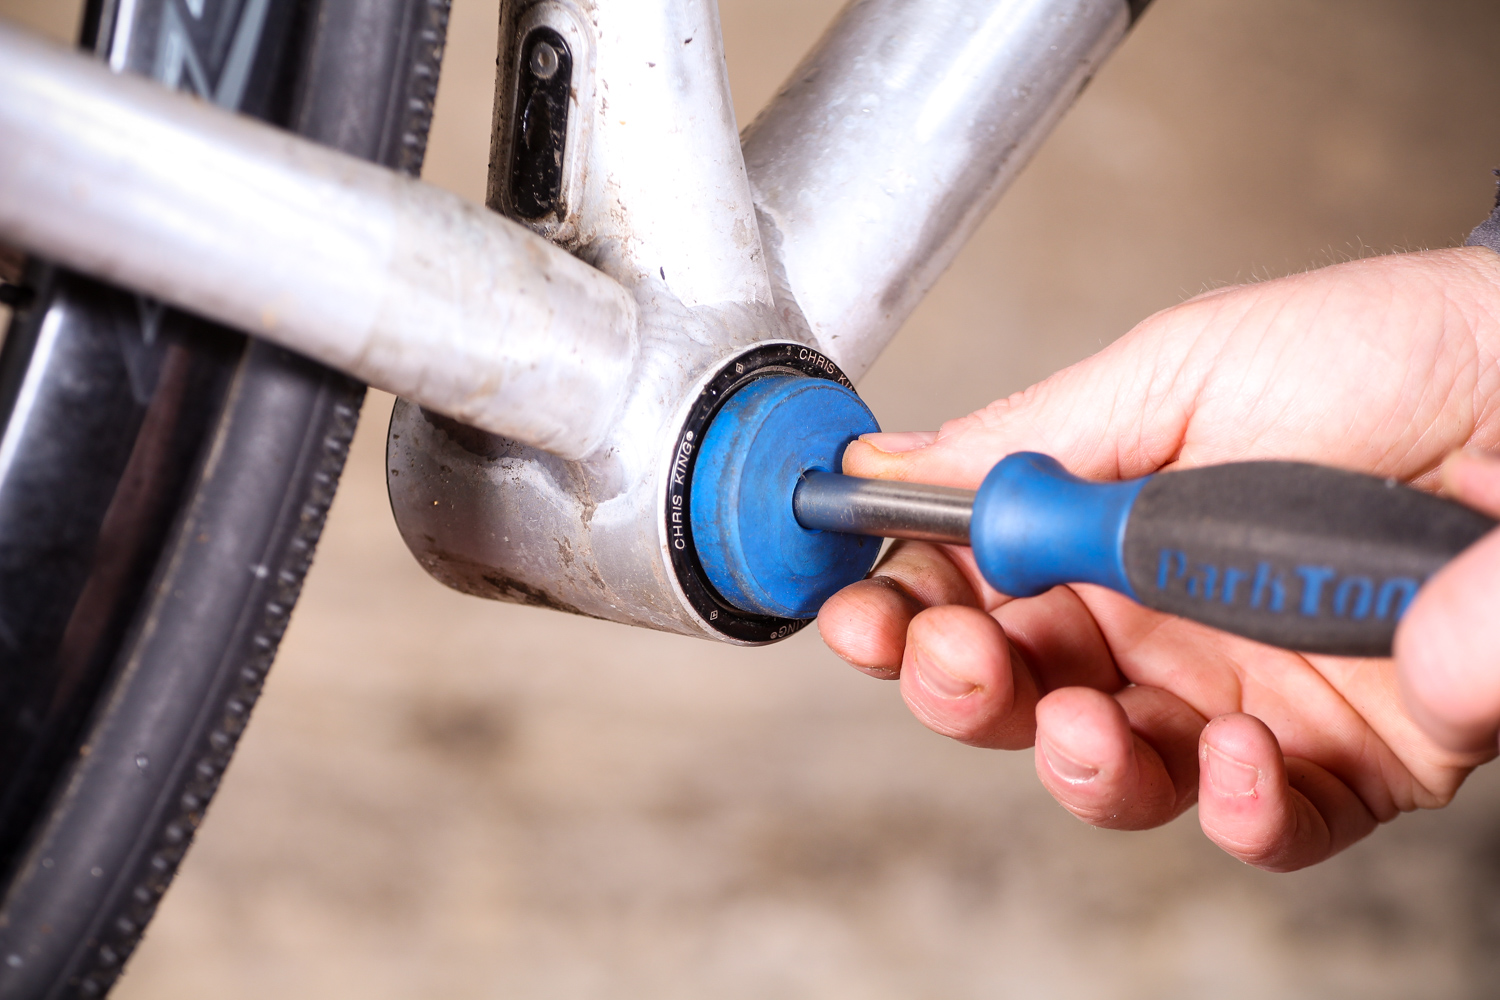
9 Fit the guide With the head seated against the far bearing, slide the blue plastic guide against the bearing facing you. This supports the tool shaft and keeps everything lined up while you hit the metal end of the tool’s handle with a hammer. Sharp blows will dislodge the far bearing. Keep going with even blows. Hold the blue collar flush and you can’t go wrong.
If you had to use anything else as a drift remember this. Only ever let the inner metal ring of the bearing take the force. The plastic shields and the outer case of the bearing must never be struck or you risk permanently damaging the bearing.
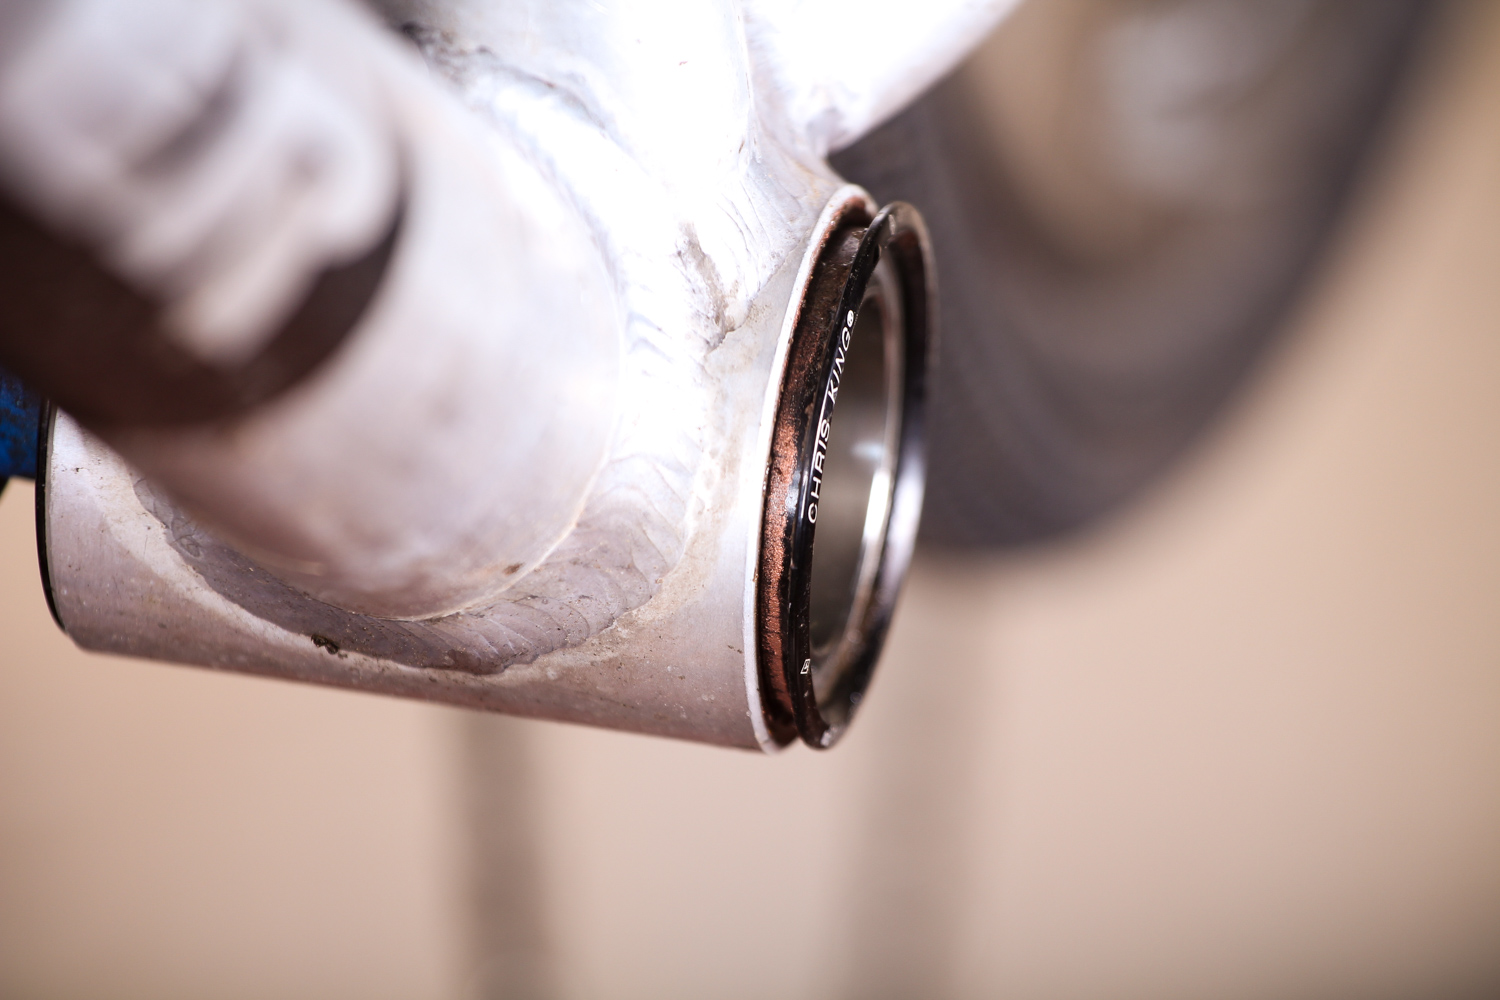
10 On the way out As the bearing starts to move, it’ll creep out of the shell in a neat, uniform way. Here you can see the cup after three good hits. The first breaks the static fit, the second and third each produce just over a millimetre of movement. Keep going.
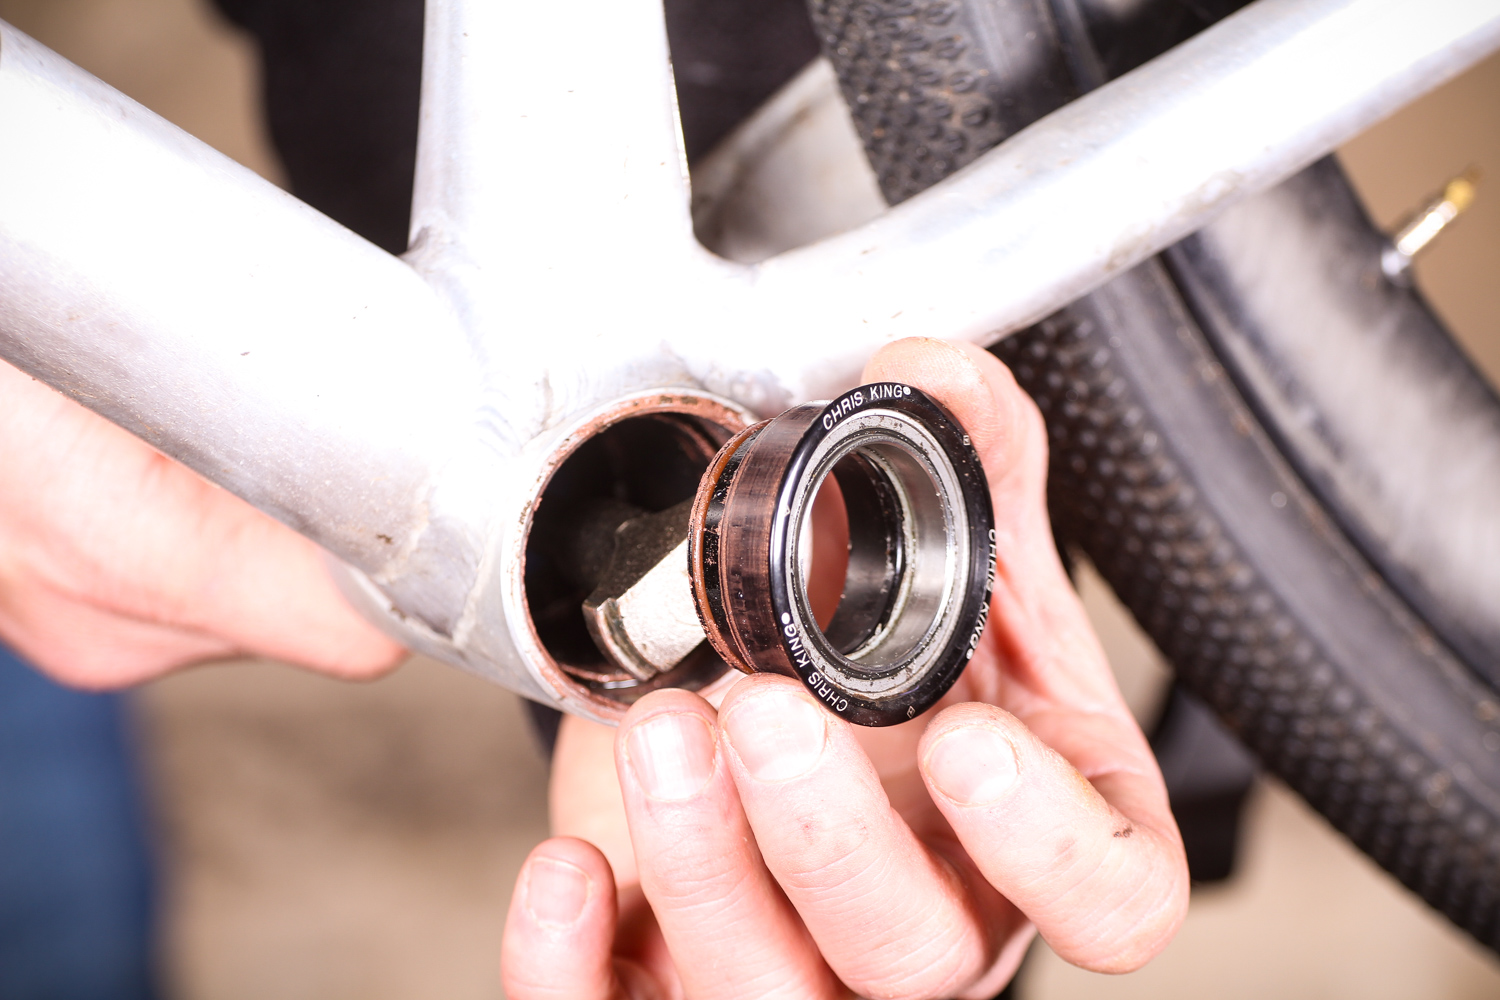
11 The bearing and cup The cup will pop right out. Have a hand ready to catch it.
12 Take out the second bearing The form for removing the other side is a reverse of the first, only you won’t have to wiggle the tool head through a bearing, because you’ve just removed it. Remember to seat the tool properly on the inside face of the second bearing before you hit the tool, as you haven’t got a direct guide to automatically ensure that it’s square on.
>> Read more: The full archive of road.cc maintenance articles


13 thoughts on “How to remove press-fit bottom bracket bearings in 12 easy steps”
One important tip when
One important tip when hammering the bearing extraction tool –
You need the instant impact force a metal hammer gives to move the bearing. If you use a rubber or woodern hammer, it will be a more drawn-out blow which doesn’t shift the bearing and the energy ends up going into the frame around the BB. With a rubber hammer, instead of one or two sharp blows to get the bearing out, your spend ages belting away getting nowhere and just flexing the frame adversely.
One other point, I disagree with the reason* for only aligning an extraction tool to the inner race of the bearing, as IMO you are still at risk of damaging the bearing. The reason for aligning the tool to the inner race is instead to ensure you don’t damage the carbon frame (or on a BB30 the soft metal BB wall) which is right next to the outer bearing. On a PF bearing you can usually extract it with one metal hammer blow and not damage the bearing, but extracting from a BB30 takes few hits and I always replace the bearing in that case.
*but not where to align – I very much agree you should align to the inner race
I agree with the post above
I agree with the post above regarding hitting the inner race and reusing the bearings. The Park and FSA BB30 (and similar) tools all locate on the inner race (for legitimate reasons) but you then hammer against that inner race. That is putting far more side load onto the bearings than they would ever see when installed, and I would argue is going to mean that the bearing in question shouldn’t be used again. If you intend to re-use the bearing then it would make more sense to drift it out applying force only to the OUTER race. That way the rollers/balls and retaining cage are seeing no load at all. It is after all the rollers/balls and the races they run in that are fundamental to the smooth running and long life of the unit. The difficulty with this is of course finding enough purchase on the outer race to dislodge it evenly/squarely and not damage the bearing seats of the frame itself. If the bearing slides out easily then you could argue that the loads applied are not that great and within the safe limits of the bearing, but I know how hard I had to hammer the bearings of my bike yesterday to dislodge some VERY tight fitting old bearings. I certainly would want to refit those ones! Of course this isn’t a concern if you are planning to replace the old worn out bearings anyway, which I imagine is the only reason to do the job for most people.
Is anyone else just slightly
Is anyone else just slightly alarmed by the idea that you are going to bash out the most often replaced bearing using a hammer on materials that are particulary vulnerable – aluminium and cabon fibre – to shocks, distortion and dimensional stability from wear?
Why would I care about
Why would I care about damaging the bearing? If it’s OK leave it alone. It if needs replacing making it worse dosent matter.
wycombewheeler wrote:
Yes no problem with that, I didn’t make the point very clearly. I was thinking more about the tubes that contain the bearings and their longevity.
Kevcaster wrote:
Yes no problem with that, I didn’t make the point very clearly. I was thinking more about the tubes that contain the bearings and their longevity.— wycombewheeler
I was thinking more about the previous comment on hitting inner our outer race so the bearing could be reused.
As to damaging the tubes, I guess that’s why the tool has a guide to ensure the impact is applied perfectly axially. A press would be better though. Or even better a system where the bearings are screwed into the frame, to allow simple and repeatable installation and removal.
wycombewheeler wrote:
Yes no problem with that, I didn’t make the point very clearly. I was thinking more about the tubes that contain the bearings and their longevity.
— Kevcaster I was thinking more about the previous comment on hitting inner our outer race so the bearing could be reused. As to damaging the tubes, I guess that’s why the tool has a guide to ensure the impact is applied perfectly axially. A press would be better though. Or even better a system where the bearings are screwed into the frame, to allow simple and repeatable installation and removal.— wycombewheeler
Like no-one has ever stripped the threads in a bb shell by cross threading a bottom bracket. No system is fool proof.
I actually quite like press-fit, so long as the frame was manufactured correctly. I have it on a couple of bikes and never had any issues.
It’s not exaxtly a new thing in the bike world – headset cups for example.
I think that a bearing press
I think that a bearing press would be better. To remove the old bearings and replace with new ones. I would take it to the bike shop and get the job done there.
its not as if a job like this needs to be done frequently.
BSA ,it’s so fucking easy
BSA ,it’s so fucking easy ,press fit this press fit that . So many different sizes for something that worked fine . My cervelo build has BSA , so fucking easy service.
Now I’m going to totally contradict myself . My other bike is a custom guru ,it’s fucking light , the issue was that the BSA thread started spinning in the frame “ fucked “ so they replaced it with press fit 30 . I use THM cranks and use their BB which is so easy to install . You just screw both sides together. That simple , you only need the THM wrench and thats it . Not a single creak since it’s been on and before the THM I have sisl2 crank on and I used the wheels manufacturing BB which also Joins up in the middle and again not a creak . But BSA is still king for me . You can get titanium BSA shells which would make more sense than the standard alloy ones . Ti and carbon is a much better mix ,galvanic corrosion no more .
I’d regard myself as a
I’d regard myself as a reasonably able amateur mechanic with patience and mechanical sympathy, but this is one where I’d take it to the LBS.
It’s not so much the removal, it’s that removal implies reinstallation, and I’ve found it’s very easy to get press fit bearings to start go in at an angle using the more basic home mechanic tools.
For me the £20 to the LBS is a price worth paying versus the high cost consequence of getting it wrong. That’s why I hate press fit BBs with a passion!
(Plus, with the removal, I don’t have enough experience to know what’s a normal amount of hammer force to need to apply and what suggests a bigger issue that may require cutting the old BB shell out or the like)
tom_w wrote:
Yeah, I’ve managed to push BBs in at an angle using a really cheap press-fit tool – it was a section of threaded rod with a circular press thing on each end. The more I tightened it, the more the tool bent. I ended up paying for the very expensive Park Tool bearing press and that made easy work of installing the bearings correctly (despite there being damage caused from my first ham-fisted attempt).
To those who commented on
To those who commented on taking their bike(s) to the LBS to get this job “done properly” not all shops have a bearing press so therefore there is little difference between you hammering it out and them hammering it out!
P.S. yes some LBS’s are wonderful…..but some aren’t
I own what is beyond doubt
I own what is beyond doubt the best tool ever created for press fit bottom brackets – its a 14lb sledge hammer and it works wonders compressing them into as tiny a space as possible so they don’t take up to much room in the recycle bin… the best place for them imho.