

Rim tape. The stuff that protects your inner tubes from the inside edges of the rim bed. Hardly the topic to make palms sweaty, but it’s important to understand why it’s there and more importantly how to fit it.
Traditional drilled rims, where access to the rear of the spoke nipples is through the rim bed, tend to have sharply defined edges to the spoke holes. Some rims are fitted with separate metal spoke eyelet reinforcements. The backs of these reinforcements also present thin metal edges, edges which can and will puncture inner tubes if not shielded with some sort of rim tape.
There are a few different types, traditional cloth, synthetic tape and looped band. Pick the one which best suits your rims, taste and pocket and follow these simple instructions.
Tools and material
- Rim tape
- Screwdriver
Preparation
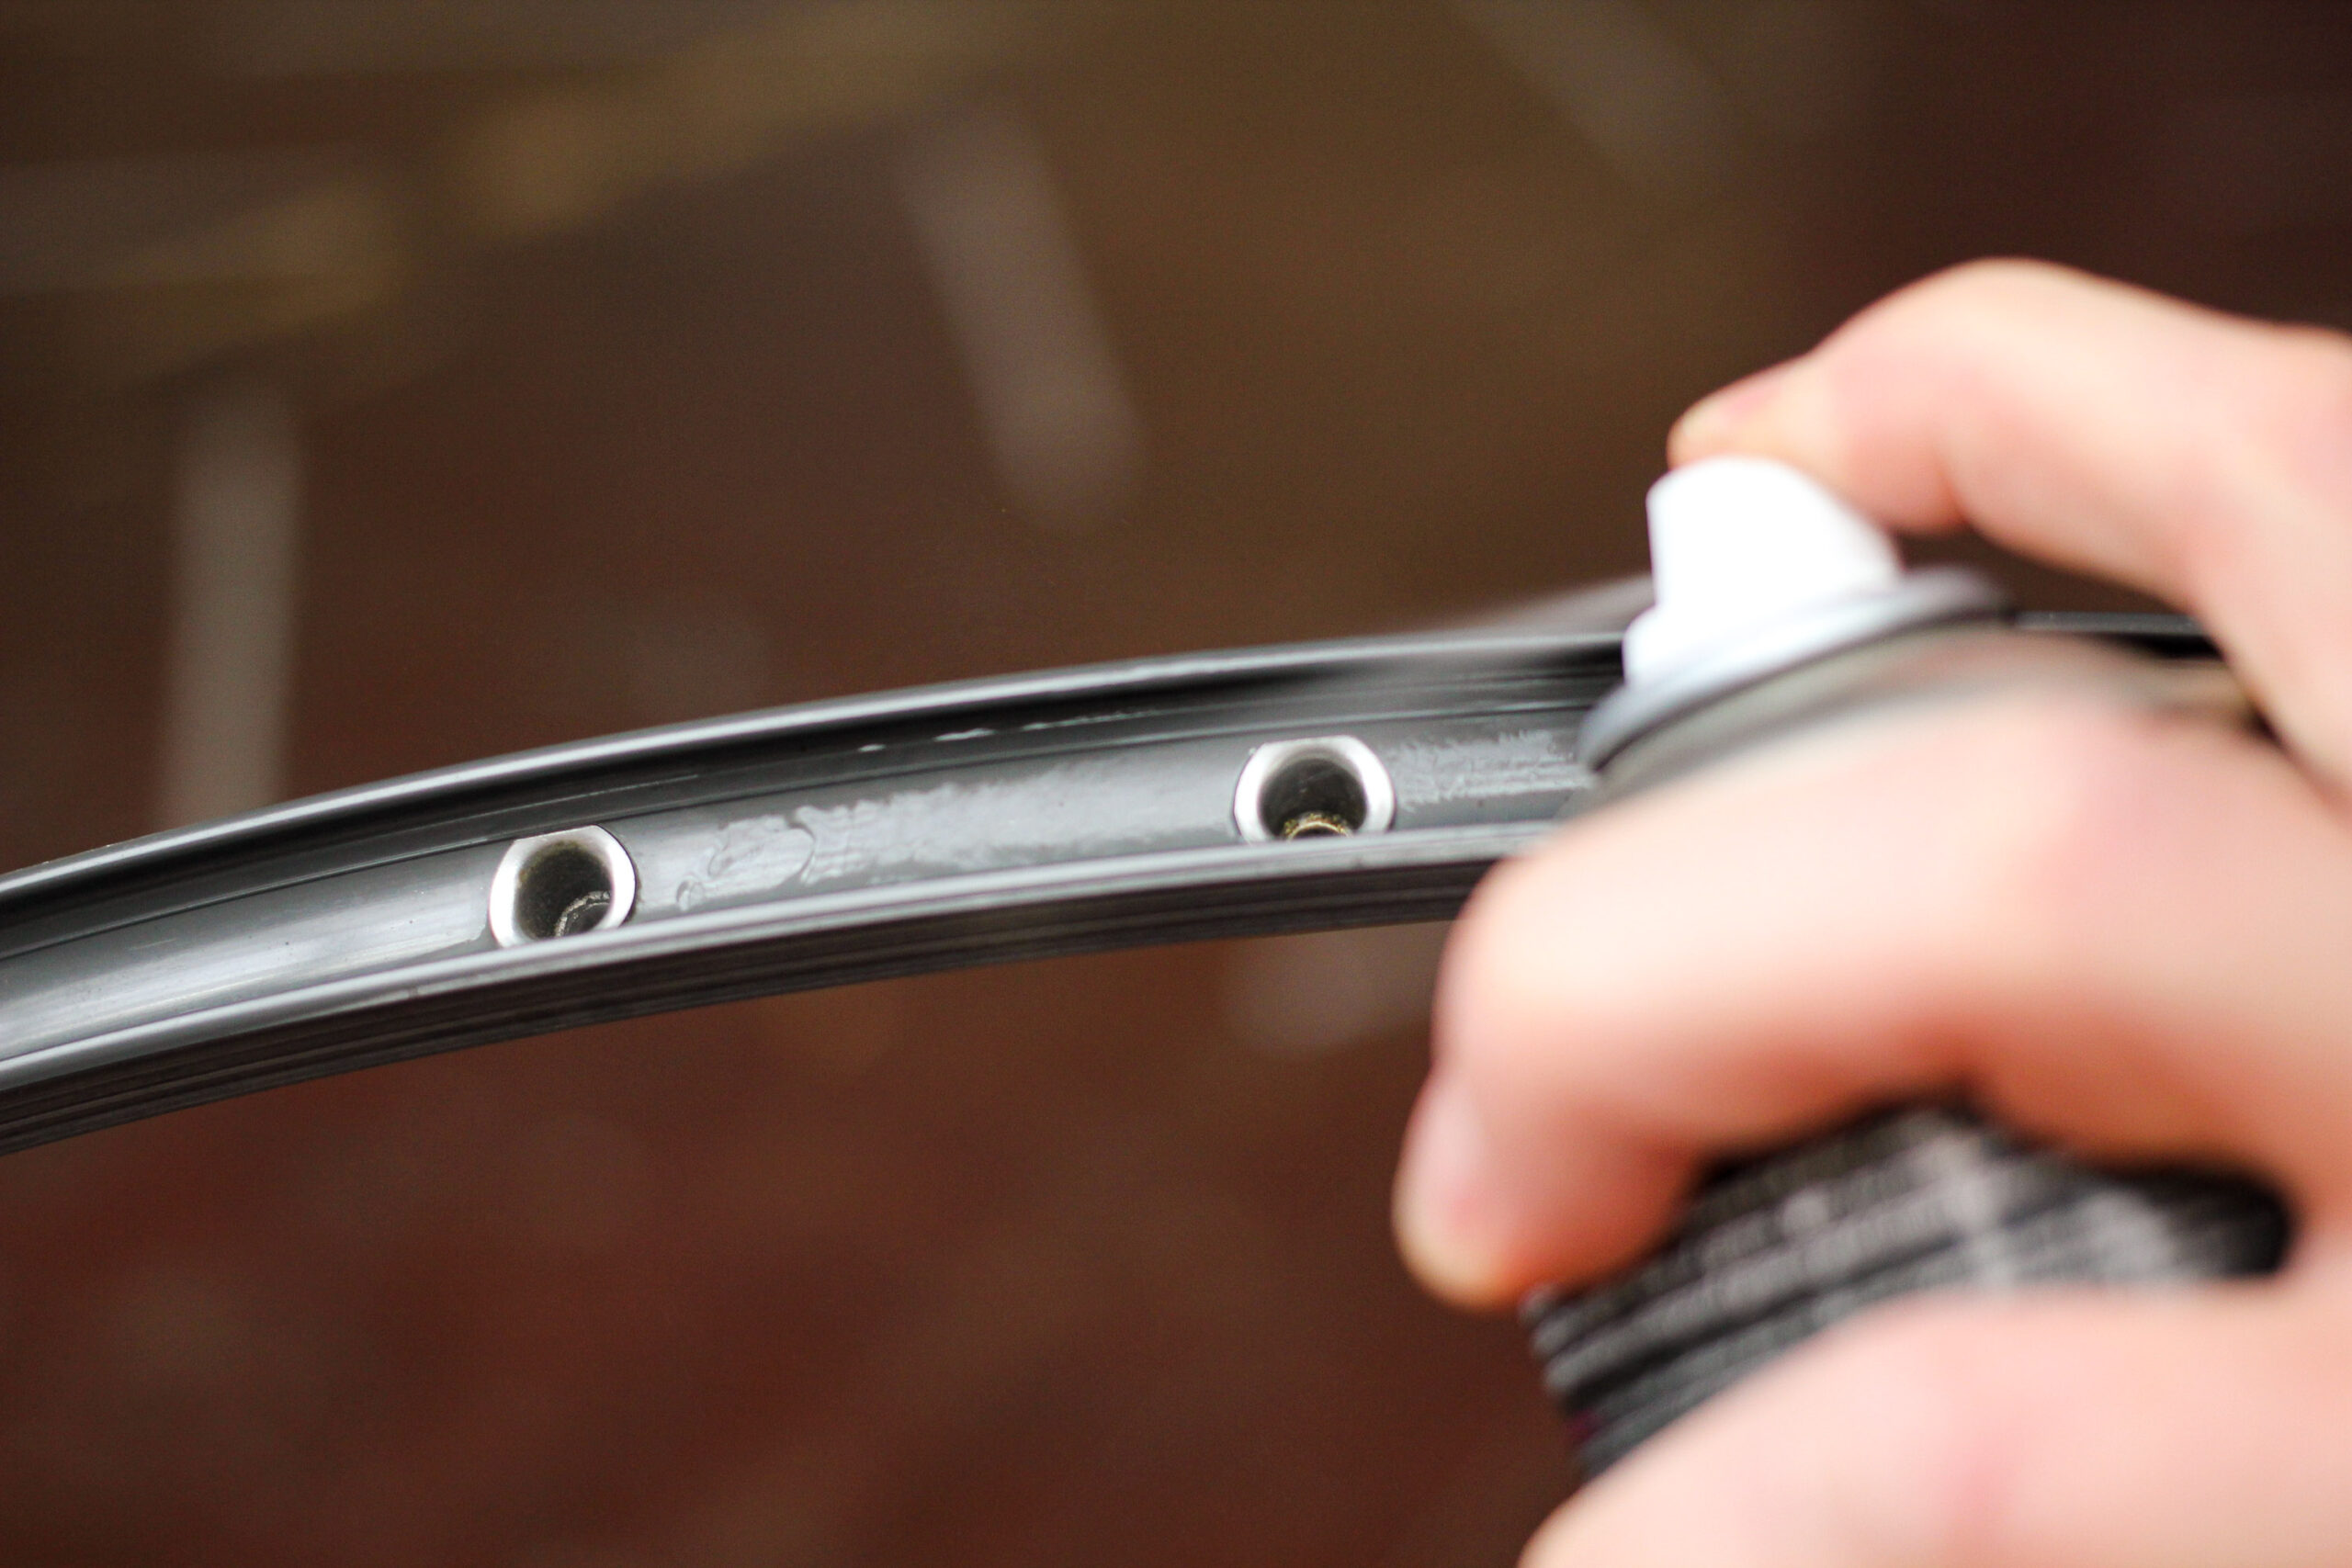
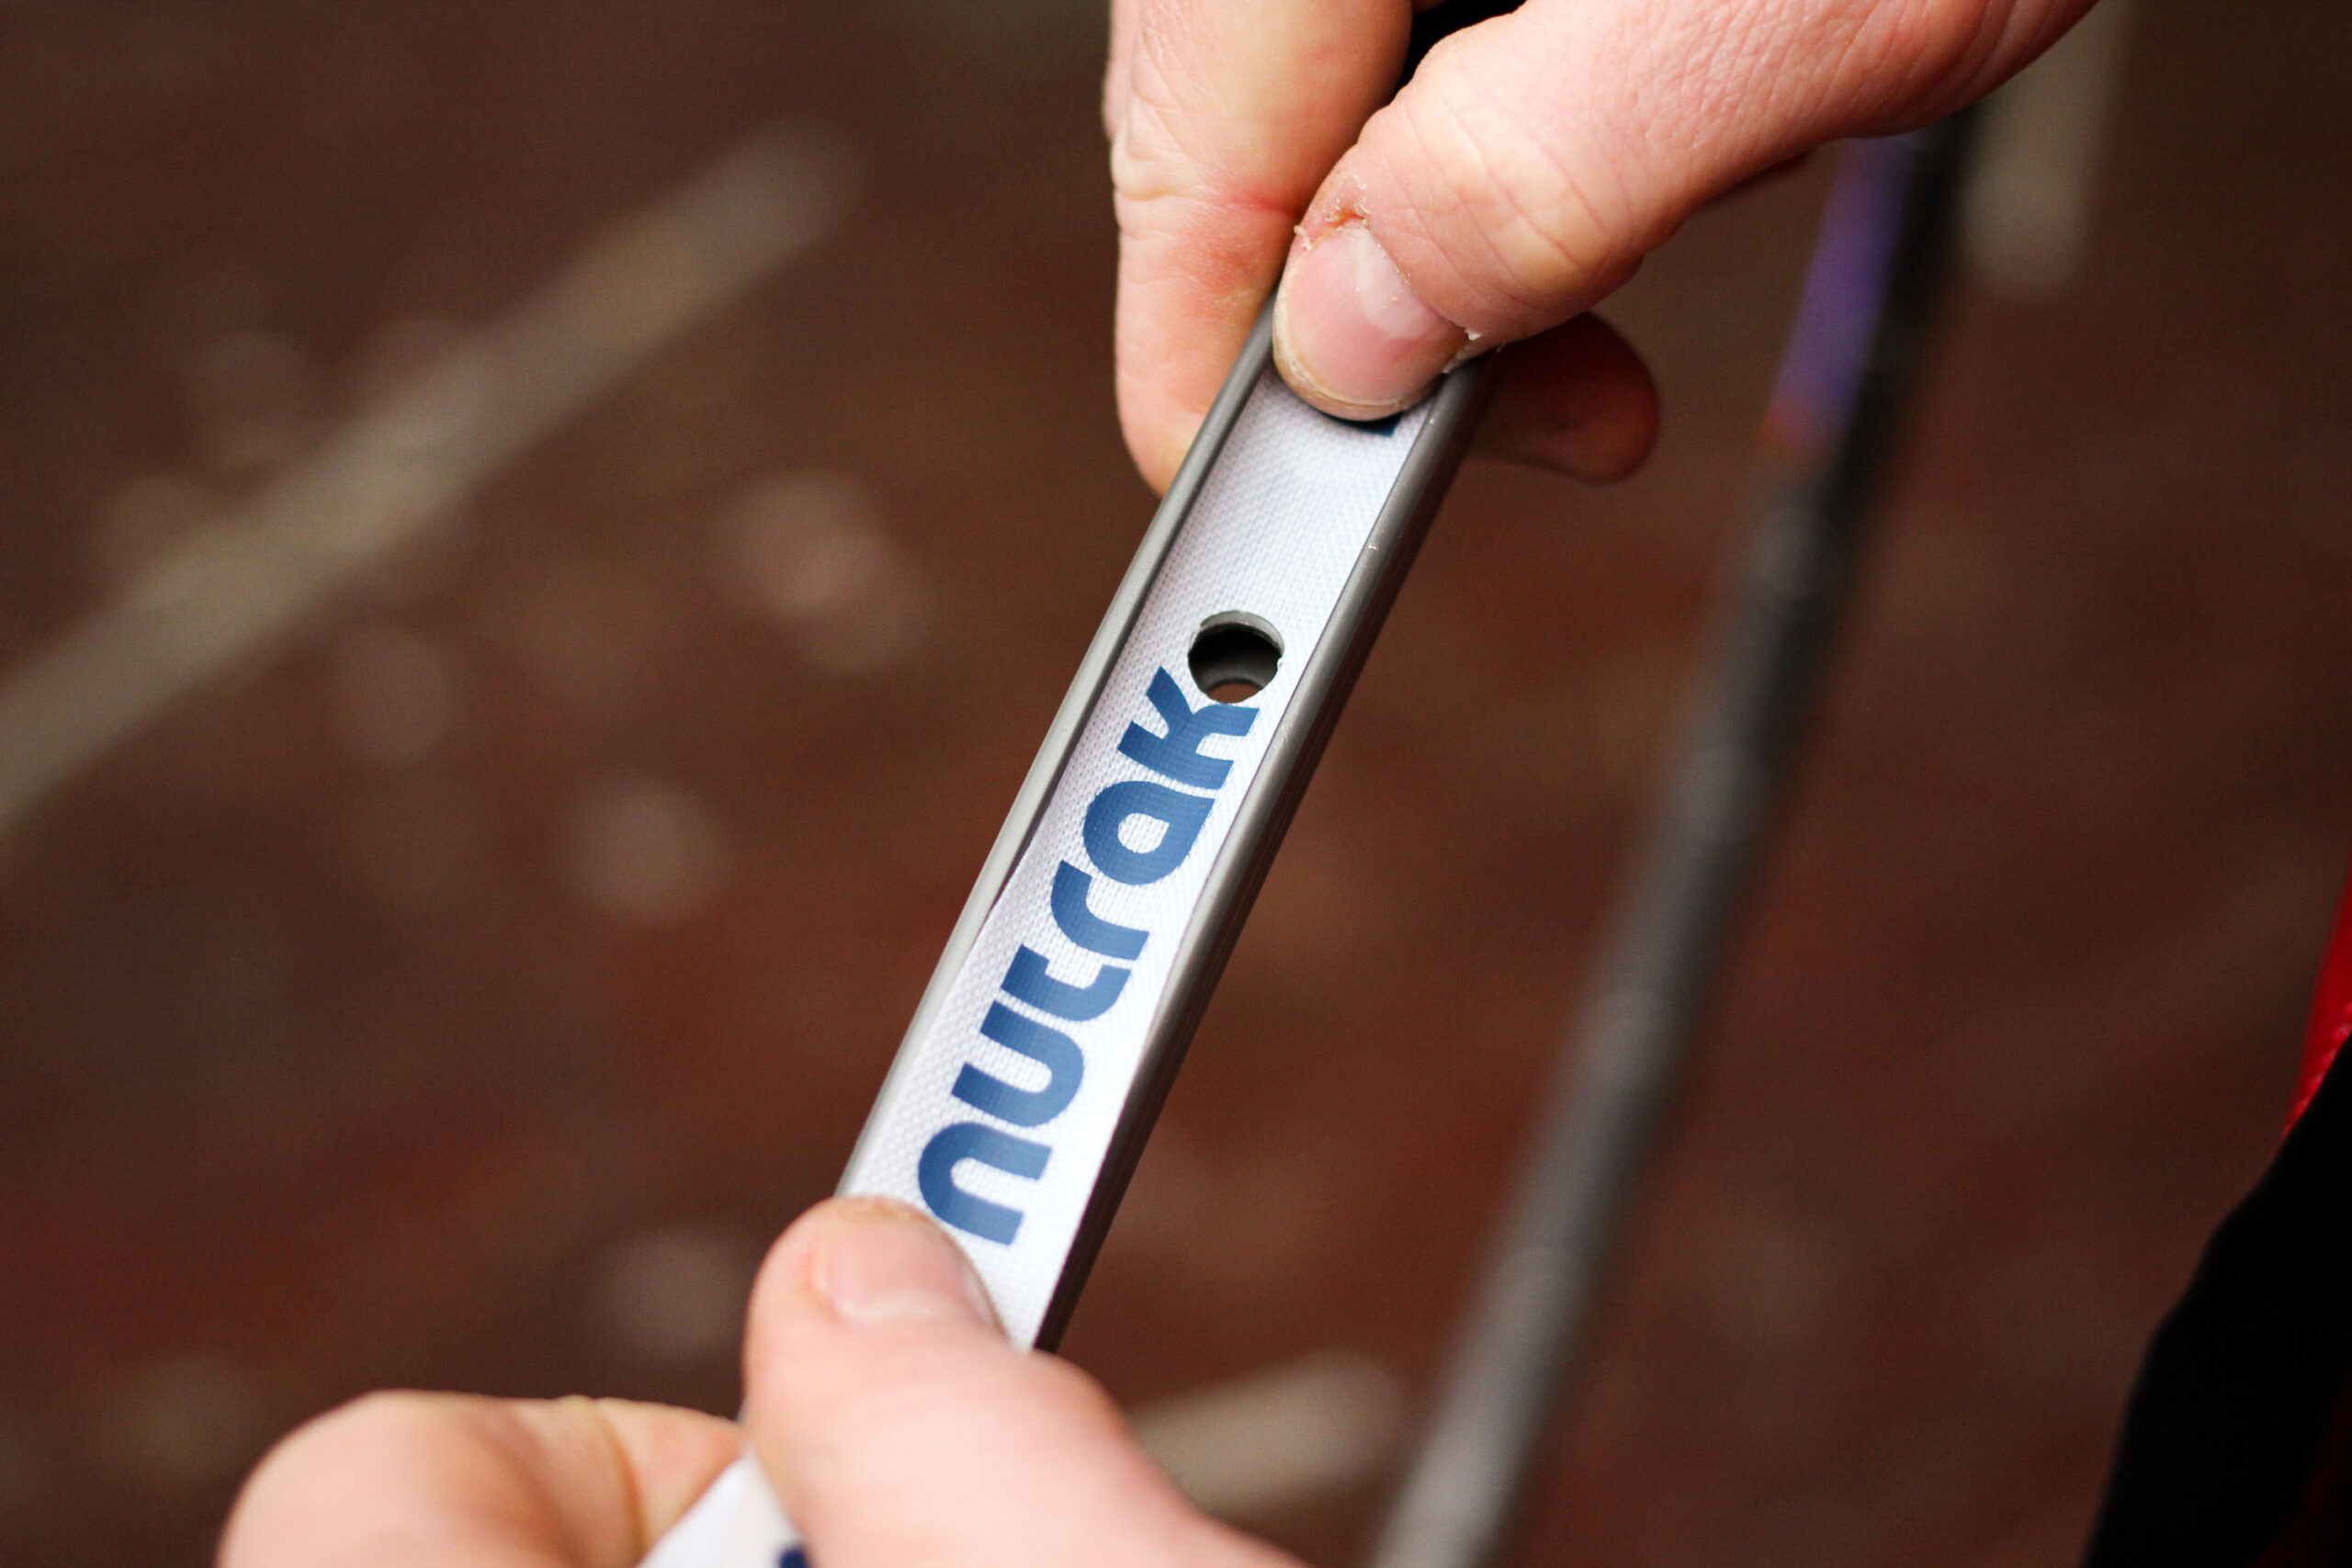
This rim (shown without spokes for clarity) is being cleaned prior to being fitted with a rim tape. Notice the holes, which are drilled to hold the spoke nipples. The light metal rings around the holes is a thin brass flashing, the rear end of the eyelet reinforcement – with or without eyelet reinforcement, your drilled rims need rim tapes fitted to stop them puncturing inner tubes.
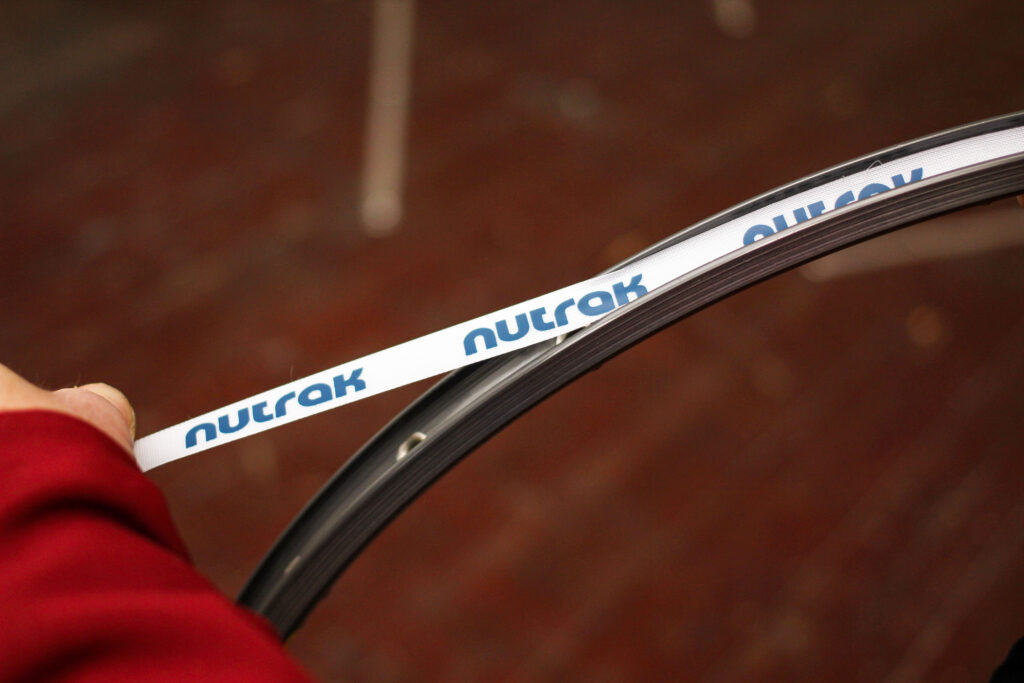
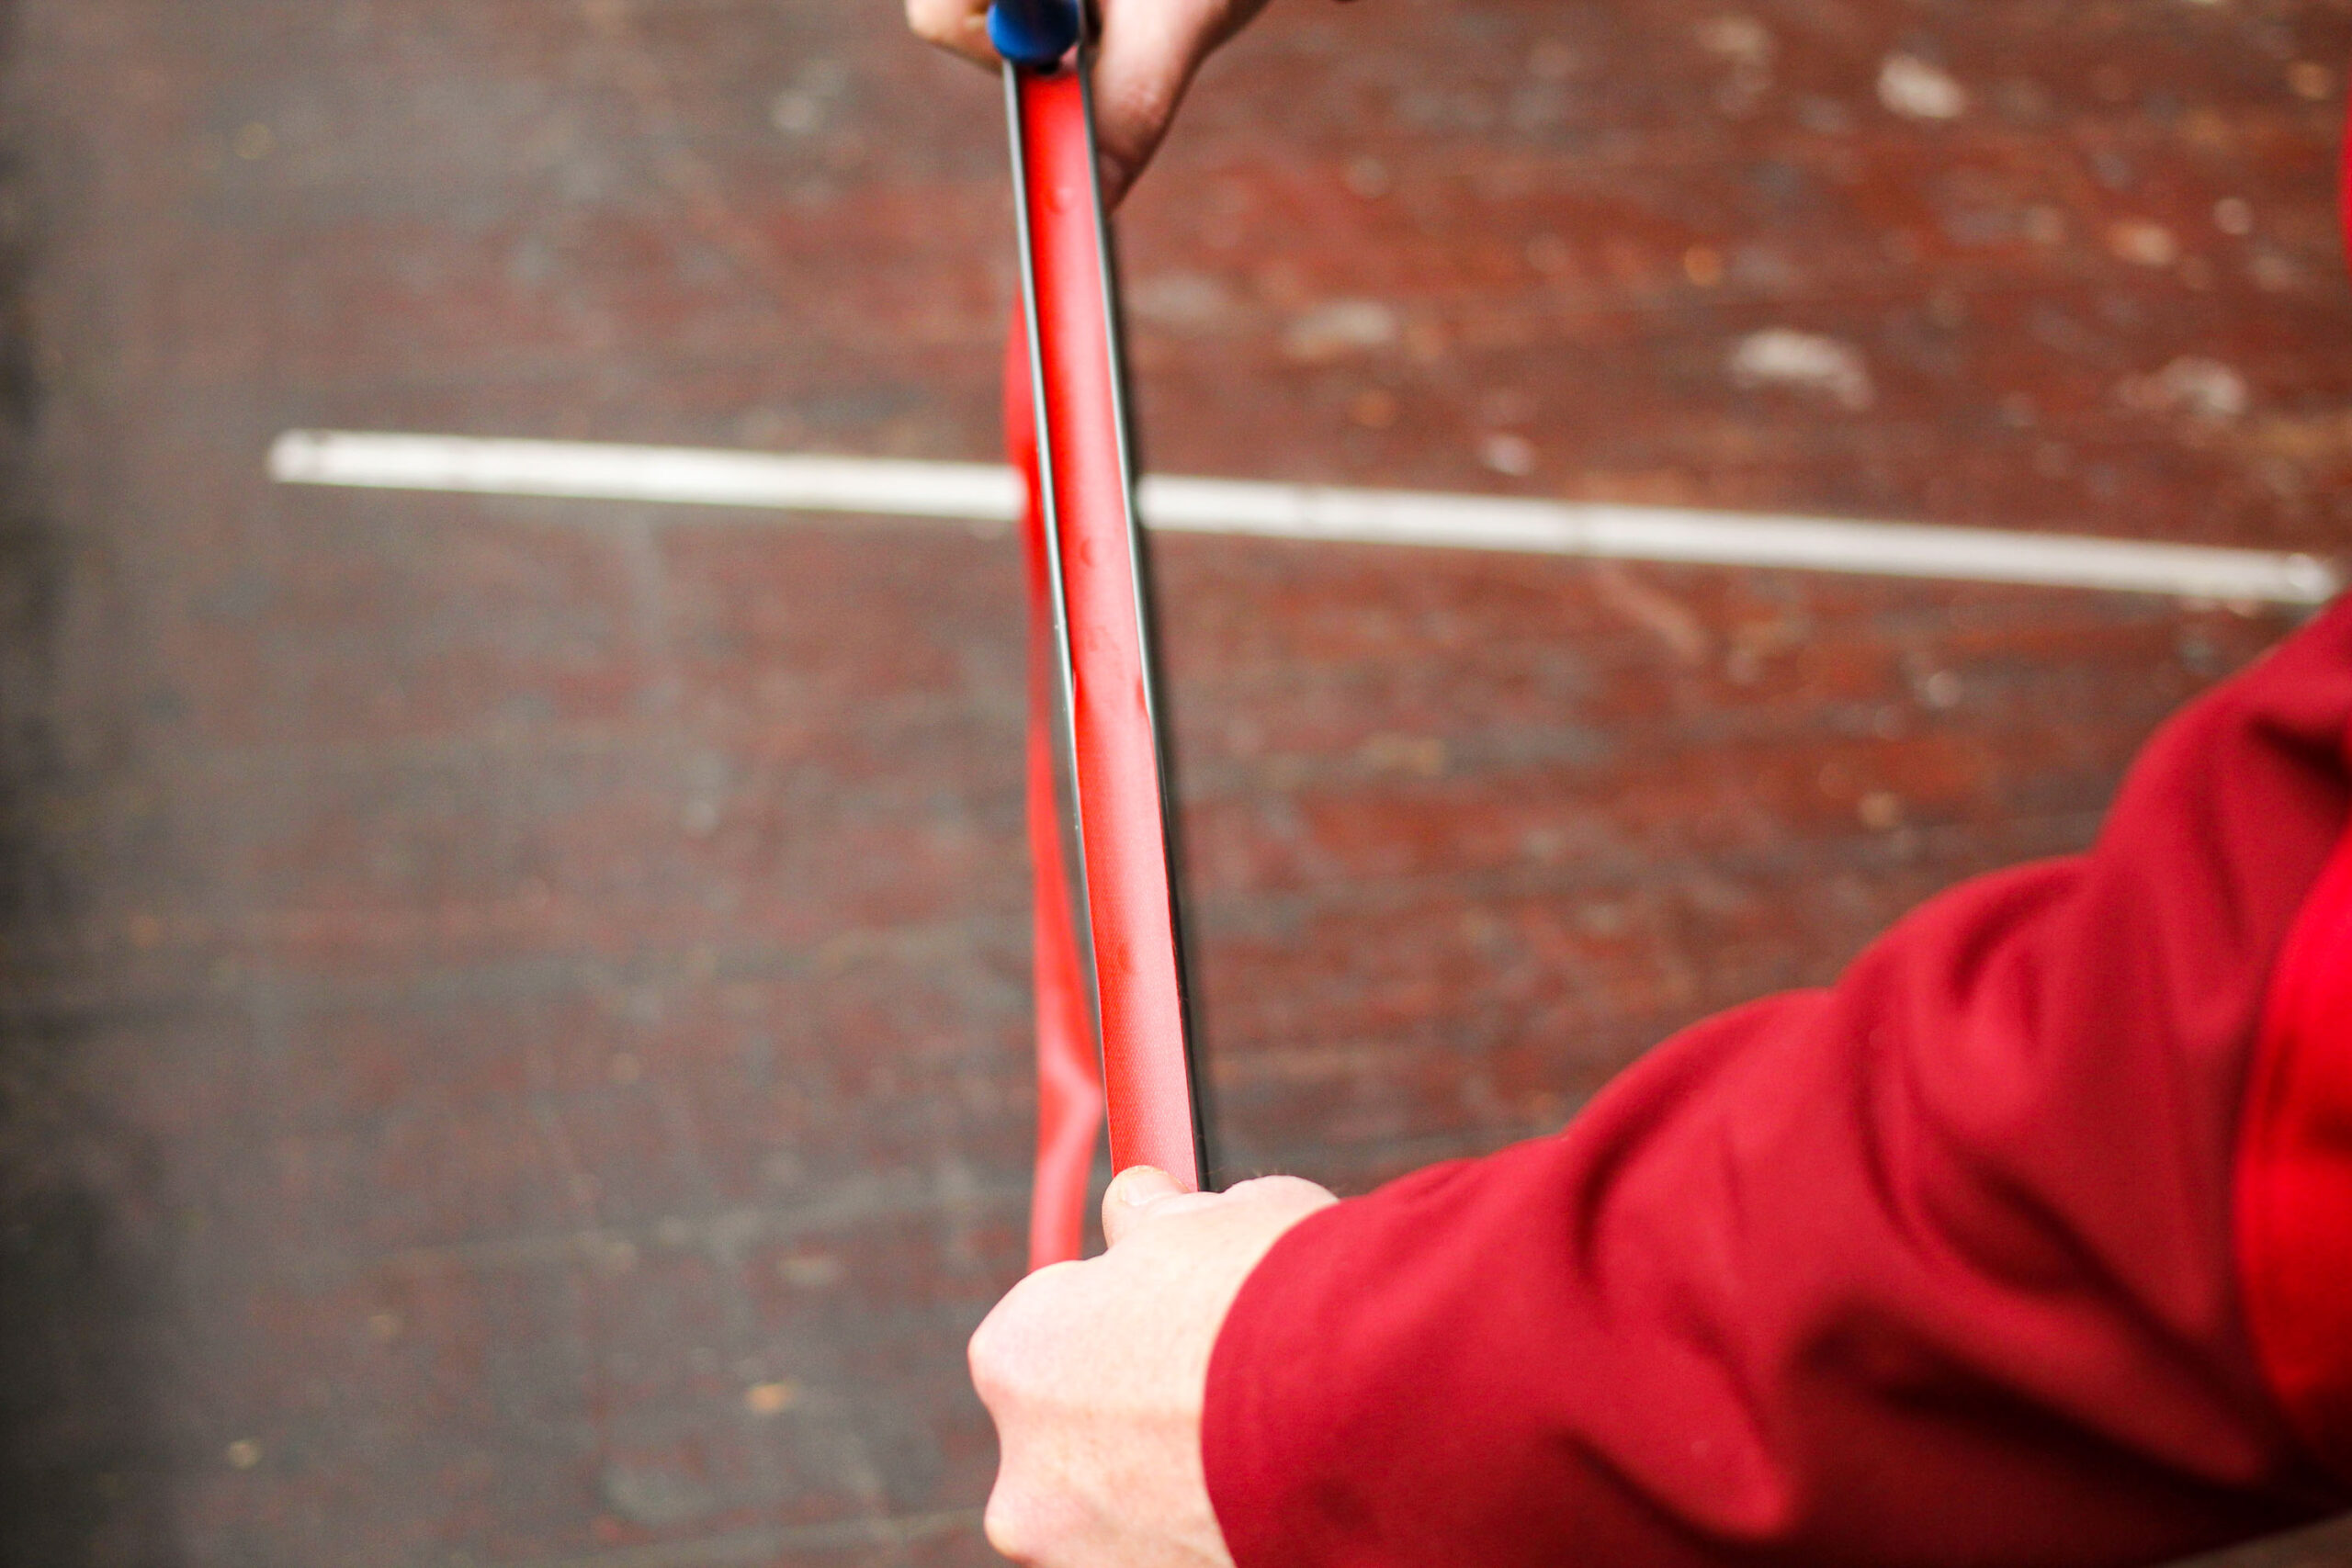
Looped tape
Take the joined loop and see that it is turned the right way, there is occasionally an inner and outer surface, but check anyway. When you’re ready, line up the valve hole in the tape loop, with the actual valve hole in the rim.
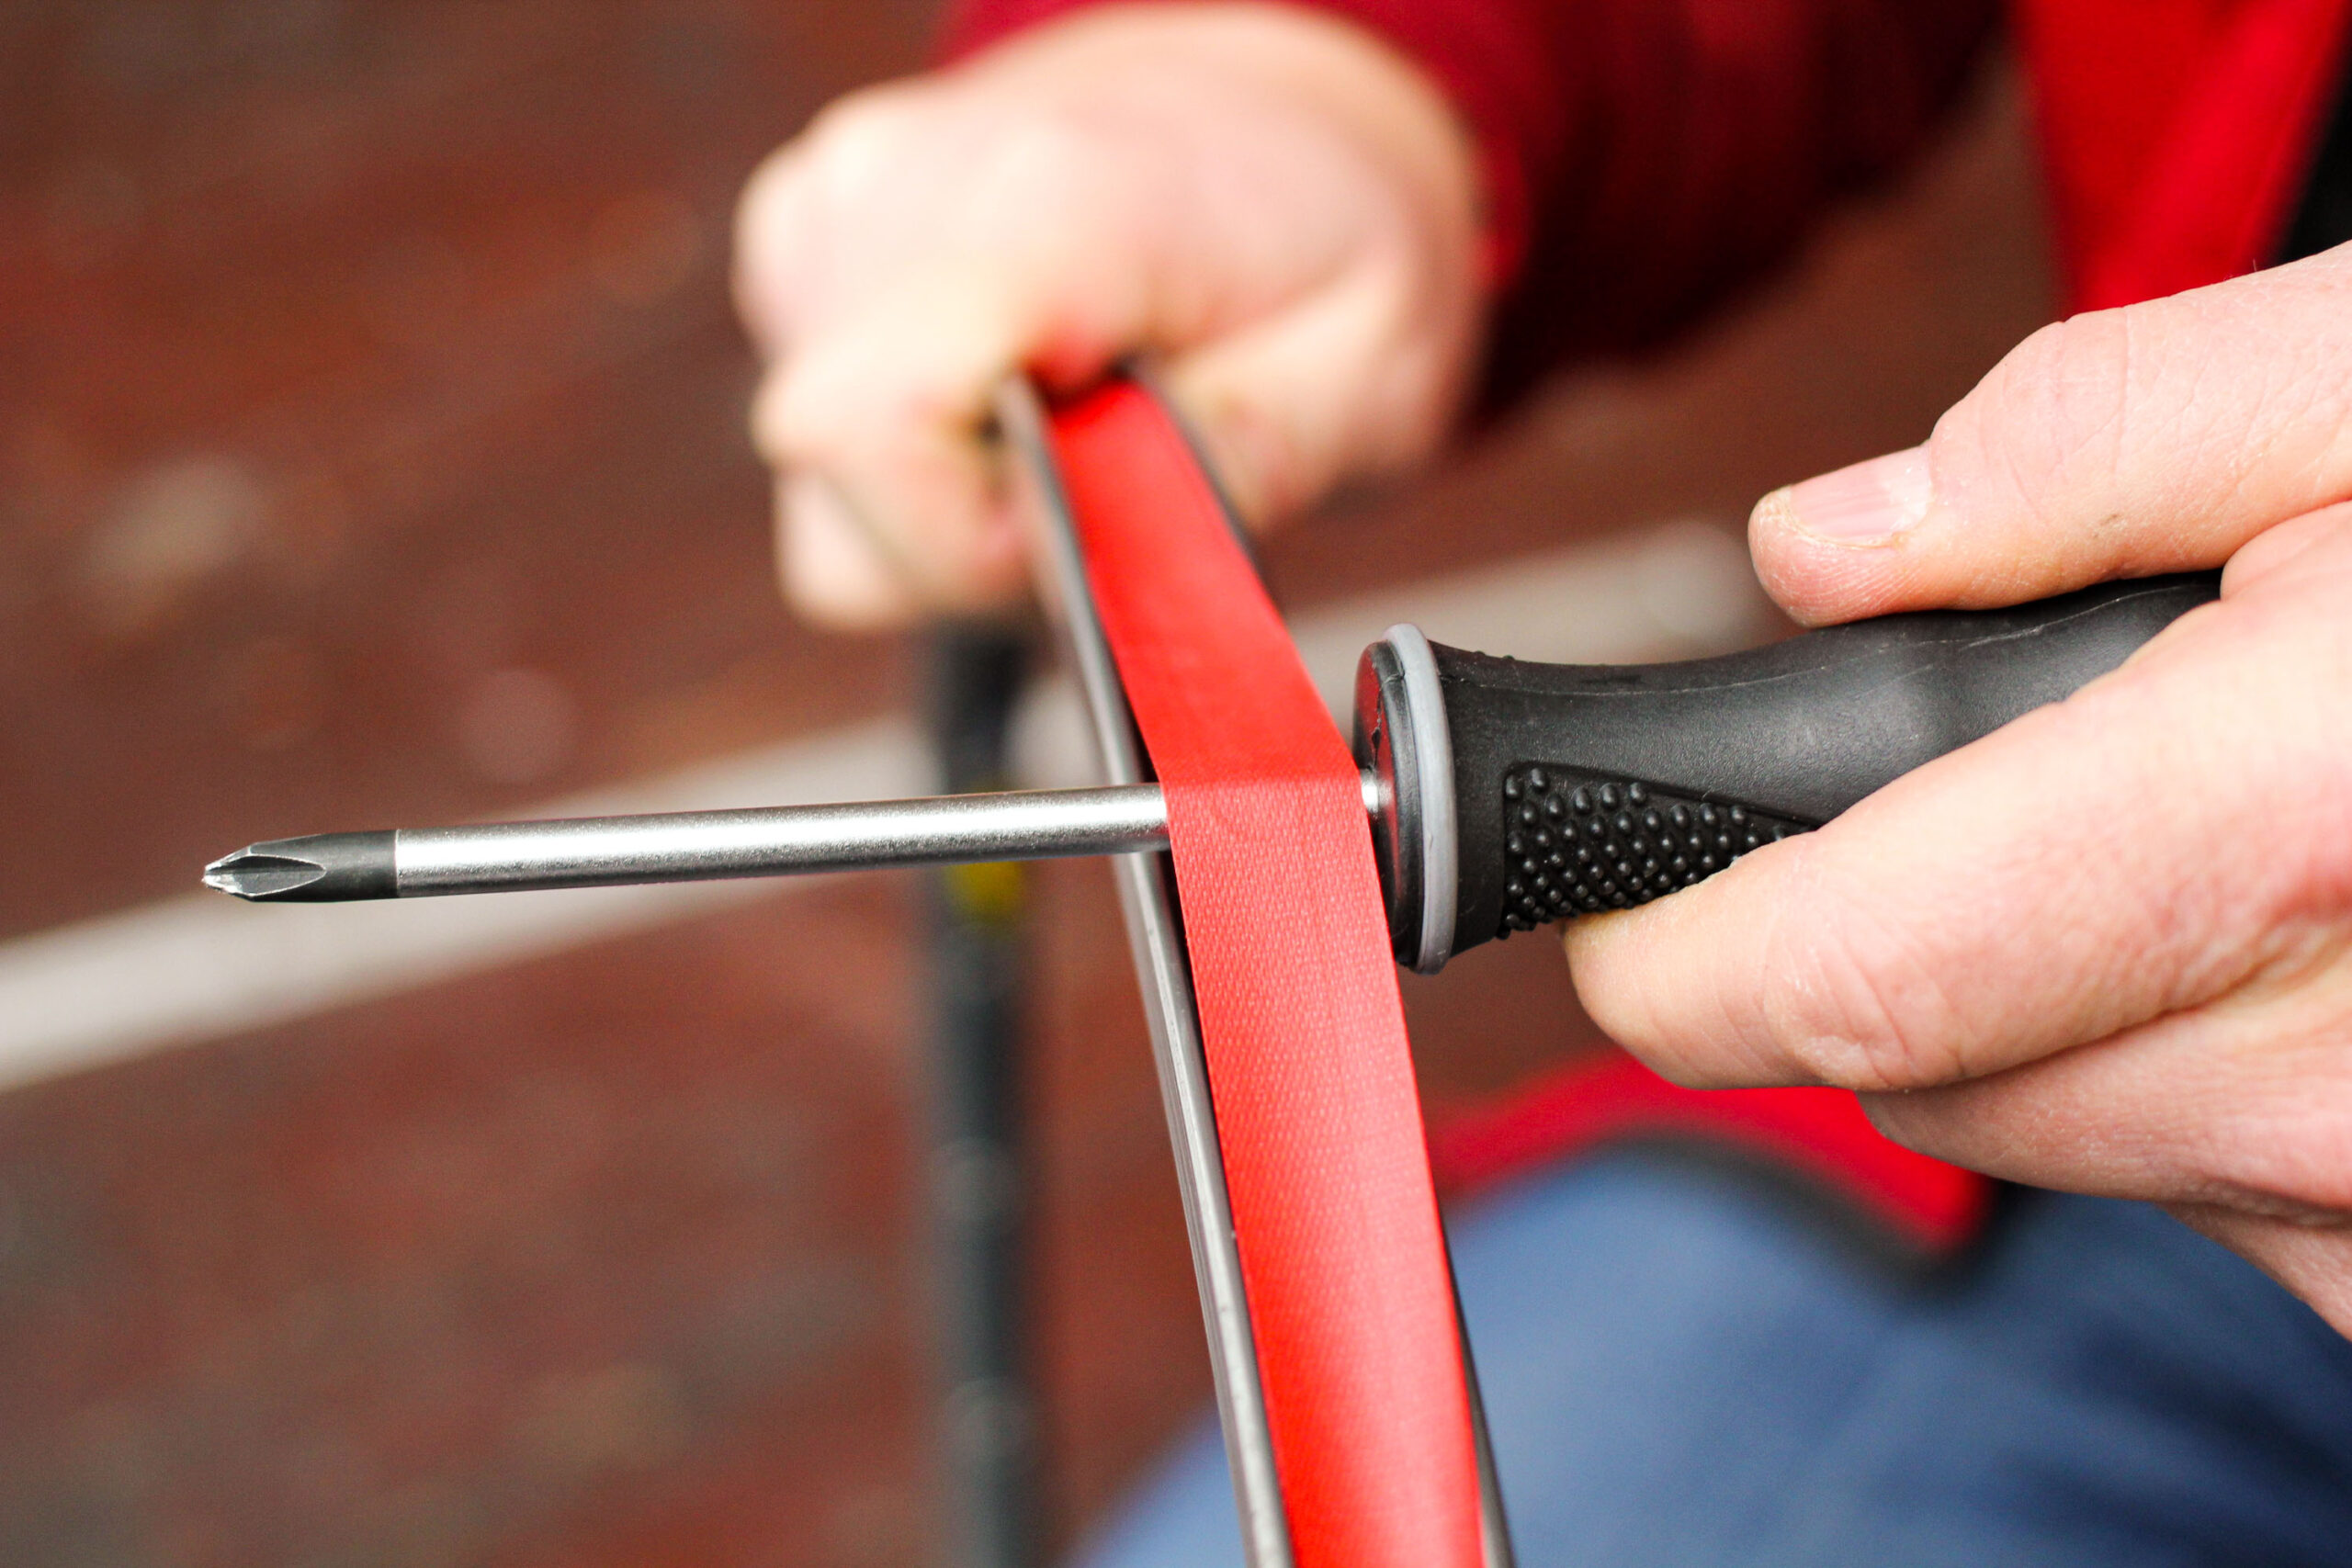
While you’re fitting the loop, it can, and will, slip around the rim as you manhandle it into position in the rim bed. We use a screwdriver shaft dropped through the lined up tape and rim valve hole to effectively lock them together while you’re fitting the remainder of the loop.
As you work around the rim circumference, away from the valve hole keep a good level of tension on the tape. This will cause the side of the tape to curl up a fraction, narrowing the tape and making it easier for it to be seated in the rim bed.
When you get to the last section is can be very tricky to snap it over the rim wall with you fingers as they get in the way a bit. We use another screwdriver instead. When you get to the last six inches or so, slide the shaft of the screwdriver under the tape and use it to lever the last bit into position. After it snaps into the rim bed run the screwdriver right around the outer edge of the rim (as shown) to even out the tape tension around the rim. Remove the locking screwdriver from the valve hole and carefully withdraw the one you’ve just used to install and even out the tape.
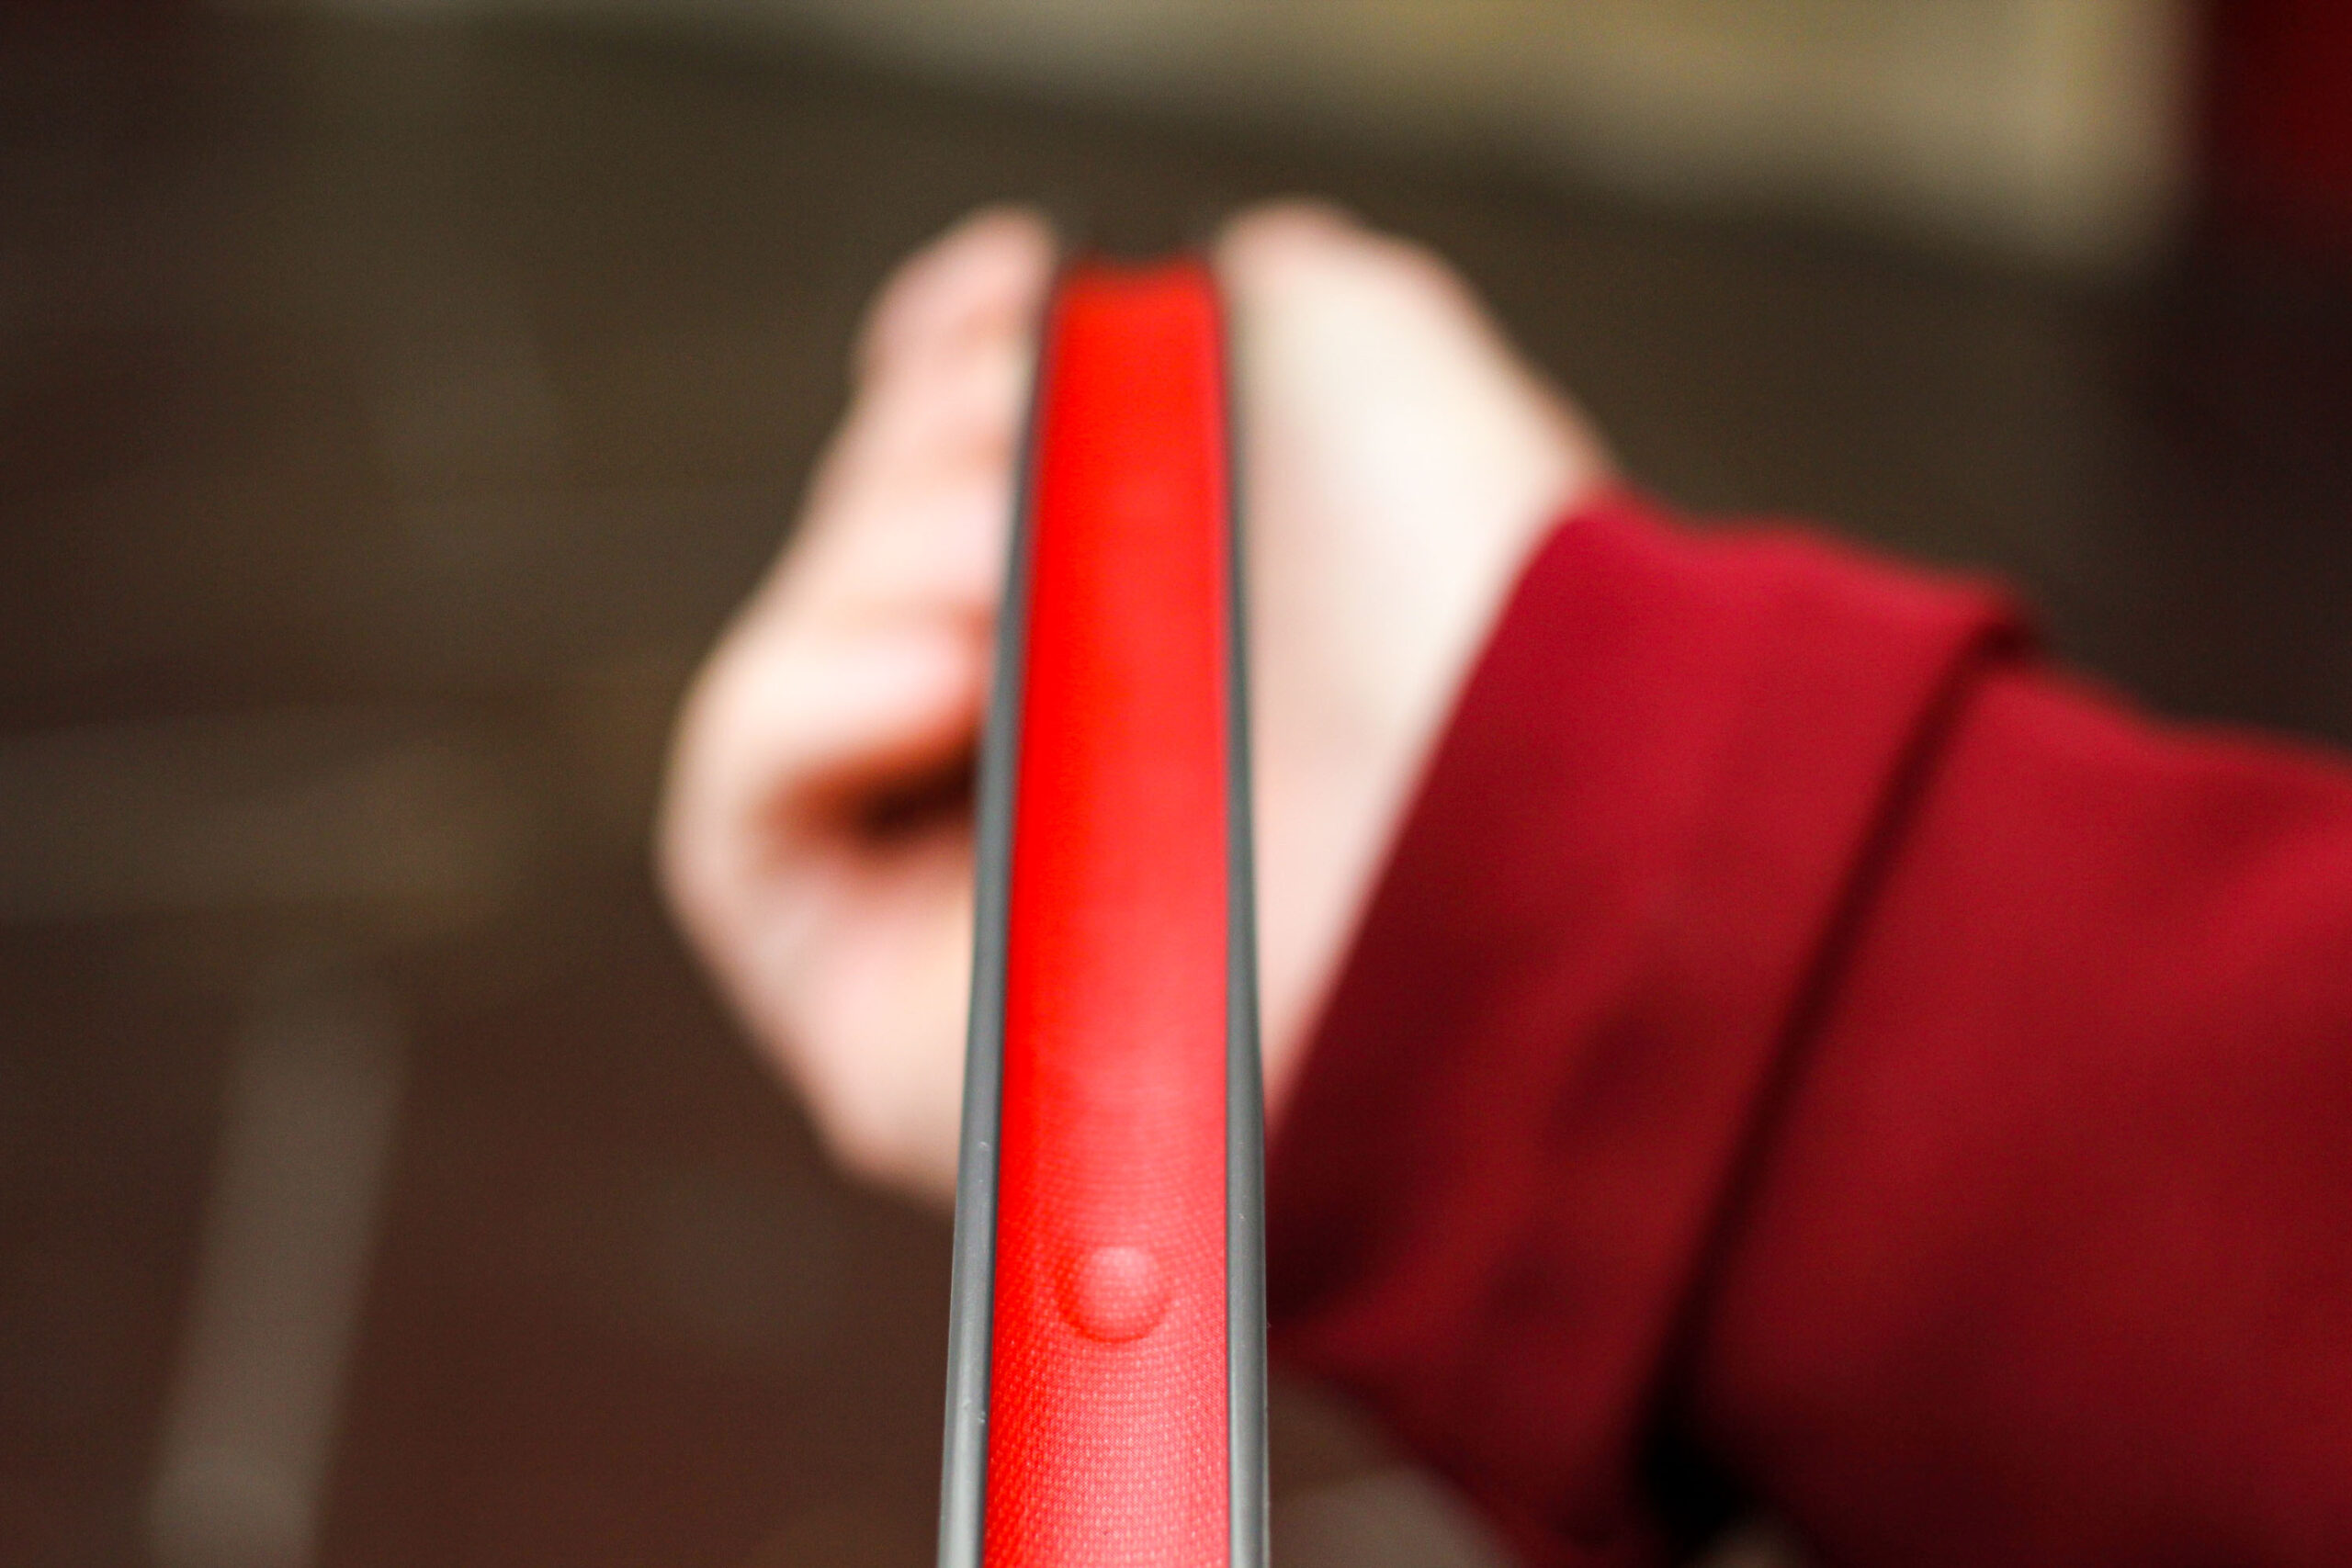
Give the tape a visual inspection to ensure that it is fitted squarely into the rim bed and isn’t creeping up the sidewalls – which is why buying the right width tape for your rims is important.
Fabric self adhesive rim tape
Traditionalists will love the fabric tape with self adhesive backing, it comes on a roll and in different widths. It’s probably the easiest rim tape to fit.
As with the loop type, start by lining up the precut valve hole.

Again like the loop rim tape as you apply it you should try to maintain a good even tension. This will help seat the tape and ensure the tape sticks well to the rim bed.
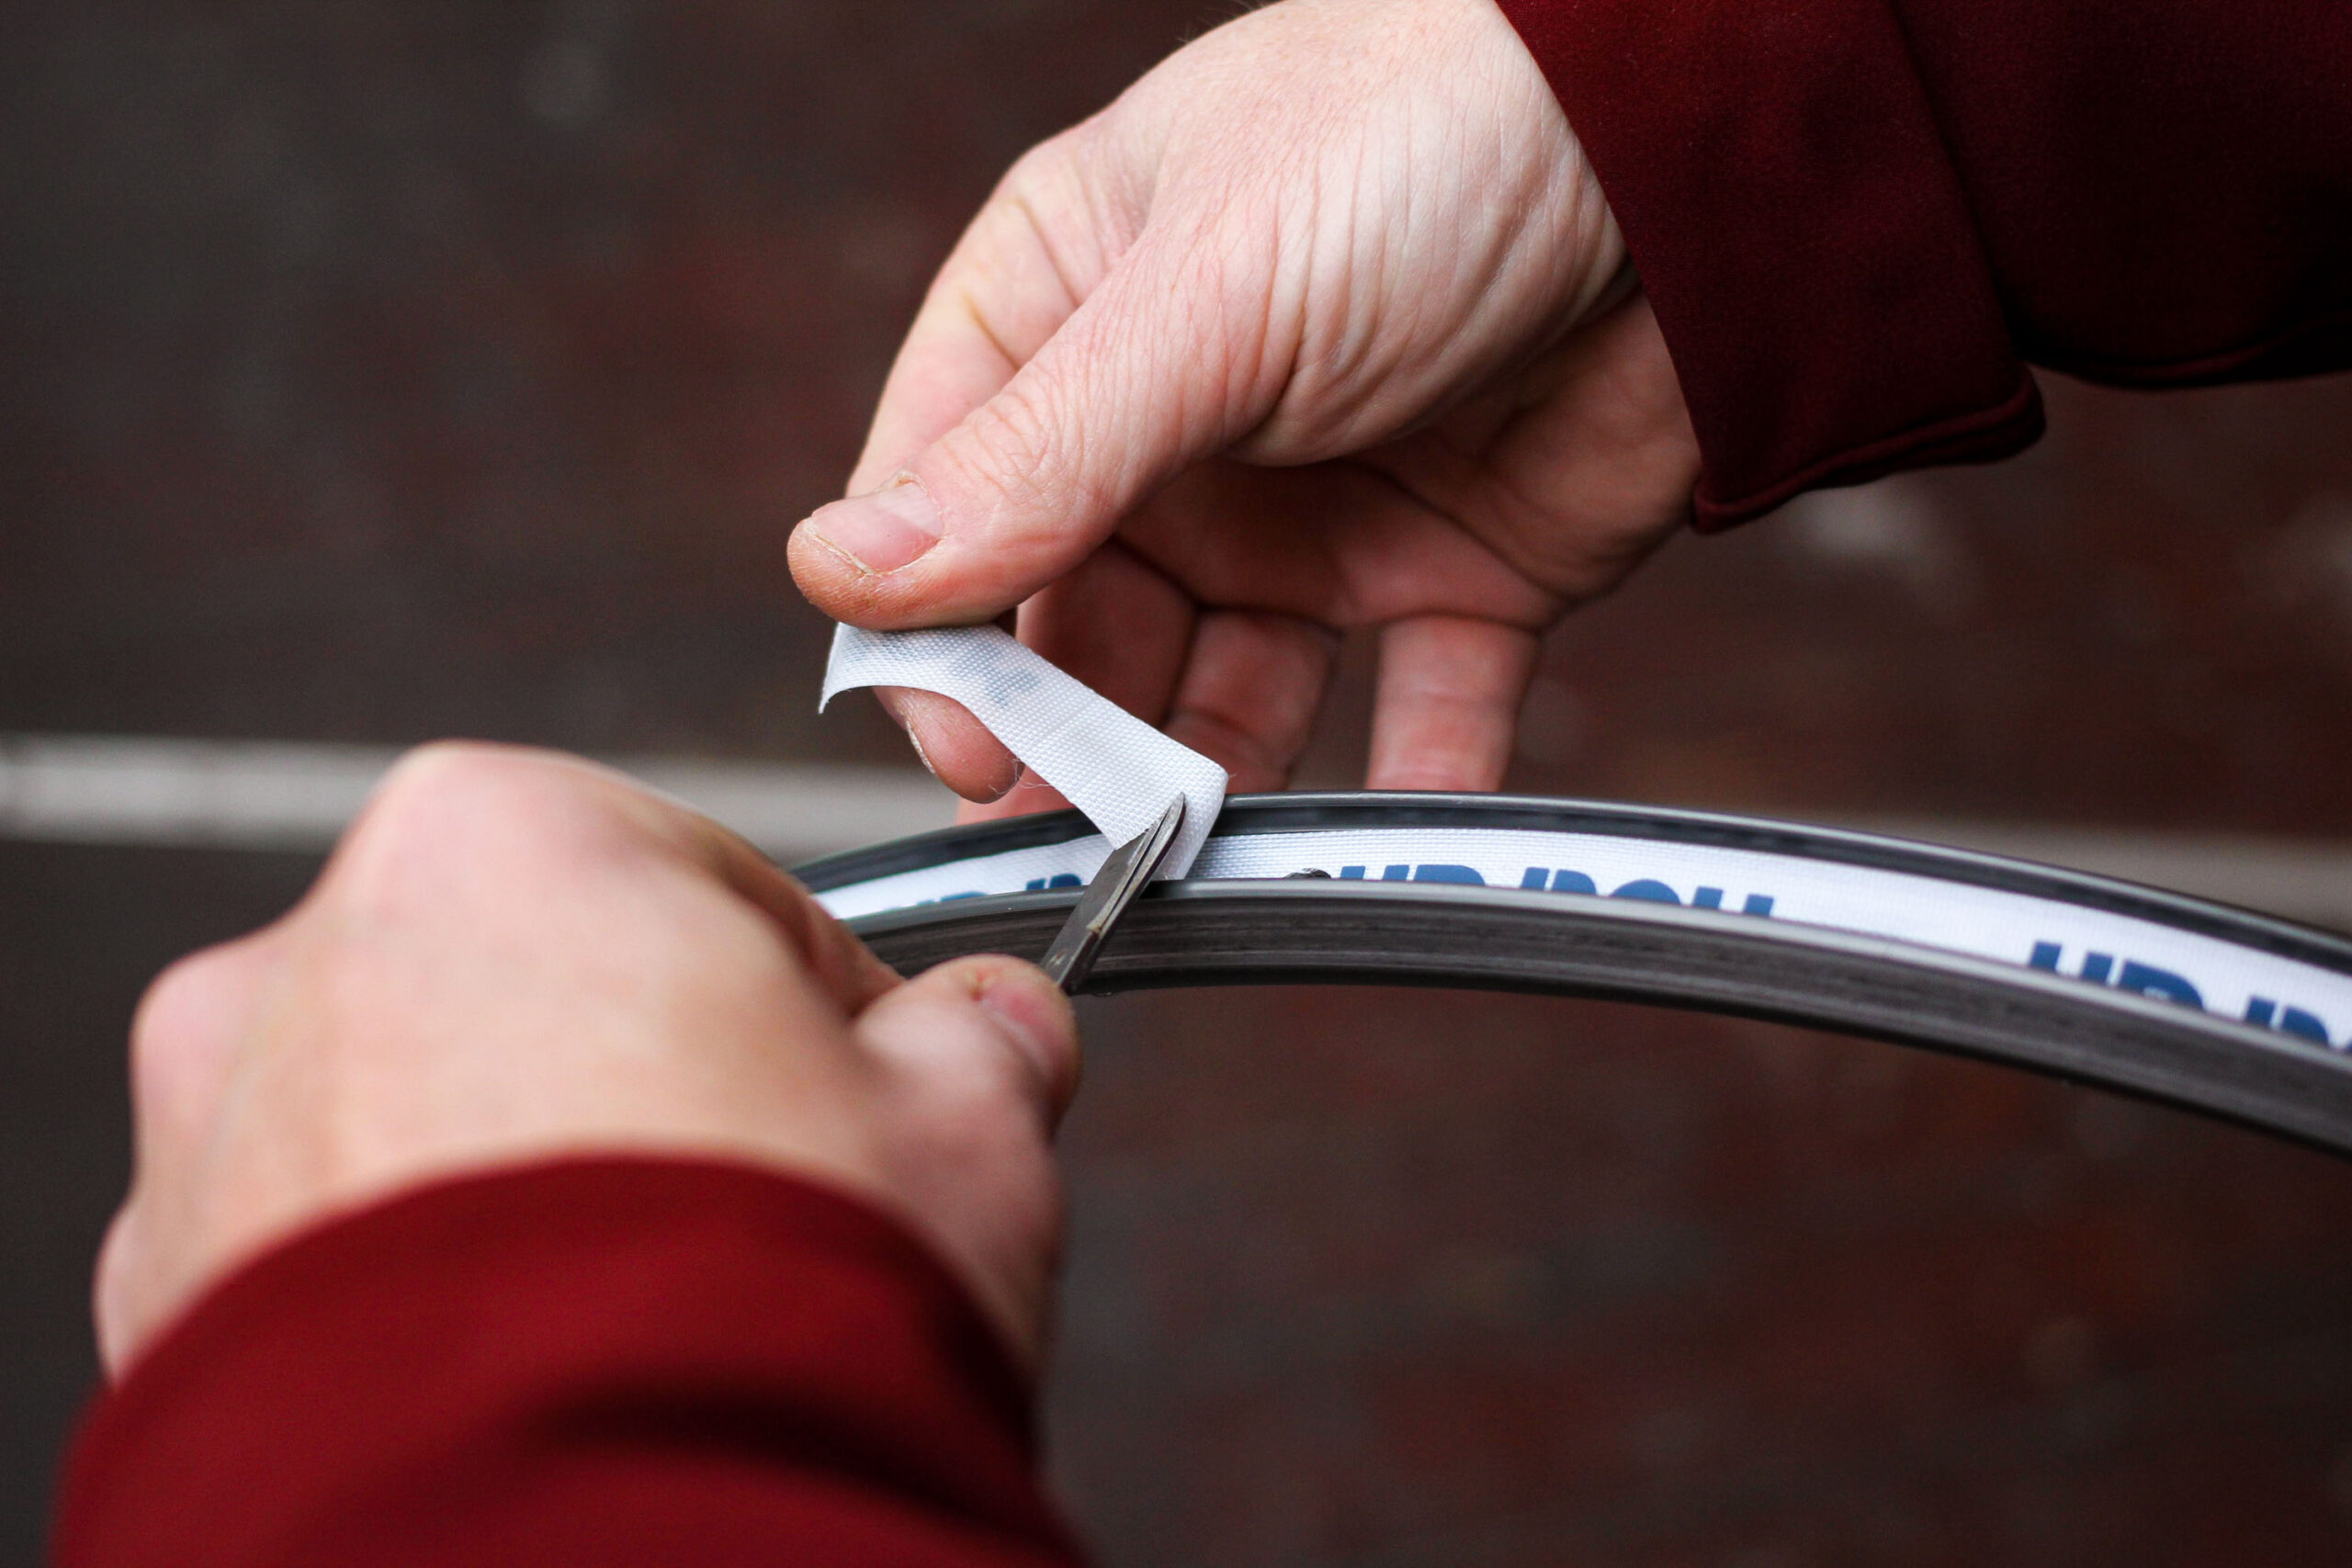
The roll of tape will be a bit longer than the rim, so use a sharp pair of scissor to trim the excess off. I like to trim the two ends for fit flush up next to each other, rather than overlapping.
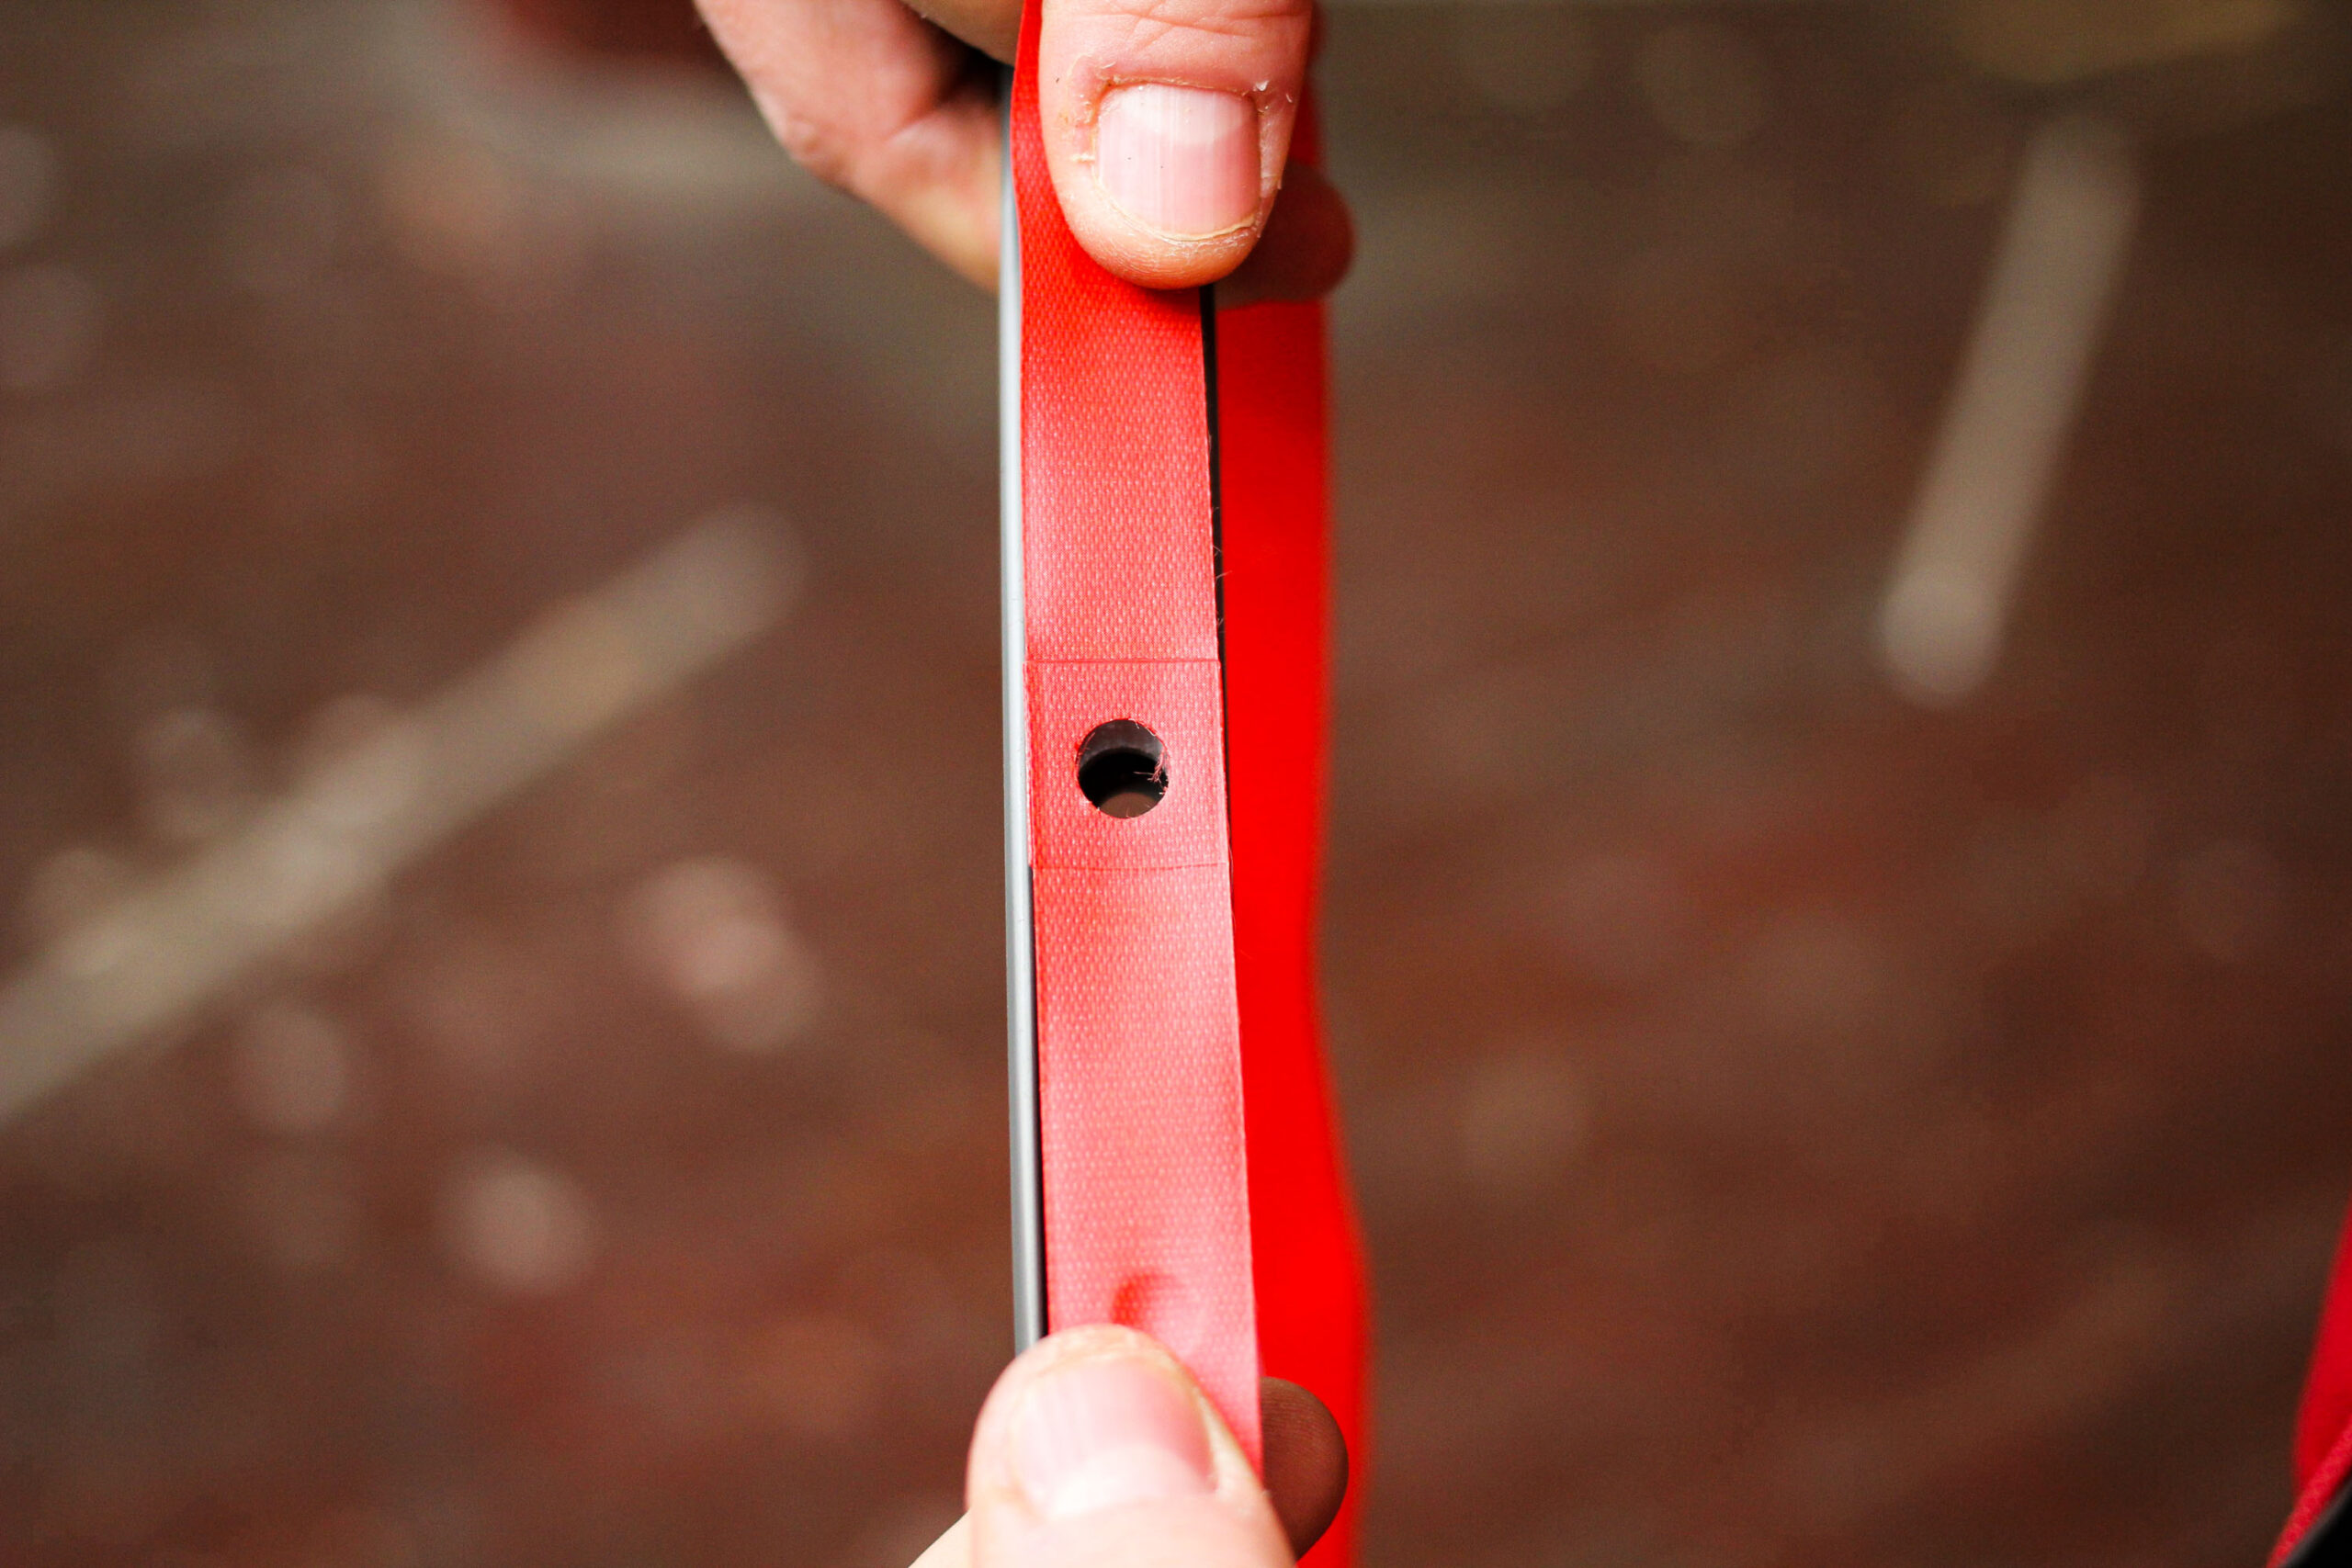
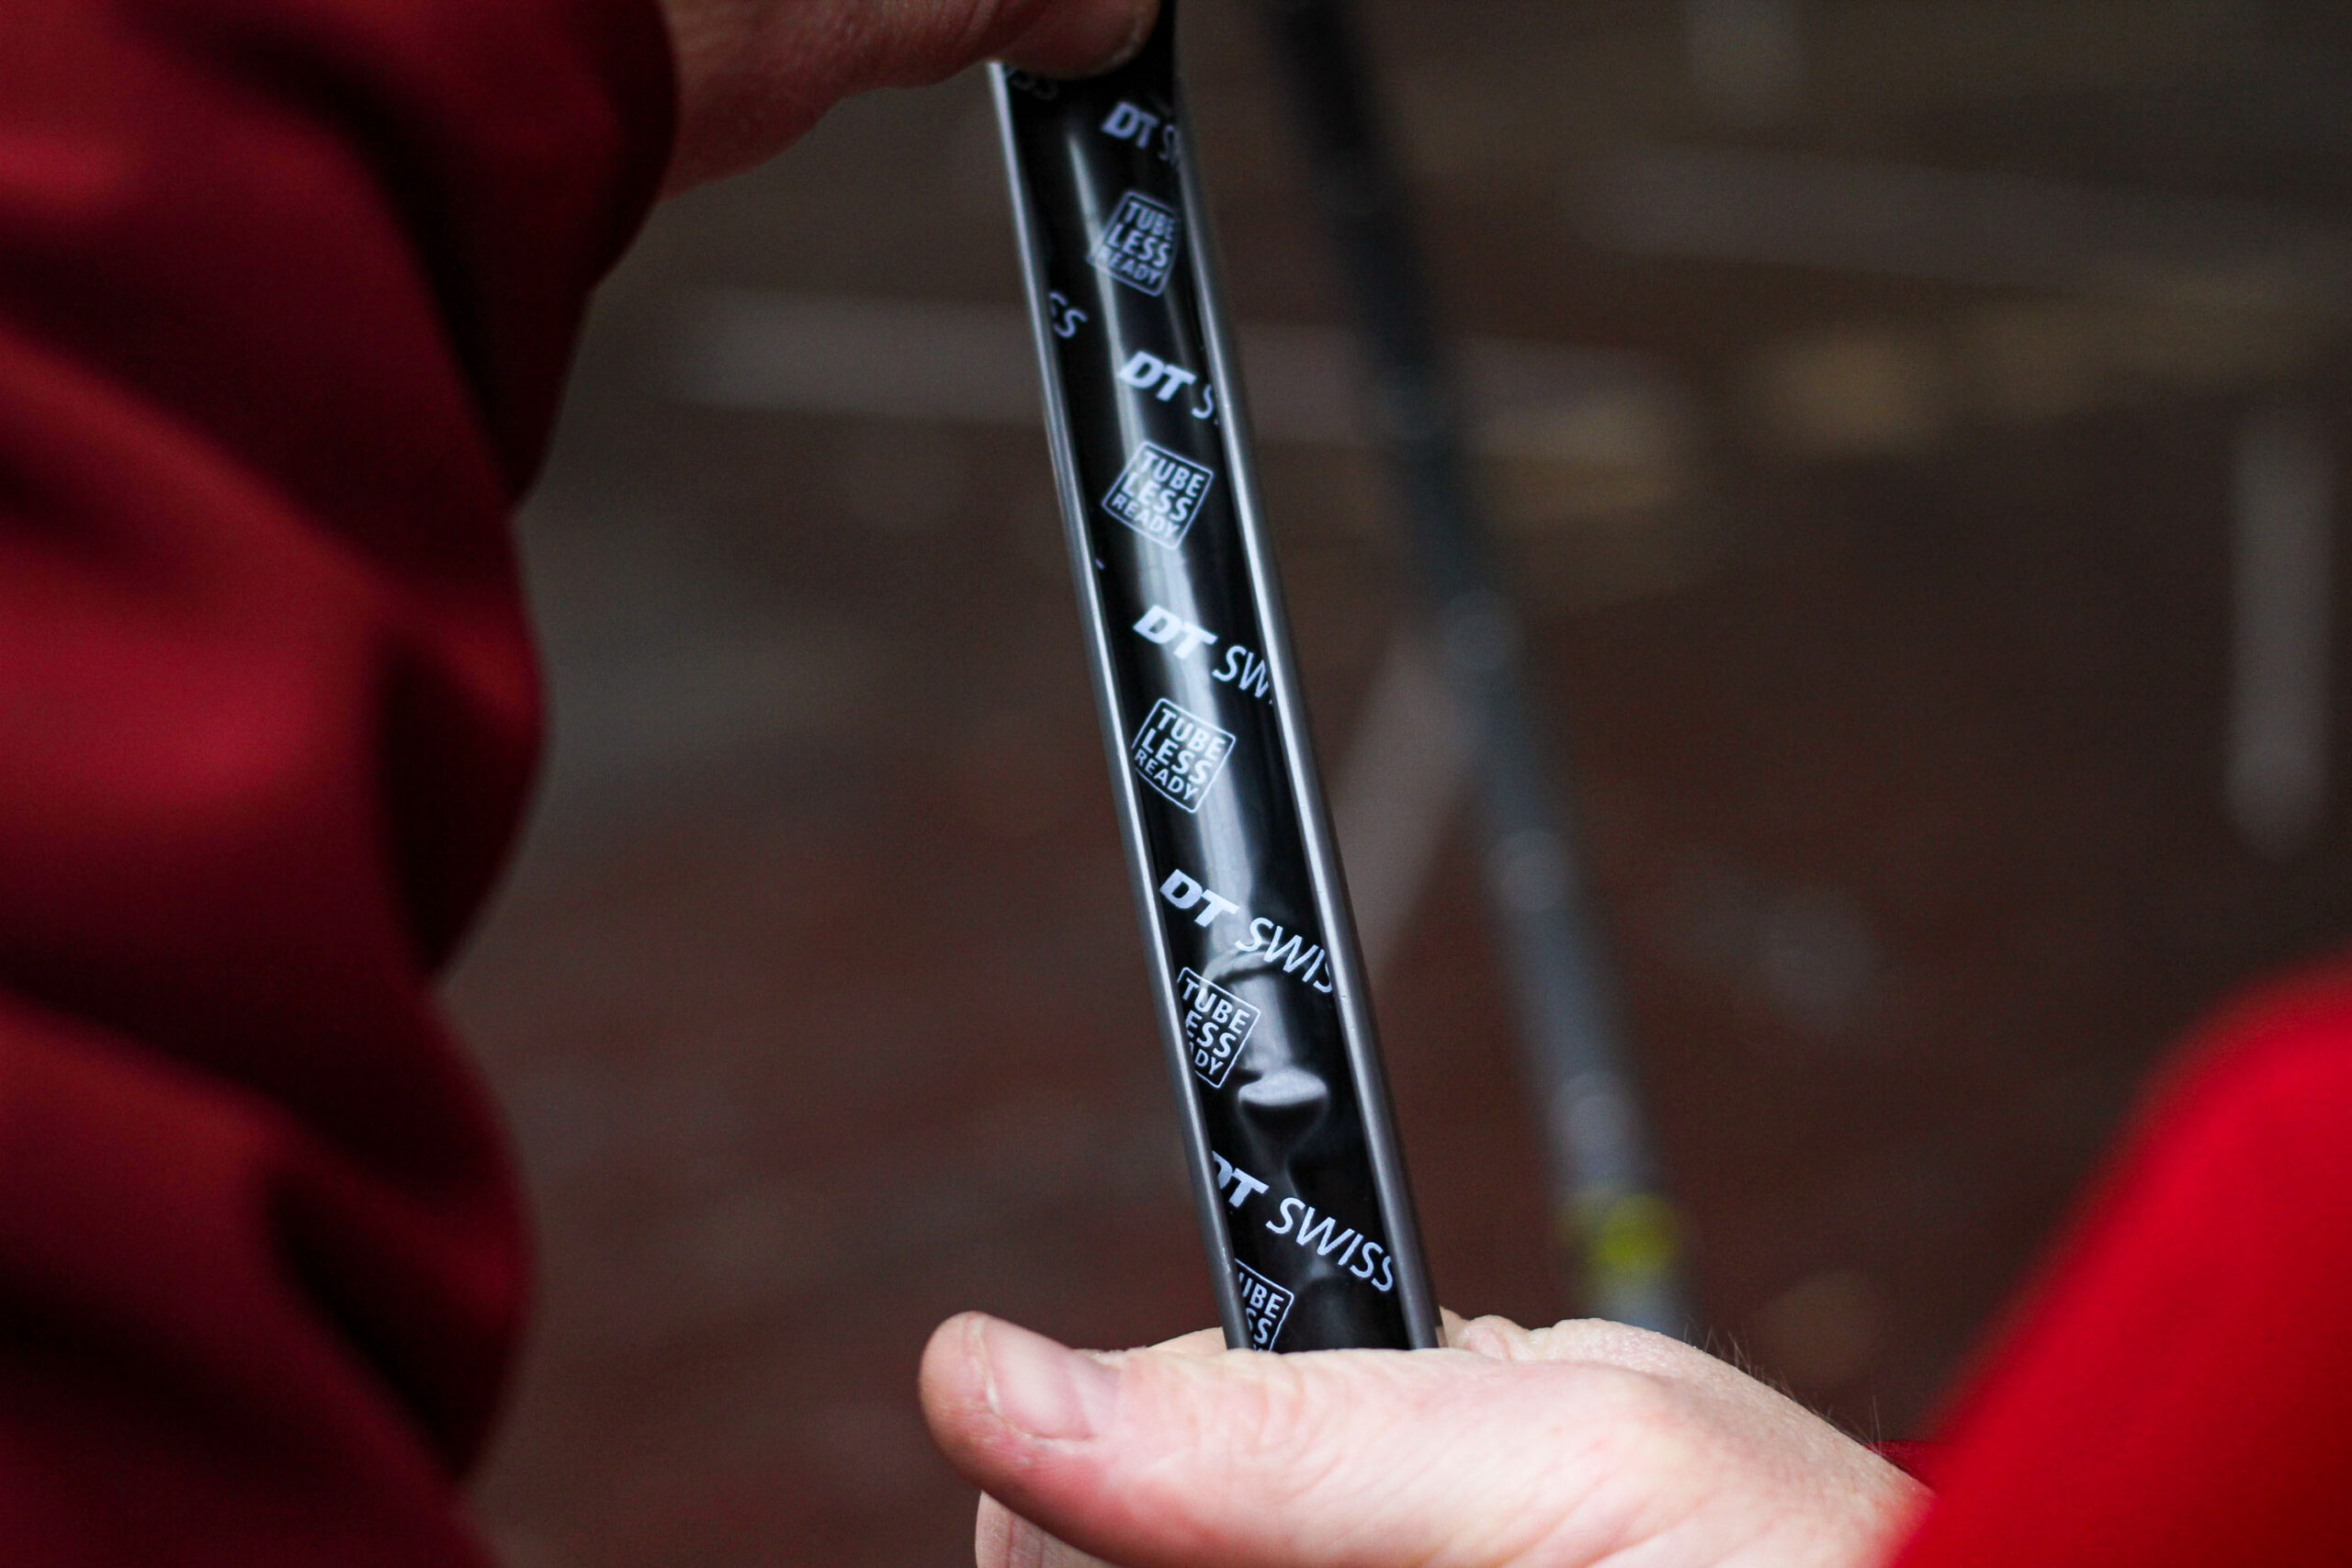
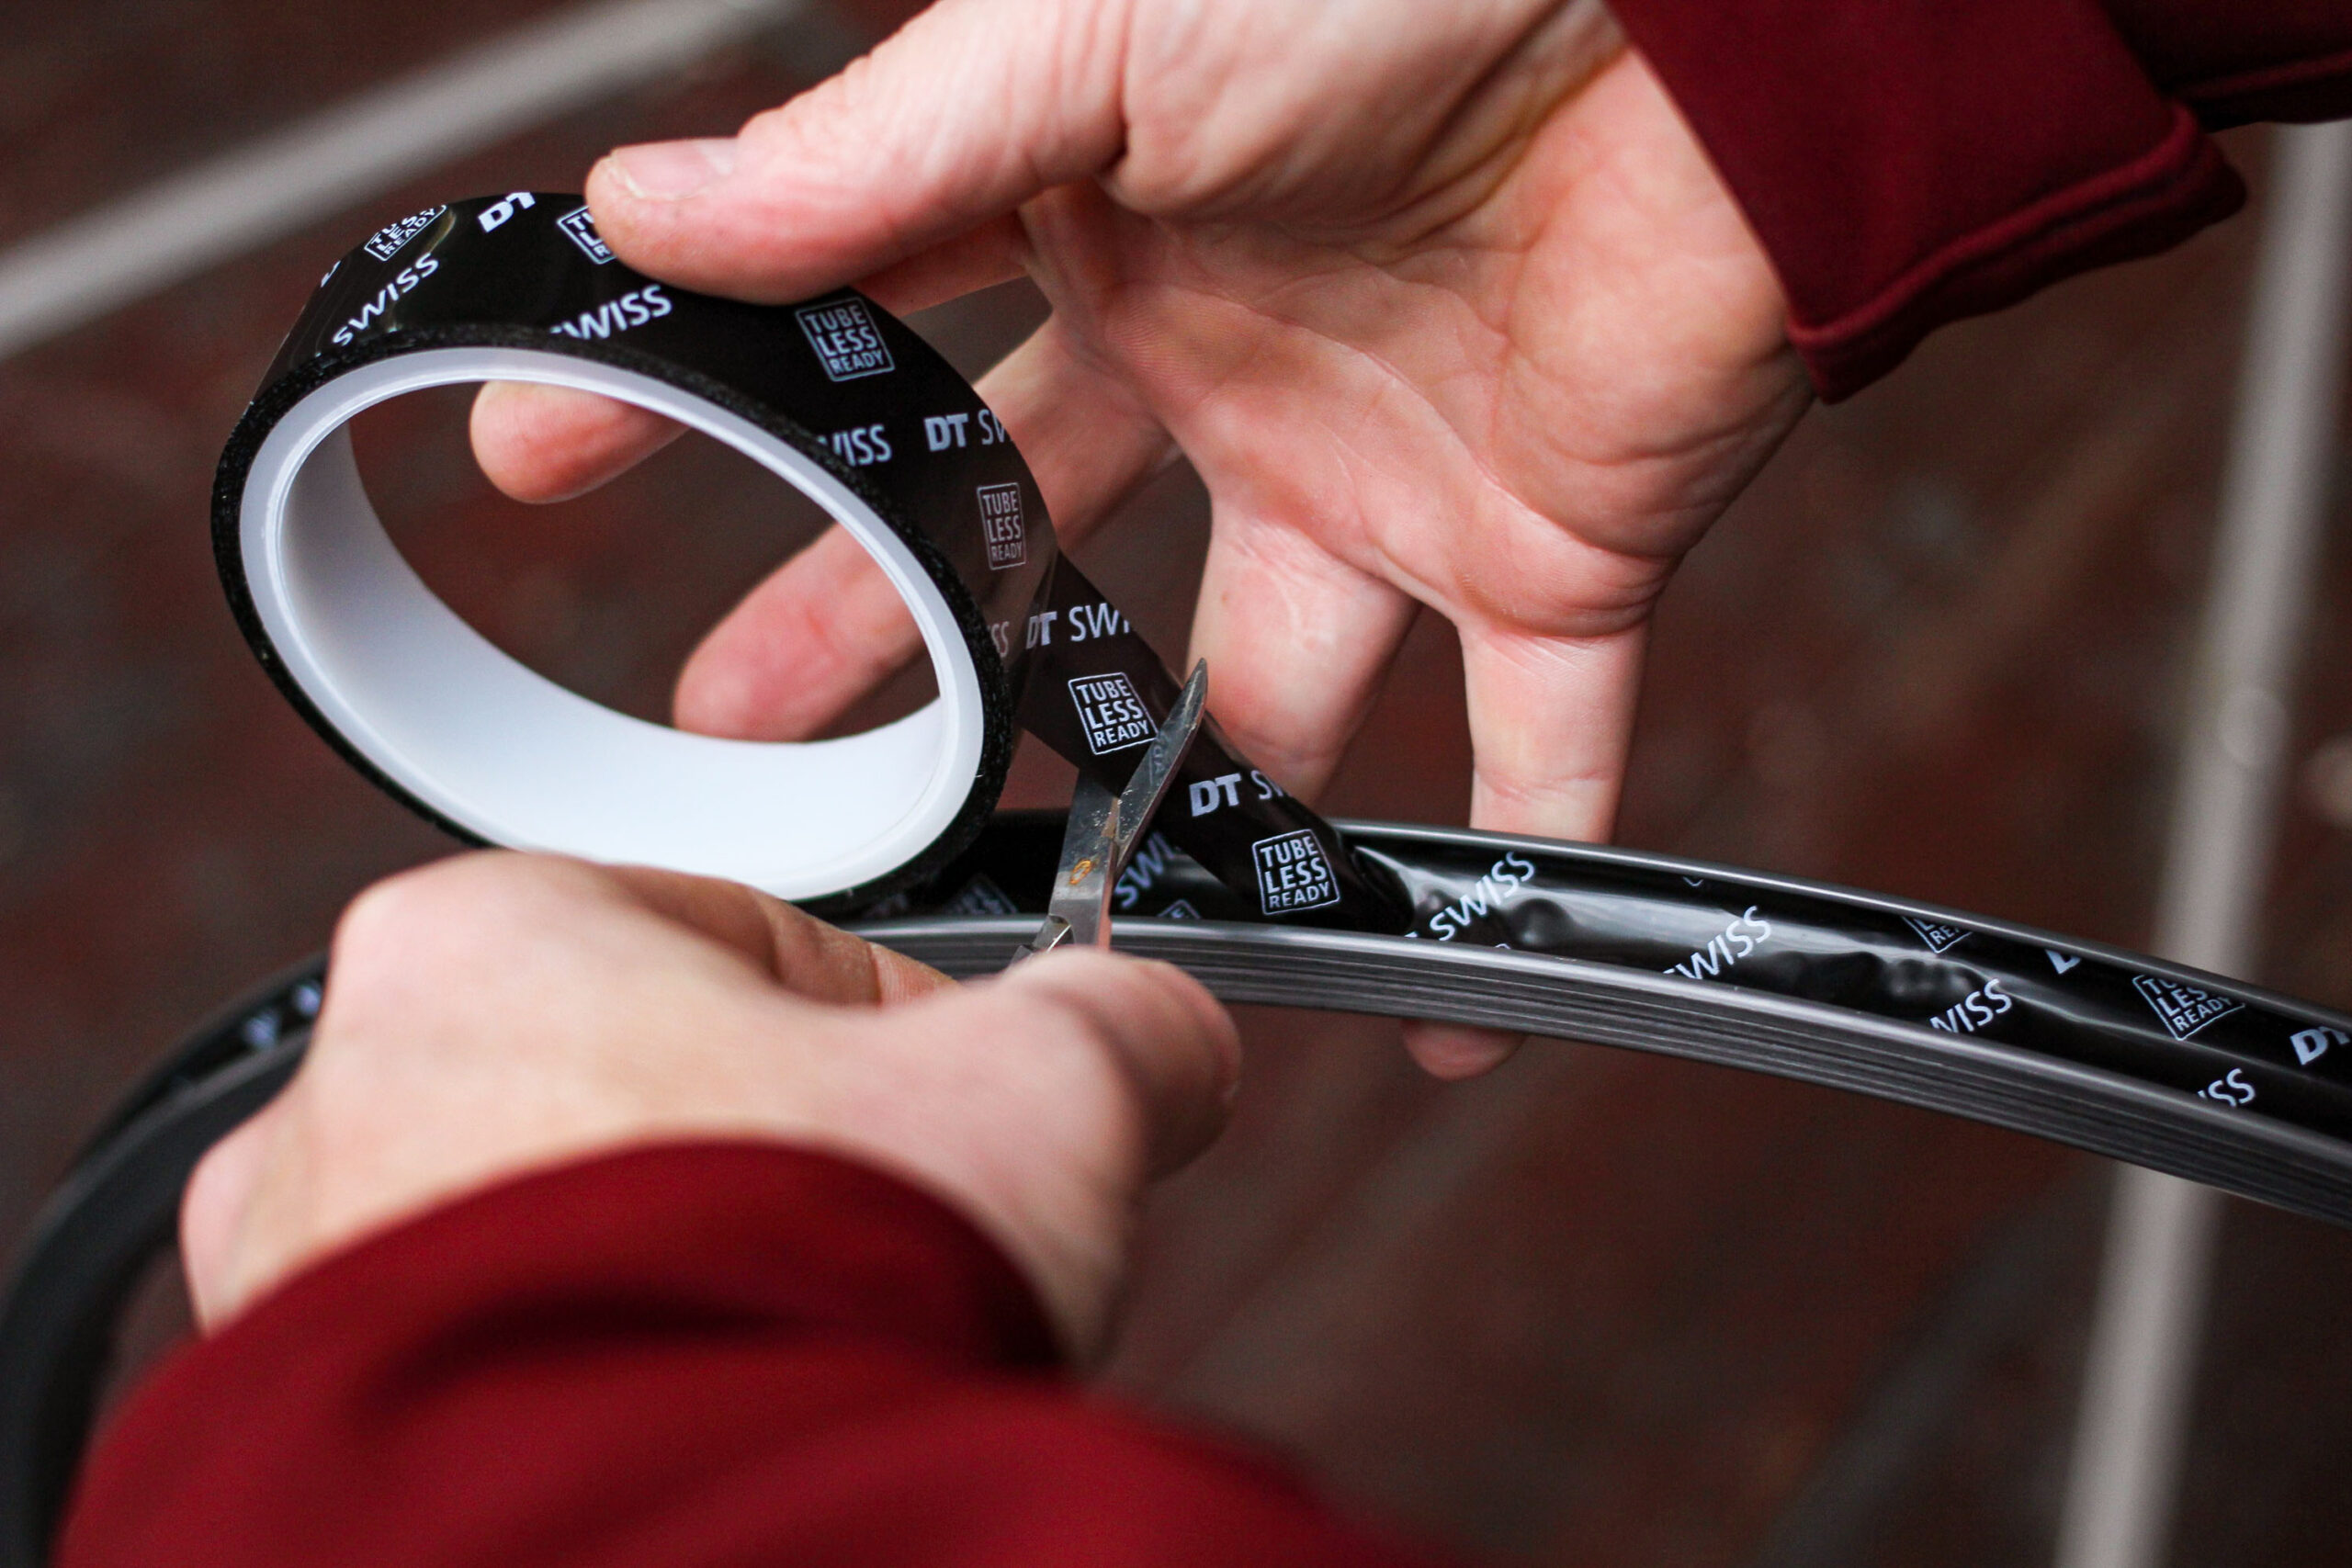
Tubeless conversion tape
Air tight tubeless tape like this fits in a similar way. It won’t have the precut valve hole in it, which doesn’t matter as you’re going to make one yourself… Start at the valve hole and cover it as you move around the circumference.
The tubeless tape needs to fit tightly and evenly into the rim bed – after all it has to also provide an air tight seal.
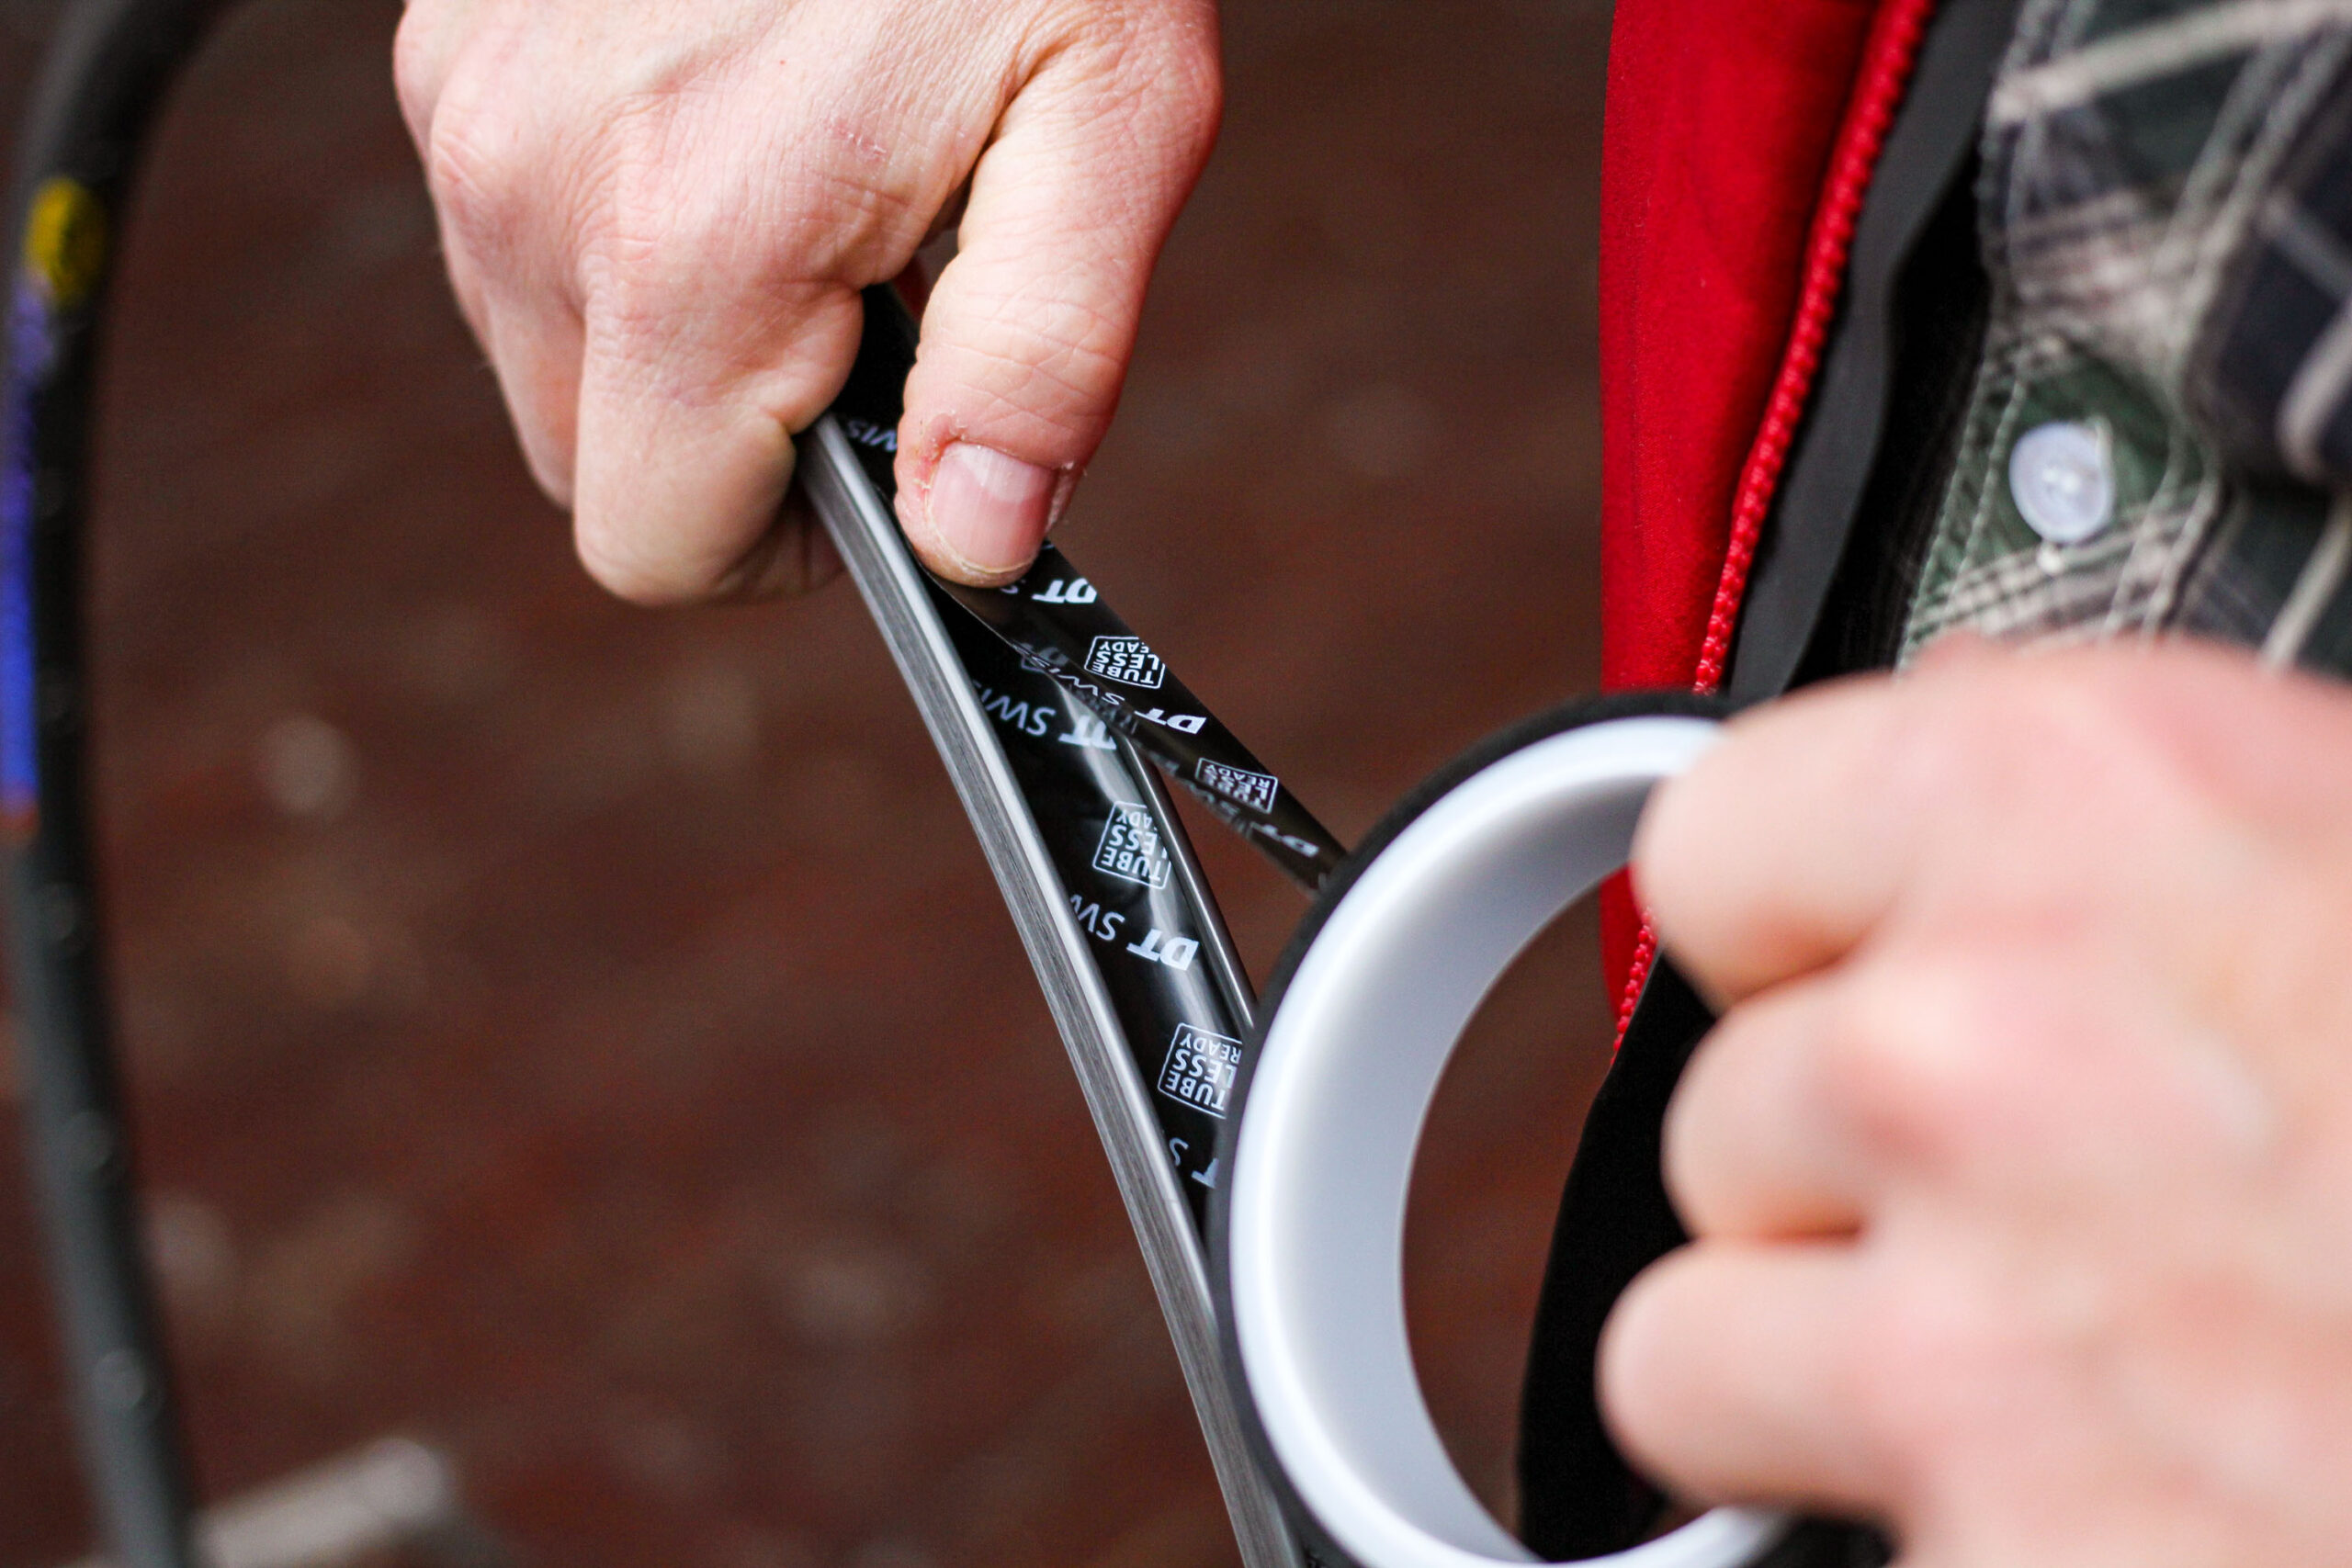
You might want to add a second wrap of tubeless tape to build up the height of the rim, which in turn helps make the tyre fit more tightly and speeds up the process of the tyre bead ‘finding’ the inside edge fo the rim wall – to create a seal.
Trim off neatly.
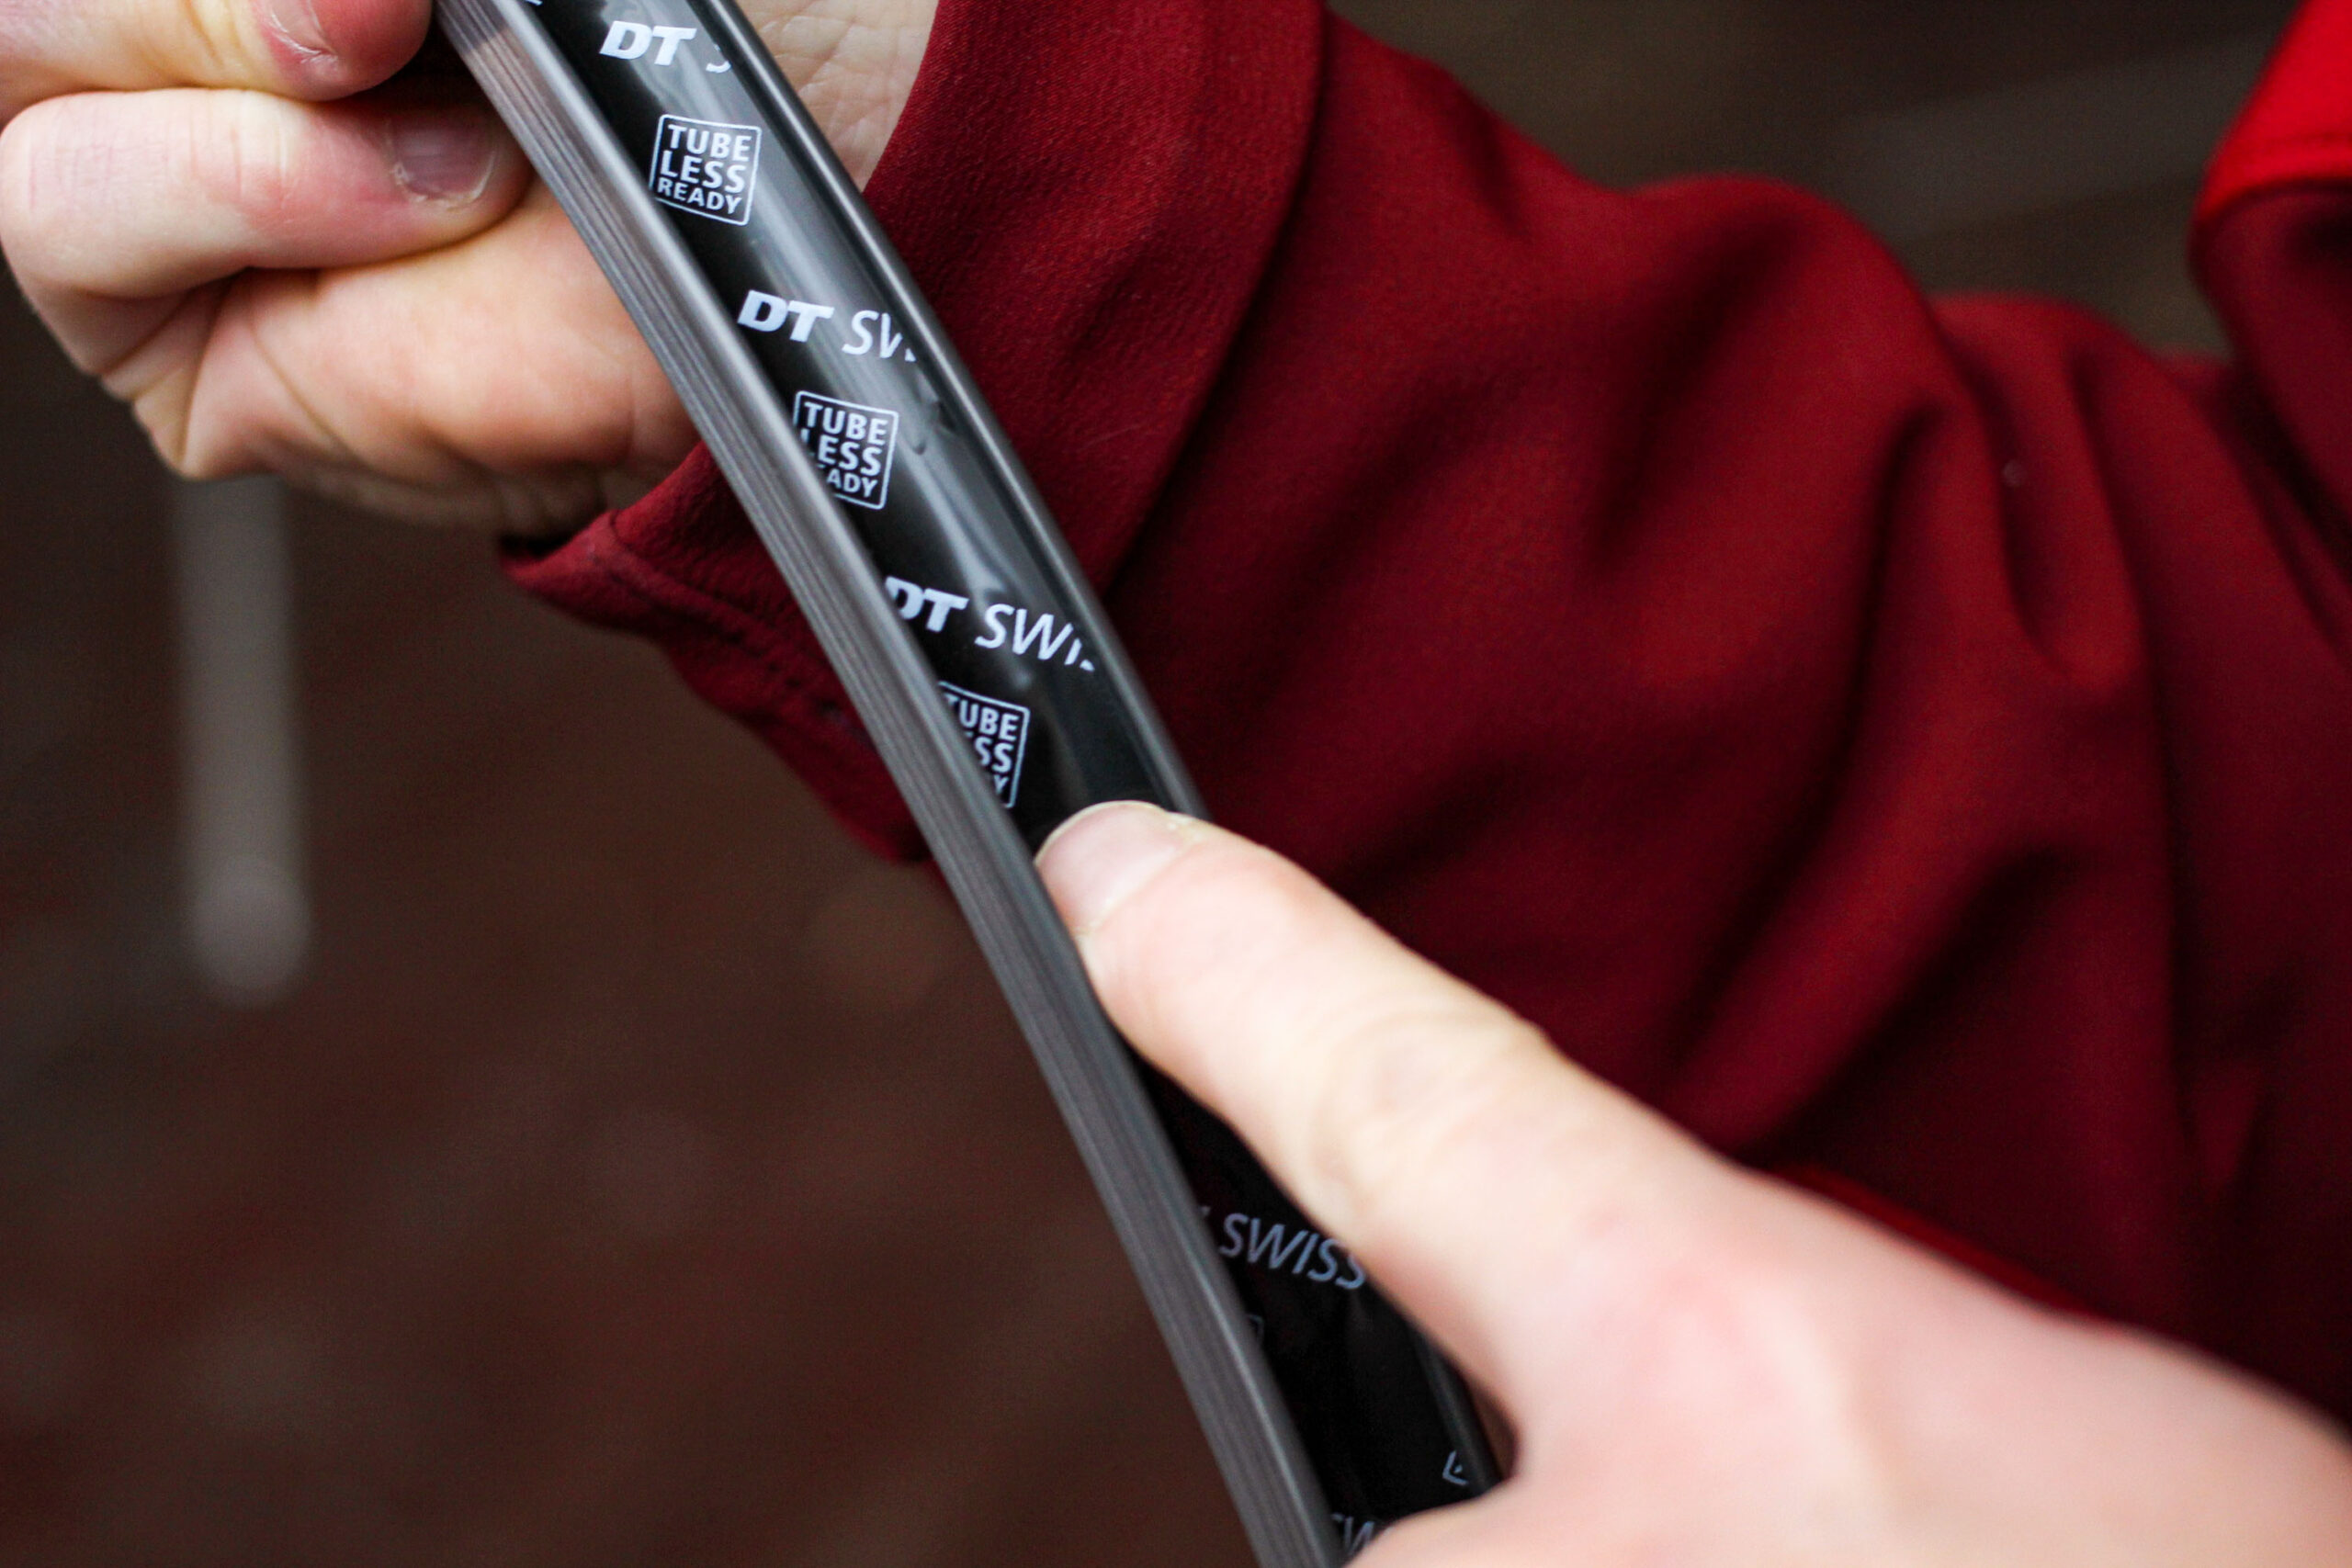
Work around the fitted tubeless tape ensuring it is well stuck to the rim with no air pockets, ripples, folds or creases.
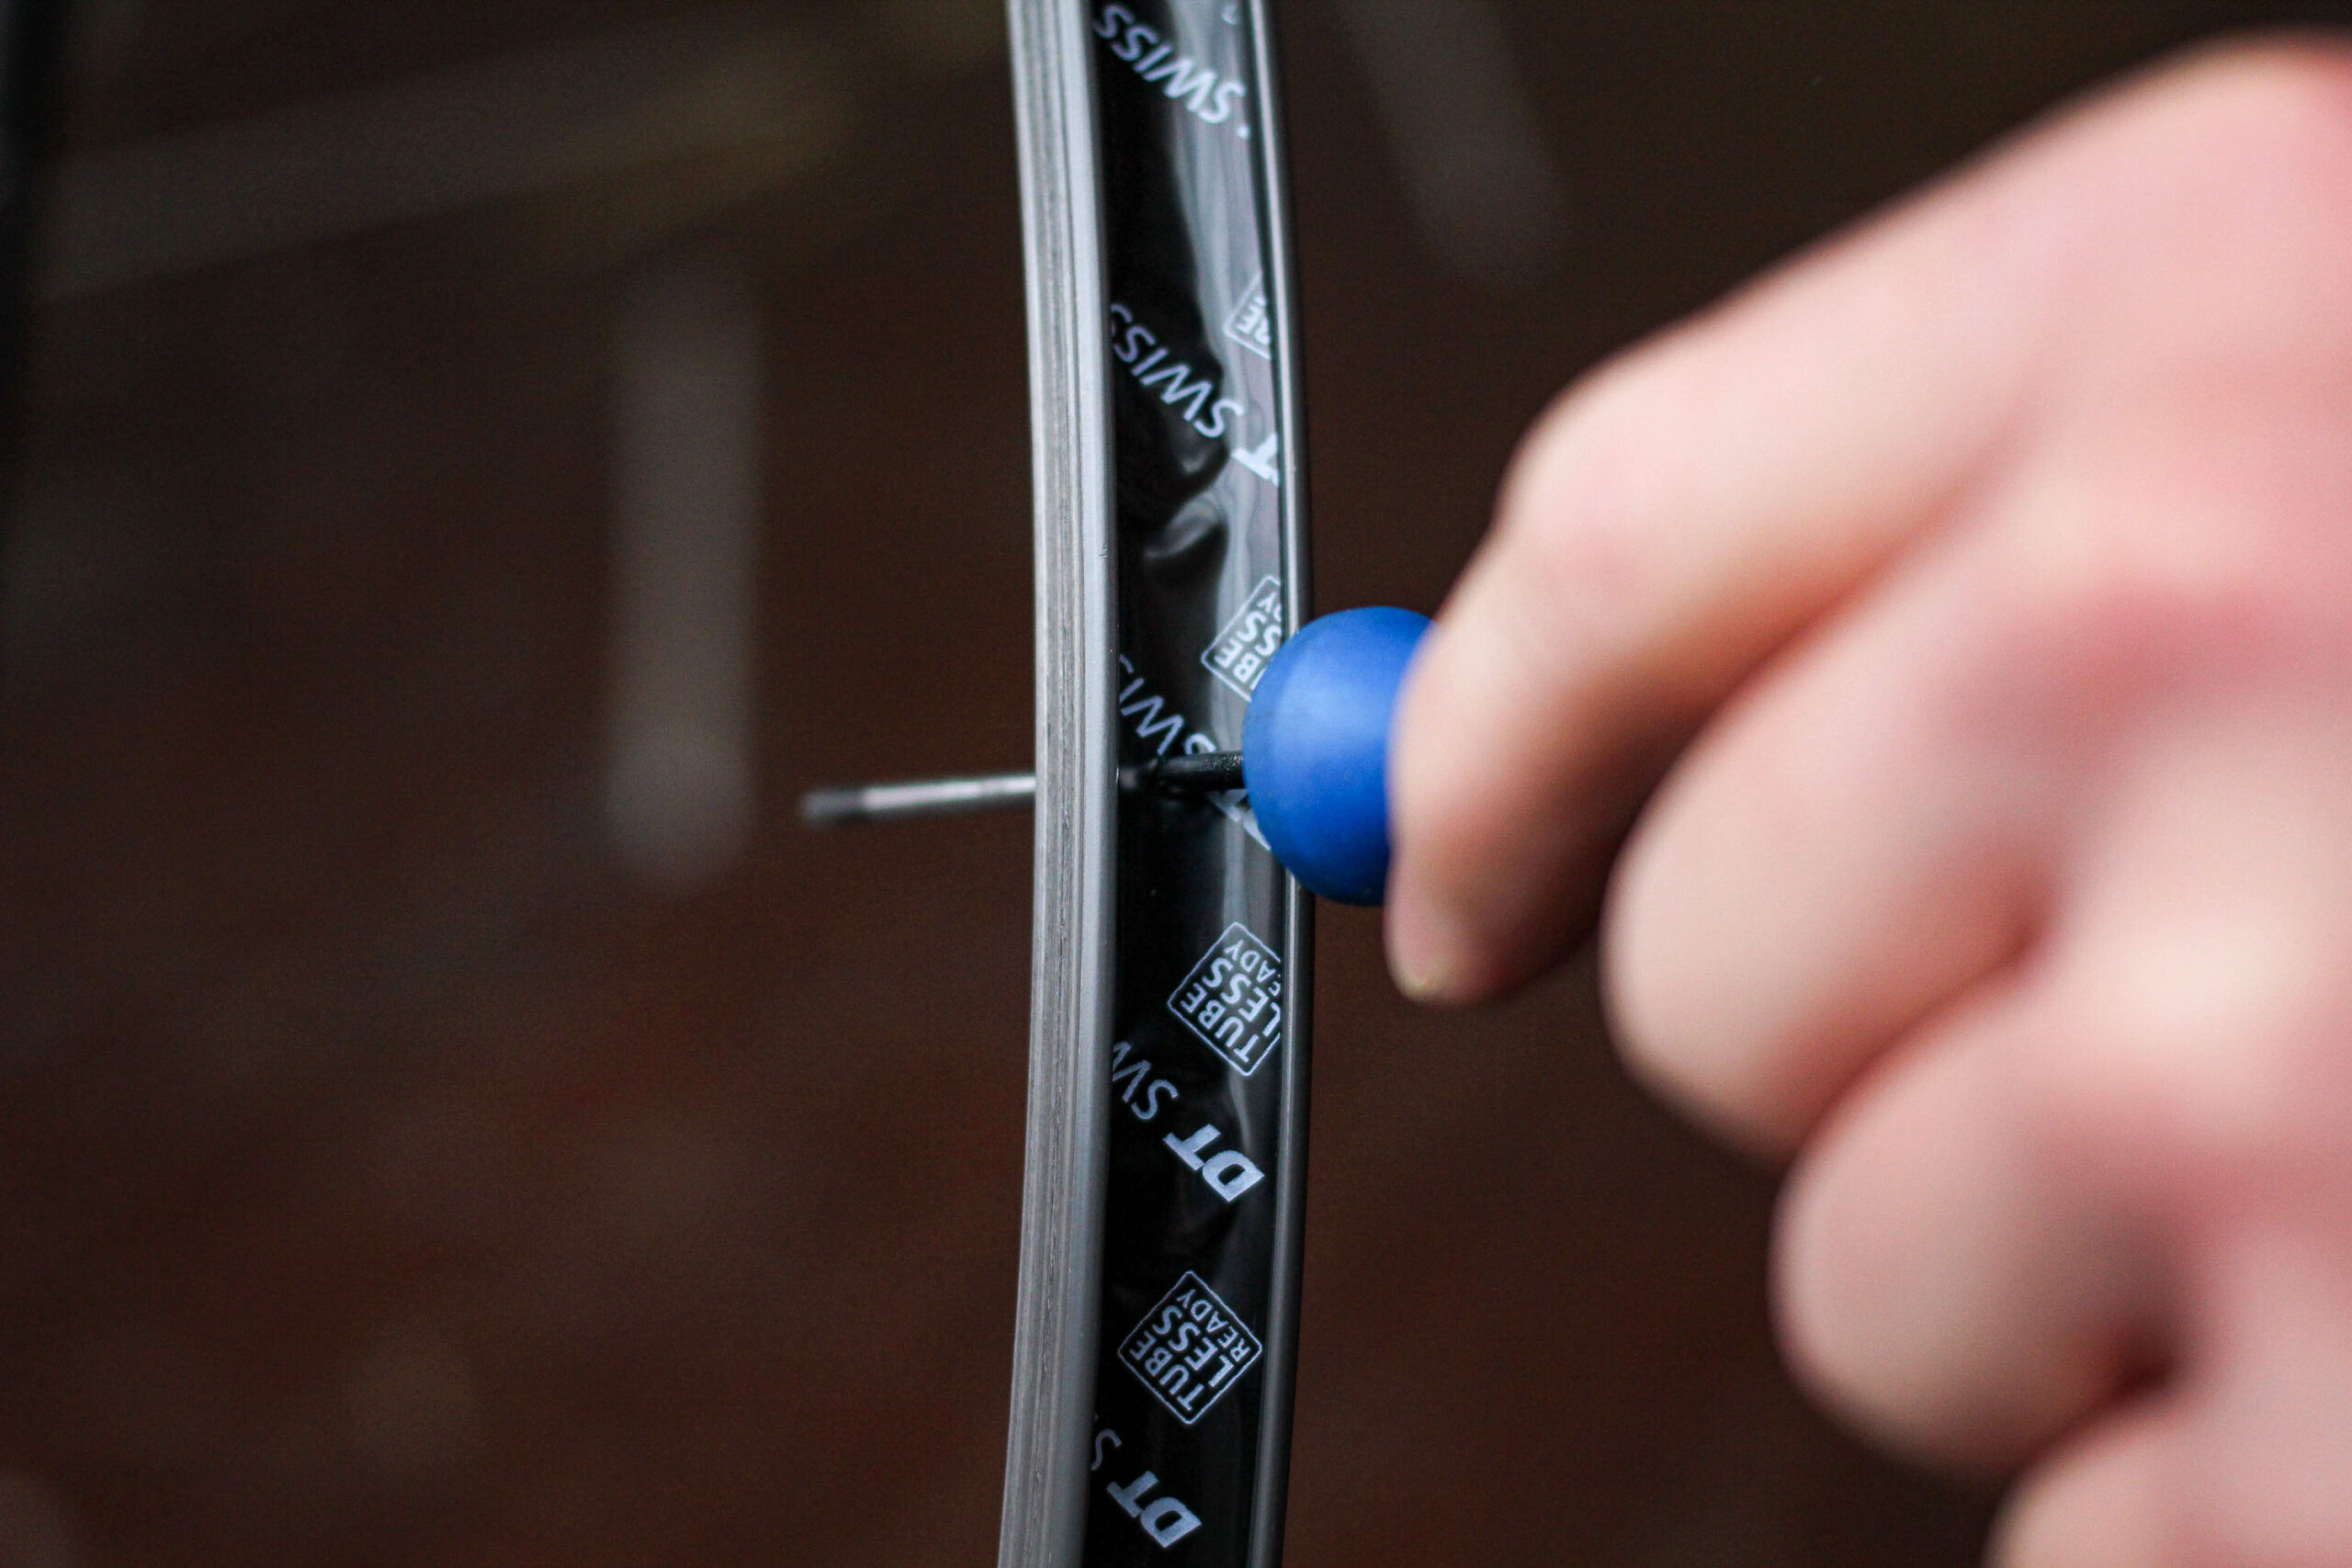
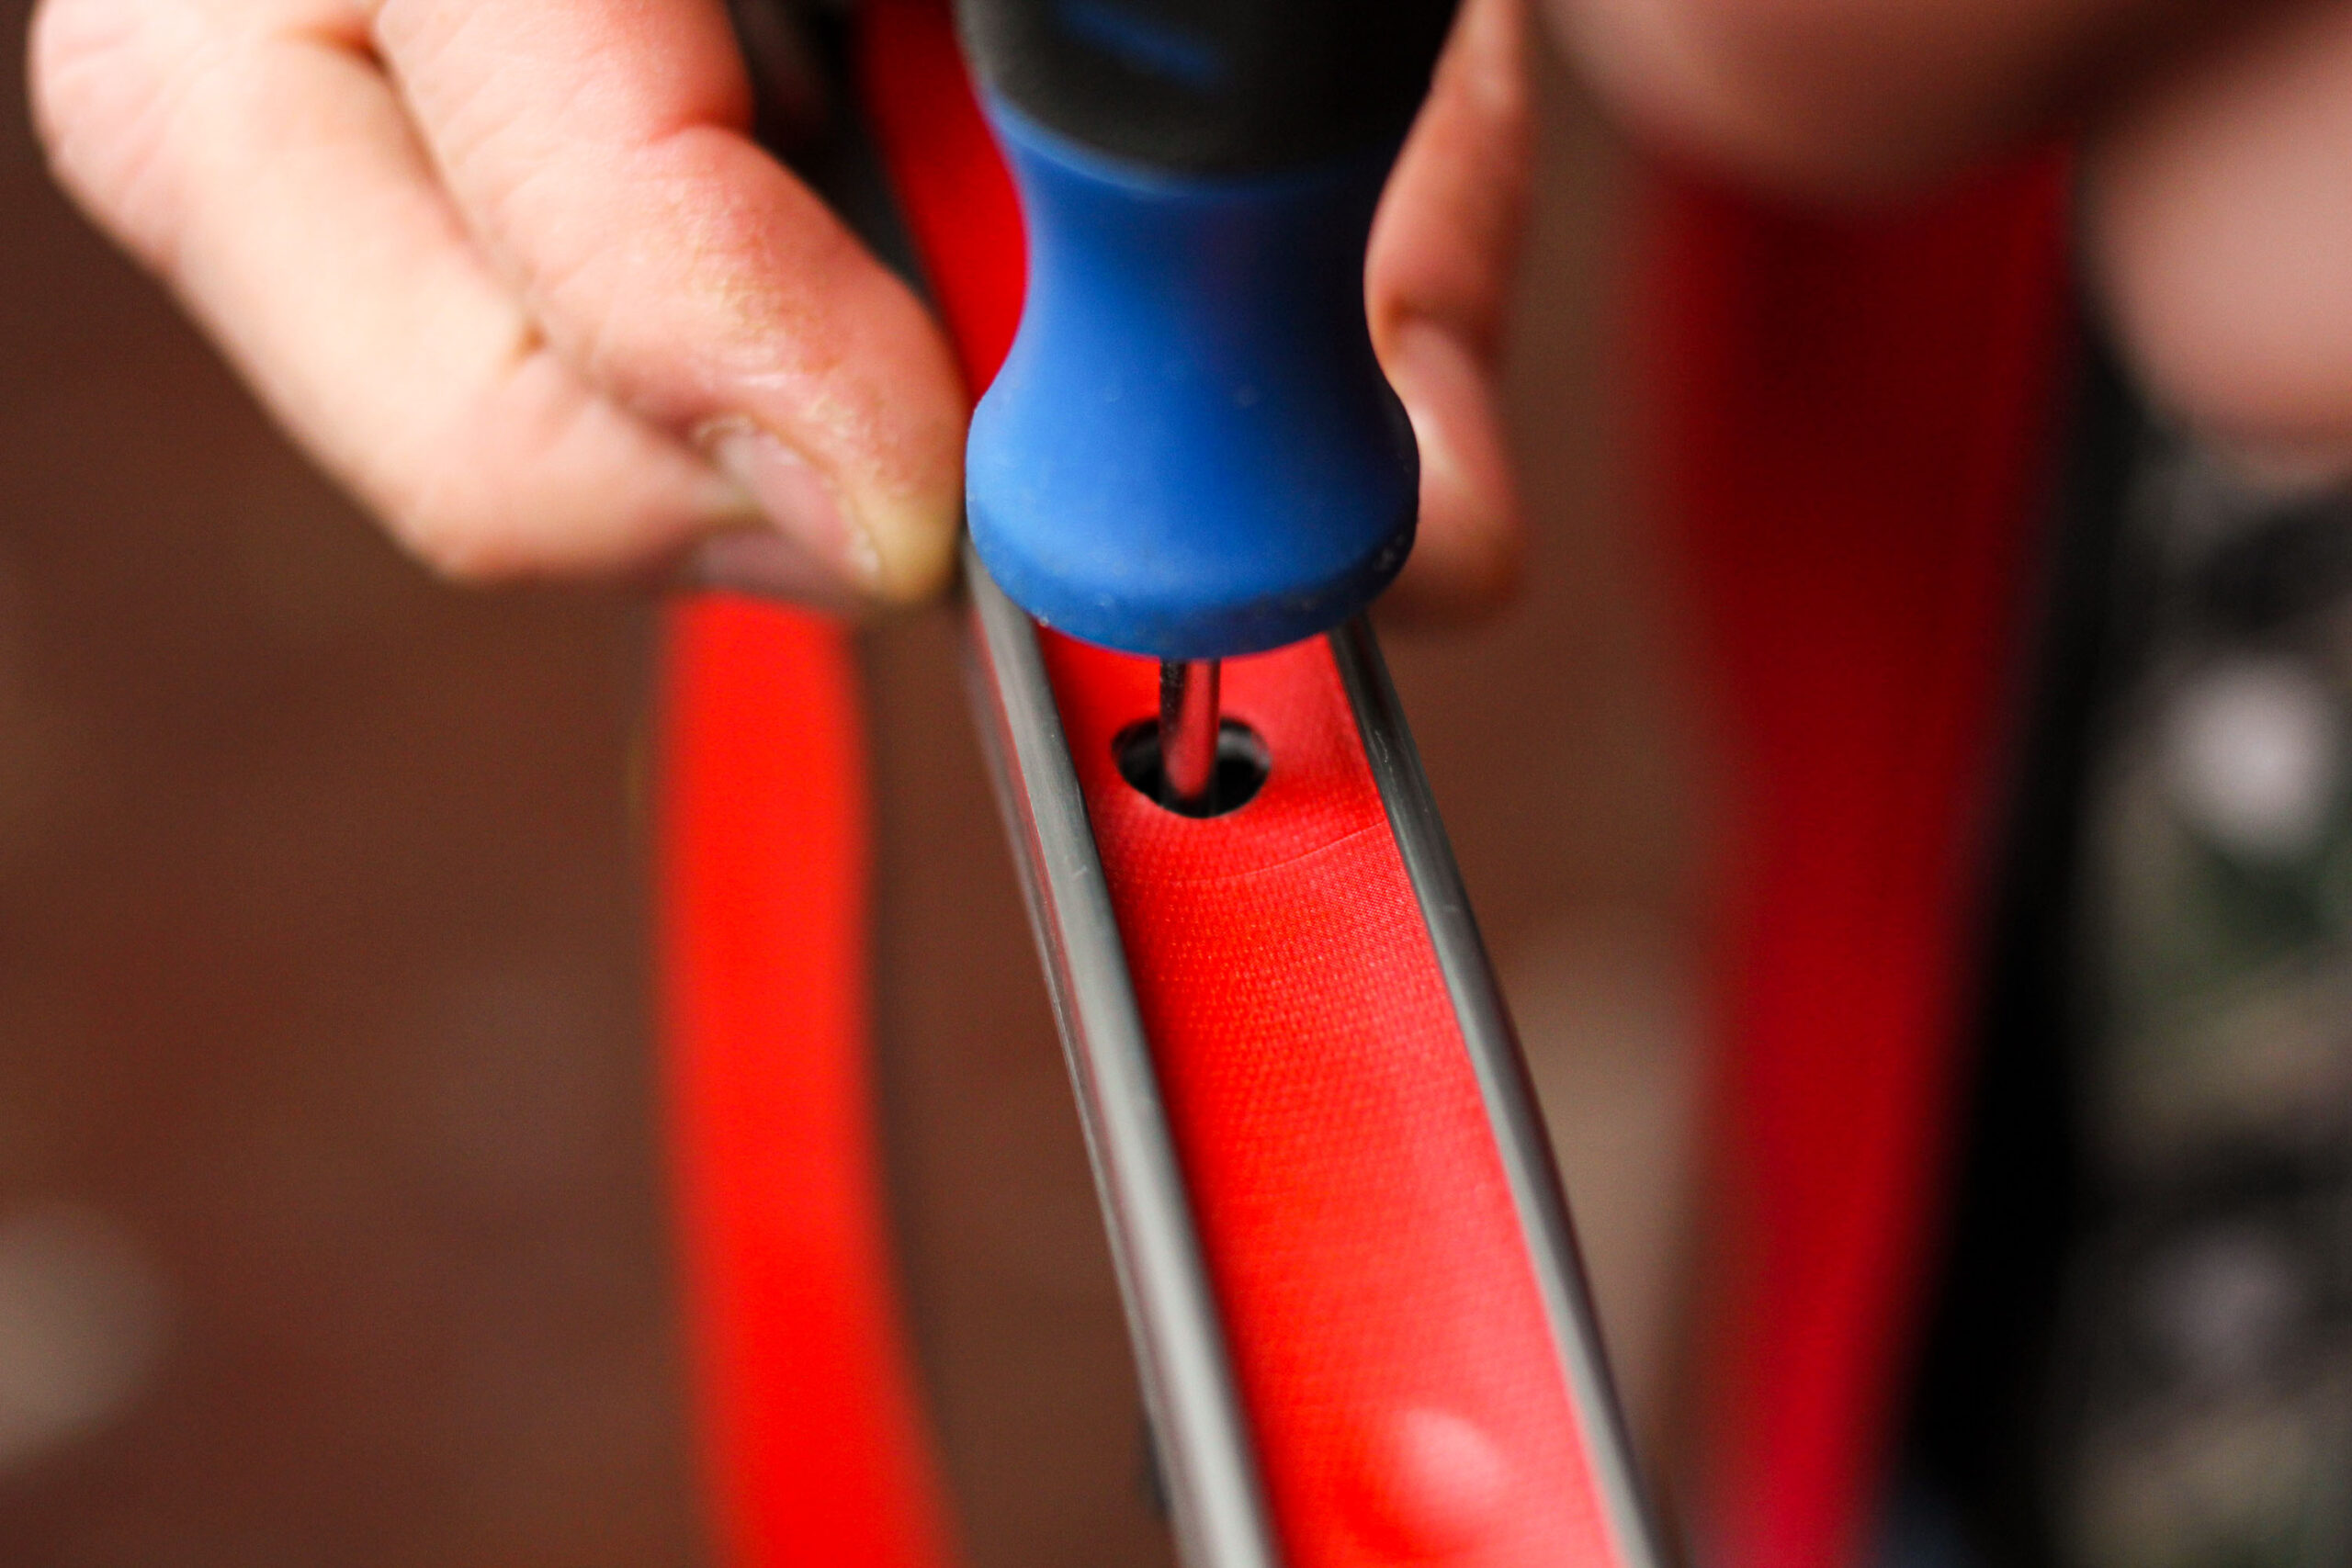
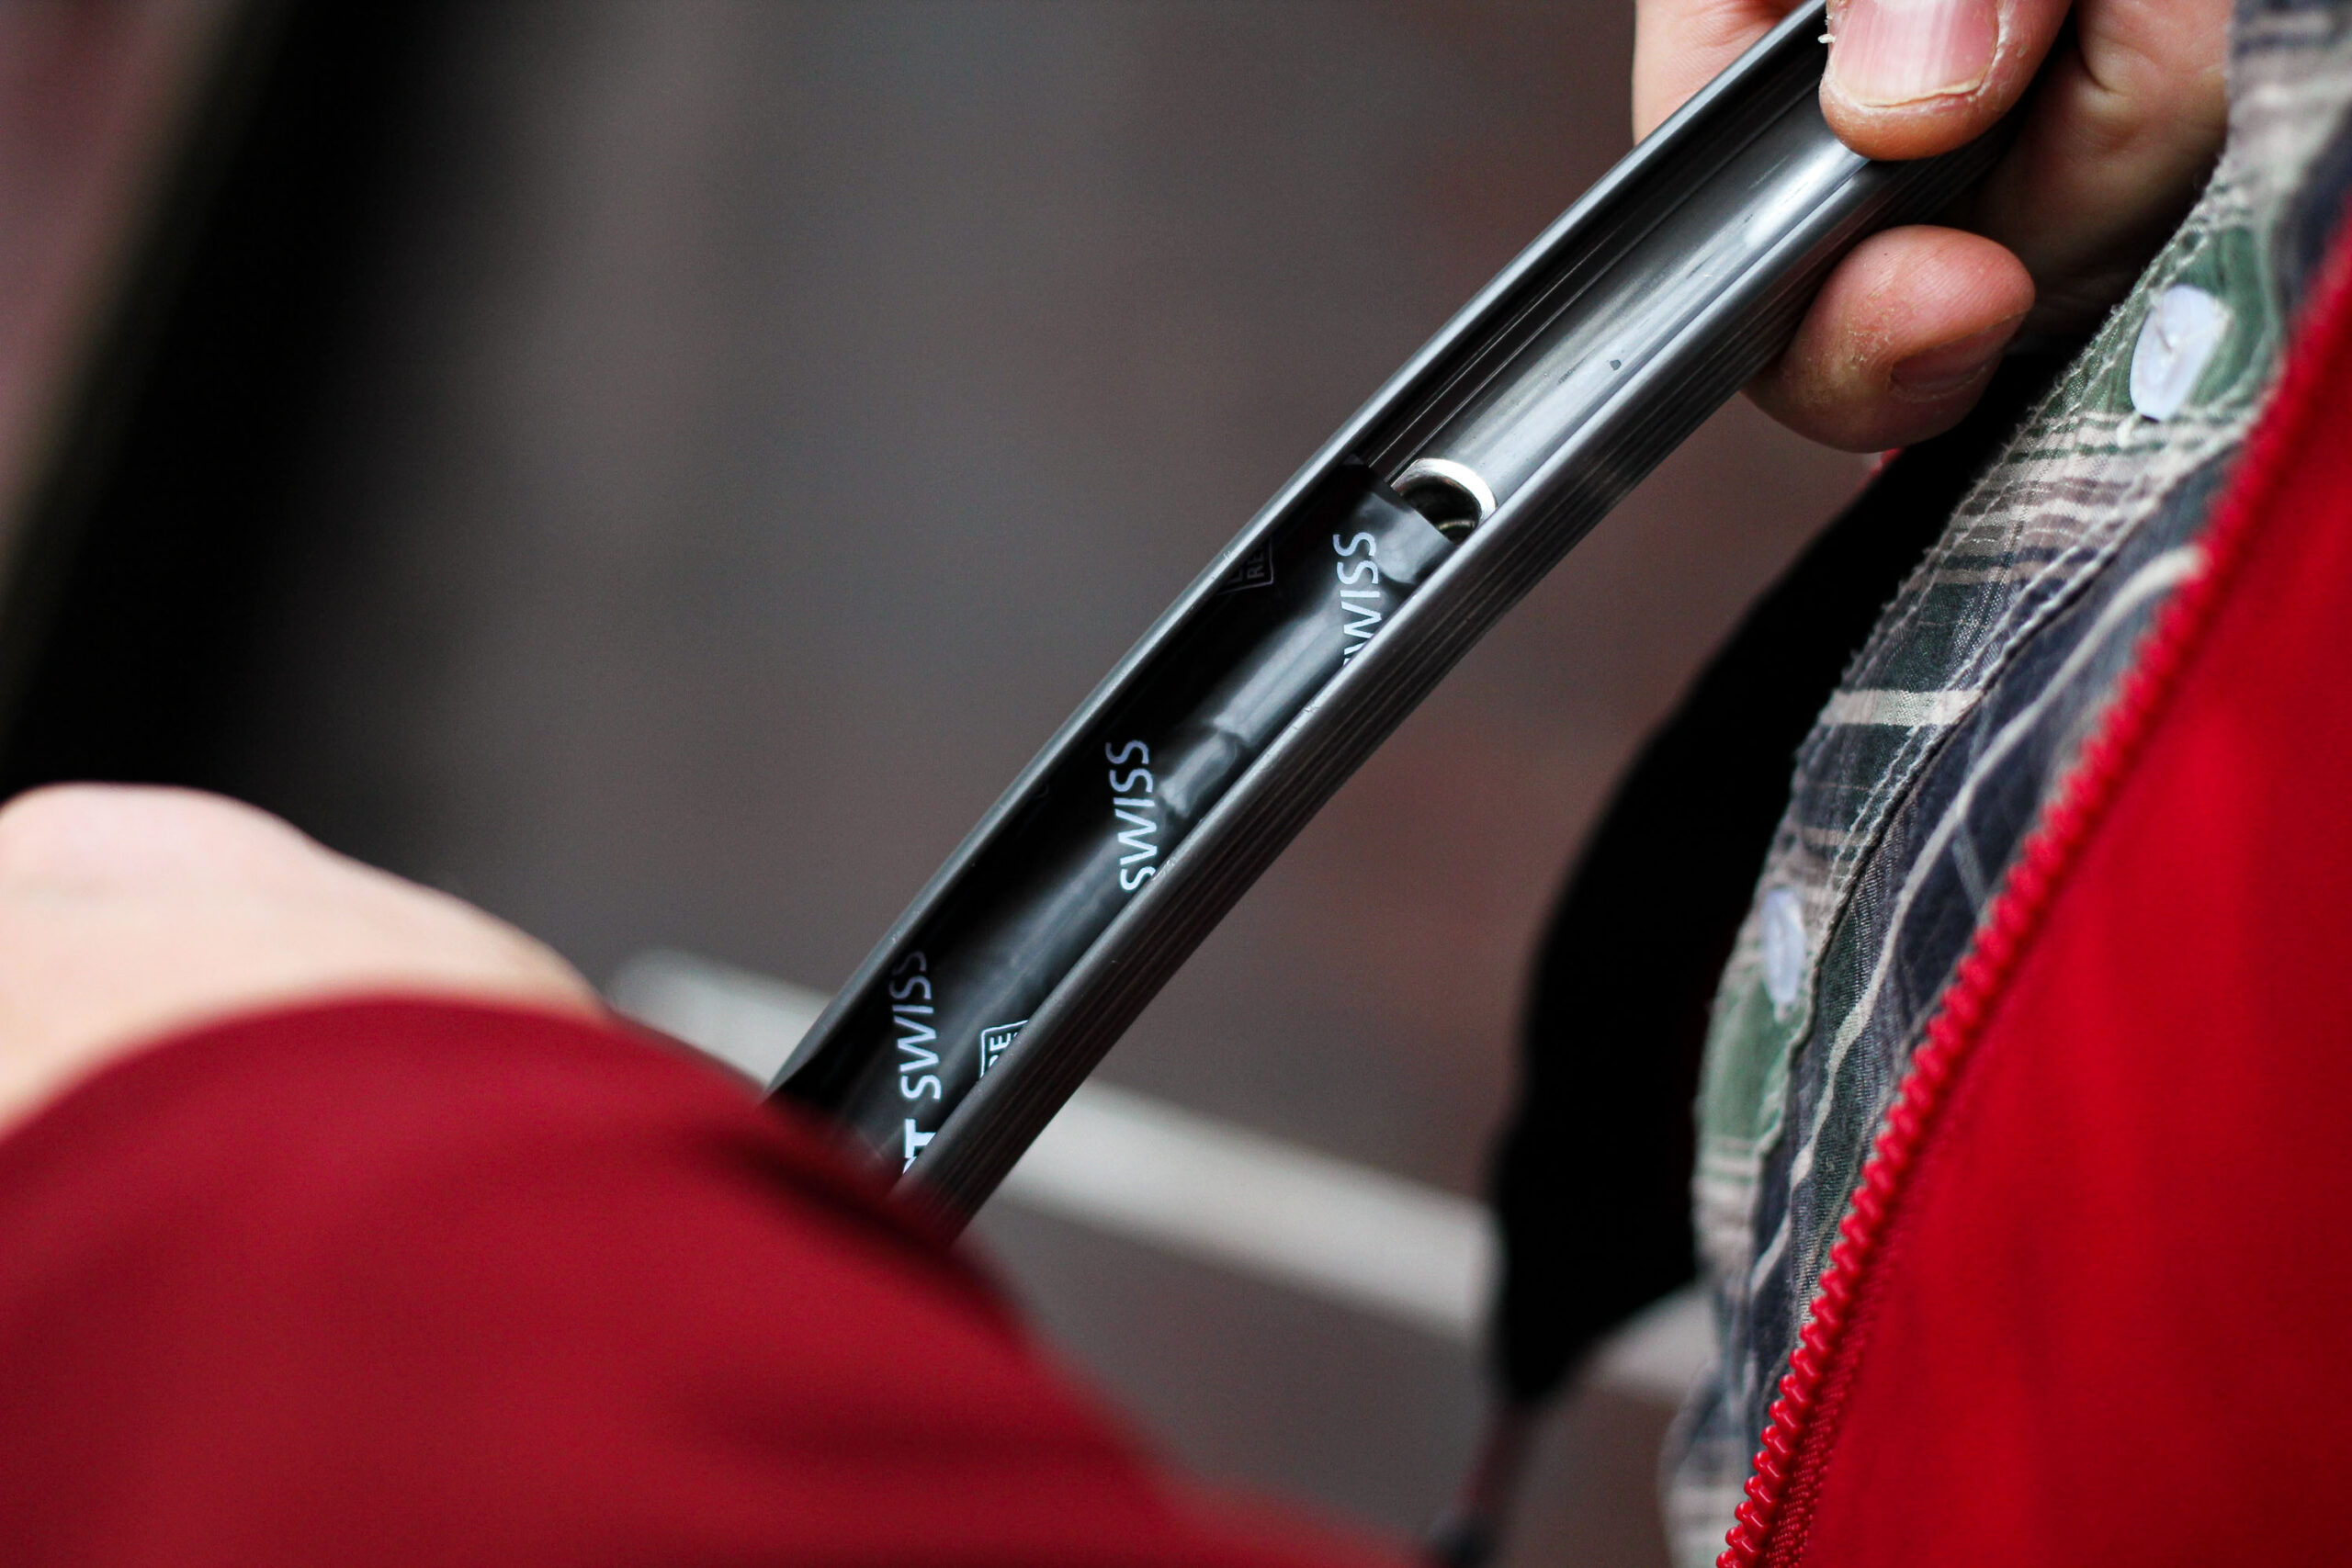
Locate the valve hole in the rim. Make a small hole in the tubeless tape with a sharp, pointy object -we’ve used a fine cross head screwdriver.
Other tape types
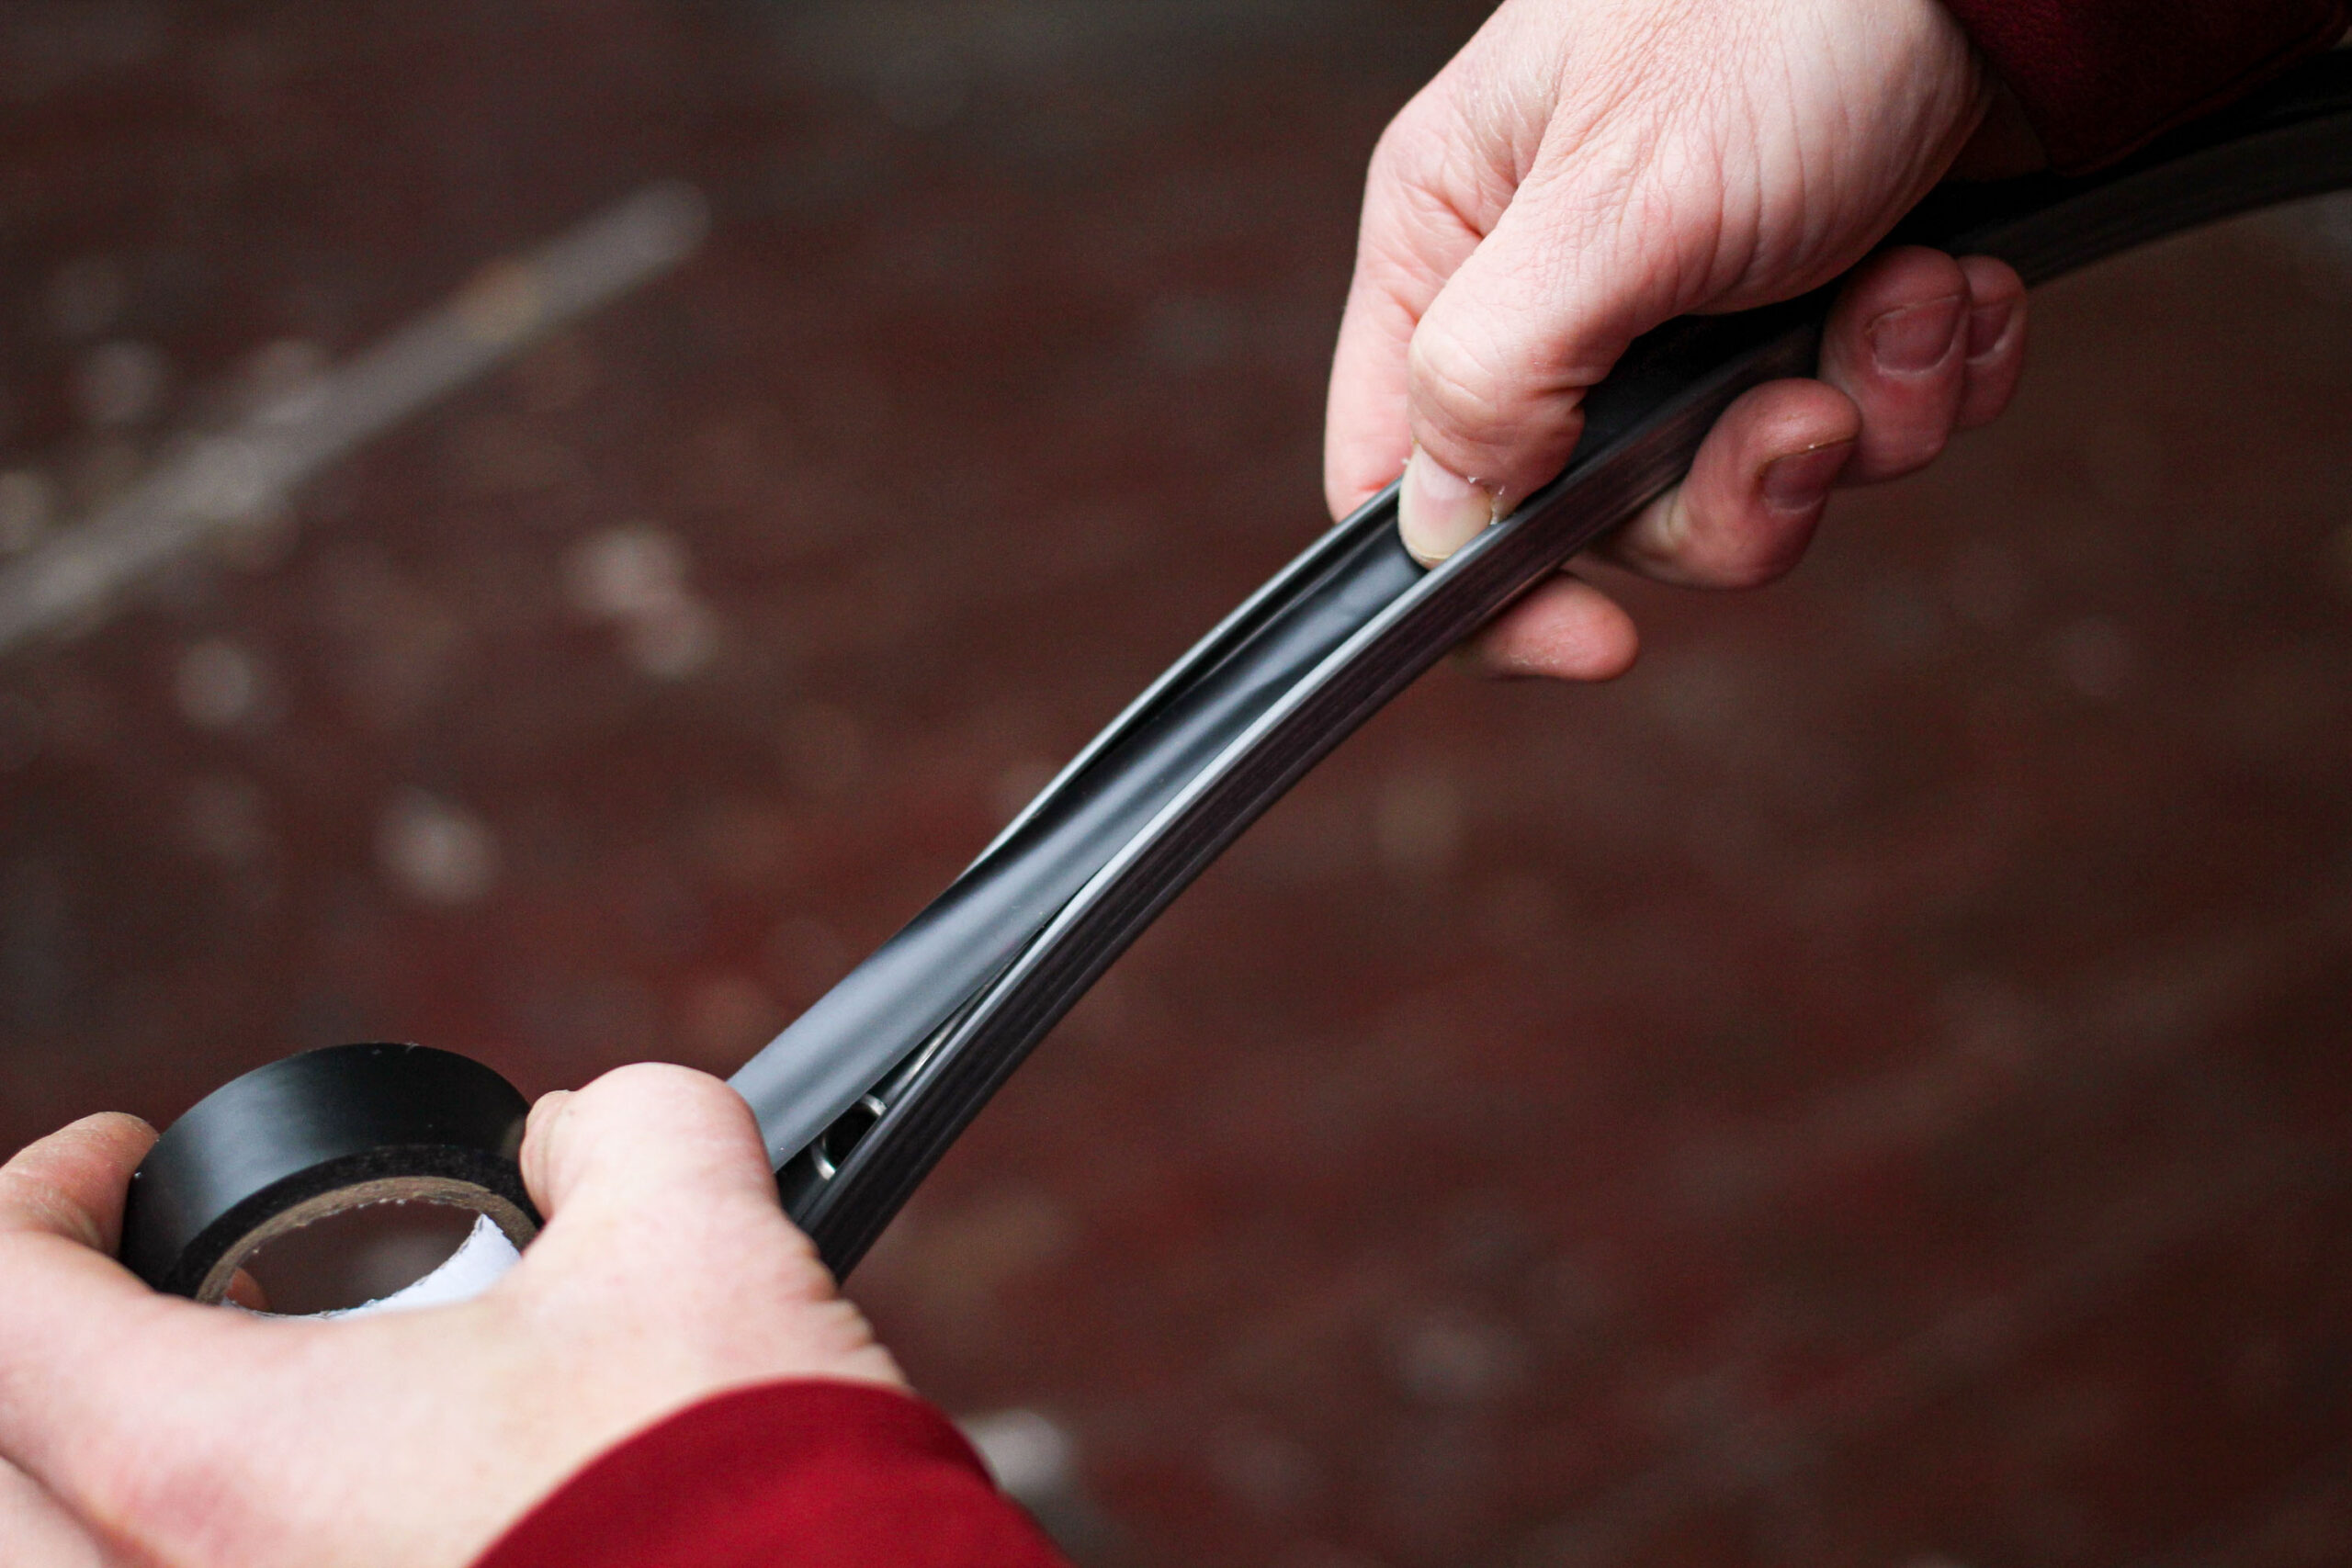
Of course, if you’re not looking for a tubeless air tight finish and have a roll of bog standard self adhesive electrical tape, that will do at a push. Similarly, plastic and cloth ‘gaffer’ tape, when ripped lengthwise to the right width, will also get the job done… I’d avoid classic Sellotape and packing tapes, as neither are thick enough.


17 thoughts on “How to fit rim tape — get it right with this expert guide”
QQ for anyone still up: if I
QQ for anyone still up: if I have these rims (19mm internal width), what rim tape should I get from Evans/Halfords/LBS first thing tomorrow morning please? (Has to be something likely to be in stock, not something rare.)
http://www.superstarcomponents.com/en/arc22-ultrawide-rim.htm
Ta muchly.
If you go to a good LBS they
If you go to a good LBS they should have the good cotton adhesive stuff in various widths. I used it for the first time recently (velox?) and it’s much better than the plastic loop type ie it stays in place and doesn’t squish to one side or move around.
guyrwood wrote:
Ta – was looking at the Velox or the Conti Easy Tape. They have both at the local Evans, so I’ll pop there via the LBS (see if they have it, and at a similar price before I go to Evans).
Just a small tip. I’ve
Just a small tip. I’ve occasionally found that heavy cloth tape (eg Velox) is too thick to allow the tyre and tube to seat properly.
Electrical tape (easily and cheaply available at Poundland) makes a damned good alternative.
You should really think of
You should really think of building the wheel before applying the tape 🙂
Yeah but that’s a simple task
Yeah but that’s a simple task, too obvious to need a proper instructional article. Fitting a rim tape: complex.
Twice in recent years I have
Twice in recent years I have seen riding companions with ‘inexplicable’ tyre bulges. The first time, after all but giving up on solving it – after checking rim, changing tyre and tube, etc. – I noticed that the looped rim band had deformed and moved slightly up towards the bead, preventing the tyre from seating correctly.
Easier to diagnose the second time! In both cases, no amount of fettling could get the band to stay back in place. I always keep a roll of Schwalbe adhesive rim tape to hand now!
If I recall correctly, both cases came after roadside puncture repairs, so tyres levers might have been the culprit, followed by riding to cause the tape to deform into the wrong position.
Oberon wrote:
maybe they were pleased to see you?
Well played! Suppose I should
Well played! Suppose I should have seen that coming!
I’m generally mistified by
I’m generally mistified by what width tubeless tape to use on various rims. Some types will just have medium/large widths and others will state width in mm, but I’m not sure how wide the tape should be compared to the inner rim width of the wheel.
I’ve found that if you have the tape a bit too wide so that it curls up towards the tyre bead, then it can get damaged when fighting the tyre with tyre levers. It seems to work best when it just covers the rim bed.
Top tip, you can use Duck Tape® as tubeless rim tape and it’s quite easy to rip it to the desired width. However, it does end up distributing stickiness around your rim after a few tyre changes, so it’s best for when you’ve got nothing better.
hawkinspeter wrote:
Two mm wider than your inner rim measurement is the gereral rule of thumb, if tape says medium or large I’d steer clear as it’s not made for people who care.
peted76 wrote:
Maybe it’s just certain tapes – just checked on the Effetro Mariposa tape at Wiggle (https://www.wiggle.co.uk/effetto-mariposa-caffelatex-tubeless-tape) and that lists 25-29mm as medium and 20-24mm as small. Maybe they’re using outside rim measurements? Then there’s the Schwalbe (https://www.wiggle.co.uk/schwalbe-tubeless-rim-tape-10m-roll) which has 19mm or 27mm.
Don’t forget tape is for MTB
Don’t forget tape is for MTB’s as well.. hence the larger width’s.
What wheels do you have?
I’m running a Prime RP-50 on
I’m running a Prime RP-50 on the rear (16.5 internal width) and a Prime Black Edition 60mm on the front (19mm internal width).
On Effetto Mariposa’s own
On Effetto Mariposa’s own website, it does appear to indicate the actual width of the tape, although it’s a tad confusingly presented. I also note that the Wiggle page mentions the rim’s “external section” where as their own website refers to “internal width” – I can only assume that the Wiggle listing is erroneous. https://www.effettomariposa.eu/products/caffelatex-tubeless-tape-adhesive-tape-for-tubeless-conversion
While Wiggle might only stock a limit selection of Schwalbe rim tape, their own website lists available widths of 19mm, 21mm, 23mm, 25mm, 27mm, 29mm, 32mm, 37mm and 42mm https://www.schwalbe.com/en/zubehoer
OnYerBike wrote:
That Effeto Mariposa page is slightly confusing itself – it has the small listed as 20.5mm and the diagram shows it as fitting 16-20mm internal widths.
The one time I’ve fitted
The one time I’ve fitted tubeless tape it took 4 goes to get the starting edge of the tape to adhere because it’s not really under tension holding it under your thumb. Is there a trick to that?