

Hydraulic disc brakes can provide you with loads of power and control… as long as you keep them in tip-top condition. You’ll need to change the pads periodically – that’s an easy job – and bleed the system from time to time. If your brakes have begun to feel spongy and you’ve checked that the pads are fine, it could be that they need bleeding.
Bleeding your brakes for the first time can be a little daunting but it’s straightforward enough when you know how and have the right kit. It’s slightly complicated by the fact that there are various disc brake designs out there, but the principles are similar across the board.
There are zillions of brake bleeding kits out there, just make sure you get one that’s compatible with the components you use. Apart from anything else, make sure you get the correct brake fluid. Shimano uses mineral oil (not DOT fluid). Using DOT brake fluid in a Shimano system can damage the seals and void your warranty.
One more thing before we get going: if you’re unsure about the process or you’re not 100% confident in your maintenance skills, get your brakes sorted by a professional bicycle mechanic. Madison, Shimano’s UK distributor, told us it would advise consumers to use their local bike shop to carry out the work, and that’s never a bad idea. Please don’t take any chances here.
That said, the necessary tools are easily available should you want to do the job at home and, realistically, many people will want to do that, so here goes…
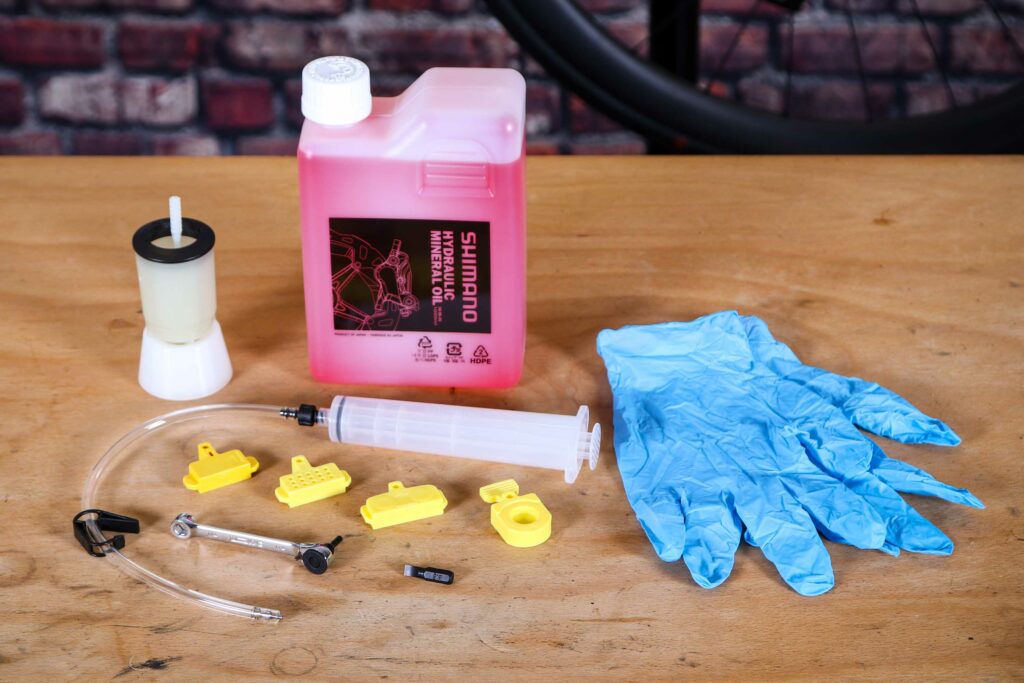
Tools required
• Hex keys – down to 2mm or 2.5mm (depending on your components)
• 7mm ring spanner (for some systems)
• Flathead screwdriver
• Shimano hydraulic mineral oil
• Shimano disc brake bleed kit (including bleed spacers)
• Disposable gloves
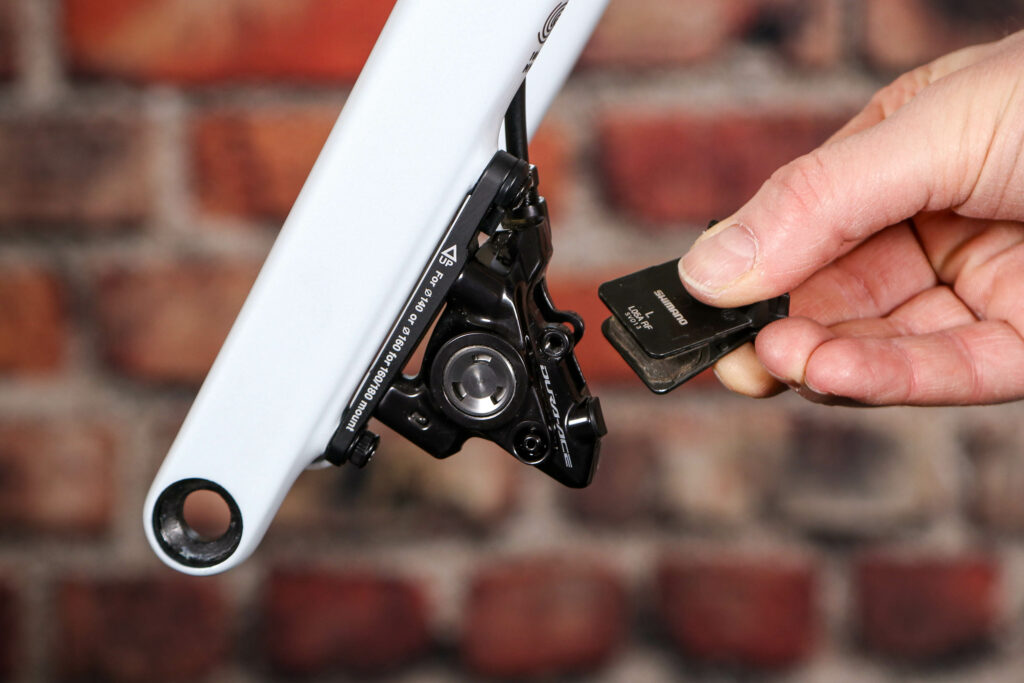
1 Take the wheel off your bike to protect the rotor from contamination with mineral oil, and take the pads out of the calliper after first removing the retainer clip and bolt. You might want to use this opportunity to ditch worn pads.
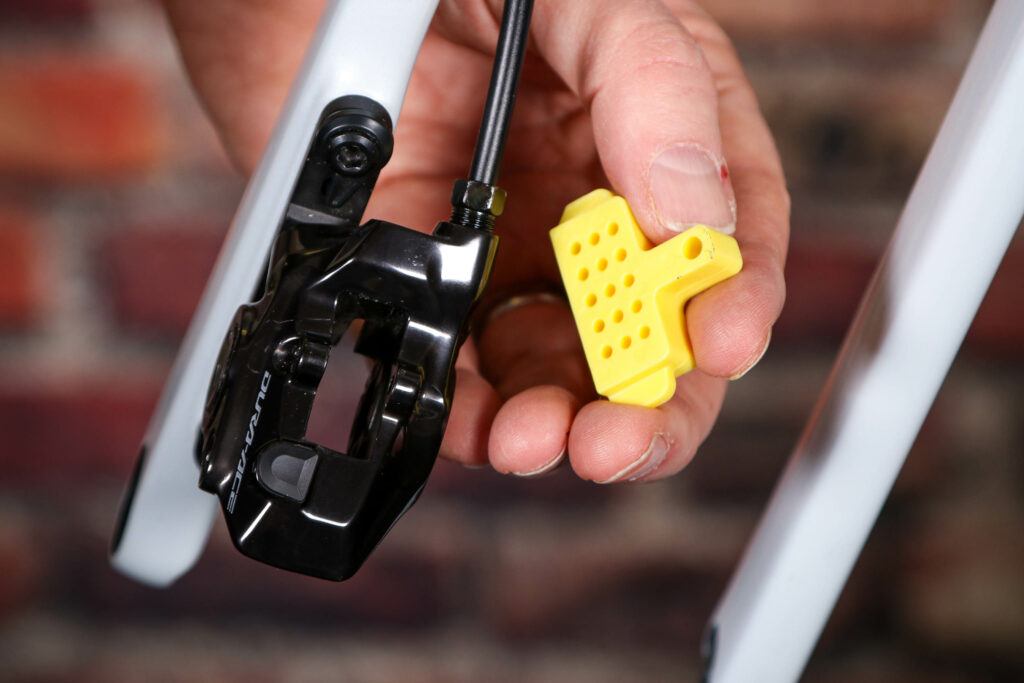
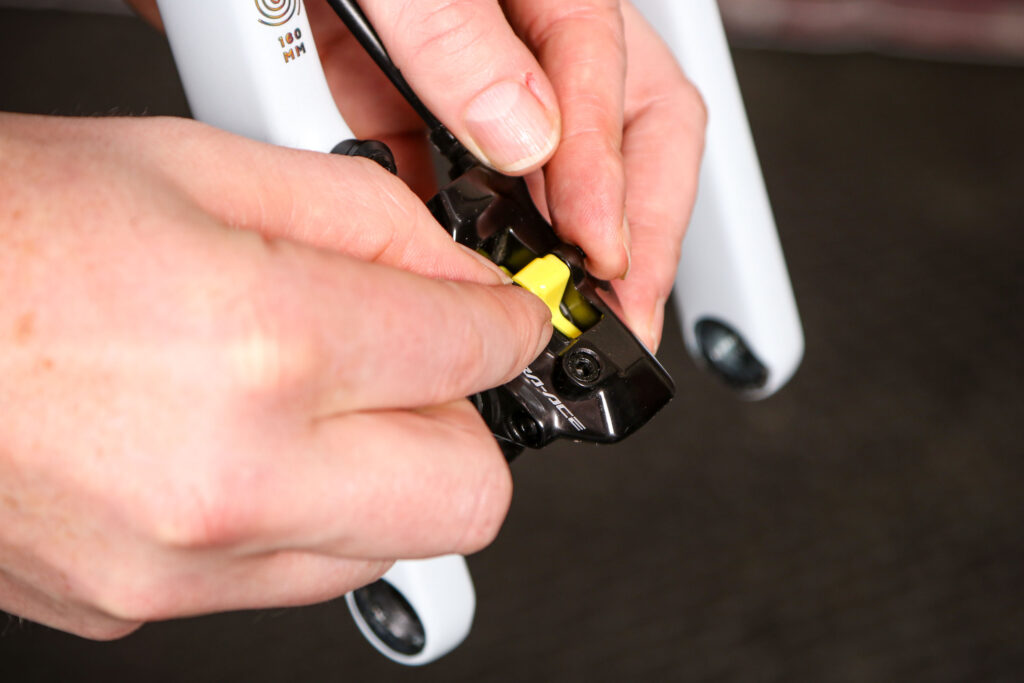
2 Push the pistons back as far as they will go with a flat-shaped, non-sharp tool. Many plastic tyre levers will do the job. Go gently and be careful not to damage the pistons. Insert a bleed spacer between the pistons and hold it in place with the retaining bolt.
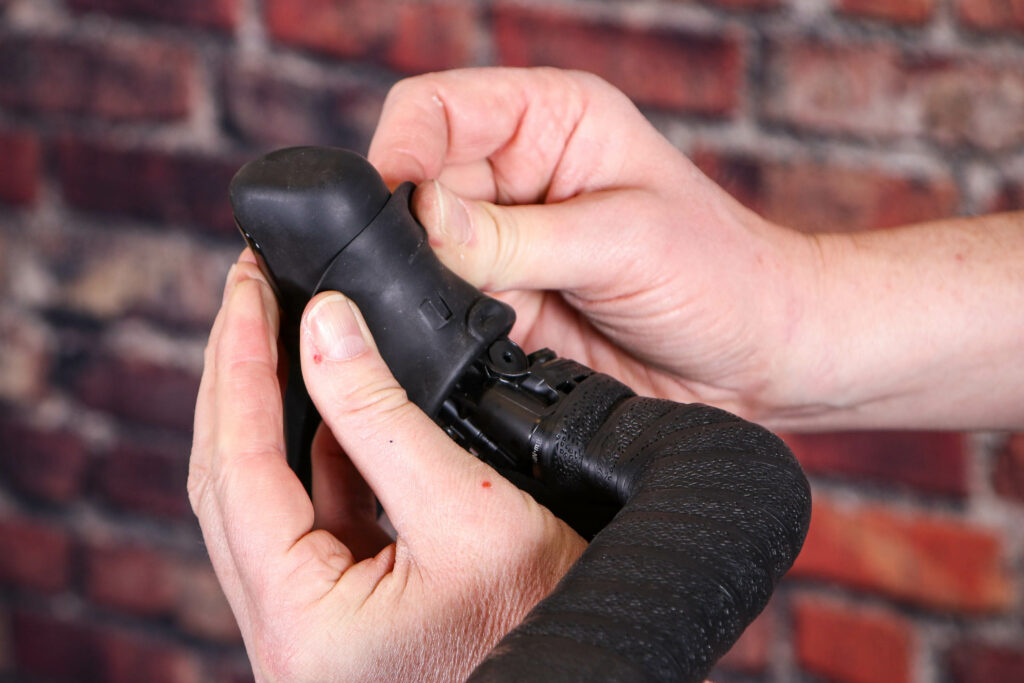
3 Roll back the rubber cover on top of your dual control lever to expose the bleed screw (the exact position varies depending on the components fitted to your bike). You’re looking for a broad-headed screw.
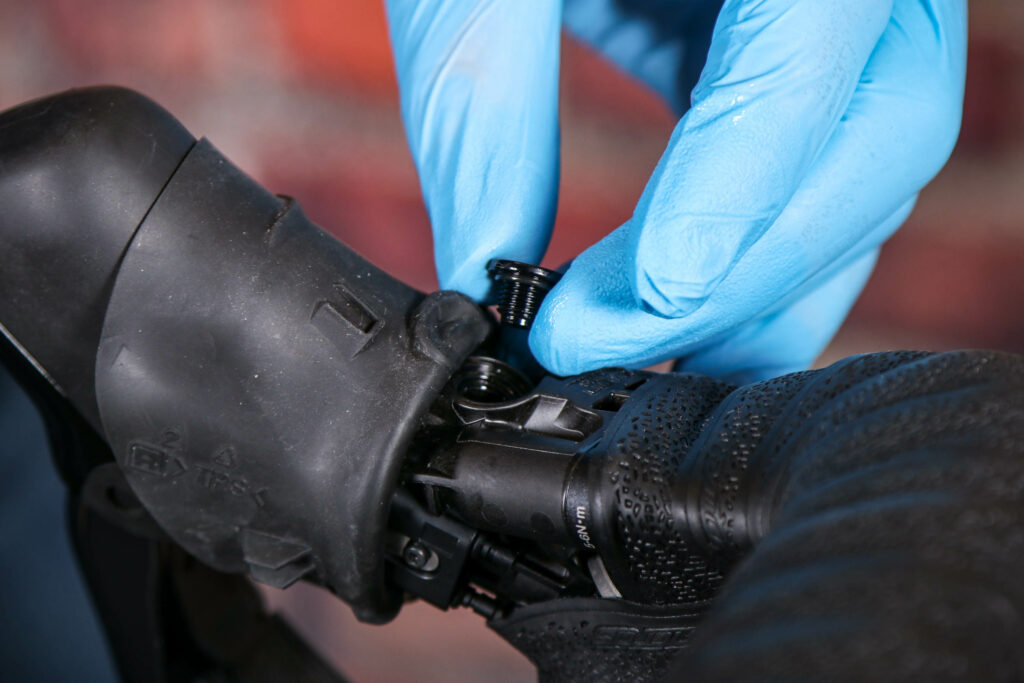
4 Adjust the position of your bike so that the top of the bleed screw is parallel to the ground, then use a hex key to remove that bleed screw, complete with its little O-ring. Make sure the hex key is high quality and is fully inserted to avoid rounding the head.
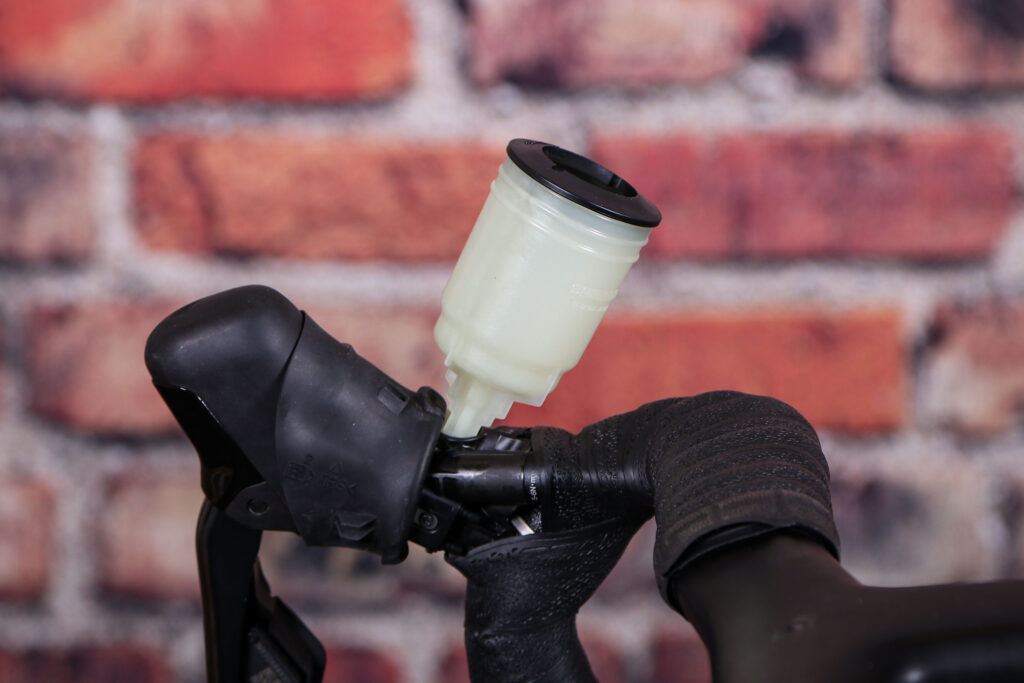
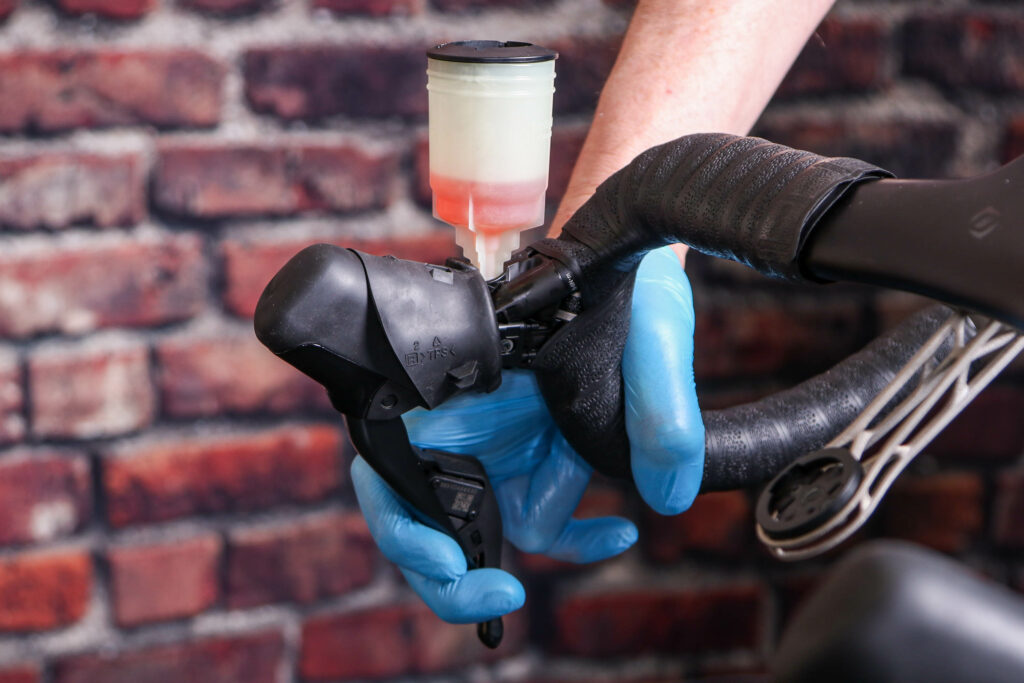
5 Carefully thread the oil funnel onto the bleed port (with a funnel adapter between them if your groupset requires it). You don’t need any tools for this; finger-tight avoids damage to the bleed port thread.

6 Fill the syringe with mineral oil, making sure there’s no air in there, then head down to the brake calliper. Some Shimano brakes have a protruding bleed nipple with a rubber cap on top, others have a bleed boss that’s more integrated into the body of the calliper. Whichever system you have, attach the bleed tubing from the syringe, and secure it.
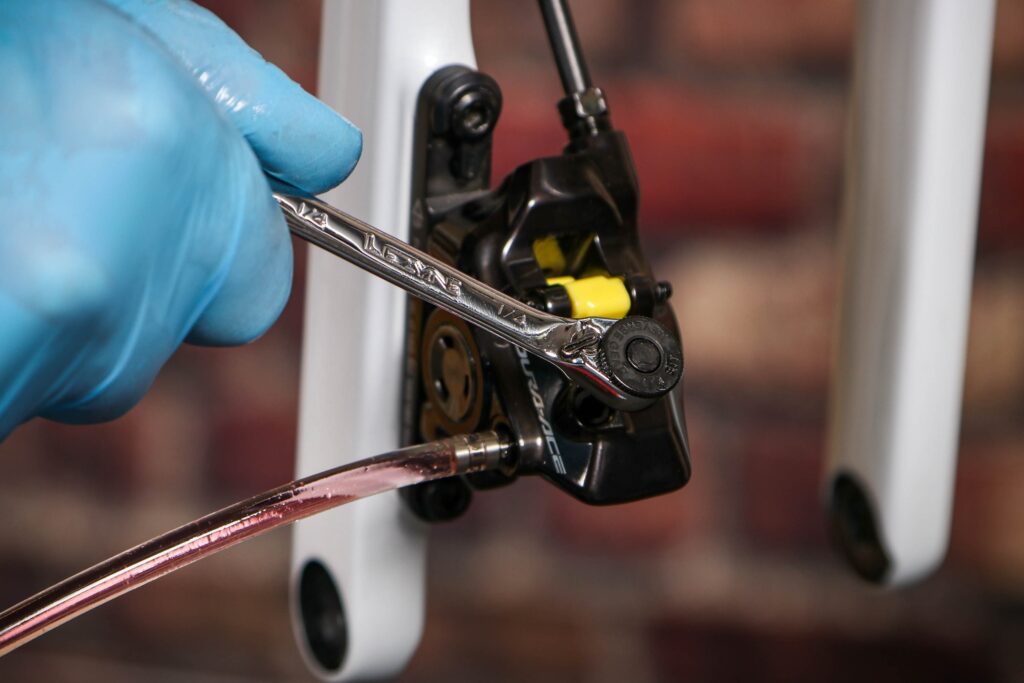
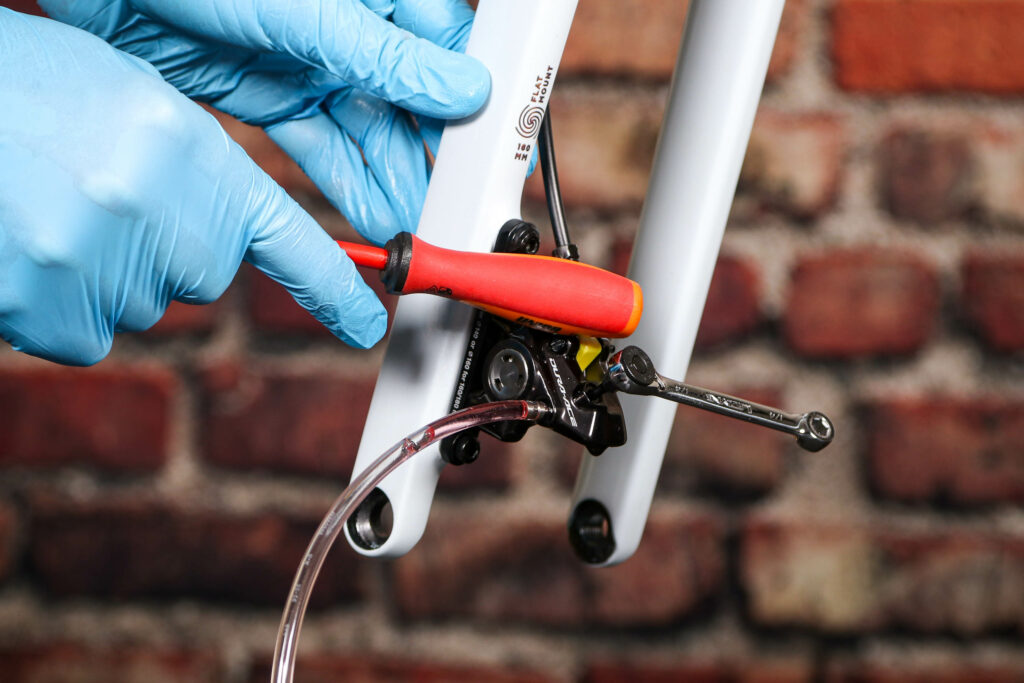
7 If the bleed nipple on your bike’s brake protrudes, use a 7mm spanner to loosen it by about 1/8th turn – enough to open the system (it’s easiest to use a 7mm ring spanner that you’ve put onto the bleed nipple before attaching the bleed tubing).
If the bleed boss is recessed into the calliper body (as in our picture), use a hex key to loosen the bleed screw (which is just around the corner) by 1/8 of a turn.
Push oil gently from the syringe into the calliper. It will eventually start coming out into the funnel attached to your dual control lever. Keep going until you see no more air bubbles in the oil that is coming out, then tighten the bleed nipple/screw.
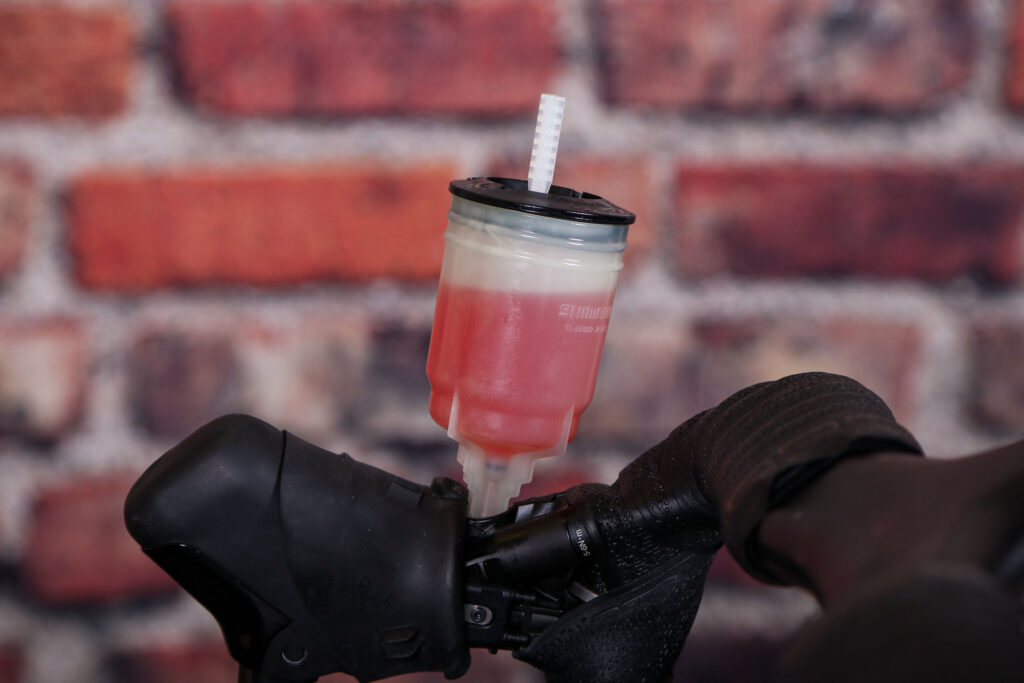
8 Move your bike so the funnel points forward at an angle to the ground. Then add more oil until there are no more air bubbles mixed in the oil coming out into the funnel. Then tighten the bleed nipple/screw.
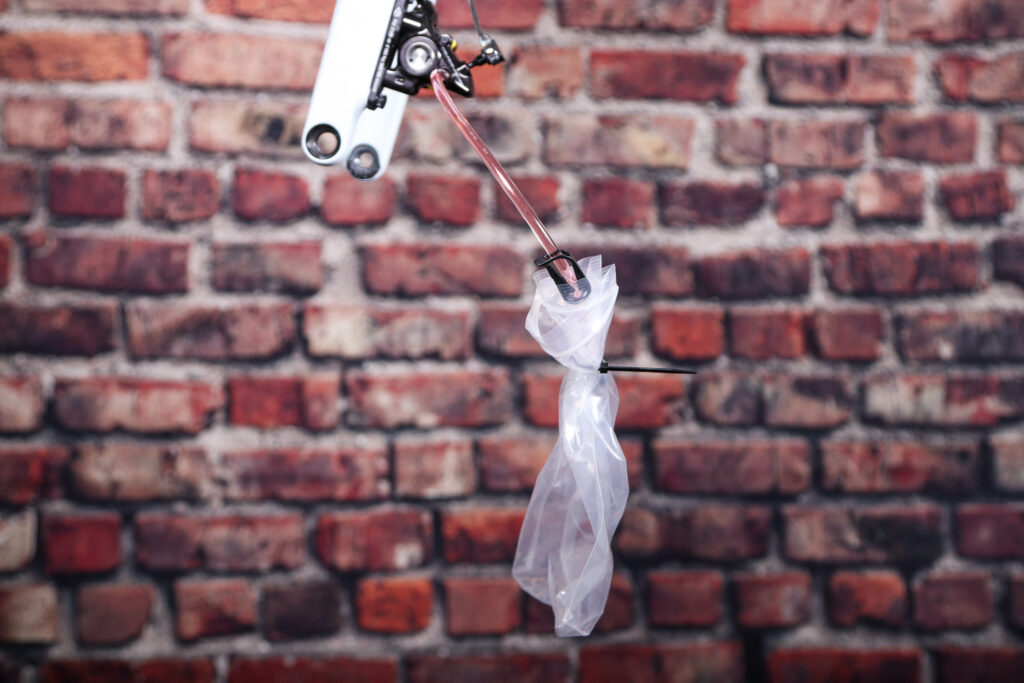
9 Remove the syringe and tubing that are attached to the bleed nipple/boss, being careful to avoid spilling any oil (there might be a clip in your bleed kit to seal oil in the tube as you remove it). Then attach a length of tubing to the bleed nipple/boss with a small plastic bag secured to the opposite end with a zip tie or rubber band.
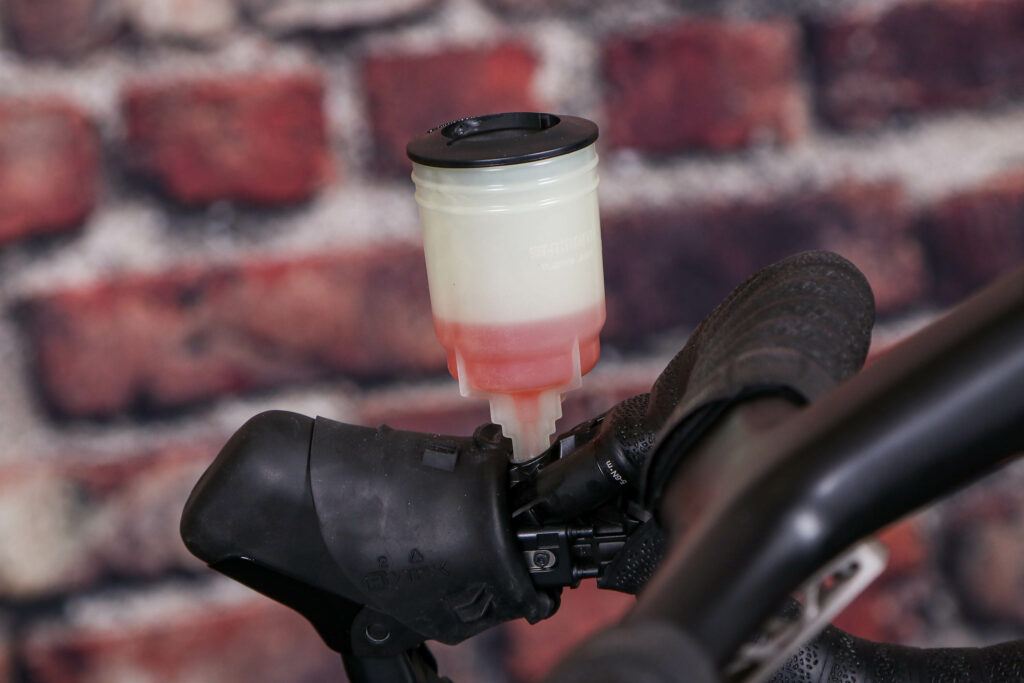
10 Make sure the funnel that’s attached to the dual control lever is sufficiently full of mineral oil before loosening the bleed nipple/screw on the calliper to let oil flow slowly through the system and into the tube and plastic bag. As the oil level in the funnel drops, keep refilling it to prevent air from getting into the system. Shake the brake hose (if it’s exposed) and/or tap the brake calliper with the handle of a screwdriver to encourage any air to move out. When no more air bubbles come out of the bleed boss, retighten the bleed nipple/screw.
11 With the brake lever pulled in, rapidly loosen and tighten the bleed nipple/screw (about 0.5 seconds each time) to release any air bubbles in the calliper. Do this two or three times, then tighten the bleed nipple/screw. If the lever is slowly pulled, any air in the system will rise into the oil funnel. Once air bubbles stop appearing, pull the lever in as it will go. It should feel stiff. If not, go back and do the process from step 10 again. Remove the tube from the brake calliper and wipe away any oil.
12 Change the angle of the lever a couple of times and pull it in each time, checking that no more air bubbles are coming up into the funnel. Then set the lever horizontally, plug the oil funnel with the oil stopper (with the O-ring side facing downward), and remove the (now plugged) funnel (and adaptor, if you’ve needed one) from the dual-control lever, surrounding the bleed port with a clean rag as you do so to absorb any oil that drips. Reinstall the bleed port screw into the dual-control lever, complete with its O-ring. The reservoir tank should be full enough that oil flows out slightly when you tighten this screw. Do NOT pull the lever until the screw is in place or air could enter the cylinder.
13 Use a clean cloth to wipe away any excess mineral oil. Take off your gloves (because they’re likely to have mineral oil on them), remove the bleed spacer from between the brake pistons, refit (or replace) the brake pads with their retaining bolt and snap pin, and put the wheel back on your bike. Make sure that all bolts are fully tightened, there are no leaks, and the brake works effectively – first when you’re off the bike, then when riding very slowly and not in traffic – before heading out for a ride.


