


Your brake rotors have to be perfectly true for your disc brakes to work well. If they’re not they can sometimes be straightened but the safe bet is to replace them. here’s how.
Our guide below shows you what we believe is the best method to fit disc brake rotors. We’ve included a list of the tools and materials that you will need to complete the job and in some cases where you can buy them. If there are others that you prefer then feel free to let everybody know in the comments.
Tools & Materials
Cassette lock ring removal tool
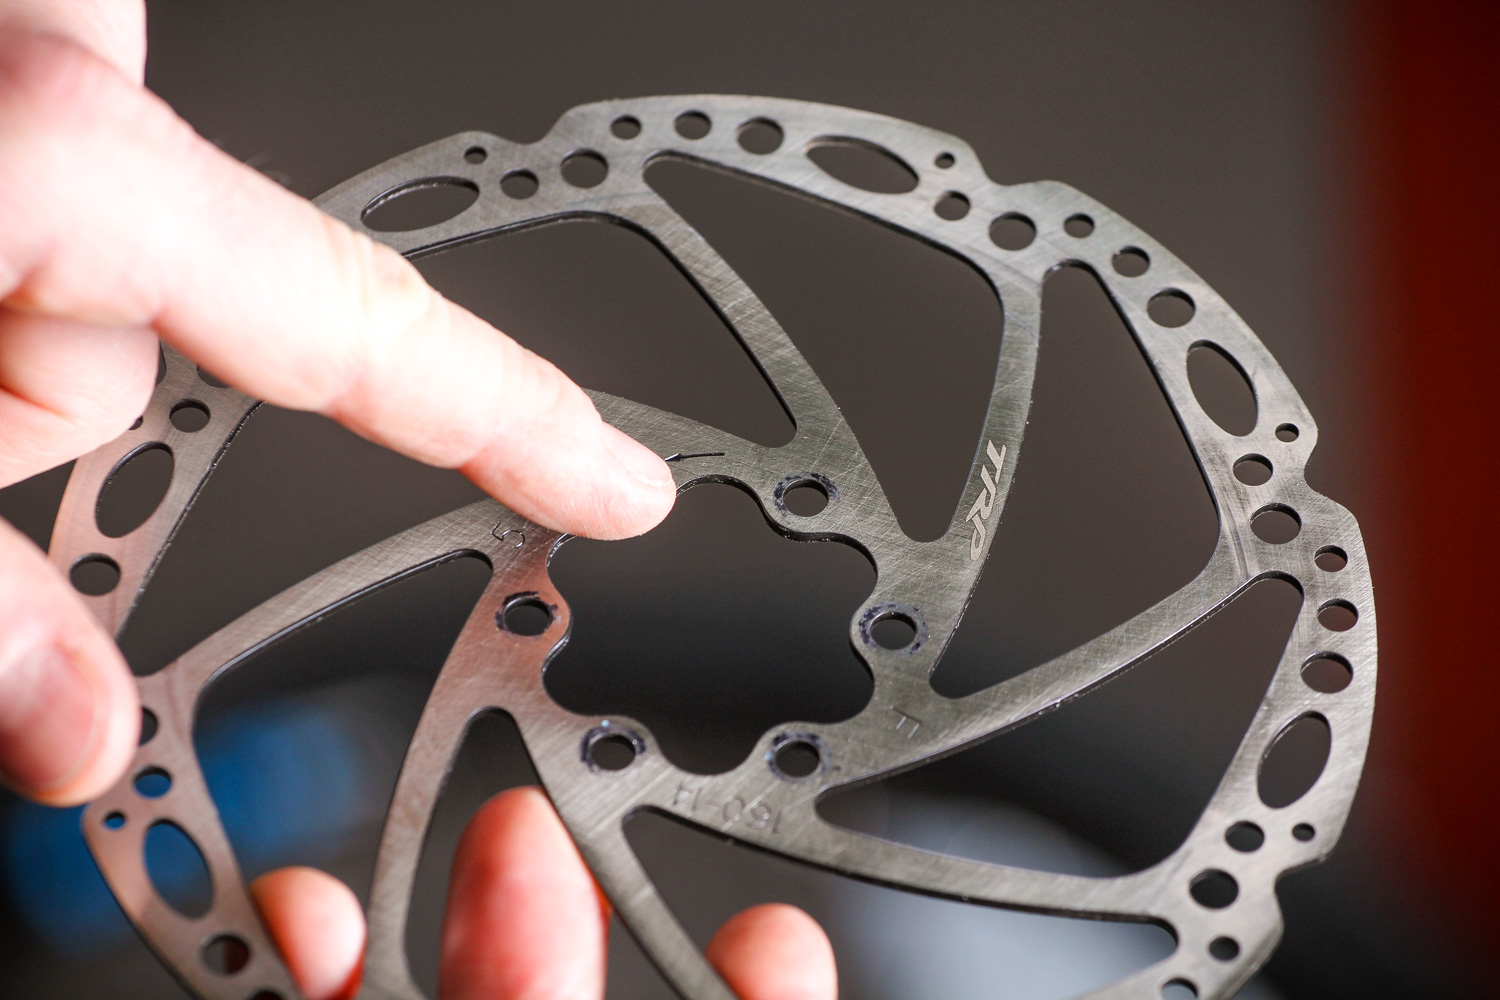
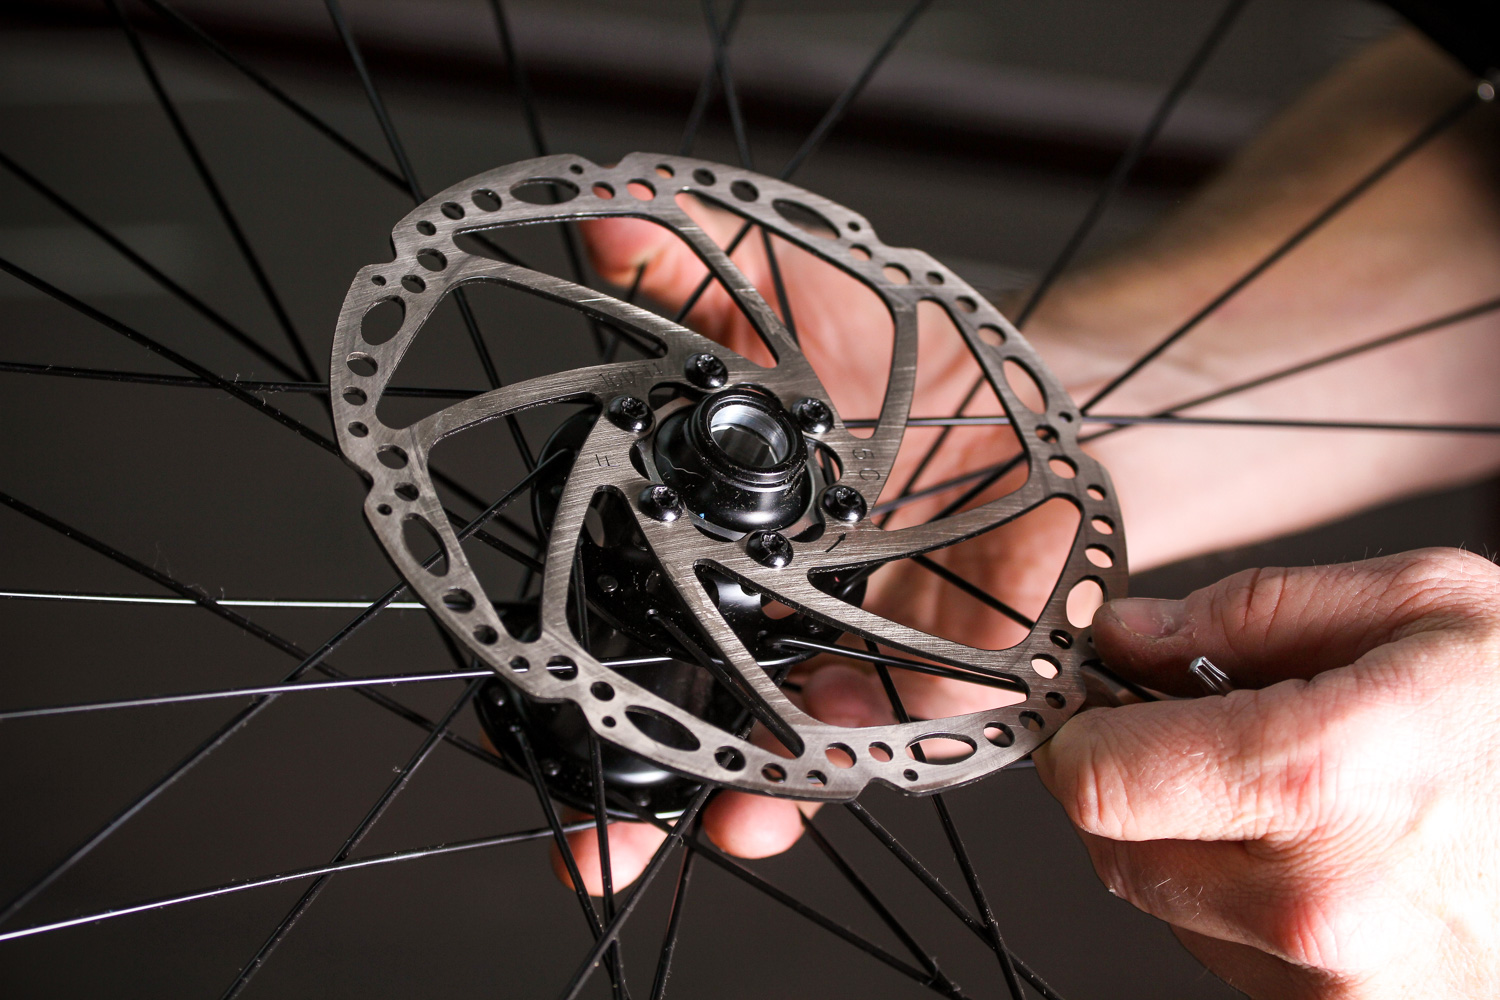
Rotor types
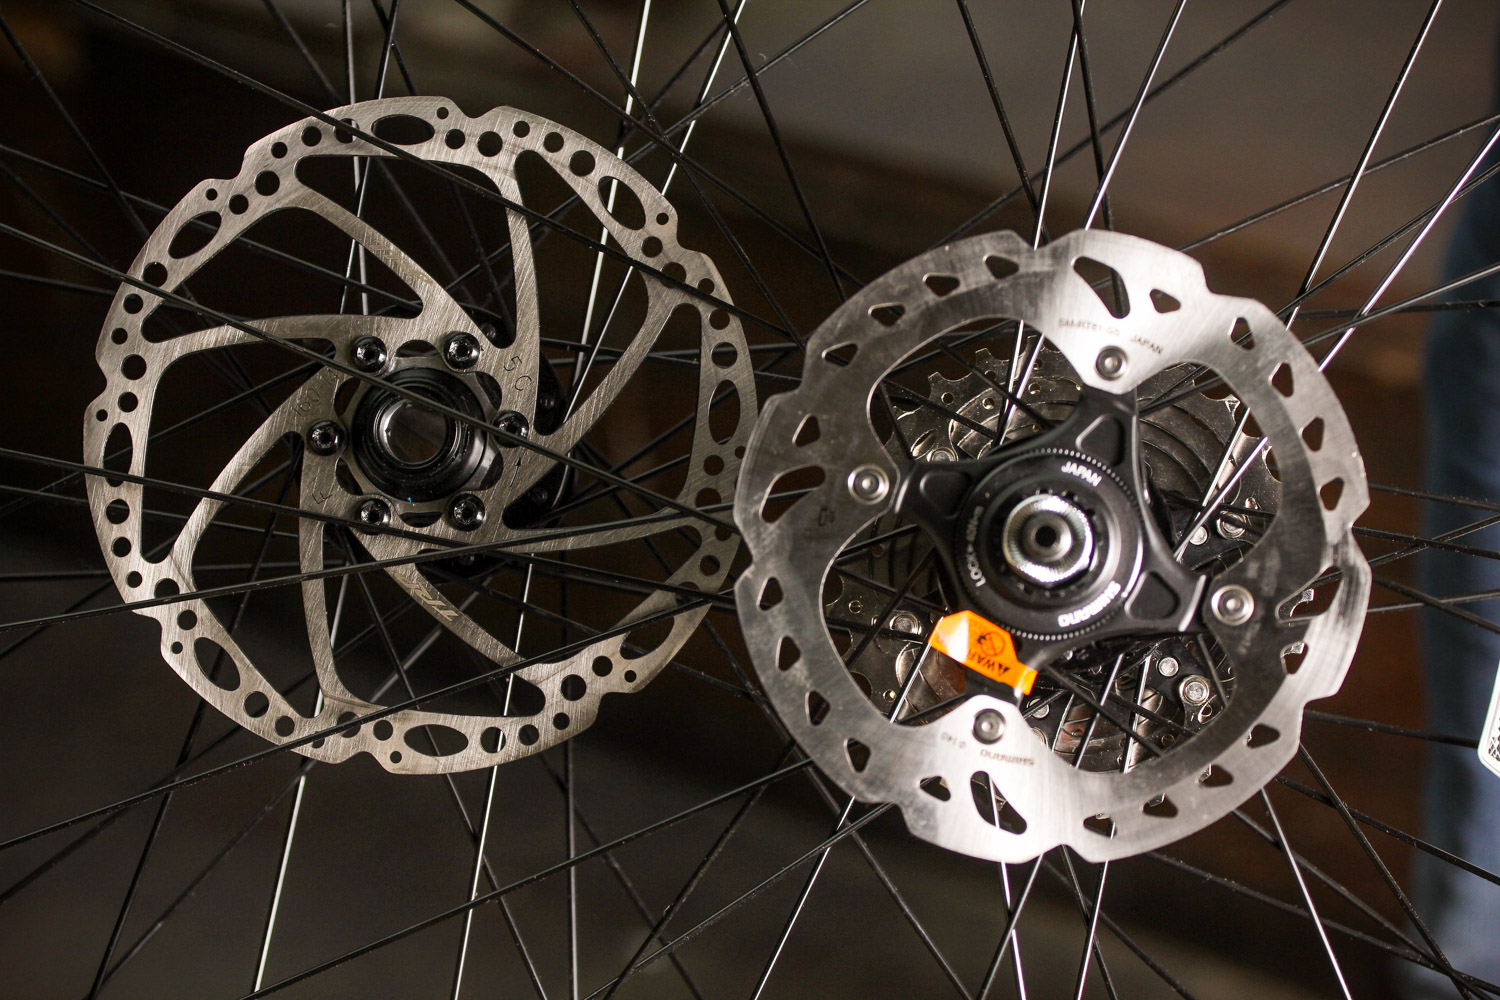
The two styles of disc brake rotor. On the left is the six bolt style, often referred to as the ‘international standard’, it uses six Allen head or, more commonly these days, Torx head bolts. They screw directly to holes in the hub shell.
On the right is the Shimano Center Lock style. The rotor slides on to splines and is held into place by a lock ring that’s removed by the same tool as a Shimano sprocket set.
Adapters are available to fit six bolt rotors to splined hubs, but not the other way around.
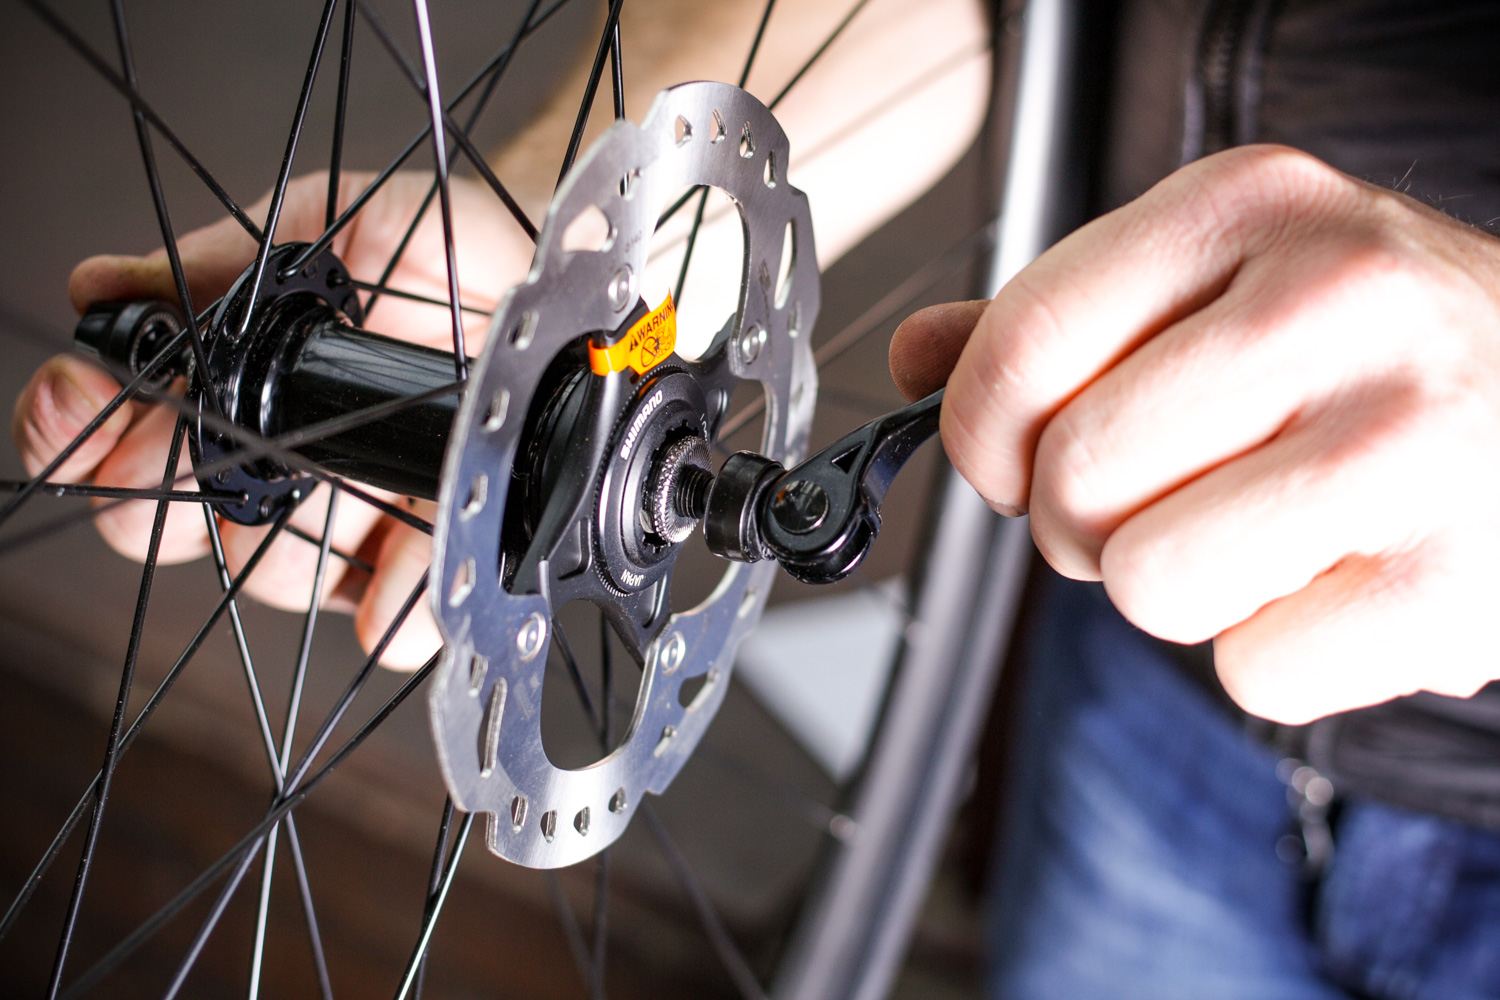
0 take out the skewer Whatever type of rotor you have, remember to remove the quick release skewer first. You won’t be able to remove either style of rotor with it in the way.
Replacing a Shimano Center Lock (splined) rotor
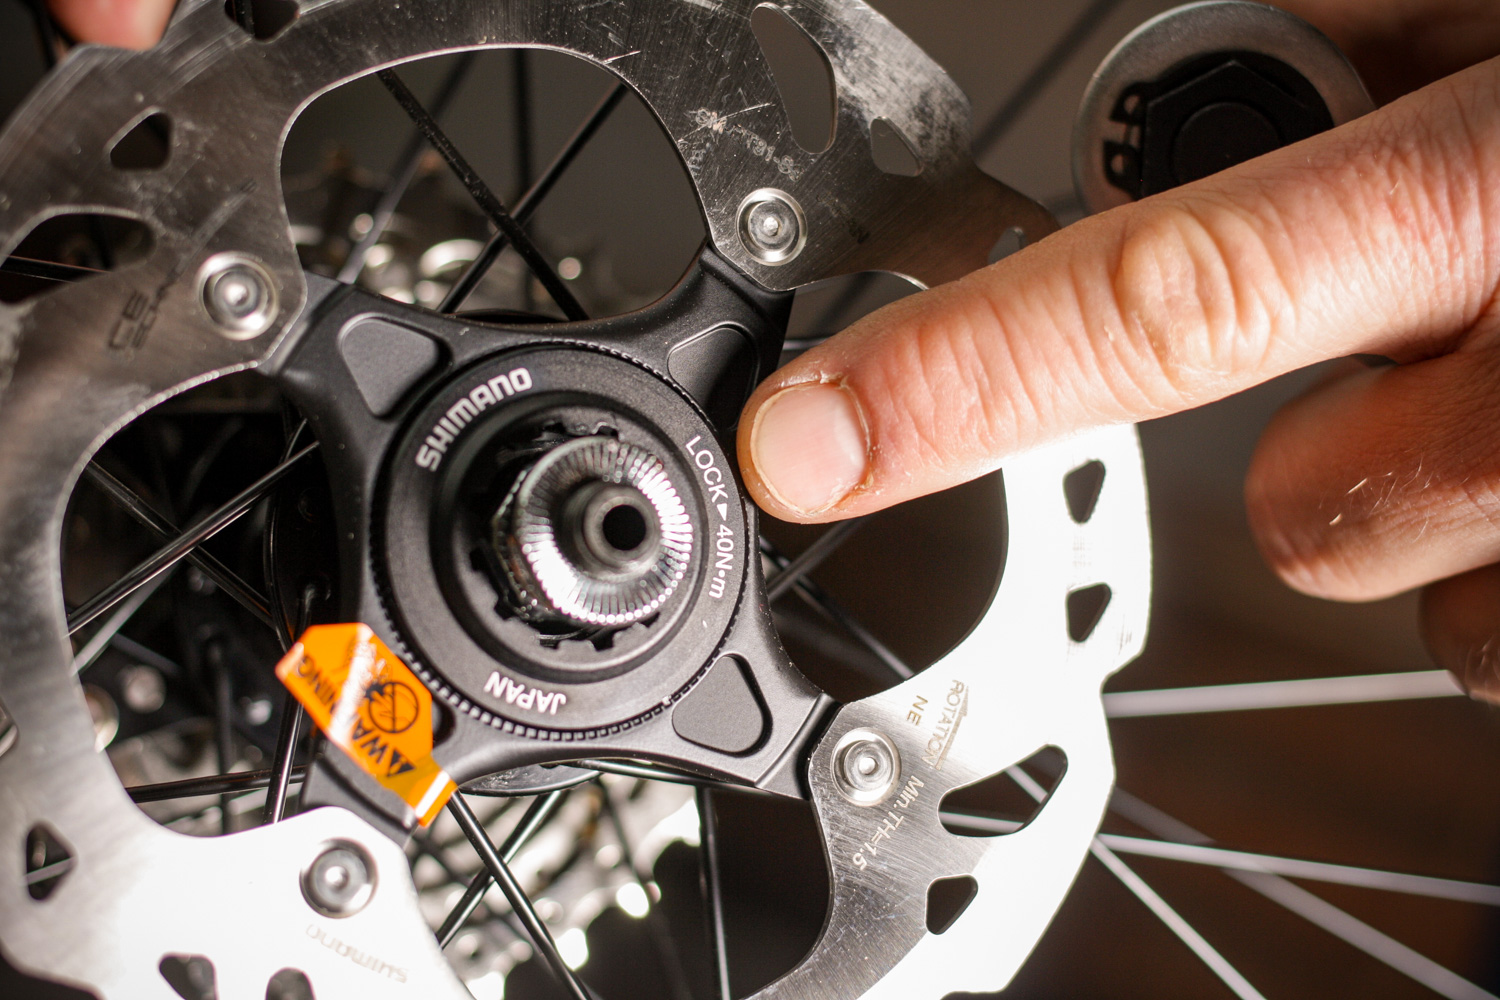
1 The lock ring The Shimano Center Lock rotor design uses a lock ring to secure the slide on rotor to the splines on the hub. Make a note of the direction the lock ring does up.
2 Undo the lock ring The lock ring is removed with the same tool used for a sprocket cassette lock ring. Insert the splined tool into the lock ring and turn it anti clockwise. Lock rings can be very tight, especially if your rotors were fitted at a factory, where compressed-air powered tools can whack them on hard. Try using shock force to break the hold, or some sort of extension to the tool handle.
3 Take off the lock ring Once you’ve broken the initial hold the lock ring should come off quite easily. It can be easier to do the final turns with your fingers.
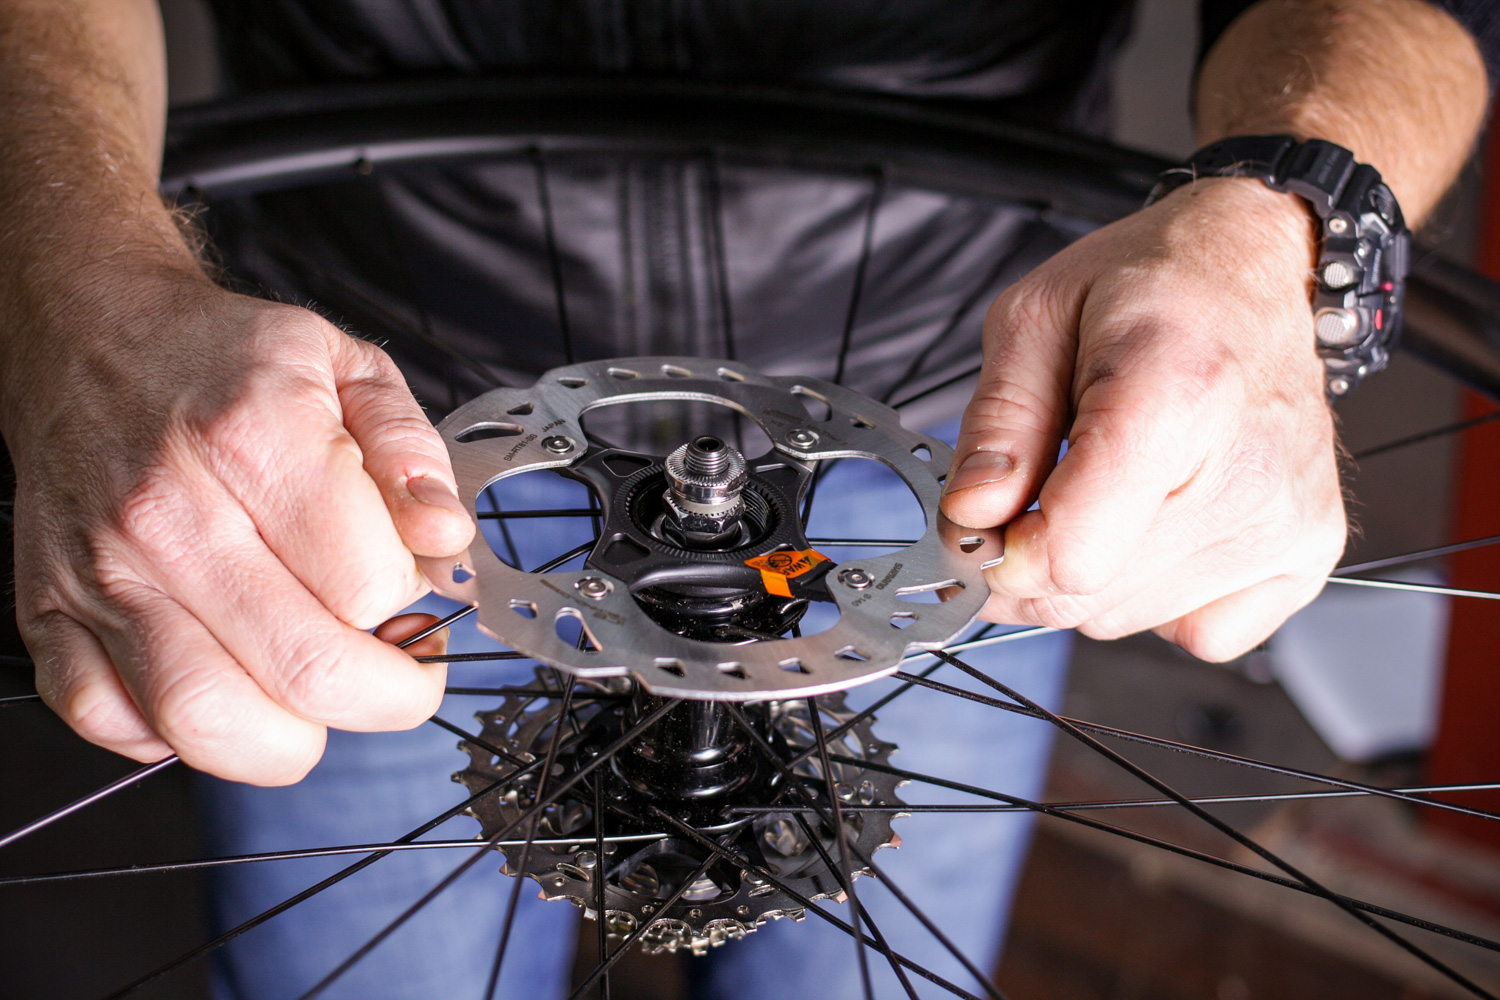
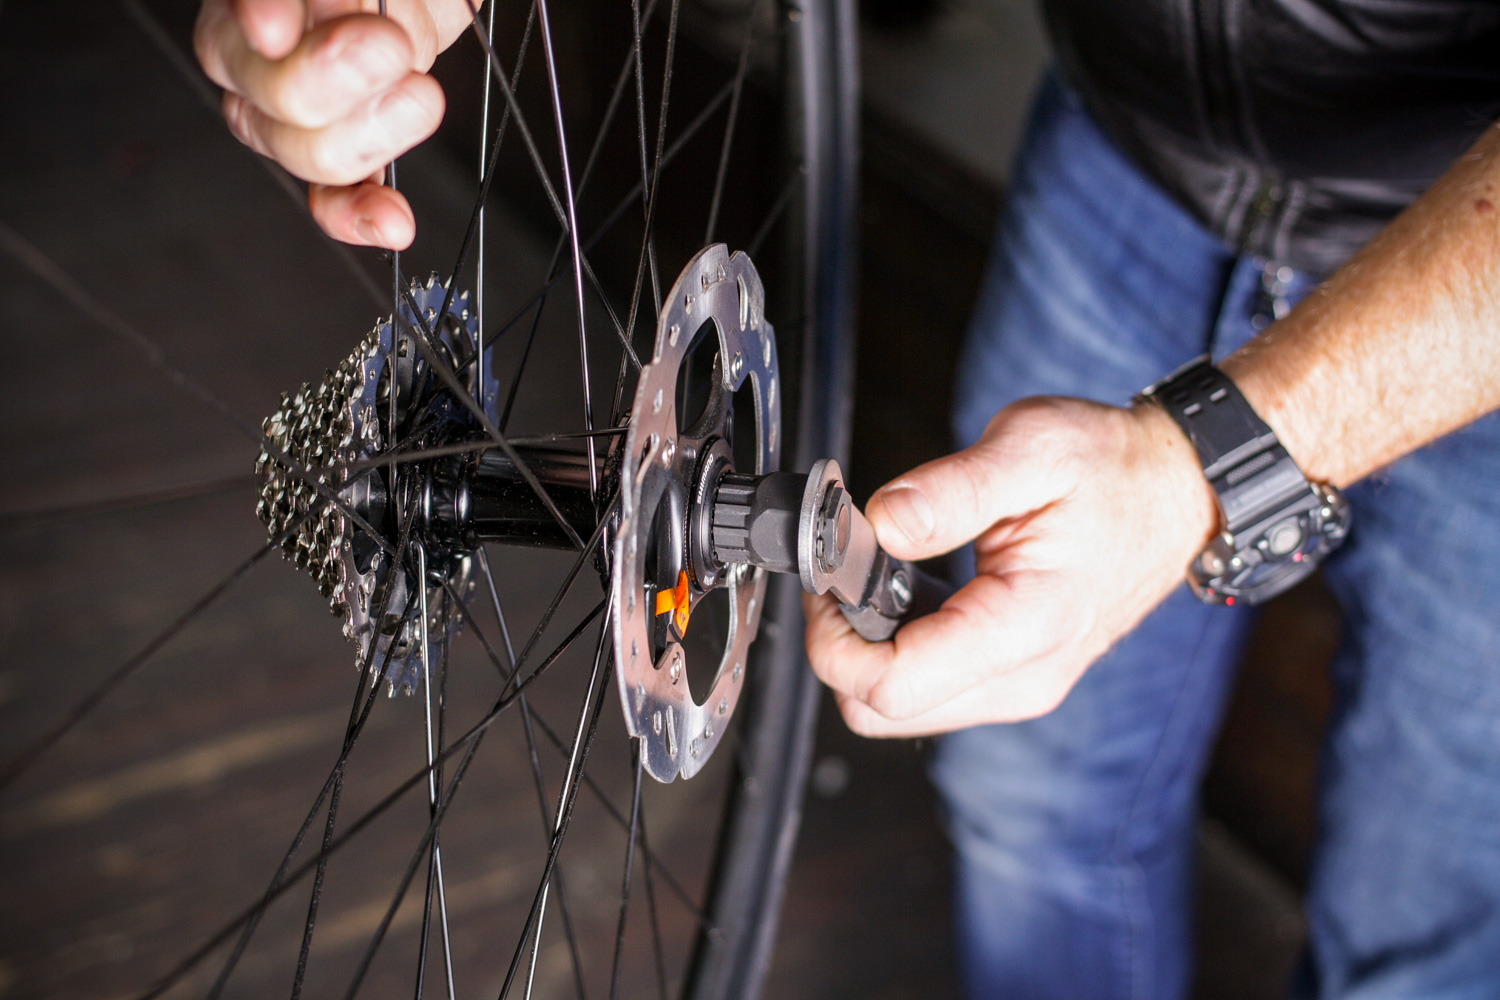
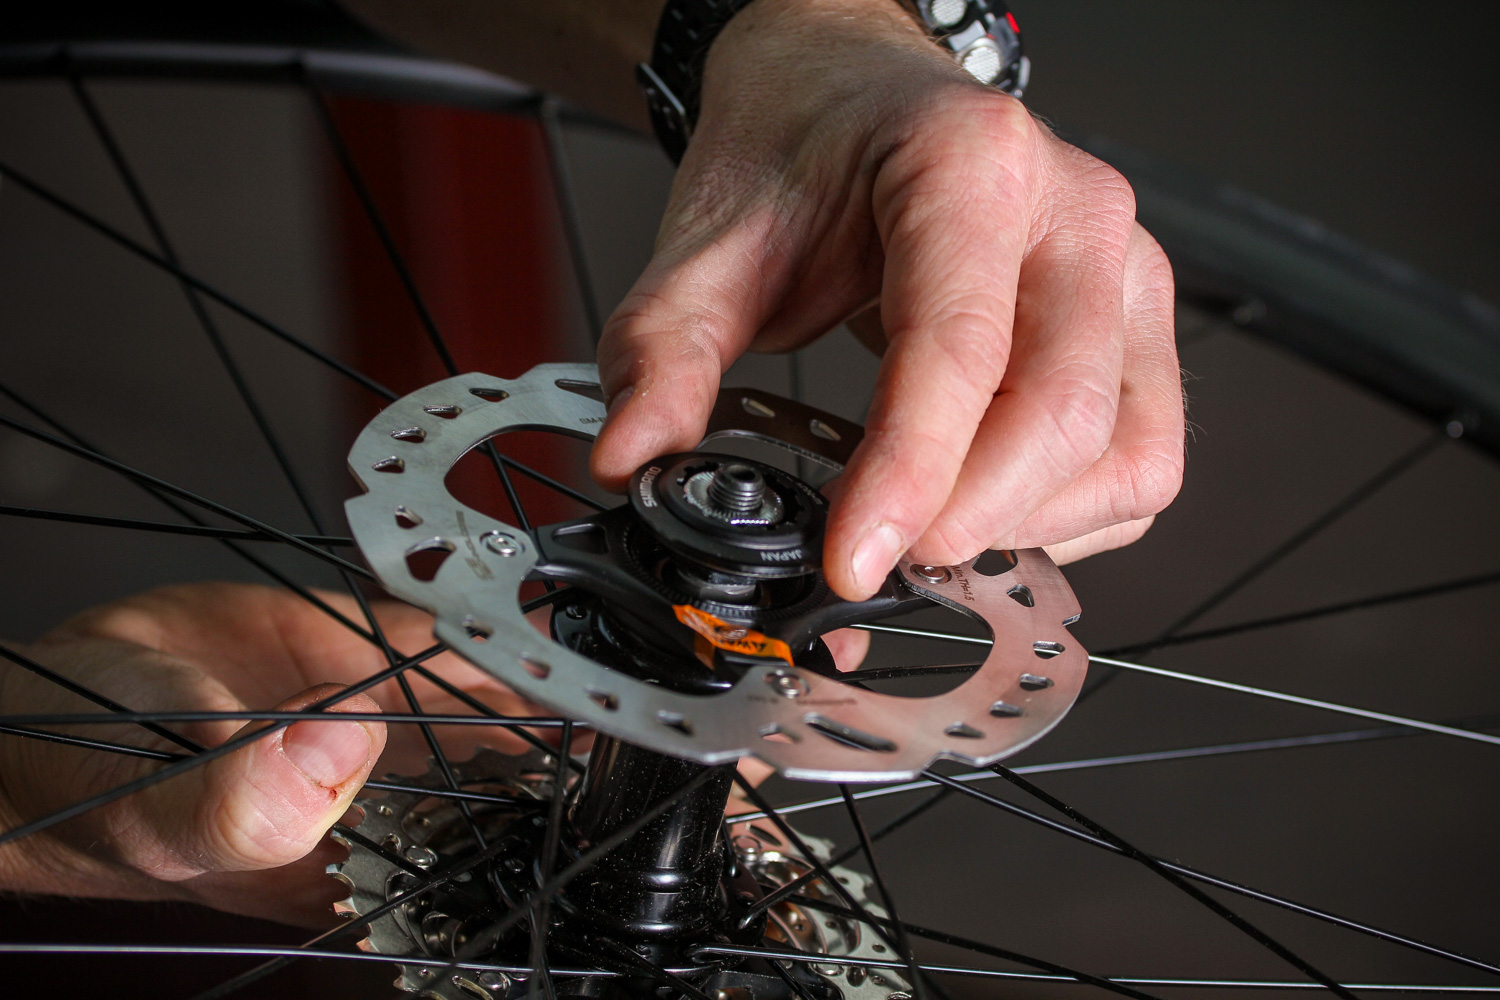
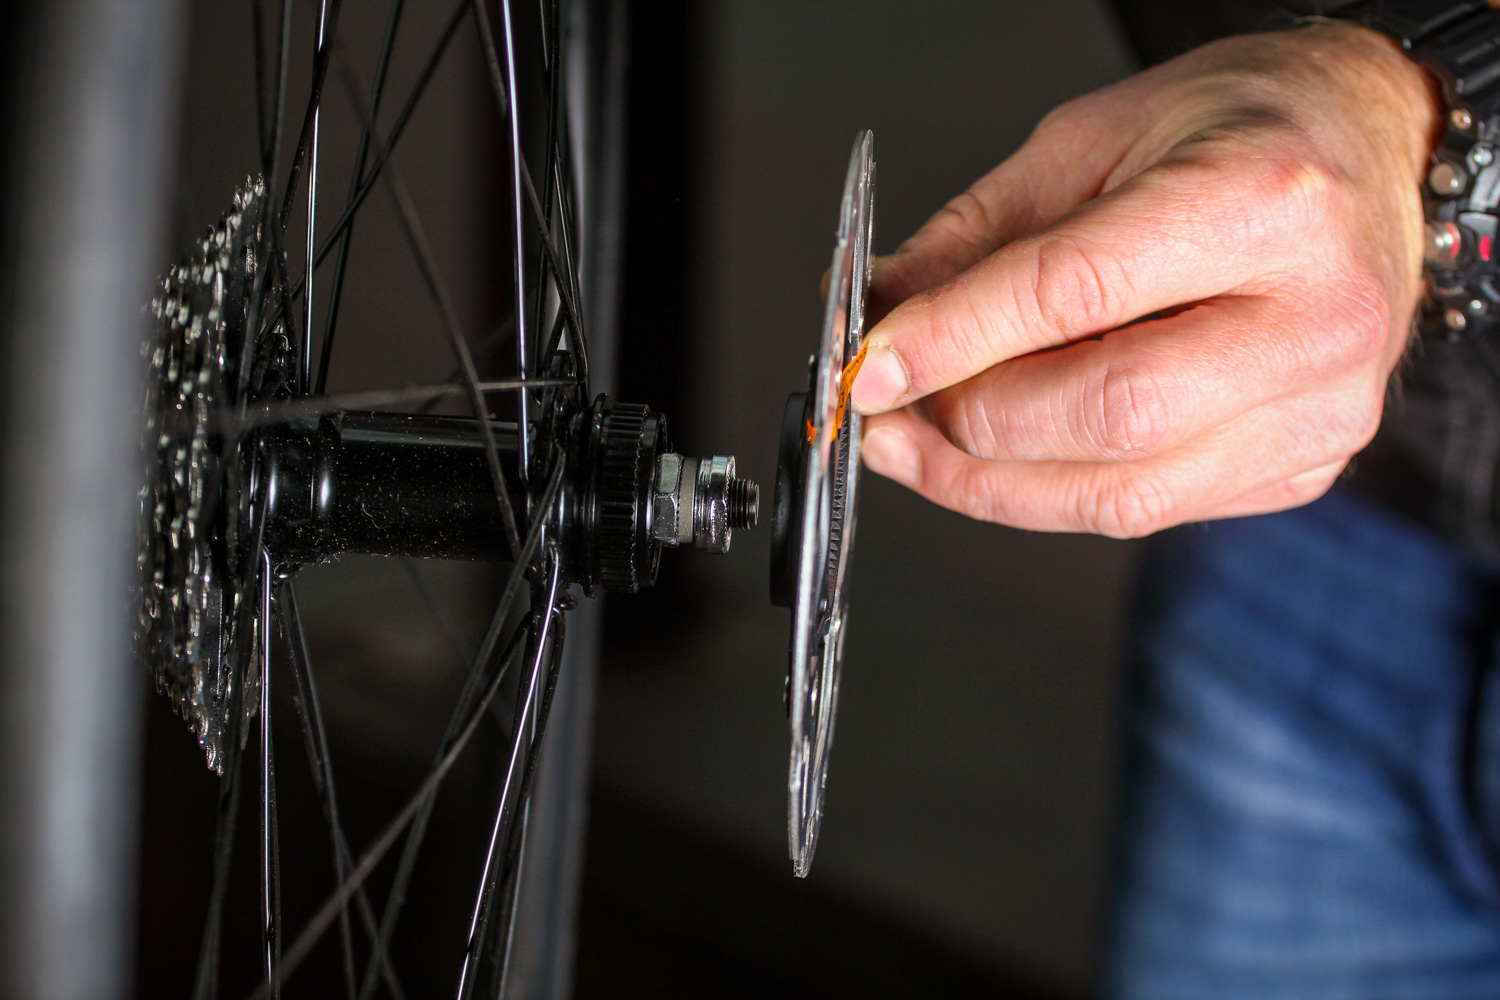
4 Lift the rotor off the splines Even with the lock ring removed the rotor can be reluctant to come off (though some will slide right off). Gently grasp each side the rotor and give it a a wiggle with a slight upward lifting motion.
5 Clear of the splines Gently use upward pressure on the rotor circumference to walk the rotor off of the splines.
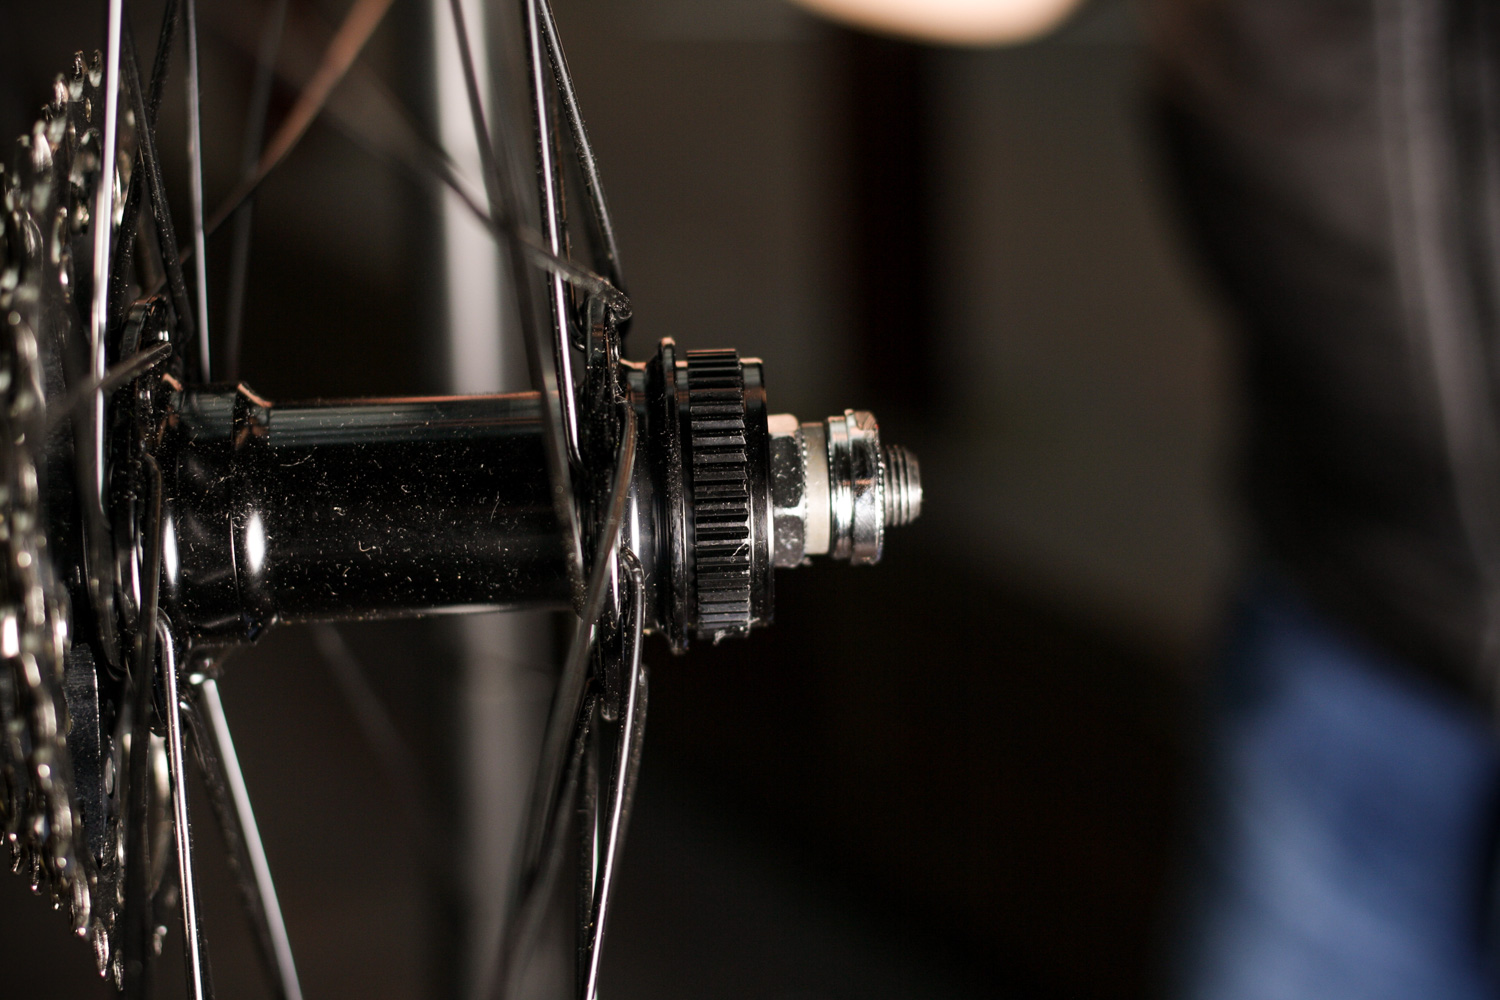
6 The splines While you’ve got the rotor off, it’s a good ideal to give it all a clean and inspect for damage. They don’t tend to wear or get damaged, but they can get a bit gungy. A quick wipe down with some degreaser is a good idea, followed by a light dab of grease.
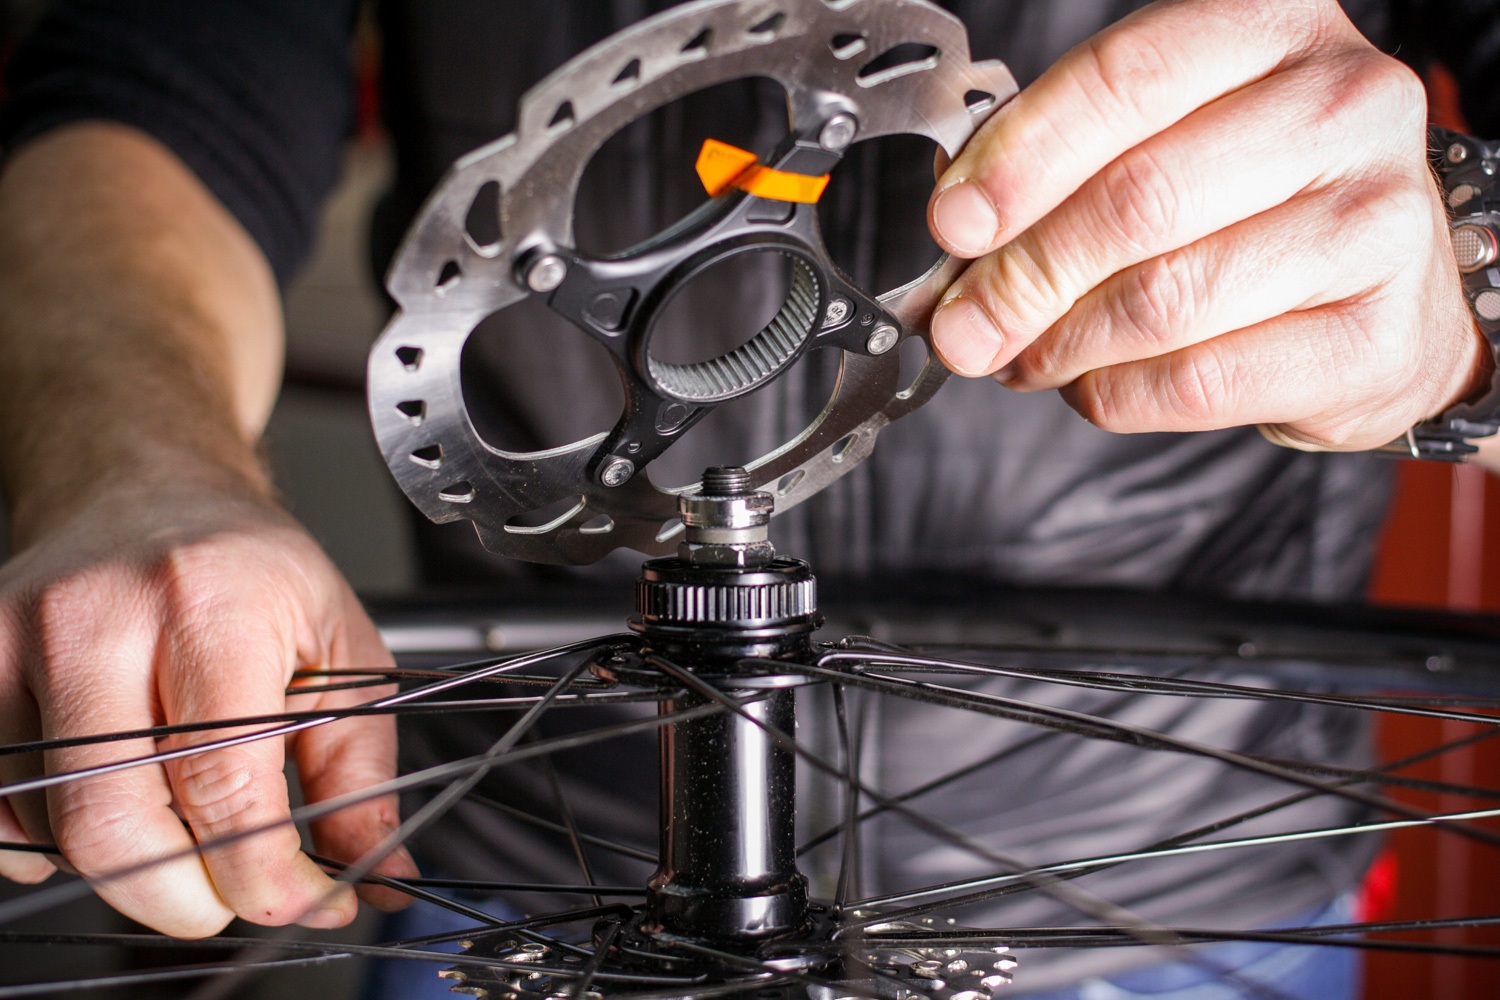
7 Fit the new rotor When fitting a splined rotor it is important to get it the right way round. Center Lock rotors have a stepped alloy centre section and this must face the hub. Getting it wrong will place the rotor too far inboard, and it won’t fit back into the frame and calliper.
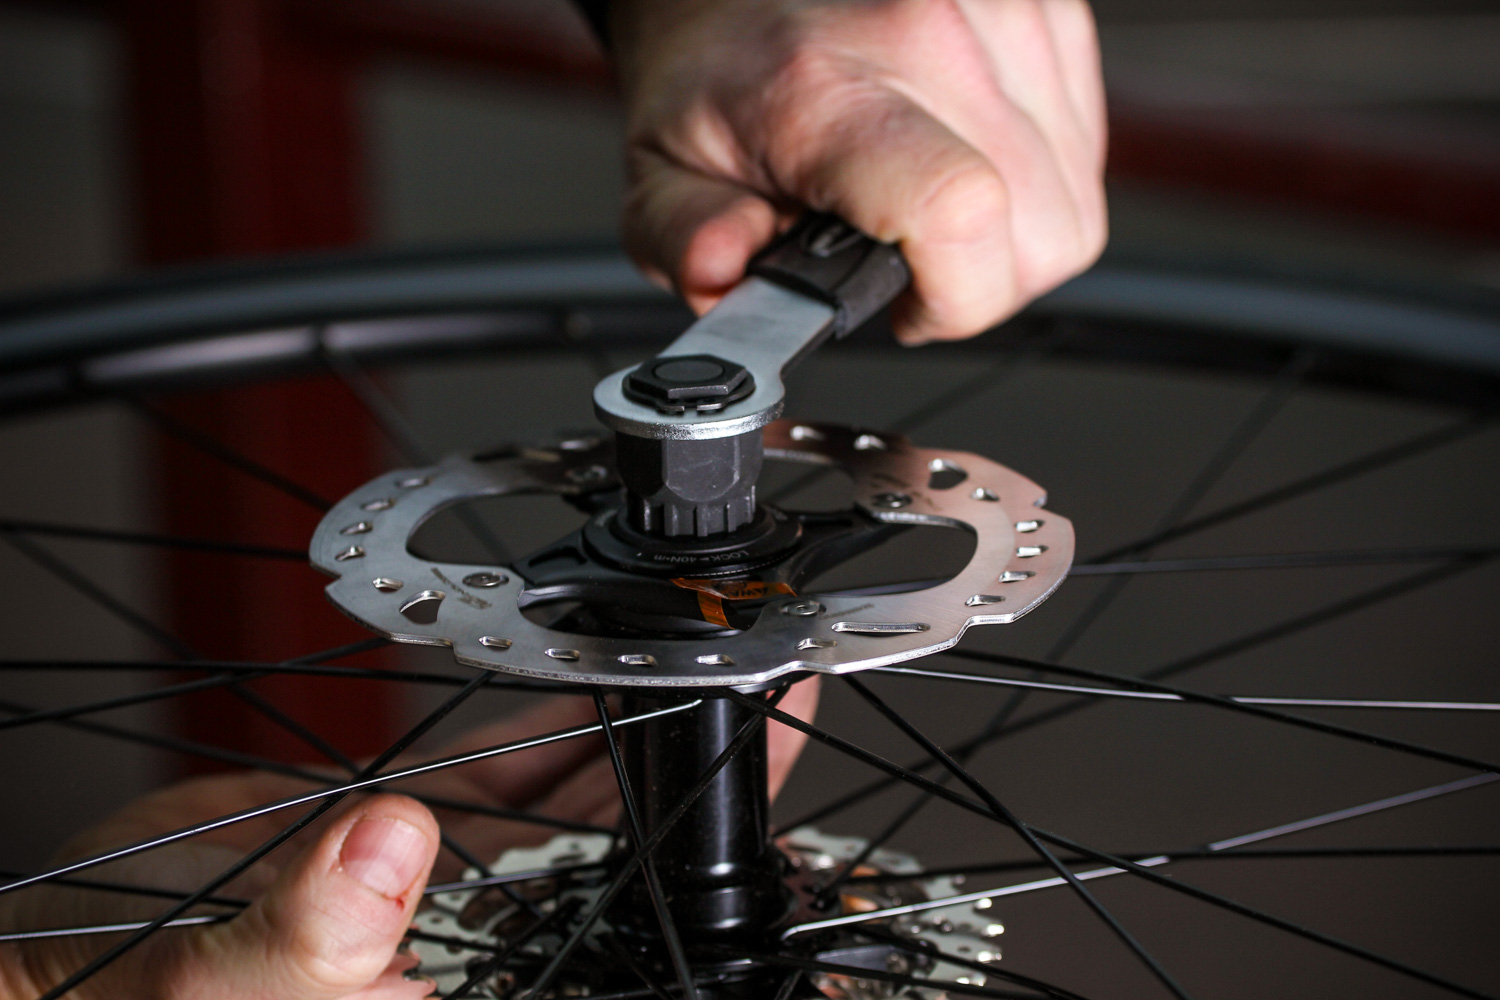
8 Fit the lock ring With the splined rotor back on the hub, take the lock ring, add a small amount of grease to the threads and spin it on by hand. With the first threads engaged, use the lock ring tool to do it up tight. It needs torquing to 40Nm, a full white knuckle job with a standard-length tool.
Replacing a six-bolt (international standard) rotor
This style of disc rotor is the most popular as it came out first and the choice of hubs is far greater.
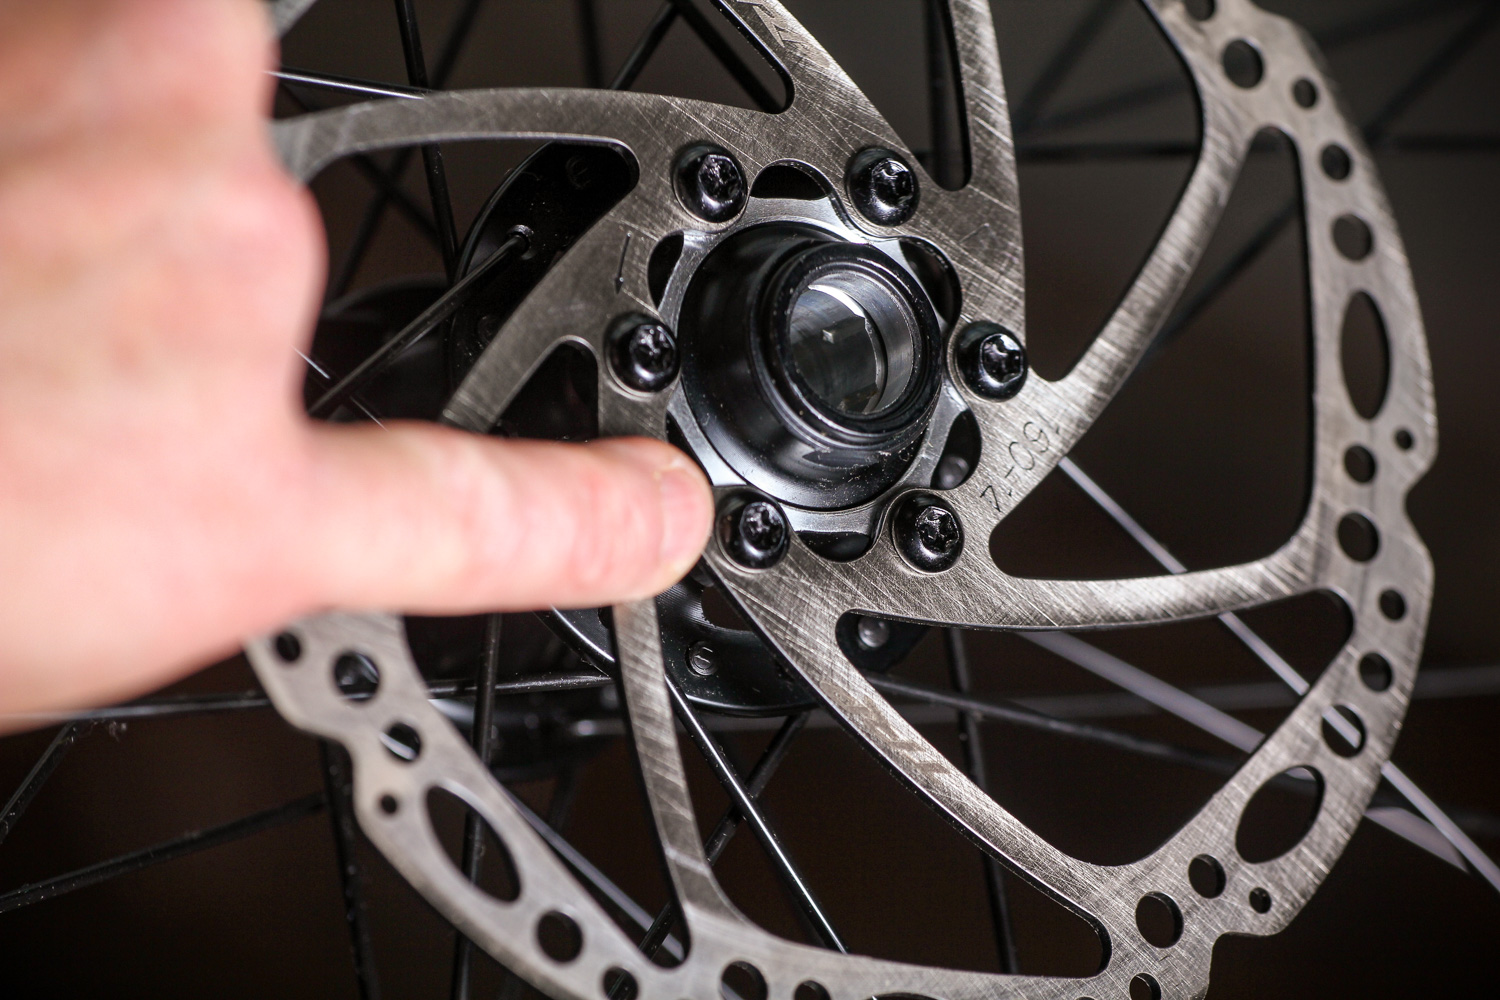
1 The bolts Six bolts attach the rotor to the hub. The bolts usually have a Torx head, with a star shaped hole instead of the traditional hexagonal Allen style. Torx bolts require specific Torx drivers. If you have a recent multi-tool it probably has a Torx T25 head, but we’d advise getting a specific workshop quality tool for the job.
2 Undo the bolts They can be a bit stiff, so make sure you don’t slip with the tool as you loosen them. While Torx bolts resist rounding more effectively than hex bolts, you can still ruin them. Lift off the rotor.
3 Check the rotating direction When you fit a rotor it’s important to get the rotating direction right; rotors can fail if used in the opposite direction than the one they’re designed for. As a clue the brand logo and rotation direction arrow should be on the outside of the rotor (the side away from the spokes).
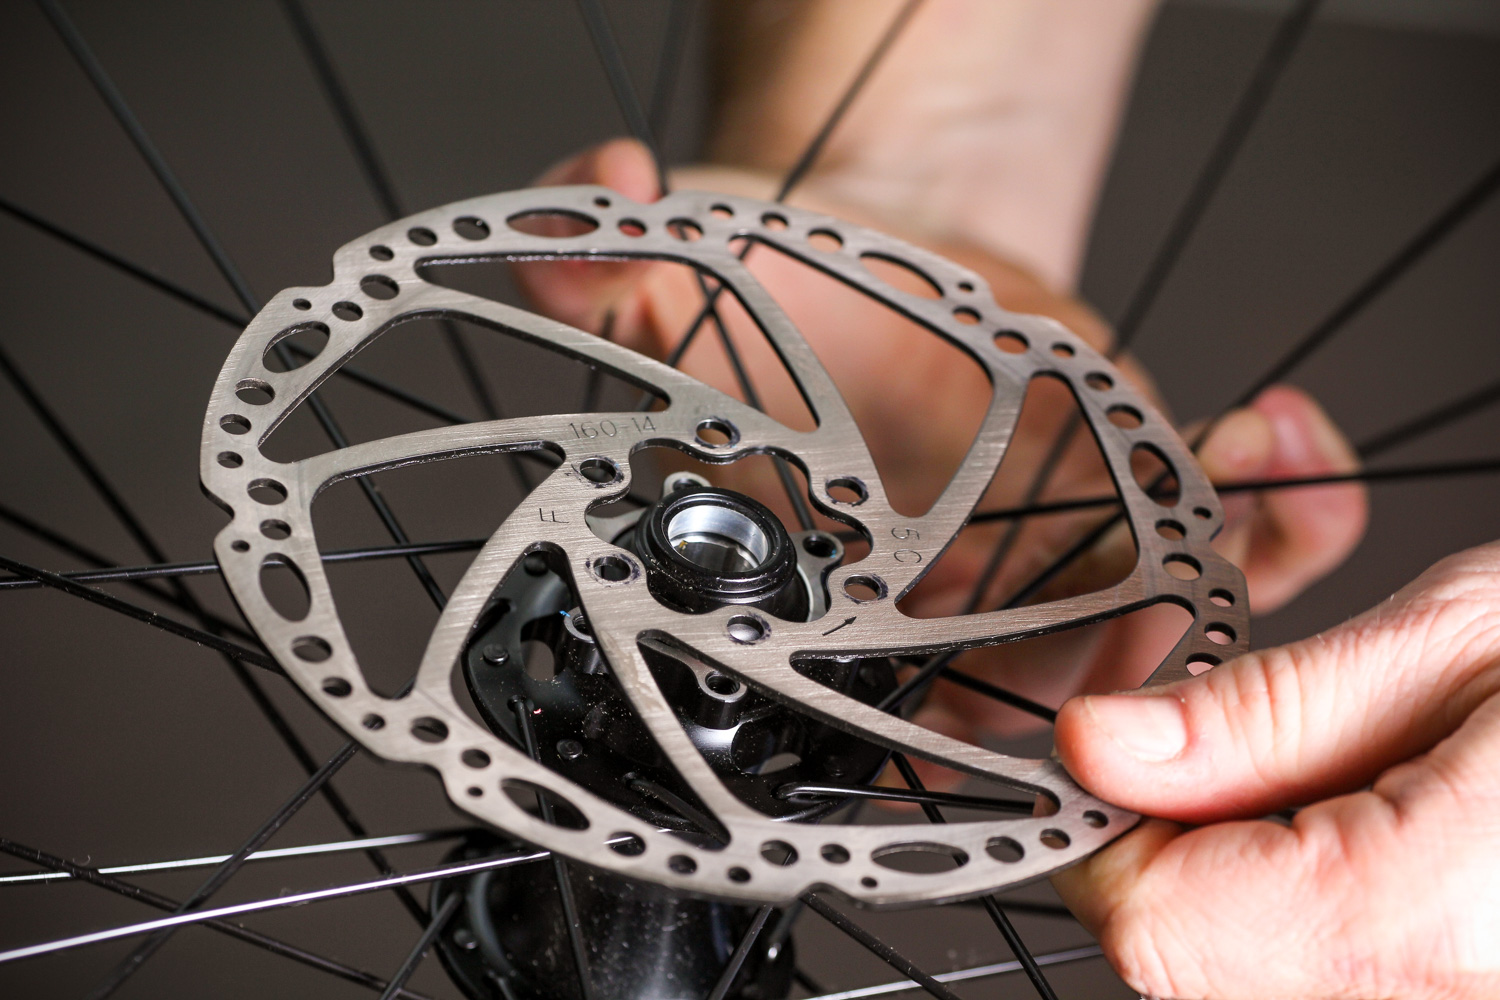
4 Place the rotor on the hub Just make sure the face of the mount is clean and flat and lower the disc rotor (the right way up) on to the hub. Line up the rotor bolt holes with those on the hubs. There is no specific orientation of the rotor to follow.
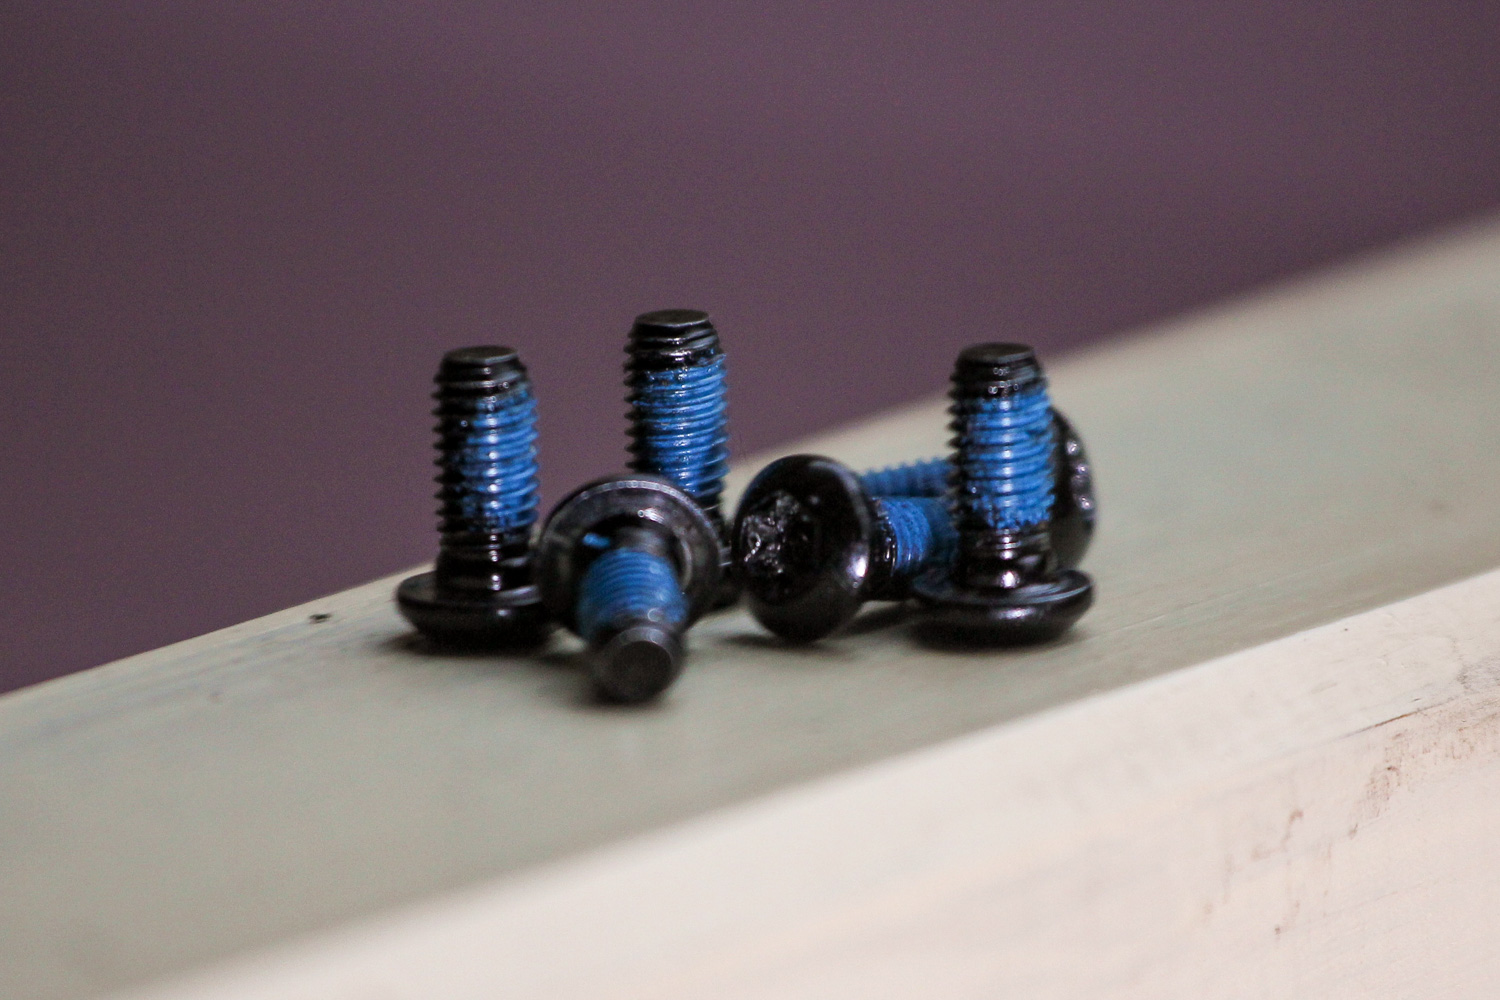
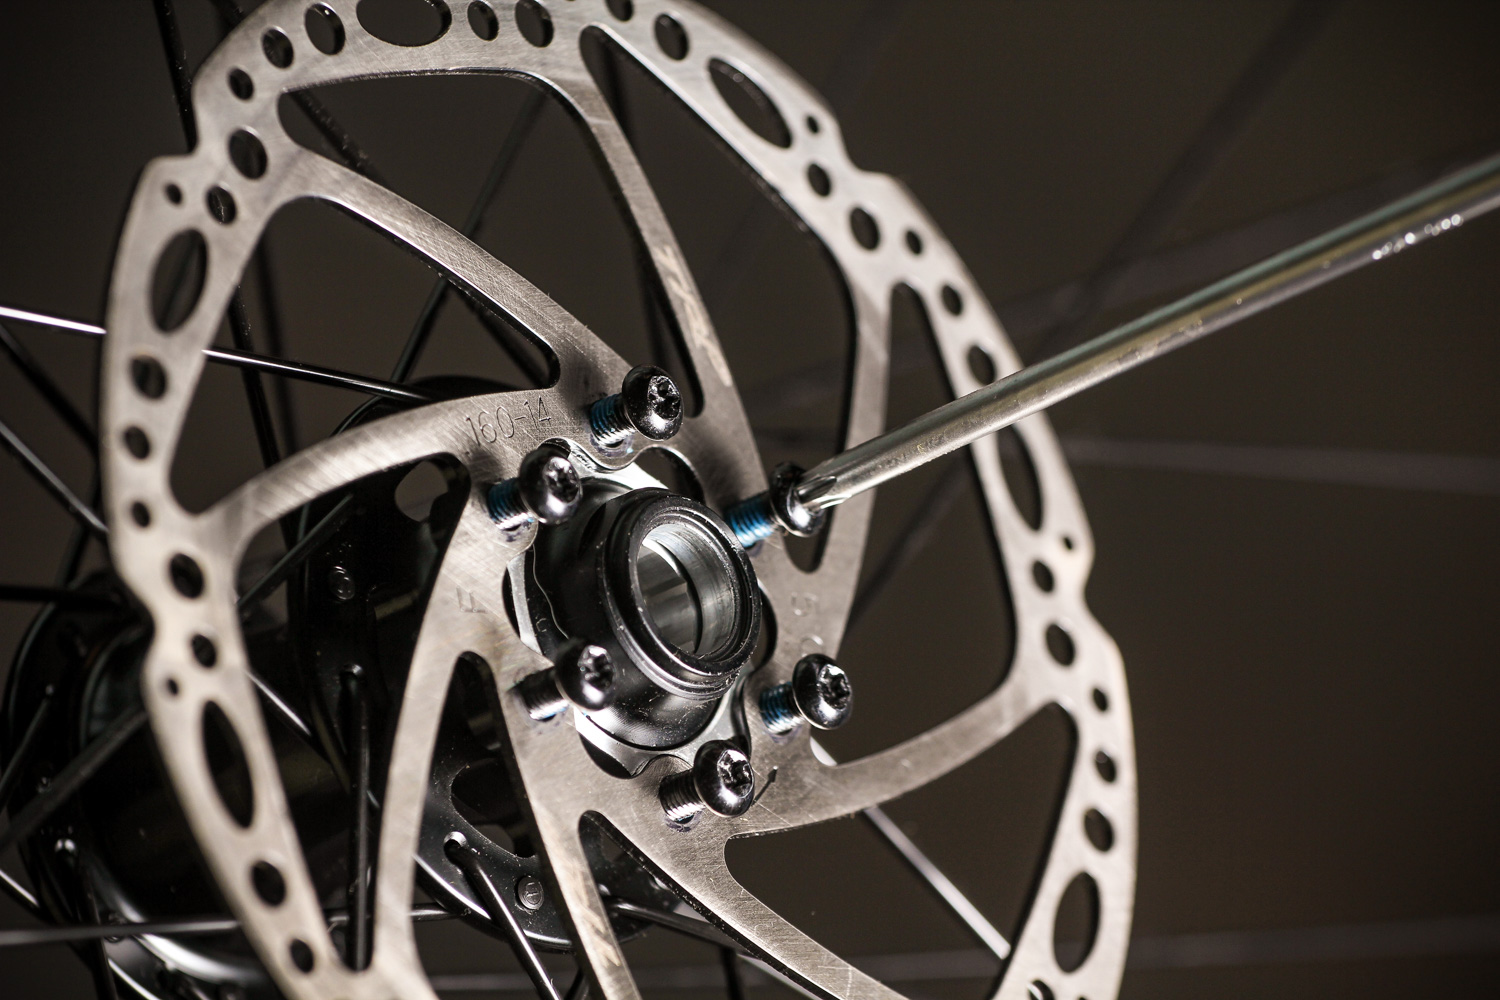
5 Thread lock You don’t want a rotor bolt to come loose in any circumstances, which is why they’re usually coated with thread locking compound, the blue stuff you can see here. If you’re reusing bolts, a couple of drops of Loctite 243 will do the trick.
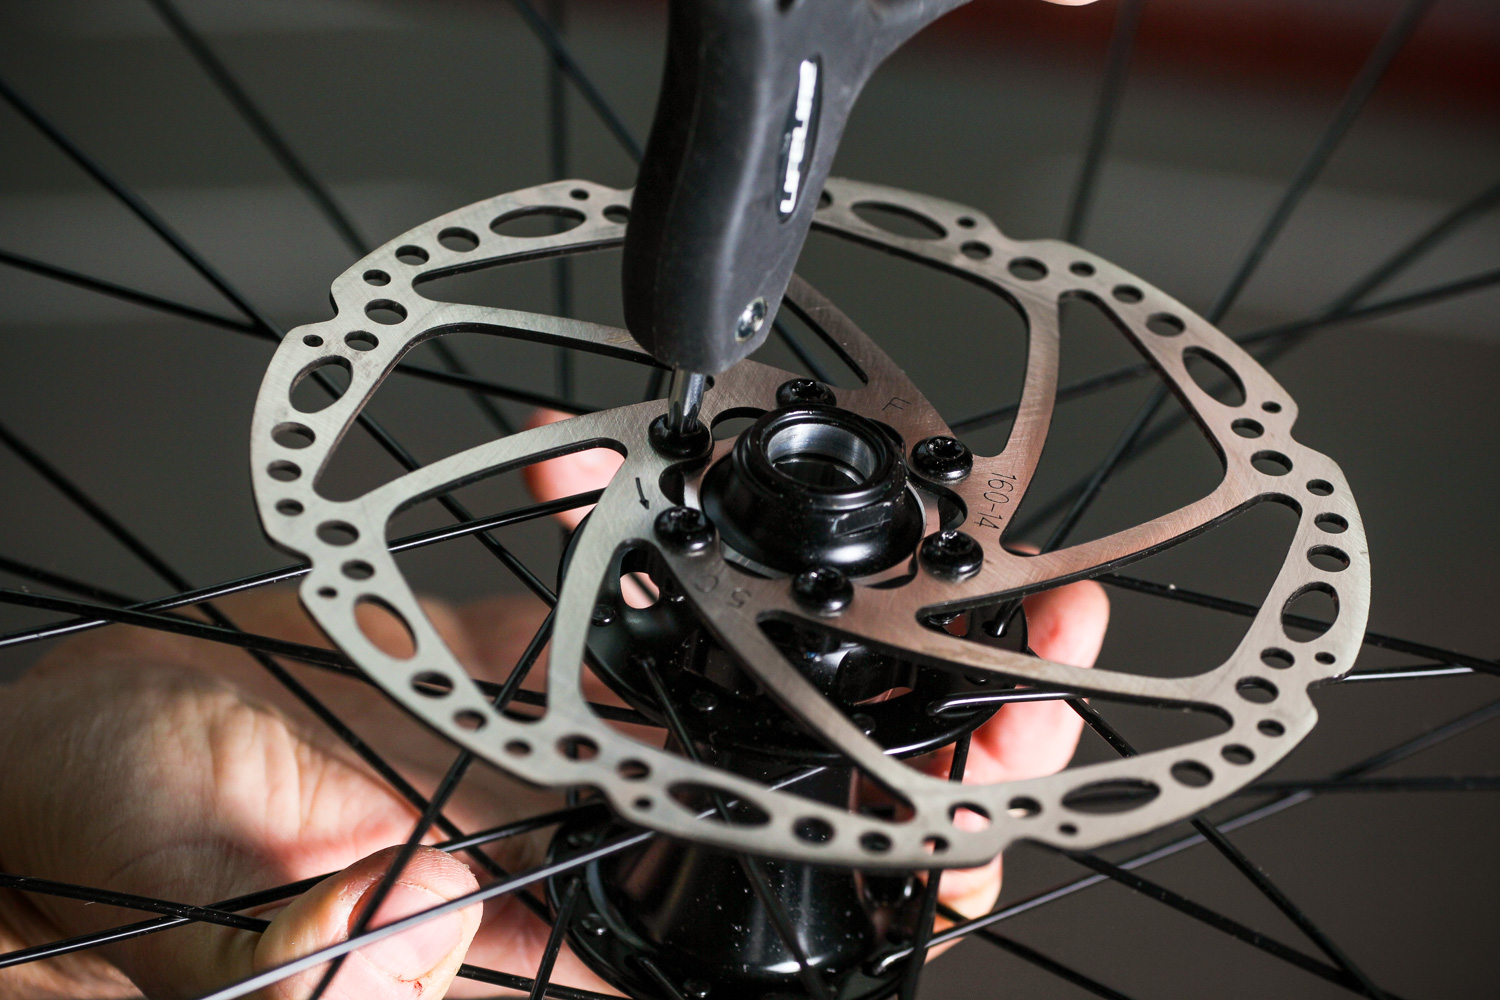
6 Tighten the bolts Work around the rotor and ensure that all of the six Torx bolts are done up tightly. It’s a good idea to counter tighten them, working sequentially, directly across the axle, rather than work around the rotor in a circle.
7 Job done The finished international standard six bolt disc brake rotor, ready for braking.
>> Read more: The full archive of road.cc maintenance articles


8 thoughts on “How to fit disc rotors: get fresh brake surfaces in 8 easy steps”
Hmm. So, the process of
Hmm. So, the process of replacing the rotor is:
1. Undo the retaining screw(s).
2. Remove the rotor.
3. Replace the rotor.
4. Replace the retaining screw(s).
Well, I’d never have thought of doing that. ☺
“You don’t want to be doing
“You don’t want to be doing that” by holding on to a spoke or two to brace against the lock ring being undone. It can be very tight mainly when fitted at the factory.
Use your weight to push down on the lock ring spanner whilst gripping the rim/tyre.
Nice to see the lock ring being an existing design so you don’t need yet another bespoke tool for a job that doesn’t need doing very often.
Butty wrote:
I agree. Some wheels (Fulcrum for example) come with a different lockring that needs the Shimano Hollowtech II bottom bracket tool. If you have Shimano equipped bikes you probably have that lying around too.
Depending upon the hub
Depending upon the hub/bearing design, the internal spline version of the lockring (that uses a cassette tool) can be problematic as the tool only engages with a fraction of the lockring thickness, jumps out and chews up the lockring. (this is true with my DT Swiss PRC wheels and I had to machine down the inner diameter of a cassette tool to get it to drop in far enough to properly engage with the splines.). I increasingly prefer lockrings with external splines that use the BB tool.
Don’t think it was
Don’t think it was professionally done too. Most 6 bolt rotors also comes with ‘safety washers’ tying 2 bolts together. Also such a sore eye to see the mechanic hold the rotor by its braking surface with his greasy fingers! Good luck with brake squeal afterwards!
Totally off topic, but that’s
Totally off topic, but that’s a nice G-Shock GW-9400-1AER Rangeman the model is wearing 🙂
Grump mode on
Grump mode on
When did a brake disc become a ‘rotor’
It’s disc brakes, the big round thing is a disc
I understand your grump.
I understand your grump. However, in engineering speak, the disc is a rotor (rotates) and the brake pad is the stator (stays still). That’s how is was described in my aerospace engineering apprenticeship. To be fair though, disc and pad is a bit easier to manage.