


Recently we were lucky enough to test the Frog 67 children/young adult drop bar bike. I say we, it was my daughter who rode it, I just asked the questions and wrote up the review! Anyway, it was her first time riding with drop bars, and she loved it. So when the bike went back, I decided to build her up another one myself, bike jumble style. It is her first ‘grown-up’ bike with 700c wheels. I had a few bits that I thought would work, but was missing some key components: a frame and fork!
I messaged around and my friend came up trumps with this classic steel frameset that was too small for him. He’d bought the bike for the components, and duly moved them onto a different bike. Best of all, he only wanted £25 for it. Sold!
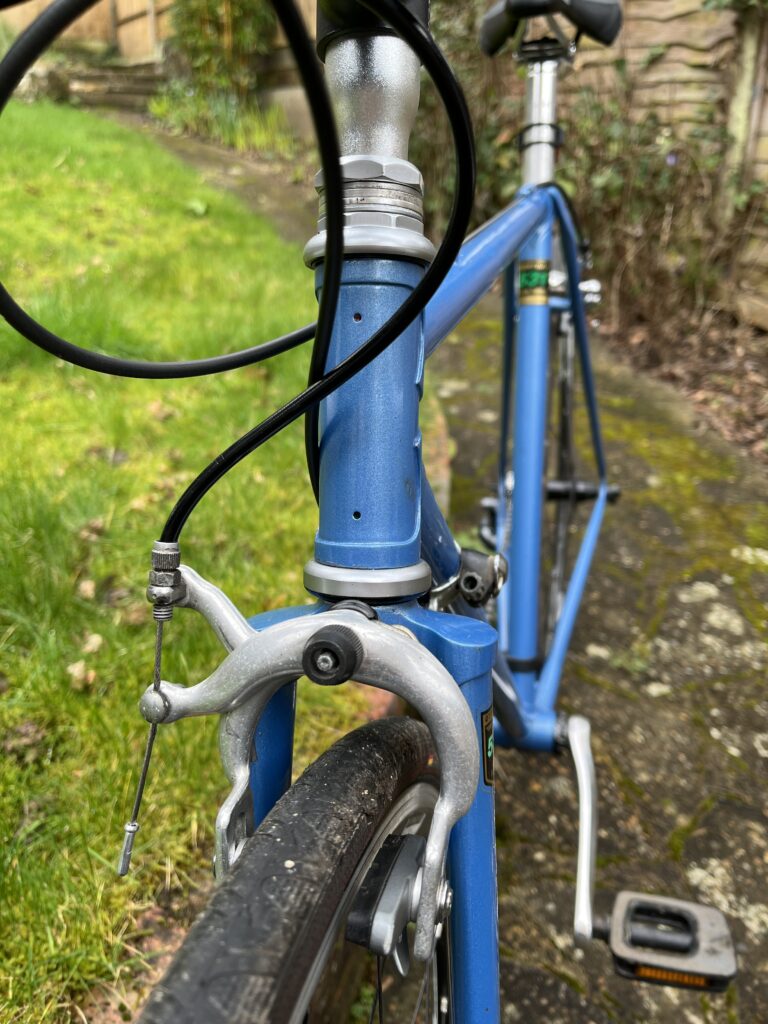
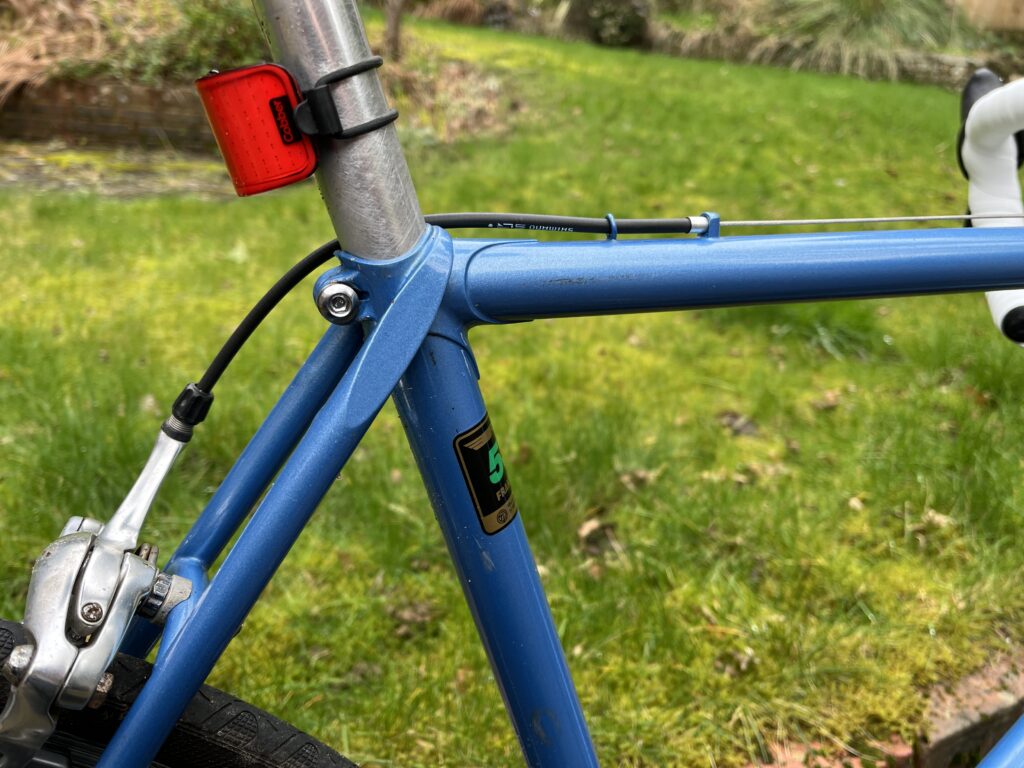
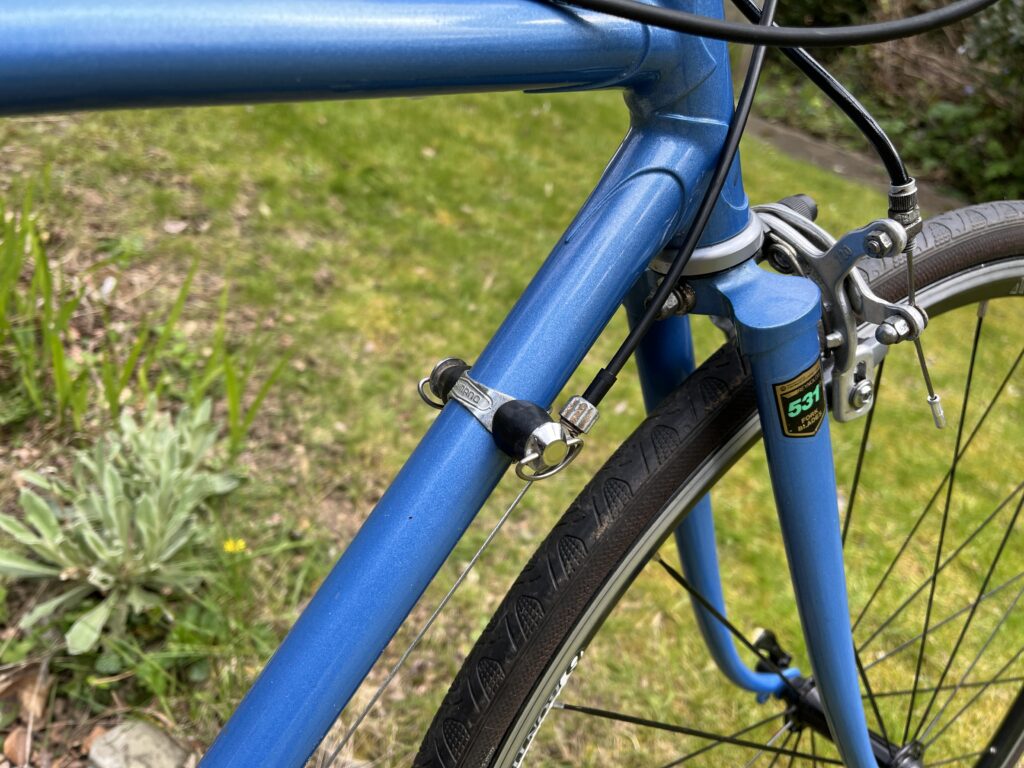
It helped that it was in this pretty shade of blue, which my daughter loved. The frame and fork (both steel) weighed in at a decent 2,564 grams too. A good start.
The only mystery is… what make was it? The head badge had gone missing, and there were no maker’s stickers, other than the Reynolds 531 badges on the seat tube and fork legs.
The only clue is a measurement of 58mm centre-to-centre between the holes on the head tube, which means it’s a riveted head badge, rather than a decal. My feeling is that it’s most likely a mid-1980s to early ’90s-era frame, as it has a wraparound seat stay and 130 rear dropout spacing. These are generally features found on steel frames of that era. The frame number is a four digit number only, no letters or other clues. Hmmm…
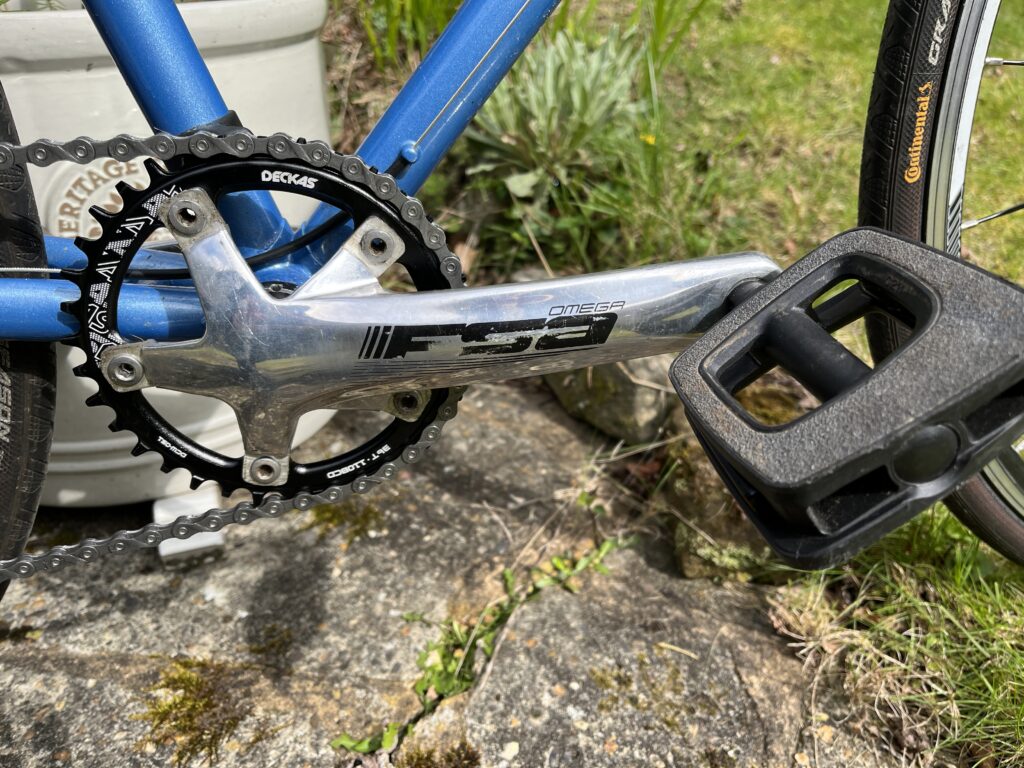
The next step was to find a crankset. I wanted a polished silver one as I thought it would match the aesthetic of the bike, and I was going to try to fit polished silver components wherever possible. Luckily I had an FSA Omega crankset and bottom bracket bearings waiting for a project.
The frame has a 68mm shell, BSA bottom bracket type. The cranks are a little longer than I ideally wanted, but I will look out for some more suitable ones at the next bike jumble that I go to. The seatpost was a standard 27.2mm round type, and the headset was a 1″ threaded type, so I had those ready to go. I had a spare pair of Bontrager 700c wheels, a pair of Conti 25c tyres and tubes, and some QR’s that I could put onto this bike too. Great, it’s starting to come together.
However I was now going to need to buy a few components that I didn’t have, or have in the correct sizes. I wanted narrower bars, and went for a 380mm wide bar. I would’ve chosen an even narrower bar, but my daughter wanted top mount extra brake levers, and we needed to allow enough room to operate them easily. So I bought some Tektro RL721 brakes that would work with the 31.8mm bar/stem type.
I also wanted a suitable saddle. The Frog saddle had been good, and I found a Madison Flux Junior saddle which looked similar. I deliberately decided not to use a more appropriate quill stem, but had chosen to use a quill converter and stem as it would allow easier adjustment should we need to set the bike up differently. My aim is, in time, to fit a classic quill stem and 26.0 bars, but only when the top brakes are no longer needed.
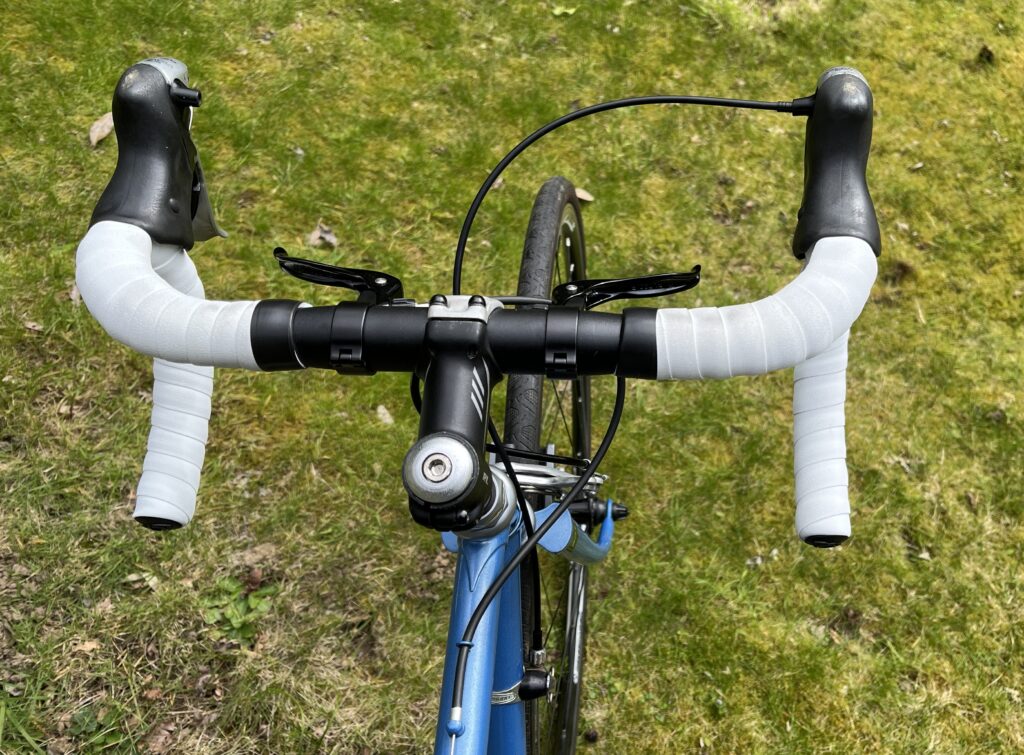
Another feature that my daughter liked from the Frog was the 1x gearing with road levers. I had a pair of old 9-speed Tiagra (4500) brake/shifter levers that I thought would work well. Obviously there would be no front derailleur and double chainrings, so I left the left lever without a cable, but clicked in to the outer setting. It felt fine to use as just a brake lever. The right side was cabled and entirely conventional.
I needed to buy a 9-speed cassette and chain, and as the Claris long drop rear derailleur would allow a wider range cassette, I chose a Shimano 11-34t cassette and a KMC chain. A Deckas 36t narrow/wide chainring would keep the chain in place and set the gearing range to where we wanted it.
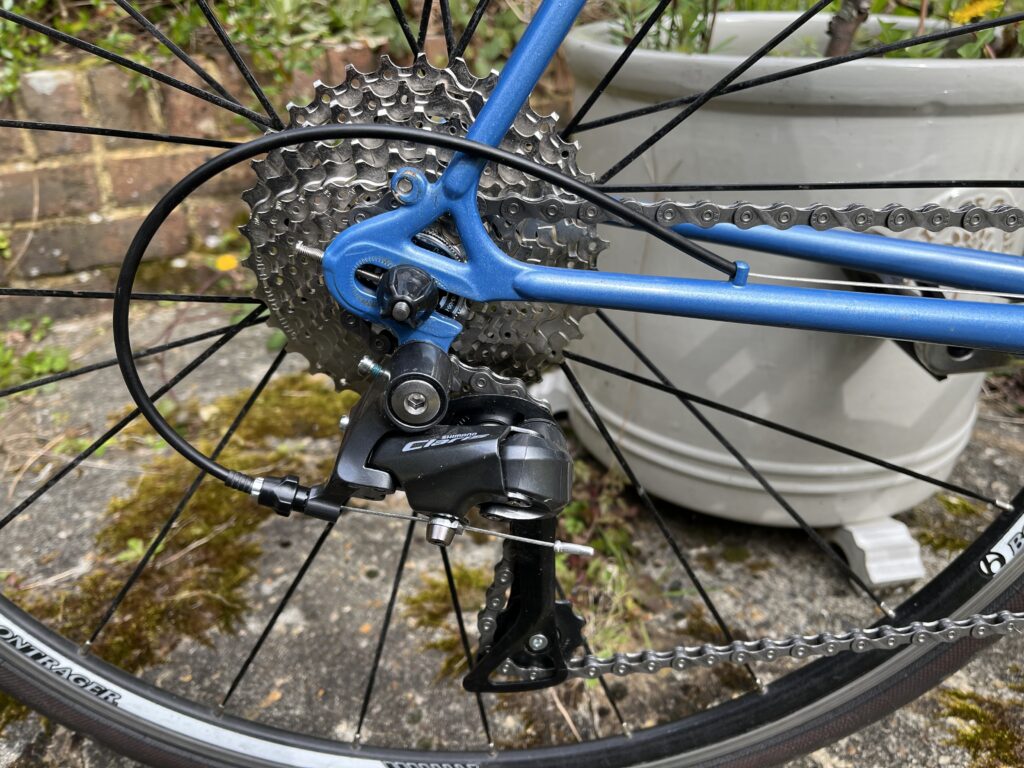
The build was coming together, but a headache was still to come in the form of brake callipers. I had naturally assumed that long drop (47-57mm) callipers would work. On the rear it did and a trusty old RX100 calliper fitted, just.
Luckily I had one random calliper with an external nut fitting, rather than a recessed nut type. I really didn’t want to drill the frame if I didn’t have to. Anyway, the rear brake stay would be awkward to access with a drill. So far so good. The front proved to be a headache though. In the end a Weinmann 720 calliper was sourced from a friend, and it could cope with the 70mm drop required. It’s not great, so I’m planning to swap it for a Diacompe BRS202N soon. But it does work, albeit a bit heavy in its action.
The upside to having space under the brakes is that we can fit some mudguards easily when winter approaches. This will massively improve wet weather comfort, so we should be able to ride all year round, and keep her riding enthusiasm going. She already has her favourite cafés to ride to as well.
Interestingly, the down tube doesn’t have shifter bosses or bottle cage bosses brazed on. So I’ll also be sourcing a band-on bottle cage. I could braze a pair of bottle mounts on, but that would spoil the paint job! I’ll leave it be for now.
All things considered, she’s ended up with a nicely fitting bike that weighs 9.7kg with pedals, it looks really pretty in mid blue, and has a classic silhouette. Some modern gearing touches keep it more usable too.
It’s cost £121 to put together, obviously using parts that some friends and I had going spare, as well as buying a few parts in. It’s given me a couple of head-scratching moments with the brakes, but it’s been fun to build. We are looking forward to more better weather and getting out consistently this spring and summer.
If some of the details have given you an idea as to who the maker might be, maybe you’d be kind enough to leave a comment below. It would be a great finishing touch to reunite this bike with its appropriate head badge.


7 thoughts on “How I built up my daughter’s first ‘grown-up’ bike with salvaged parts and a mystery £25 Reynolds 531 steel frame”
Given the condition of the paint I think it must be a respray, which would also explain the absence of decals…what are the last two numbers of the frame number? Several manufacturers who used only numbers would put the year as the last two digits. I’m not really sure why I think this but something about the frame says Falcon to me, very popular in the 80s and their badge is quite tall so might match the frame holes. Just a hunch though!
I think that frame might be a Raleigh International. The seatstays wrapping around the top and front of the seat tube could be the clue. Have a look on YouTube at Bike Farmer – he picked one up a couple of months ago which looks very similar. Different variations produced throughout 1970s. Sheldon Brown has some info and old Raleigh catalogues.
https://www.sheldonbrown.com/retroraleighs/international.html#:~:text=The%20Raleigh%20International,are%20a%20very%20nice%20ride
https://www.sheldonbrown.com/retroraleighs/index.html#catalogues
https://www.bikeforums.net/classic-vintage-bicycles-whats-worth-appraisals/1234685-1974-raleigh-international.html
Thanks, interesting article and a good reminder that older bikes with older components can make a really good bike.
Given that you needed long-drop brake calipers to reach the 700c rimmed wheels, I think it’s likely that the frame was designed for 27″ wheels, and therefore is a bit older than you suggest – maybe mid 1970s to early 1980s?
Could be a Brian Rourke frame.
That wraparound seat stay is a signature of theirs.
Good spot, although cat falcon also used that style on occasion, see below an Ernie Clements San Remo. Not defending my hunch, just mentioning it as a matter of geeky interest!
I think you may be right 👍
Head tube holes look too big for a Rourke.
They might use it but they are not the only ones, wraparound seat stays were a thing when Brian was still racing and most frame builders offered it as an option. The lugwork made me think Woodrup but that’s just a guess.