


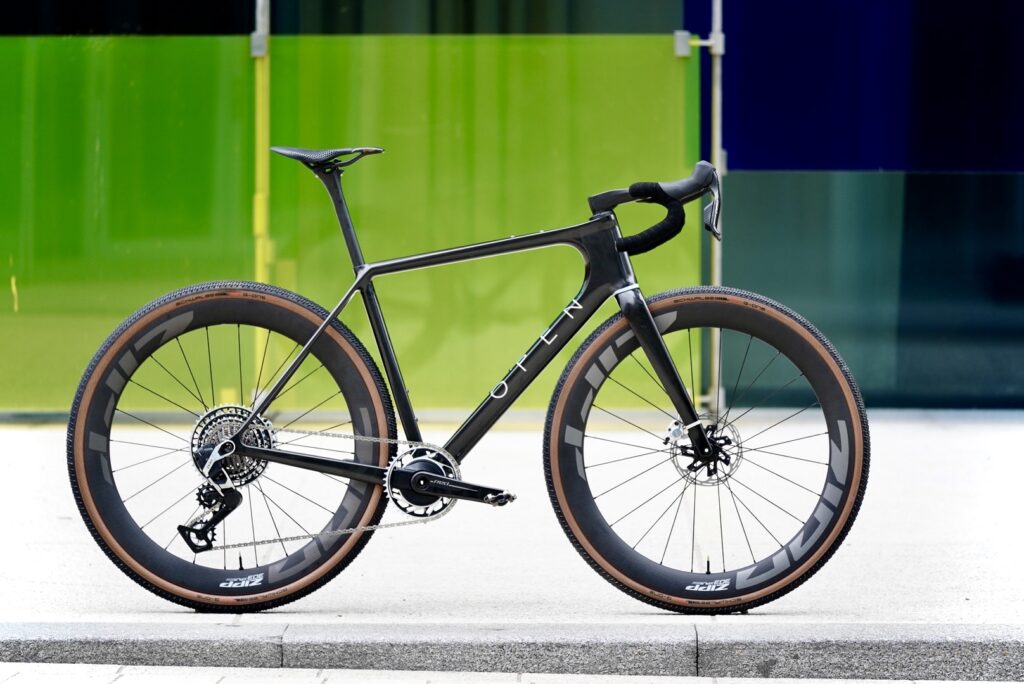
I loved the original OPEN U.P. bike. It effectively birthed and stabilised the gravel bike sector. So, when OPEN announced a whole new range of bikes, starting with a lightweight concept version, (the U.P.PER. CONCEP.T.) I put my name down to buy one of the 250 framesets. Though I ride and test many bikes, this would be my first bike purchase in years, and would mean a custom build, which is perhaps the zenith of New Bike Day excitement.
According to OPEN’s Gerard Vroomen, between 30% and 50% of their framesets go straight to a custom painter. To make this build as special as possible, it seemed only right to give it the bespoke custom livery it deserved. So I set about finding a custom painter who could guide me through the process.
There’s one caveat to this piece that you should know going in, and it’s that the video (above) and photos (throughout this article) don’t really do justice to what was achieved. In the ‘flesh,’ (the carbon?) it is soooo much more. More everything really. The colours are deeper, richer, brighter and more vivid, and I think the bike is a real work of art. But here’s how we got there…
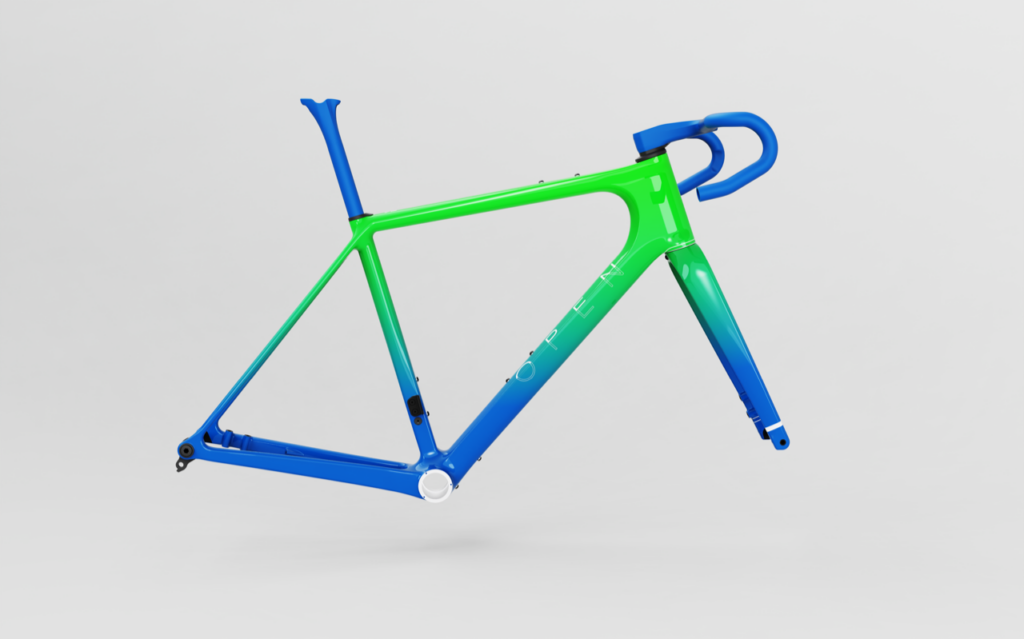
The first question I asked myself was ‘what’s the coolest bike I’ve ever seen?’, and one came to mind immediately; the mid 1990s Fat Chance ‘Yo Eddy’ mountain bike, in a retina-burning toxic-green to electric-blue fade. OPEN were nice enough to knock up some renders with that colour-scheme, but I have to say I didn’t love it. Maybe the colours were off? Maybe the matching handlebars and seatpost weren’t helping? Maybe a render was never going to capture the full effect? (I’ve heard that Yo Eddy recreations can actually look amazing, but I couldn’t pull the trigger, so went back to the imagination drawing board).
Another bike I had loved, was a custom build I’d seen on Gee Milner’s channel, coincidentally of an OPEN bike, with a gorgeous green and copper Marble effect. It had been done by Rob Nicholas of Colourburn Studios, which I was dismayed to see no longer existed. What had happened to Colourburn? Turns out Rob’s talents were quickly recognised, and he was snapped up by Cannondale, and is now a Senior Artist at their Lab71 Special Projects. He now paints a good deal of the pro bikes for EF Pro cycling, including their switch-out bikes (if Polka dots, or a yellow version is required at short notice for example). I spoke to him about custom paint jobs, and lapped up his wisdom.
Getting started
Of course by going custom, you get a superior, and more beautiful paint job out the other side, said Rob, but you also get a harder-wearing one too: ‘Three weeks of a pro-tour is more wear and tear than an average rider puts his bike through in a year.’ So they’re made hardy and strong. The quality of a custom paint job is just so far above what comes out of even the best factory. Painting is about time and skill, and that’s what you’re paying for. If you’re re-painting a bike you already own, or a factory-fresh bike, the first order of business is to remove the existing paintjob.
I’ve used an orbital sander to quickly remove the varnish from an old table, and assumed that leveraging the muscle of modern power-tools would make short work of bike paint. I was wrong. The relative delicacy of modern carbon frames means this sanding is almost invariably done by hand, and is an incredibly labour-intensive endeavour.
Another painter I ended up talking to recalled a bike bought into him for a new coat of paint. It was the bike’s third different paint scheme, and as he removed the old paint, he found the previous three layers of paint, and the bikes original coat still underneath. You can, and people do, simply paint over the top. However, you could be adding 60-100 plus grams of primer, paint and finish to a frame, so when this stacks up four times, you may have as much as 300 grams of extra weight on it, in multiple layers. It took him nearly 18 hours of sanding to remove all the previous layers. Sanding is the most time intensive part of the project, and contributes a huge part to the final cost of a custom paint job.

Of course Rob wasn’t doing any extra-curricular work, and I was still no nearer to choosing a paint scheme. My indecision was setting in, and exacerbated by my insecurity at having my taste judged… I would have to put the finished bike into this piece, exposing myself to a potential sea of disapproval. Also, OPEN’s founders Gerard and Andy might see it. I say all this to laugh at myself at becoming so strangely self-conscious. I chose the dreamiest of builds for this bike, of everything, without a thought of people judging my choice of SRAM over Shimano, of Zipps over Enves, or of Enduros over CeramicSpeed. But the colour scheme choice absolutely paralysed me. People are strange huh?
My search for Rob had taken me begrudgingly to a dark place I rarely go: Instagram. However, it proved to be a rich seam of custom bike paint ideas. It also yielded a couple of painters, whose work I thought head and shoulders above the rest, and one of those, Tom Hunt at Kustomflow, had come recommended by Rob. Having studied illustration at university, Tom started taking commissions in 2006, and his work has featured in one form or another at all three of cycling’s Grand Tours. To call him accomplished is an understatement. I made contact and inquired as to his availability and lead time.
Like all parts of the cycling world, Covid wrecked the custom paint business too. Many painters didn’t survive, and the best saw their queues fall drastically. At one point Tom tells me his wait/queue time to paint a frame was about eight months. Now, it’s down to about 6-12 weeks. Give or take. I liked Tom immediately, he’s an incredibly easy-going man of infinite calm, (thank God as I was sure I’d come to test his patience). He was technically very skilled, from a lifetime of this work, and he was up for a challenge. The one thing I was still struggling with though, was the one thing he couldn’t do for me: choosing a great paintjob.
We spoke for nearly 45 minutes initially, (he offers a full design consultation, including images if required) with him gently feeling me out: what sort of bike was it, what was I going to use it for, did I have any ideas? With some artful guiding and directed questions, he allowed me to home in on what I was looking for. Something interesting, something that would echo the frame’s split personality, half classic, half cutting-edge modern. With a couple of painted flourishes.
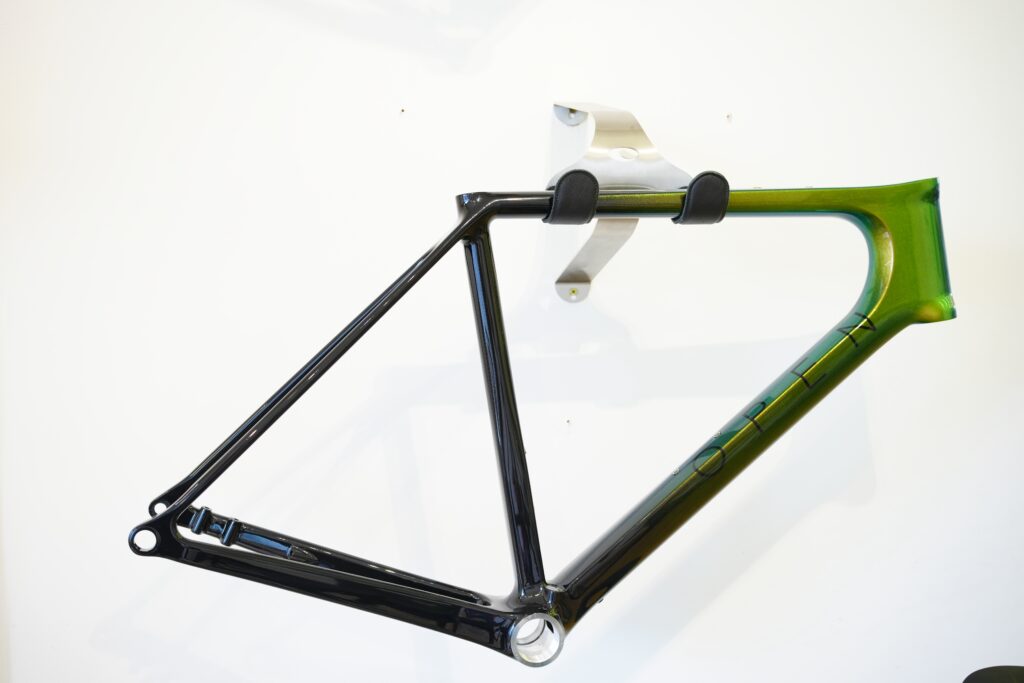
Instagram is a great shop window for showcasing your skills and design ideas as painter, and Tom’s was no exception, I spent hours perusing his back-catalogue trying to find something that grabbed me. The idea of a fade paintjob, like the Yo Eddy had taken root with me, but I also liked the idea of the deep, Piano Black that OPEN had used in their launch shots of the bike, it looked sleek and understated and elegant. But I was also keen on the new specialist paints that Tom had mentioned, and all the interesting effects that could be achieved; textured paints and colour-shifts were becoming available, descendants from the auto-industry. So why not have both that Tom suggested? Something interesting at the front, fading into a deep dark black at the back.
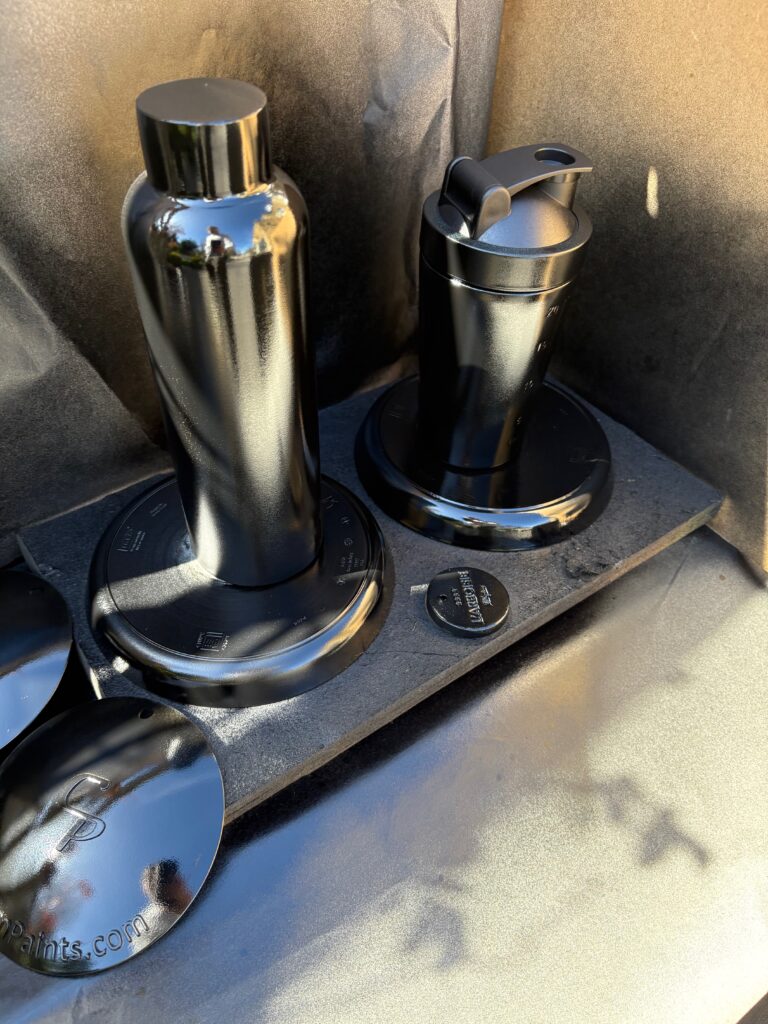
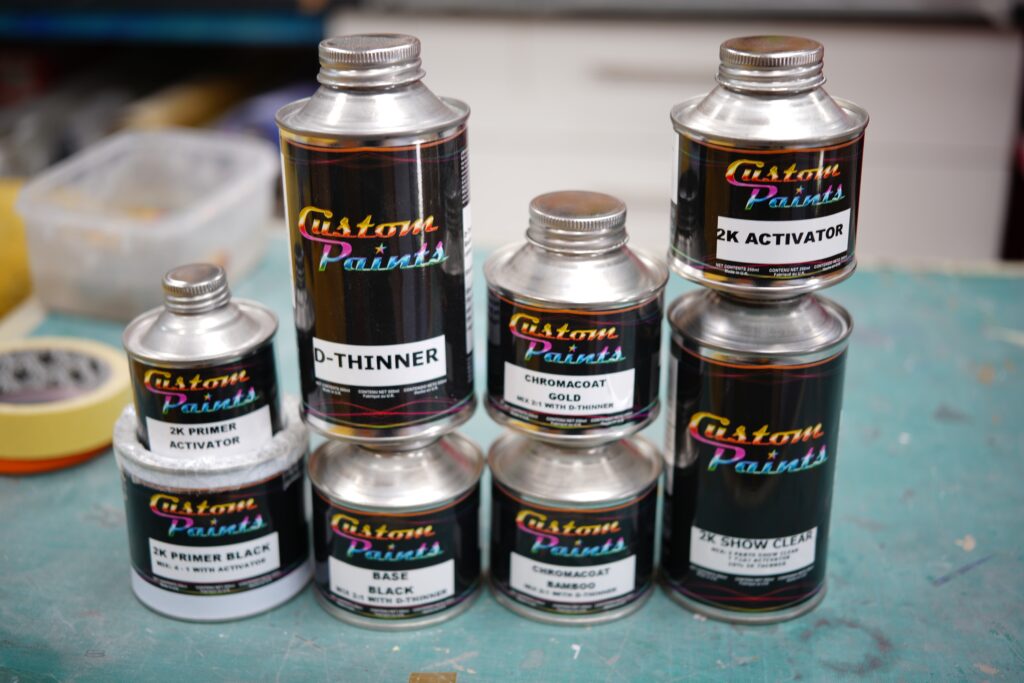
Naturally, I did what any self-respecting perfectionist control freak would do; I set up a place in my garden to field test a few options. Custom Paints is a British company that does everything from crackle and ice effects, to glows, neons, pearls, metal flakes and chameleon paints. They also do ‘rattle’ spray-can sizes, so I could order these sample sizes and test them out for myself. This bit was awesome.
Painting a bike’s tubes happens in my steps/layers. Once the frame is sanded and ready to accept paint, the first layer is primer. This evens out the surface, and provides a literal base for the paint to adhere to. Next comes the layers of colour, and finally, it’s sealed/finished. Graphics and logos etc are added in the colour stage, and sometimes, after the first coat of finish. More on that to come.
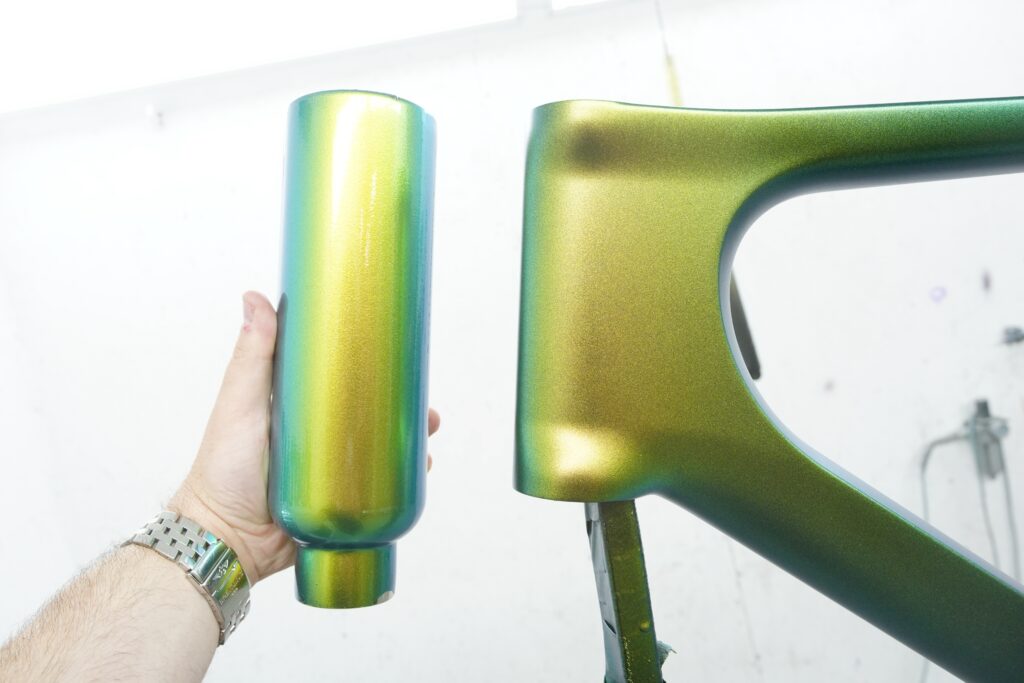
I needed a vaguely bike tube-shaped item to play sacrificial guineapig to the two chameleon / Chromocoat paints I wanted to test. (These are paints that seem to change colour depending on the angle from which they’re seen. i.e. the angle at which light bounces off them). I had narrowed it down to two that were similar, (though far more different than they look in the photos)… so a couple of old water bottles would suffice. Sorry Pinarello.
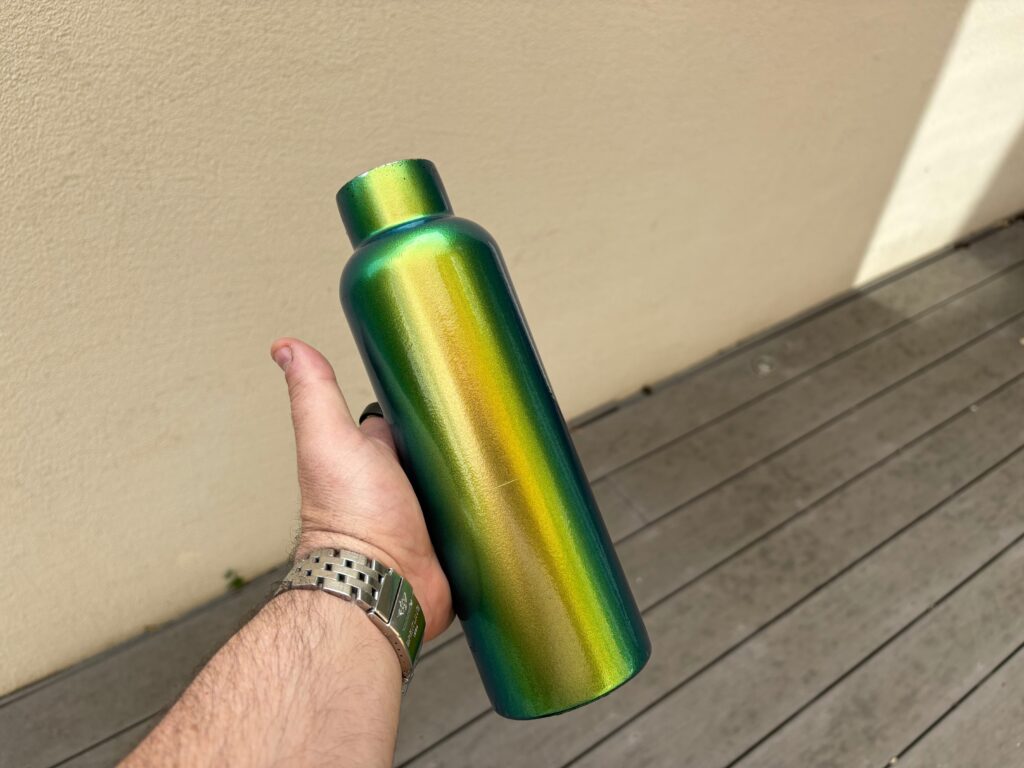
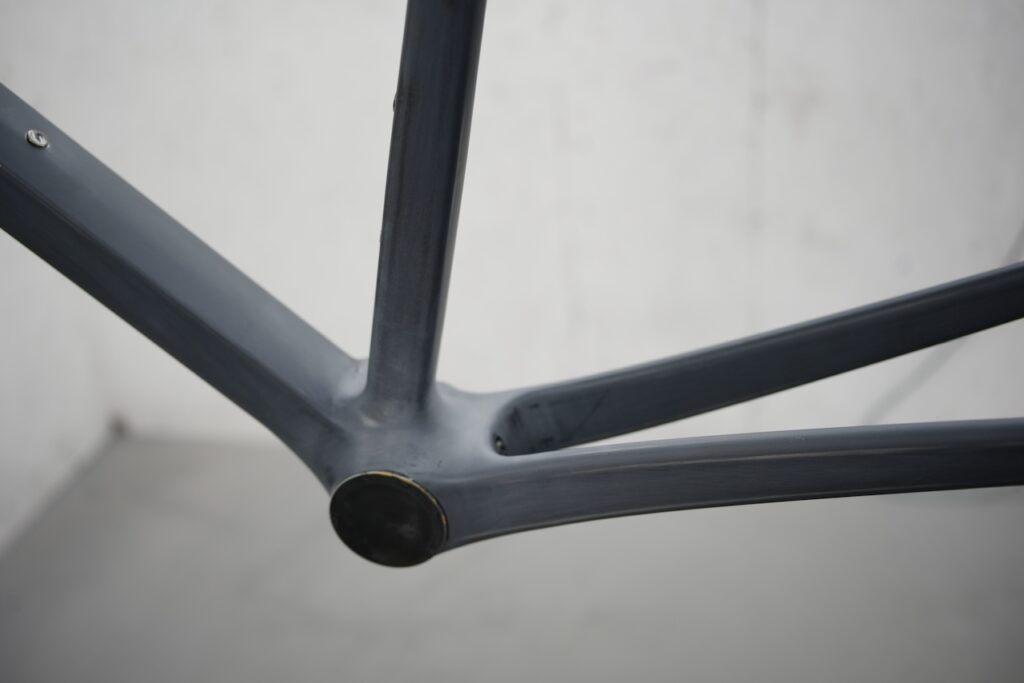
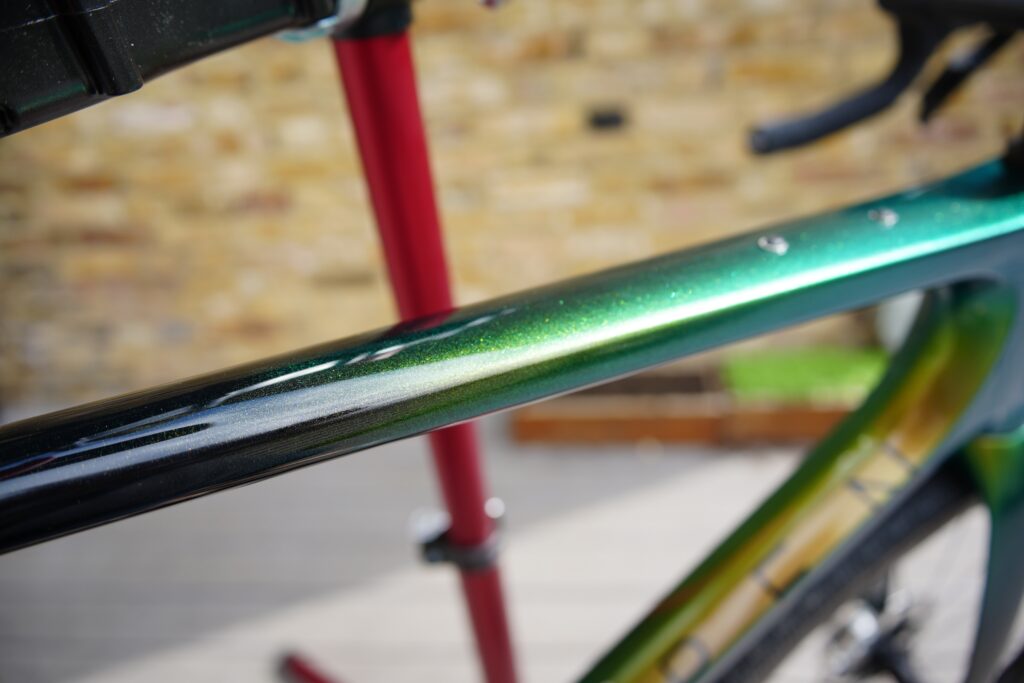
Both Chameleon paints flip from green to gold, but I ended up preferring the “bamboo” colour that had twinges of blue from certain angles too. Once I had decided on this. … I ordered the paints and waited to hear when both they, and the frame from OPEN had arrived at Kustomflow. The OPEN frame weighed in at 833 grams ready to paint, and once finished, it was 865 grams. Just 32 grams of primer, paint and finish adorned the frame. But here’s the number of paints and solvents, thinners, activators and hardeners required. It’s more than you’d think isn’t it?
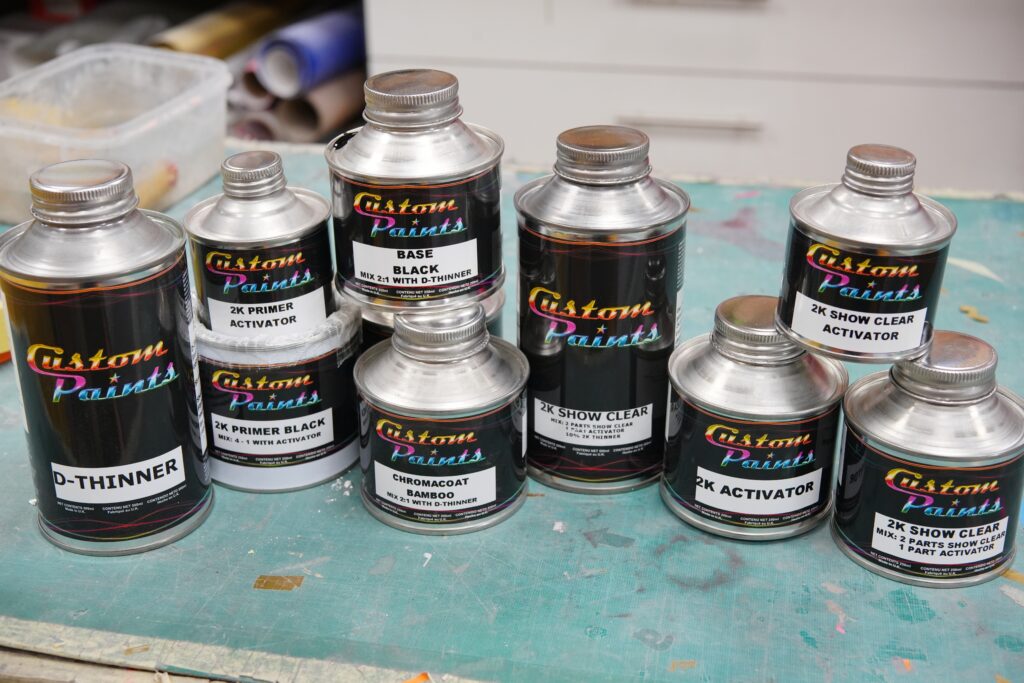
Probably 60-100ml of paint is loaded into the spray gun at a time, and a lot (most?) doesn’t end up on the bike, and is inhaled by Tom’s huge extractor. Yet more of the solvents evaporate (flash-off) in a few minutes after applying the paint.
The actual painting process
Buckle-up, there are many steps and many layers. I’ve seen them spray Dogmas at the Pinarello factory in Treviso, (hardly a company that rushes things), but I was utterly unprepared for how different Tom’s fully custom process was compared to even a great factory finish like Pinarello. How much longer could custom take? Orders of magnitude it turns out. A custom paint job can take from 18-120 hours. That’s potentially multiple weeks of work. The timespan elongates with the complexity, and the fact the primers and basecoats and paints and finishes need time to cure, and of course each ‘layer’ may require 2-4 coats. This amalgamates to 6-16 layers on a frame. Suddenly the time span started to add up. Additionally, a custom painter will paint on your graphics, no stickers or decals are used here. This results in a perfectly flat finish, and its considerably more beautiful.
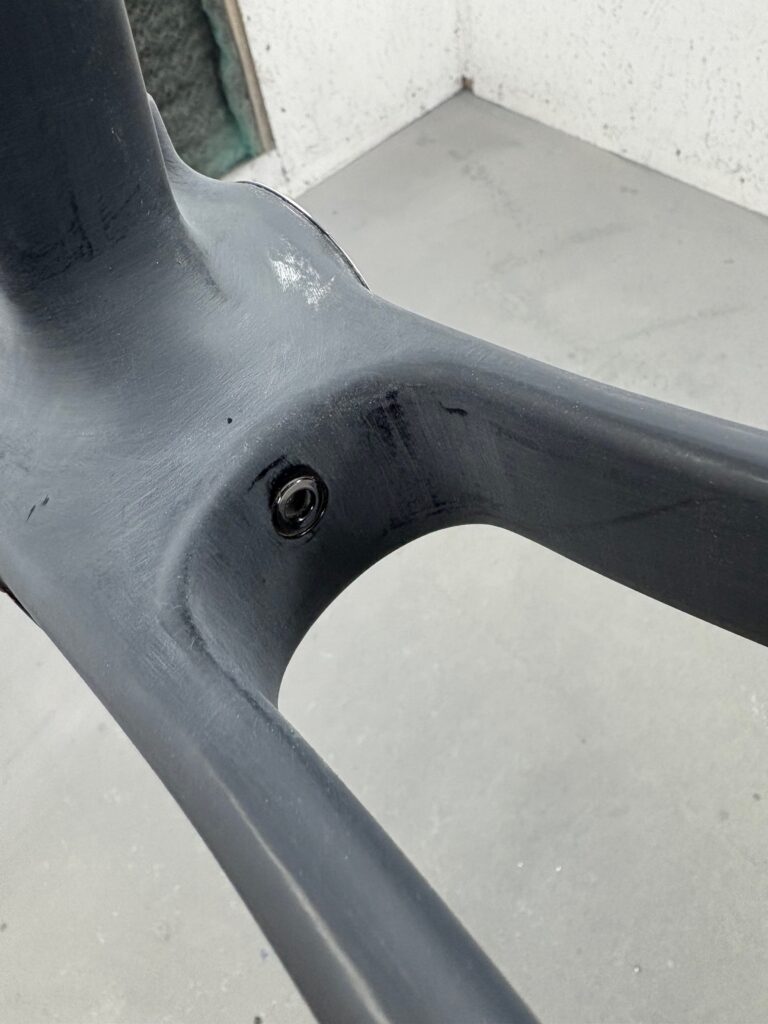
Obviously all surfaces not to be painted have been masked off. This includes the bottom bracket, axles and headtube obviously, but also important are the faced surfaces, like the brake calliper mounting points where absolute flatness is essential to the reliable operation of the brakes.
Primer
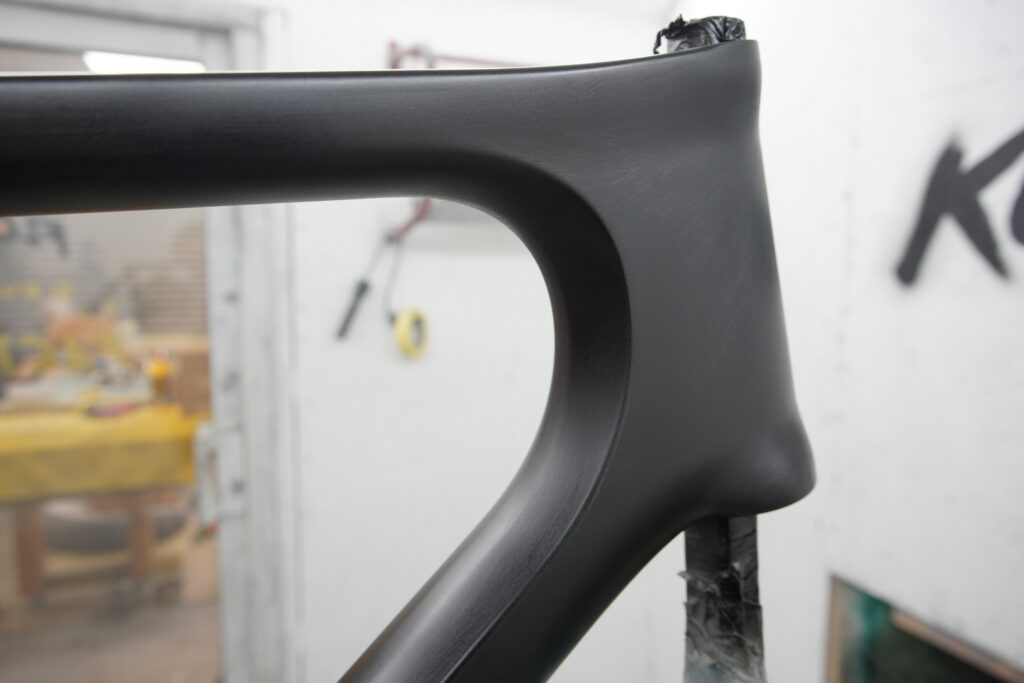
OPEN’s Ready-to-paint frame thankfully spared Tom an arduous sanding process. It required just a brief scuffing up with a double-sided sanding sponge, before the primer was applied. (The primer is mixed with an activator). Two coats of primer, some time to cure, and another brief scuff, and Tom was ready to add the first colour.
Black

The deep dark Piano black. This served as exposed colour at the back of the bike, and the base for the Chameleon paint at the front, so the whole frame got a thorough covering. The paint is mixed (with paint thinner) and loaded into a spray gun fed by a compressor, which gives precise control over distribution, and provides a much much finer finish than I had achieved with the spray cans. Thinners are added to paint to obtain the right consistency. 3 coats of black, with around 15 minutes of flashing off / drying time between coats. Tom is careful to keep the coats very thin, over-painting will cause ‘drops’ to form and ruin the coat.
The OPEN logo will remain black, and stand out from underneath the green/gold chromocoat layer that goes over the black base. So, we need a mask of sorts. OPEN has sent their RTP specifications sheet. It includes design / vector files of their logo, and other text, for example the model. It also includes the exact colour mix used to achieve their ‘standard’ colours, so Tom can reproduce them exactly if needed. The logos are sent to a sort of CNC cutter; it’s like a printer, but instead of an ink-head, it has a sharp cutter that can precisely cut out very fine shapes, and instead of paper, it cuts a vinyl-like sticky-backed plastic. The OPEN logo is then positioned on the frame, and peeled free.
Chameleon
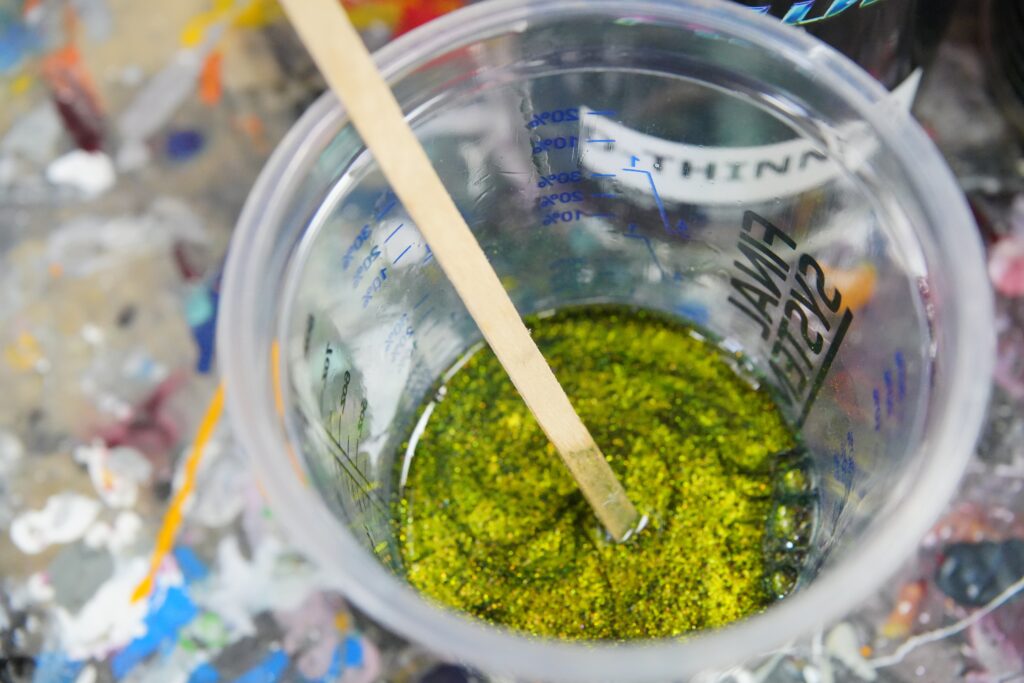
Now comes the Chromocoat, the chameleon paint. This is mixed, loaded into the gun, and feathered on from the front of the bike, (and the top of the forks) to achieve a fade. Tom takes great care to keep the fade even and consistent on all sides of the tube. Again, three thin coats with 15 minutes flashing-off time between coats. Once the three layers have been applied, the vinyl OPEN letters are individually peeled off, revealing the black paint underneath. It’s a rather good moment, and I confess to being a little over-excited. It looks glorious. Tom is happy, you don’t want to lift any paint as you peel away the plastic, and you’re hoping to achieve nice sharp edges. Success.
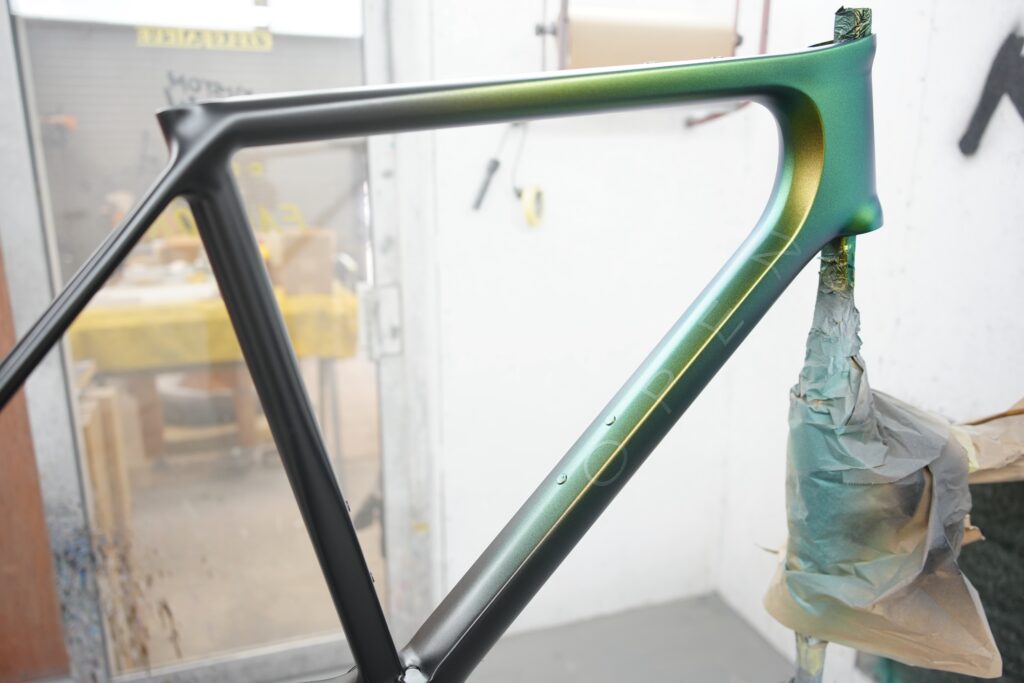
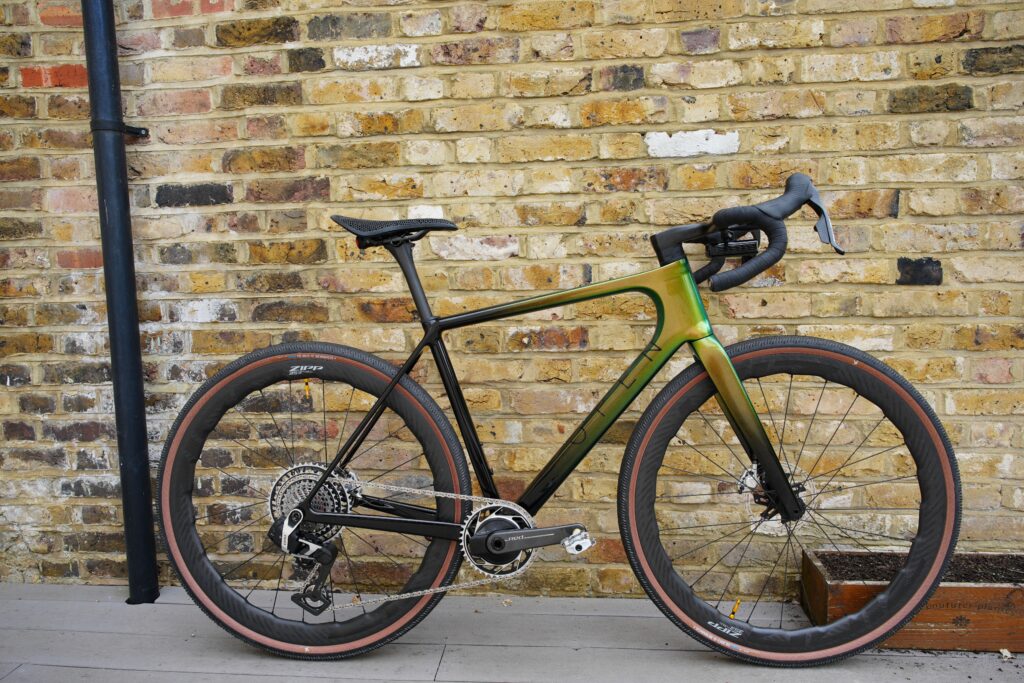
I’ve asked for the fade to be very gradual, and to transition to black slowly and gently. I think this looks stunning. There are tiny specks of the goldy green paint slowly disappearing into a dark sea of deep black. Technically, this is ‘overspray’ and Tom is inclined to go back and sharpen it up a little with some more black paint. I think the fineness of the gold on black looks like stars in the night sky though, and ask him to leave it.
Finish
After this, the finish is applied, two quick coats. Tom calls it a ‘save point.’ I have another choice to make, and must do it on my feet. (oh God…) Matte, or gloss finish. It’s impossible. The matte bike without any finish on it looks stunning, muted and elegant. Here’s the frame unfinished, next to the water bottle finished with a glossy coat. I came within an ace of leaving it matte, but plumped for a gloss finish. The colours would just pop a little more, and the difference between the two would be starker, as the black became deeper and shinier. I think there was probably no wrong answer here, and both looked amazing.
The 2k clearcoat is a gloss finish, that is mixed from two parts. A clearcoat, and a hardener mixed in the correct ratio. Again, around three coats of clearcoat are applied with curing time between them. He will do the finer graphics over the top of the finish, this means in the unlikely event that something goes wrong on the finer detail work, he can sand it down, back to this ‘finished’ state, and do it again. If a mistake was made on top of the bare paint, it would be very difficult to correct, almost impossible to sand down a fade and have it not be noticed. Hence he calls the first few coats of finish a save point, a do-over point in case of some disaster.
Finer logos
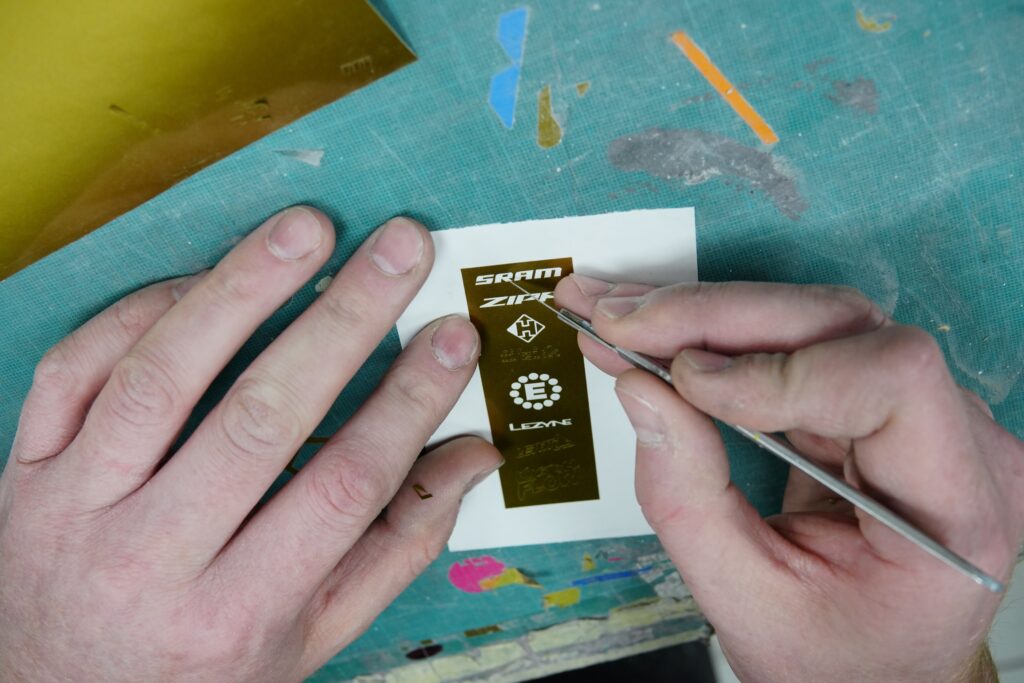
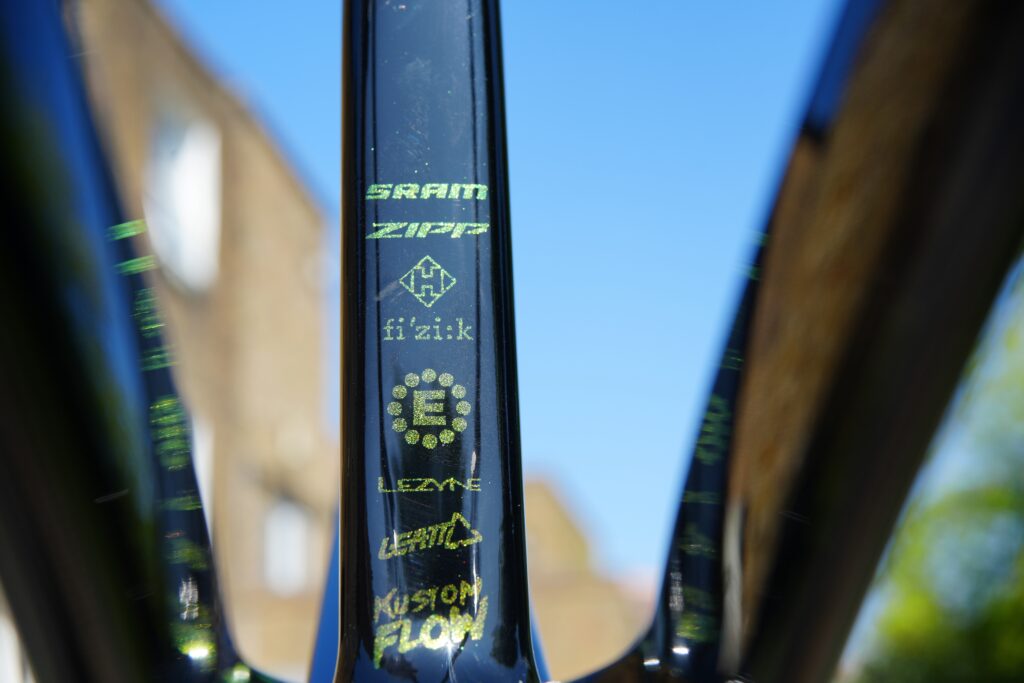
The bike name, the ‘U.P.PER. CONCE.PT.’ is applied in black over the top of the sealed bike, as are other any other graphics you may wish for. I thought of adding a custom mantra to the top tube, but everything I came up with sounded so trite I couldn’t bear the idea of it being there forever, and something like ‘Shut up legs,’ would have been sacrilegious surely. But I wanted to find something to showcase the really fine graphics Tom could achieve, and that would hallmark it as a custom painted bike. I had seen on his Instagram page, he had created some branded logos to put on a sponsored frame, and I liked the idea of doing this. It was a way of immortalising this dream build for me. Somewhere deep in the back of my mind, it perhaps also made it look slightly racey and professional, like a sponsored team bike recreation. Tom has a vast library of logos and mantras, flags and suchlike, and all can be quickly sized, cut and applied. The logos were then sprayed in the Chromocoat colour over the top of the black.
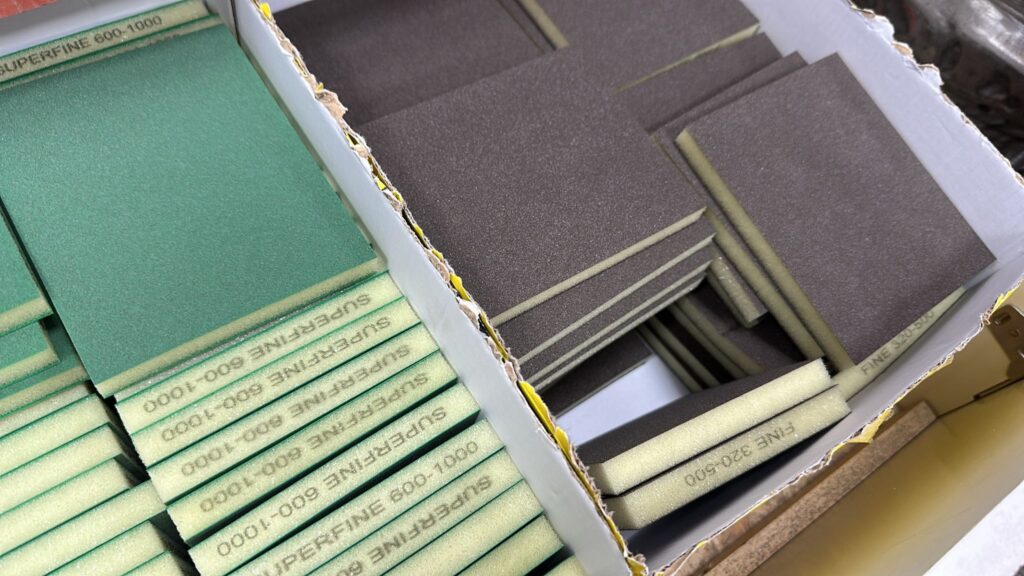
Finally, once cured, a few remaining clear-coats of gloss are applied (called a flowcoat), sanded back a touch with ultrafine 2000 grit wet and dry paper, and then polished with a polishing compound.
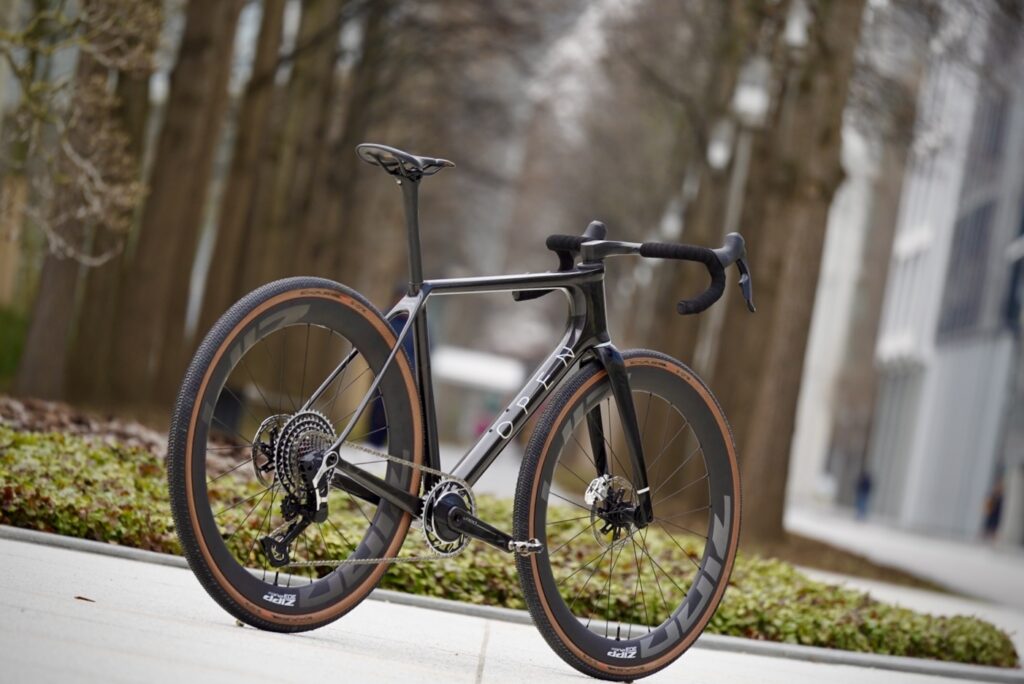
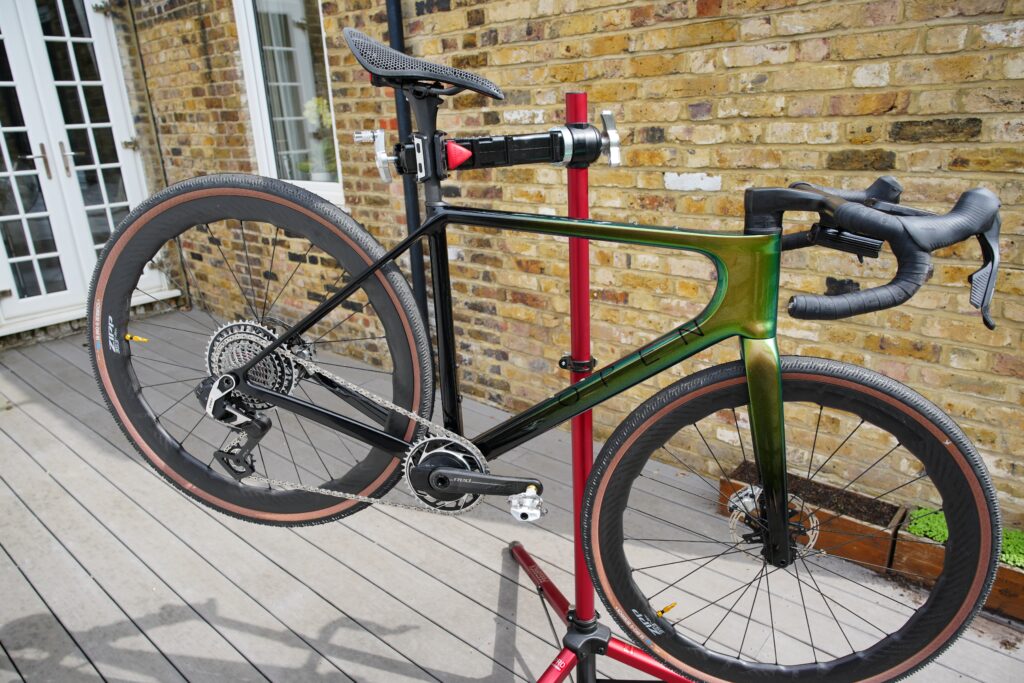
For what appears to be a ‘simple’ paint job, a two-colour fade with some logos, a mantra and graphics, it’s taken tens of hours, sanding, two coats of primer, three coats of black, three coats of Chromocoat, four coats of finish and some polishing. That’s 12 coats. It’s astonishing he’s been so efficient with the tiny weight added to the frame, and I am grateful for his economy. The result, though again the reality is much more impressive than the photos, is a stunning beautiful frame, a real piece of art. I’ve tried to capture the depth of the colours and the fineness of the finish. There’s certainly something to be said for using high-end specialist paints too.
Having been there to document most of its creation, I had to leave the frame with Tom for the finish to cure for a few days before it can be sent to me. It’s nerve-wracking 24 hours as I get the notice it’s been dispatched, but I did get my unboxing moment when it arrived the next day, and was well worth it. The whole process has been sensational, and yielded a frame I’m utterly in love with.
The final touches: components and finishing kit

The second part of the custom process is just as personal, but less nerve-wracking. You get to choose every component. For a go-fast all-road/gravel bike it needs to be not just a jack of all-trades, but a master of most of them too. (OPEN are trying not to use these category names anymore, and only delineate bikes by tyre clearance. This is a drop-bar bike with 44mm of tyre clearance. I keep failing, and thinking of it, and calling it a gravel bike, with a racey road/light gravel setup). I’ve gone for SRAM Red XPLR, which is my first ever Red level groupset, and I’ve chosen it for the innovative full-mount derailleur, and the extra cog at the back over Force. Zipp’s 353 NSW (perhaps the most beautiful wheel every created) are light, sleek looking, and as at home on tarmac as fire-roads, and when coupled with Schwalbe’s new G-One RS Pro yield a sublime ride, and complete the package.
Jamie raved about the new 3d printed Fizik Aliante, and it won a road.cc Recommends award. I didn’t have chance to do the full-fancy one-to-one, but it’s still a very lovely place to sit. A very shrewd bit of Enduro’s marketing caught my eye last year, apparently their top-flight XD-15 Bottom brackets have ‘no servicing requirements.’ They’re good forever. Colour me convinced. Leatt’s newly released Ceramic titanium pedals are a touch lighter than XTR, and the gold axel matches the frame (very important) as do Lezyne’s new tubeless valve which I’ve been wanting to try.
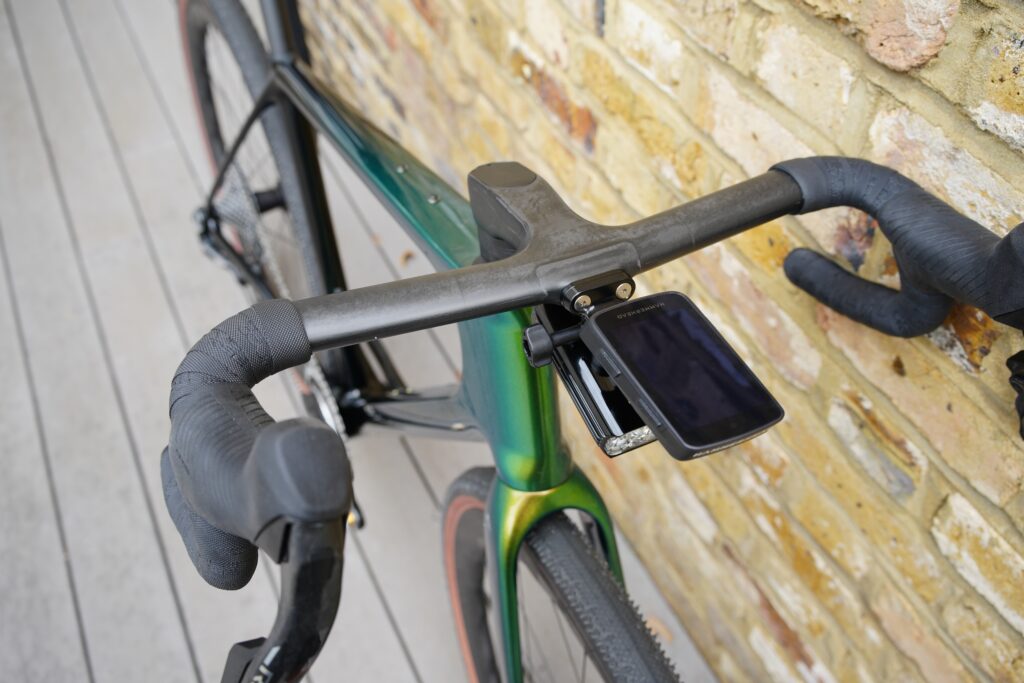
The final choice you might have to make, is whether you’re going to paint any of your components. It’s a tough one. A one-piece bar/stem can look fabulous when painted to match your frame, and I nearly did this. Very nearly. It seems to be a telltale hallmark of a custom frame. Tom chimed in though; ‘don’t do it’ he said, these OPEN ‘bars look mint’ he said. And they do. So I settled for some splashing some logos onto the frame.
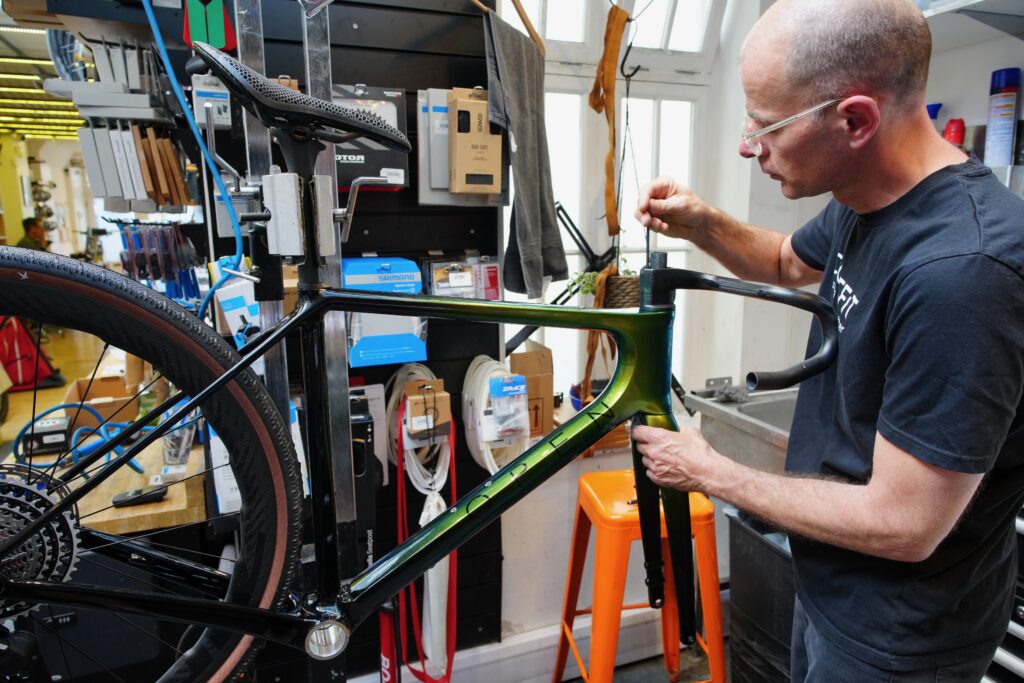
Then came building it: being as this was the first build of the OPEN U.P.P.ER. CONCE.PT, I thought I’d film it. It was built by Cyclefit, who specialise in custom bike builds, including OPENs. This was filmed too and is the first build of this new bike (it’s here ).
All in all, the paint job was more than the cherry on the cake, it’s the most personal ‘component’ of the bike. Though my frame is 1 of only 250 OPEN Concept frames, my paintjob is 1 of only 1. If you’re buying a new bike, I can’t recommend the custom process highly enough. Choose every piece. Choose your ideal paint. And if you can’t quite stretch to a new bike for the moment, or have a trusty steed you still love, a new paint job will just bond you to it more.
Tom’s great to talk to, and the cost is more reasonable than you’d think considering the entirely by-hand process. Prices start from roughly £650, and rise in proportion to the complexity and size of the job.


4 thoughts on “Going custom: the story of my one-of-a-kind custom bike build, from start to finish”
I bought a used frameset with
I bought a used frameset with a Kustomflow paint job. It’s a lovely finish.
+1 from me for Tom’s work. He
+1 from me for Tom’s work. He’s done three frames for me now and each one has been perfection. Very friendly guy too.
There is a group of people,
There is a group of people, of which I am a member, for whom a ‘custom paint job’ is of no interest whatsoever and not worthy of an extra £20 and another group (equally worthy of consideration and admiration) who greatly value one and will pay £650 upwards (that was the price of my Vitus gravel bike in late 2019, a bike which has led a hard life). This is quite a major division.
Quote:
*Not a roadie.