


Wave goodbye to skipping gears, ticking chains and annoying rubbing noises as we try to diagnose and fix some of the most common gear problems with your road bike or gravel bike.
Fettling with your derailleurs can feel a bit daunting. You don’t want to turn a small problem into a big one and, let’s be honest, there are quite a few screws down there!
But if your gears aren’t working properly, you’re likely making life harder for yourself, wearing out components faster, and even potentially putting yourself and those you ride with at risk. Here are some common reasons why your bike gears might be acting up and how to fix them.
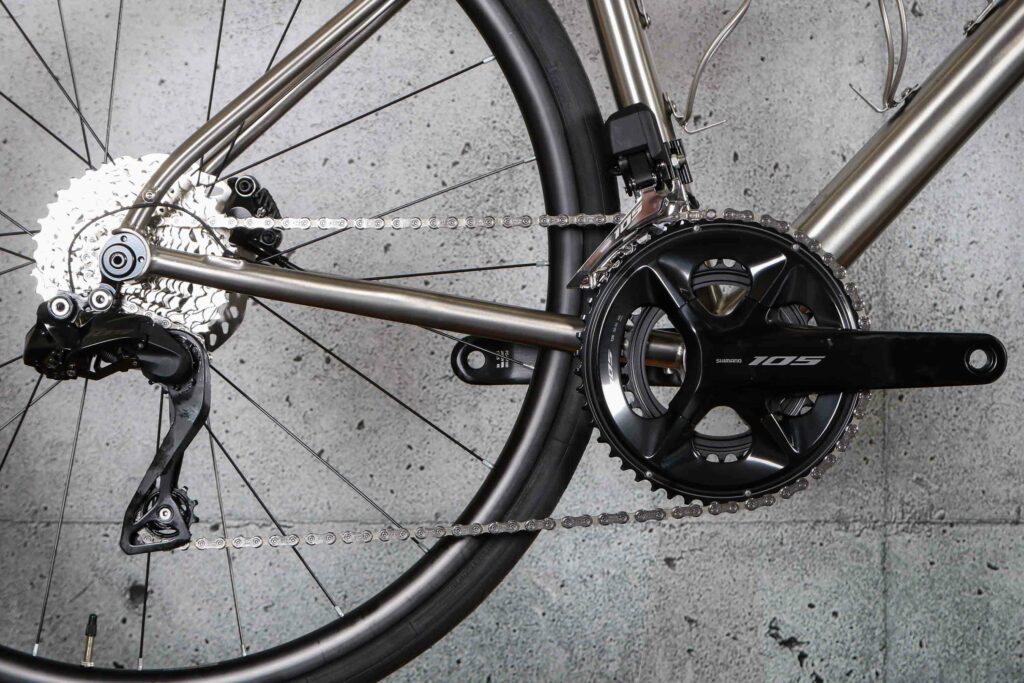
1. Worn chain, cassette or chainrings
Before making any adjustments, the first step is to check the condition of your drivetrain. If it’s worn, no amount of tinkering will fix your gear issues. When a chain wears it ‘stretches’, meaning it no longer behaves itself as it goes around the cassette or the chainrings.
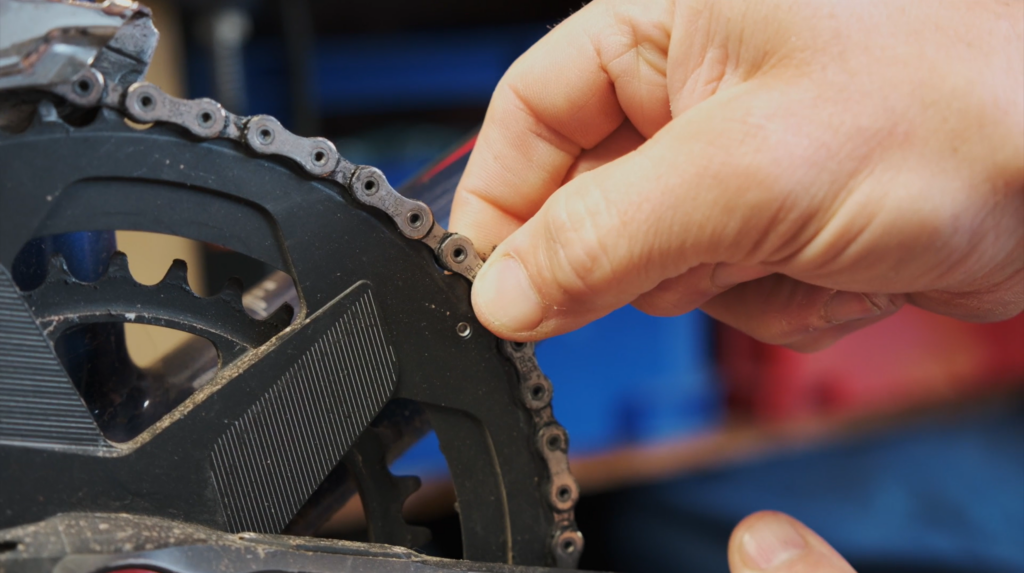
Fortunately, checking your chain’s wear is easy with an affordable tool like the one pictured below. If you don’t have one, you can also check by putting the chain on the outer chainring and pulling it away from the chainring. If you can lift it more than half a link or see a significant gap, it’s likely that the chain or chainring – or both – are worn.

Another method is to measure the chain with a ruler. Most bike chains have a half-inch pitch (the distance between the centre of one pin to the centre of the next). To check wear, measure 12 full links, which should equal 12 inches. If the length is more than 1/16th of an inch longer, it’s time to replace the chain.
Some chains might vary slightly, so checking the manufacturer’s specifications is always a good idea.
It’s important to stay on top of replacing your chains. If you don’t, you’ll speed up the wear on much more expensive components like the chainrings and cassette. Even after replacing the chain, you may still experience annoying noises and slippage because the rollers won’t seat properly between the teeth.
2. It’s dirty or dry
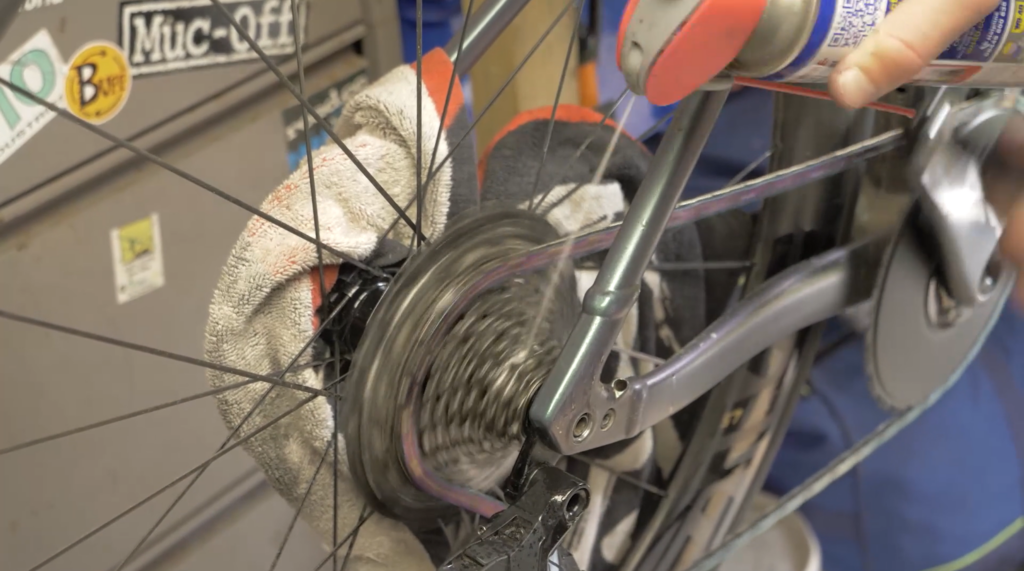
Sometimes all your bike needs is a bit of TLC – and by that, we mean a good clean. When cleaning your bike it might be tempting to focus on the larger surfaces such as the frame, but by far the most important part of your bike to clean is the drivetrain.
This is another thing to tick off before you start getting your screwdrivers out. If your chain and jockey wheels are dirty, the system won’t work as it should and will wear out much faster.
When looking at a chain, it’s actually the bits that you can’t see that need to be clean; for example, inside the rollers where any dirt will stop them from articulating properly. If you want to see how we care for our chains both when we’re in a rush and when we’re looking for every watt on race day, then click the link above.
3. Your gears need indexing

> Get your gears shifting sweetly: How to tune a rear derailleur
If you’re confident your drivetrain components aren’t too worn or dirty, but your gears are noisy or seem to shift unpredictably, it’s likely that your derailleur isn’t properly indexed. This means the rear derailleur isn’t aligning the chain correctly with the sprockets, and its position relative to the cassette needs adjustment.
How exactly you do this will depend on your drivetrain. On mechanical gears, you usually use a barrel adjuster like the one above.
> Complete guide to electronic gears: your bike’s shifting, indexing and charging explained
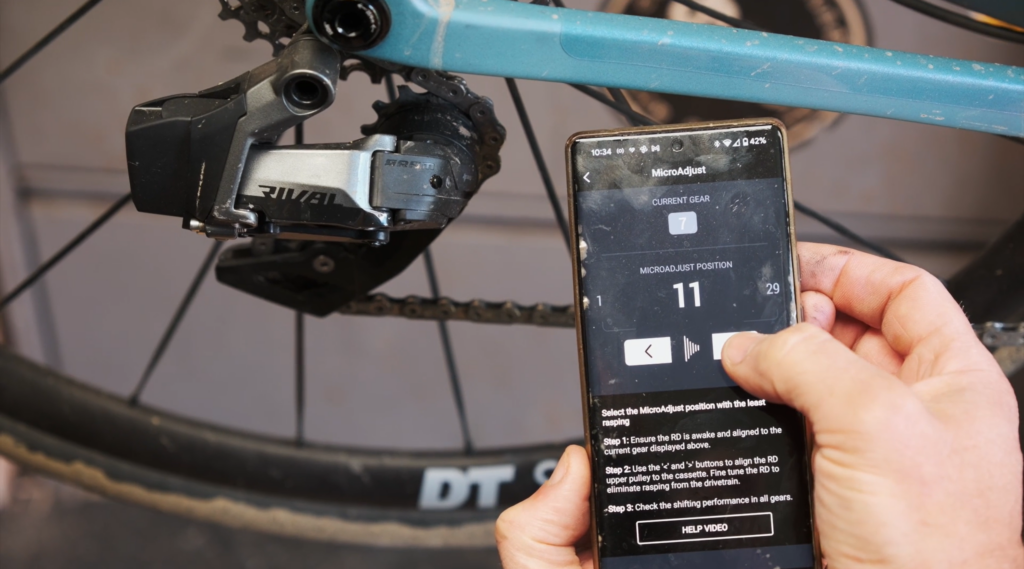
With electronic gears, you put the mechs into service mode and then use the shifters or an app to make adjustments.
To quickly index your gears, shift to the smallest sprocket and make sure the derailleur is correctly aligned there, with the jockey wheels directly under the sprocket.
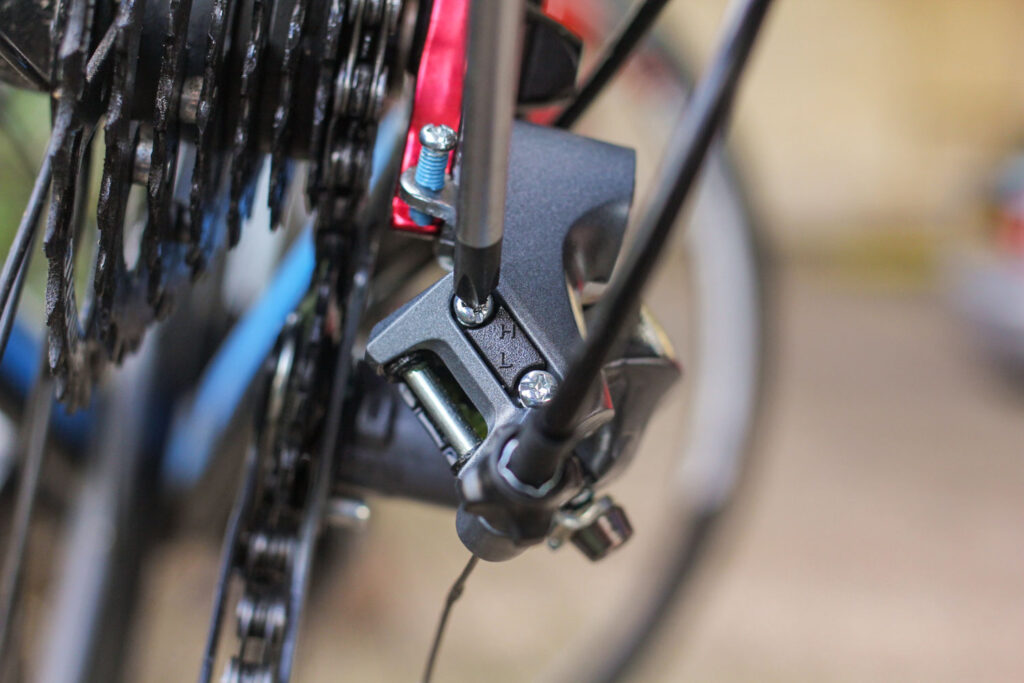
You might need to adjust the ‘H’ limit screw on the derailleur body to fine-tune its position or make micro-adjustments on an electronic setup. For mechanical gears, take up any slack in the cable using the barrel adjuster, then test the shifting across the cassette. Adjust the cable tension as needed to get it just right.
4. Worn or damaged cables
> 10 reasons why your bike gears aren’t working as they should
If you’re using mechanical gears, your cables will need replacing regularly. How often depends on factors like the conditions you ride in, the quality of the cables, and how your bike is cabled. Some bikes use a full-length outer casing from the shifter to the rear derailleur, which helps keep water out and extends cable life. However, bikes with exposed sections of cable, typically require more frequent replacements.
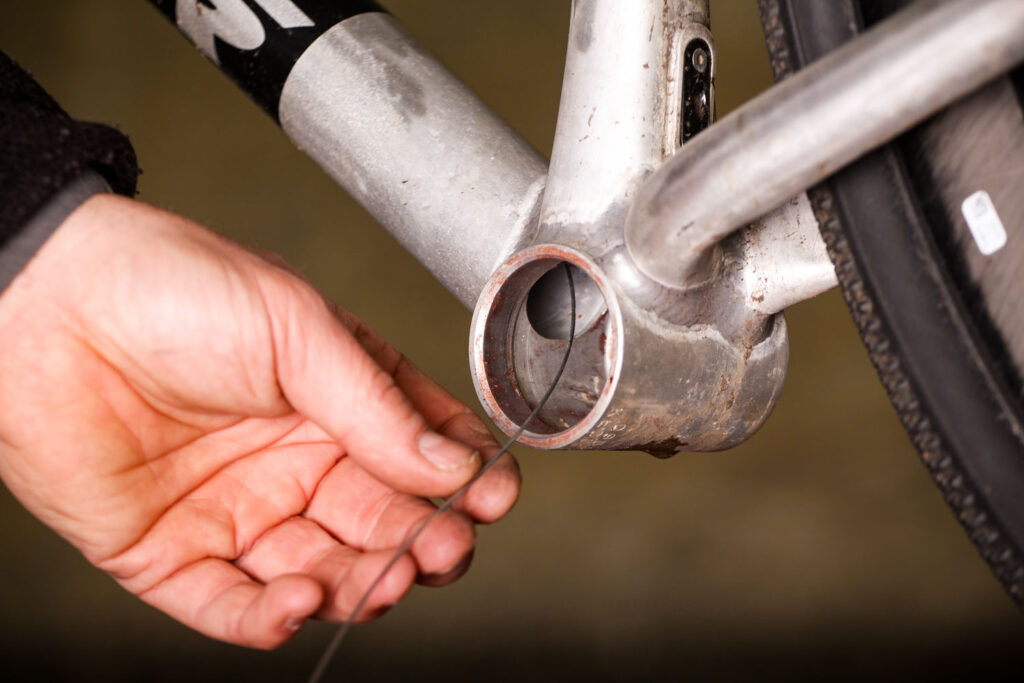
How can you tell if your cable needs replacing? A worn cable often becomes noticeable when shifting into smaller sprockets, particularly the smallest ones, where there’s less spring tension to pull the rusty cable through the outer. You might find shifting up the cassette or into the big chainring is fine, but shifting back down becomes stick or less responsive.
Sometimes, you can get away with just replacing the inner gear cable, but often the outer cable is also clogged with gunk or corroded. In certain cases, you might only need to replace a specific sesion of the outer cable. For exaple, the outer cable leading to the rear derailleur is a common problem areas as it’s the most exposed. Check out this article for a full rundown of what’s involved in replacing a gear cable.
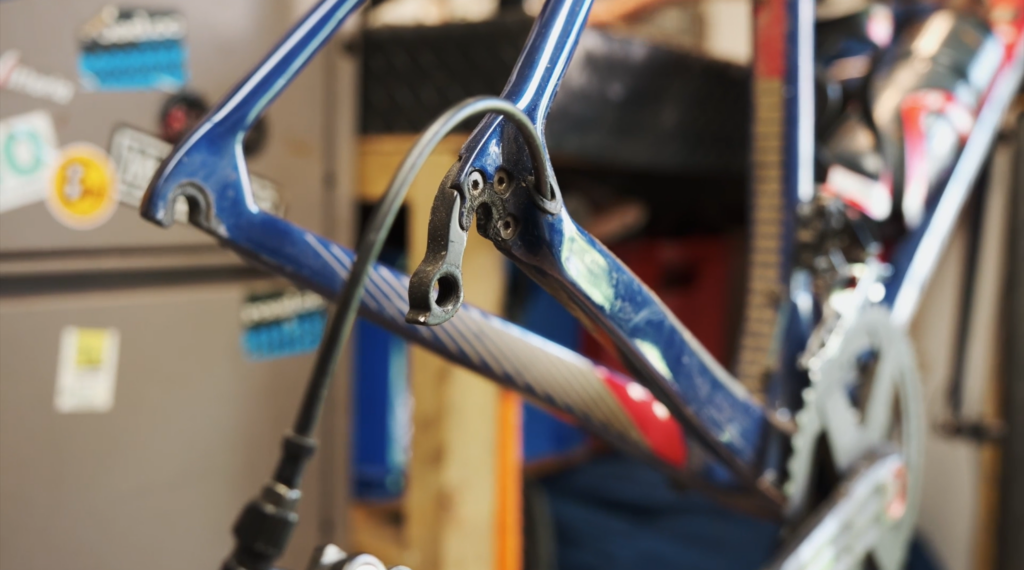
5. A bent derailleur hanger
If you’ve tried all this and your gears still aren’t playing ball, it might be due to a bent derailleur hanger. This is the component that connects the rear derailleur to your frame. There are tools available, such as a derailleur hanger alignment tool, to check and straighten it if needed.
A telltale sign of a misaligned derailleur hanger is when your gears shift smoothly at one end of the range but not at the other. Also, if you know that your bike has taken a tumble and landed on its drive side, it’s a strong indication that the hanger may be bent.
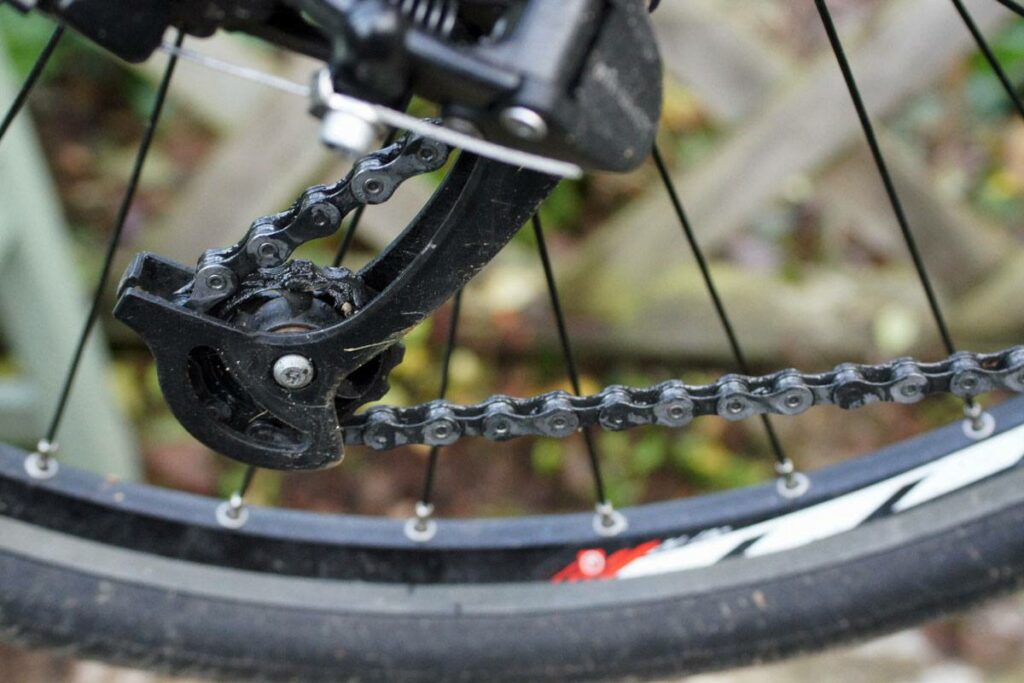
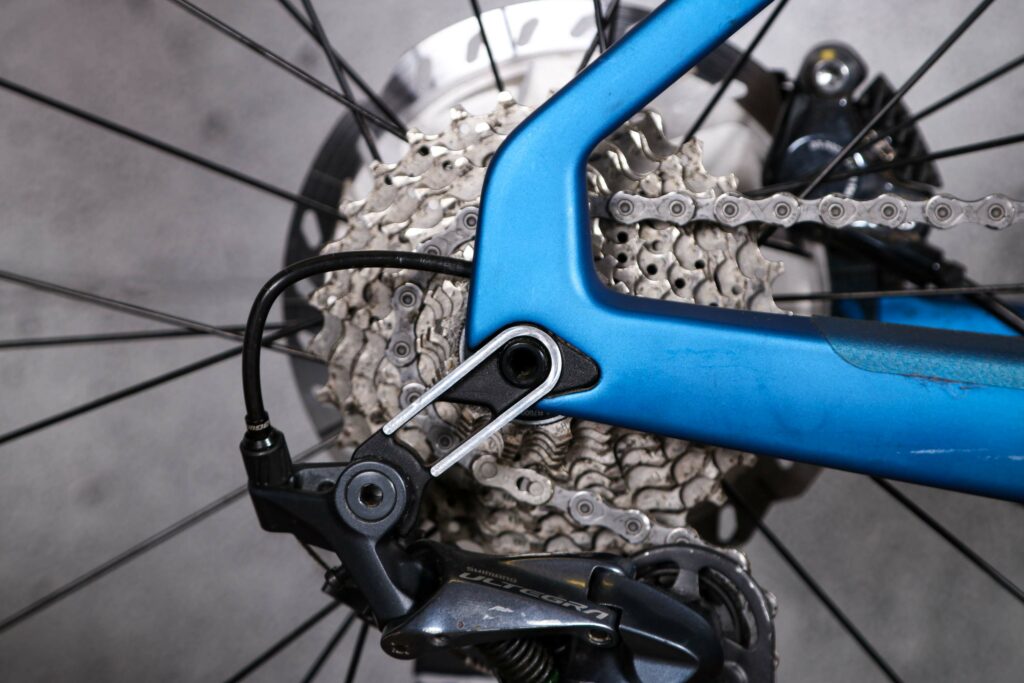
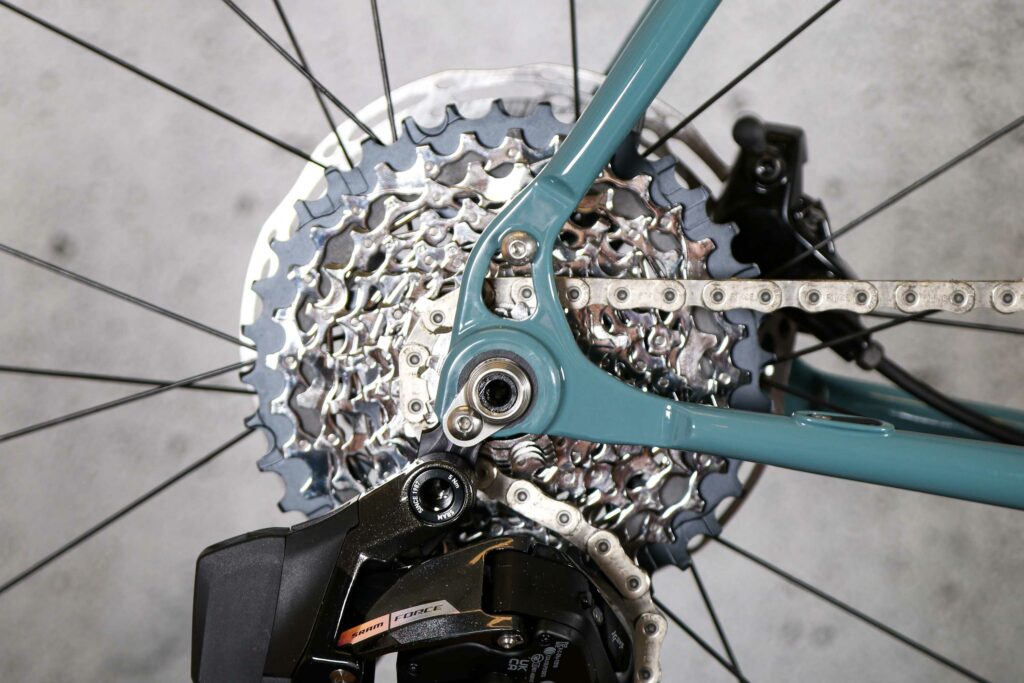
Sometimes, you can visibly spot a bent derailleur hanger. The two jockey wheels should be sitting directly below one another in line with the sprockets. We’ve even seen new bikes coming out of the box with wonky hangers.
If the hanger looks bent, it might be possible to remove it from the bike and pull it back into line either by hand, with a derailleur hanger alignment tool, or by taking it to a bike shop. Most frames use replaceable derailleur hangers designed to snap to protect the frame, so if DIY isn’t your preference and your hanger is replaceable, simply ordering a new one is an easy solution!
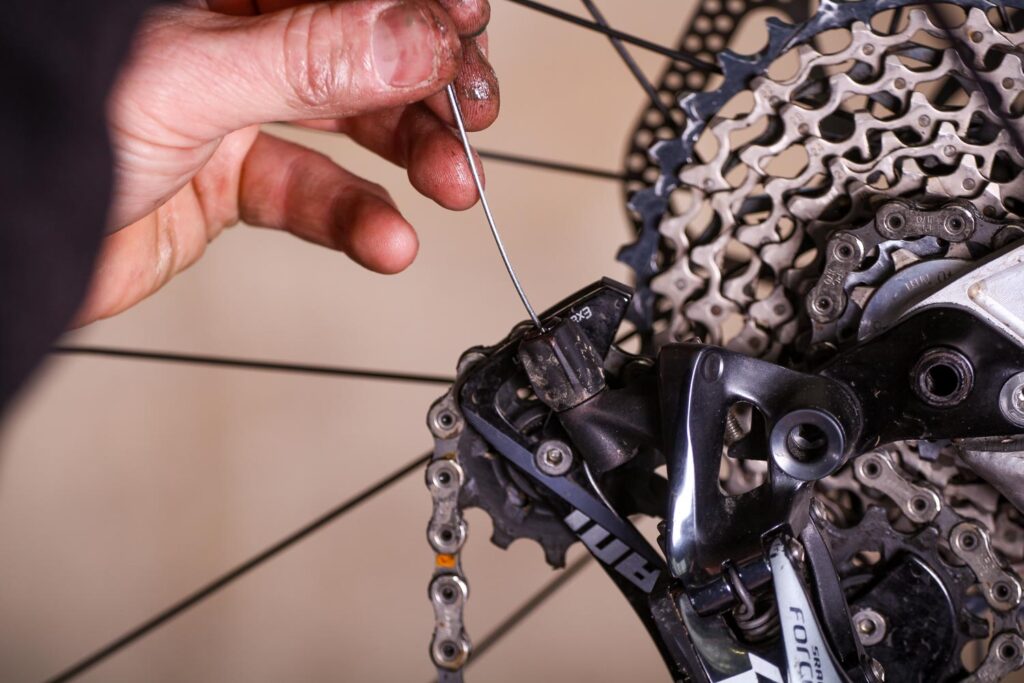
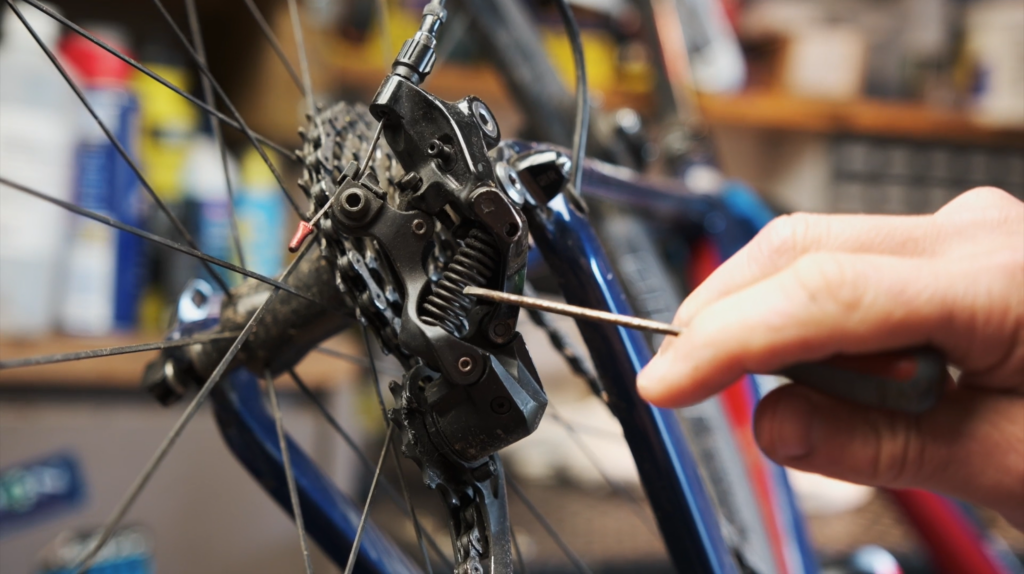
6. B-tension screw set up wrong
Our next port of call is the often-overlooked B-limit adjustment, which determines how far away this upper jockey is away from the cassette sprocket. The adjustment screw is typically located at the back near the derailleur hanger.
Turning clockwise will increase this gap, while turning it counterclockwise will decrease it. The exact recommended distance varies depending on your groupset, but generally, you’re looking for a gap of between 6mm and 14mm when the chain is on the second-largest sprocket. Too far away and shifting will suffer; too close and the derailleur will may the cassette.
7. A stiff or broken chain link
Just as one bad egg can ruin a cake, a single broken, damaged, or stiff chain link can disrupt your entire shifting experience. I’ve spent far too long adjusting gears, only to discover a cracked outer plate on a chain link that caused the chain to skip every time it reached the cassette.
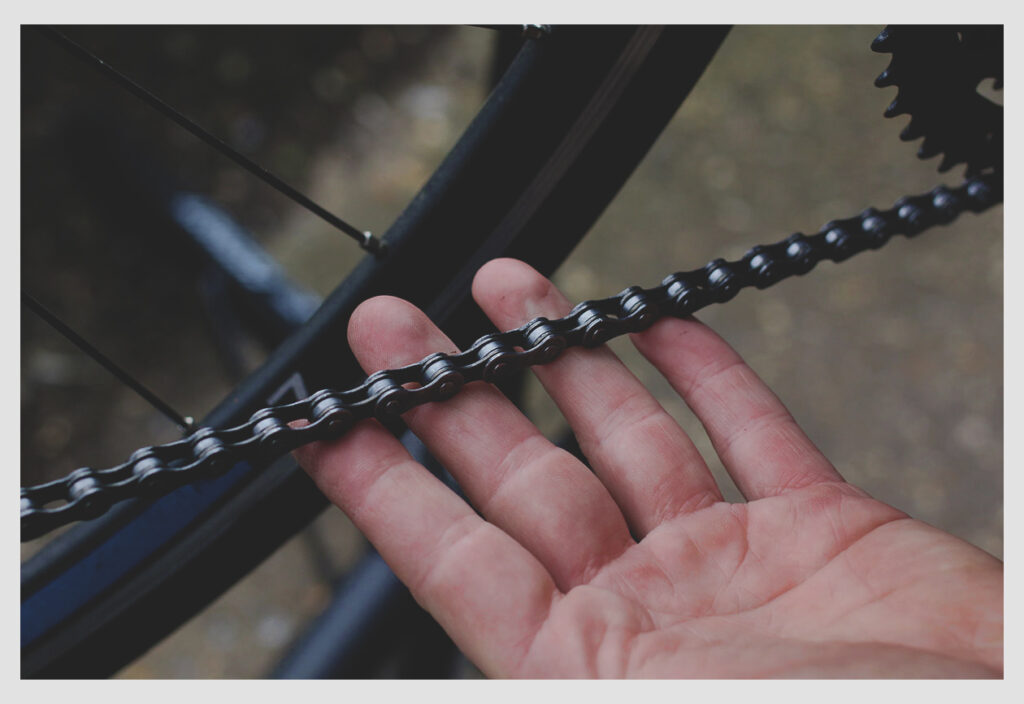
A seized or stiff link can have the same effect, so it’s a good idea to inspect your chain regularly when cleaning your bike to ensure all the links move freely. If you find a damaged link, it might be time for a new chain. However, you could potentially fix the issue by adding a second quick link to replace the damaged section.
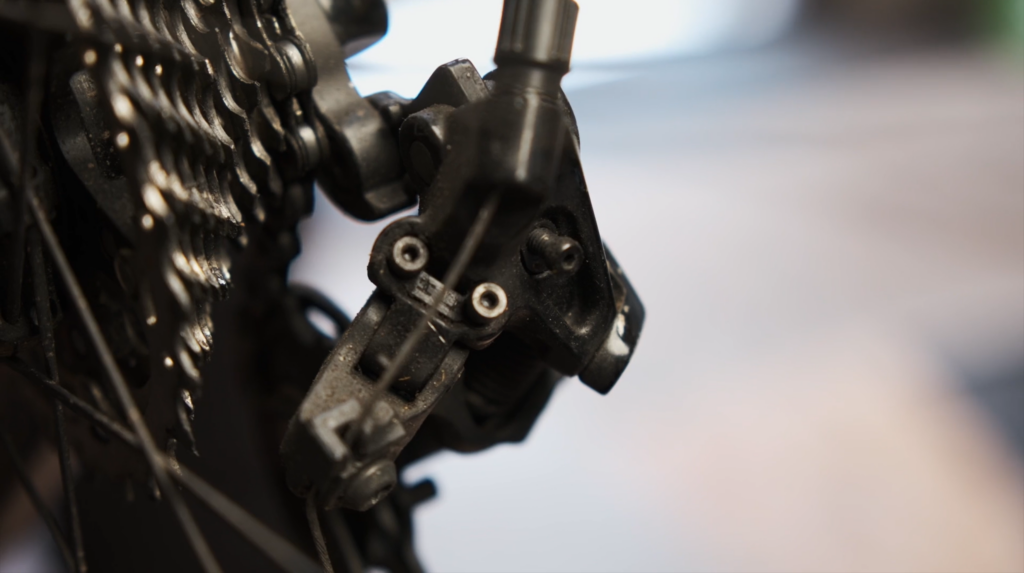
8. Seized derailleur
Sometimes, particularly if you’re a bit lax with your cleaning, the issue may lie with the derailleur itself. This probably isn’t what you want to hear as derailleurs are often some of the most expensive parts of the bike to replace – especially electronic ones. To avoid this, it’s important to clean your drivetrain regularly and after every ride during the winter, as salt on the roads can be especially harsh on derailleurs.
A derailleur relies on either a motor or cable tension to move up the sprockets or shift to the big chainring at the front. However, it’s often a simple spring that is responsible for its return. Similar to a rusty cable, a sticky or seized derailleur is most noticeable when going from a bigger to a smaller cog. This is more common on front derailleurs because they just don’t get used as much.
> Should you run a 1x set-up on your road bike?
If the spring appears to be in good condition, the issue is likely sticky pivots. Try using something like WD40 or penetrating oil on these and let it soak overnight. Then, manually move the derailleur to see if it loosens up. If you can free the pivots up, applying wet lube or grease to the gaps can help protect them from rain or road salt, preventing future seizing.
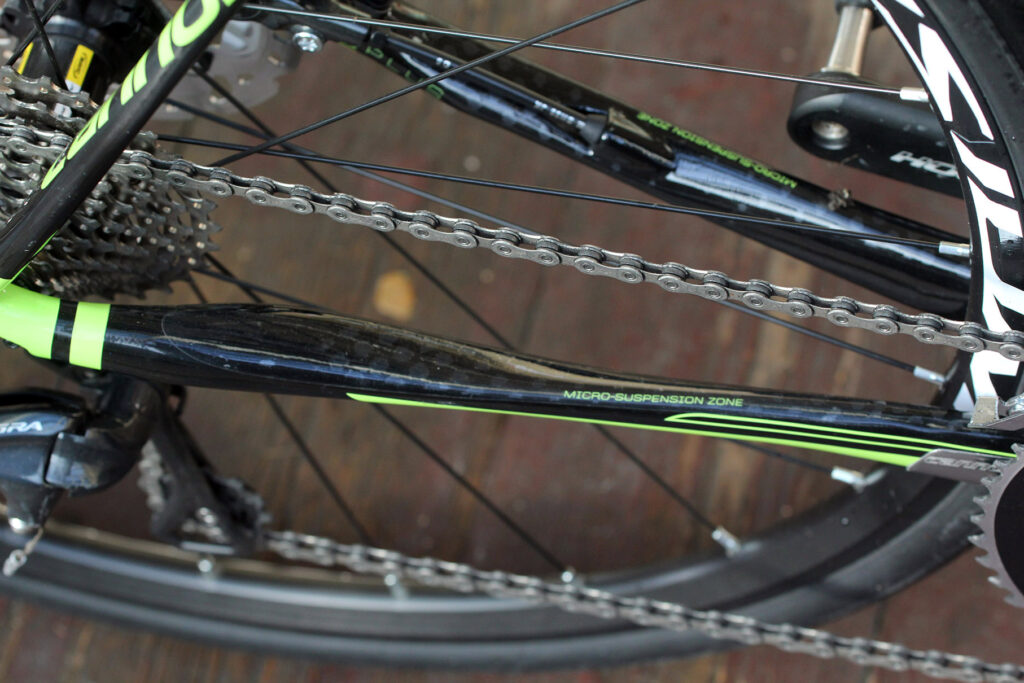
9. Loose cassette
Here’s one that has caught out many riders (myself included): that annoying noise from the rear of your bike could be caused by a loose cassette.
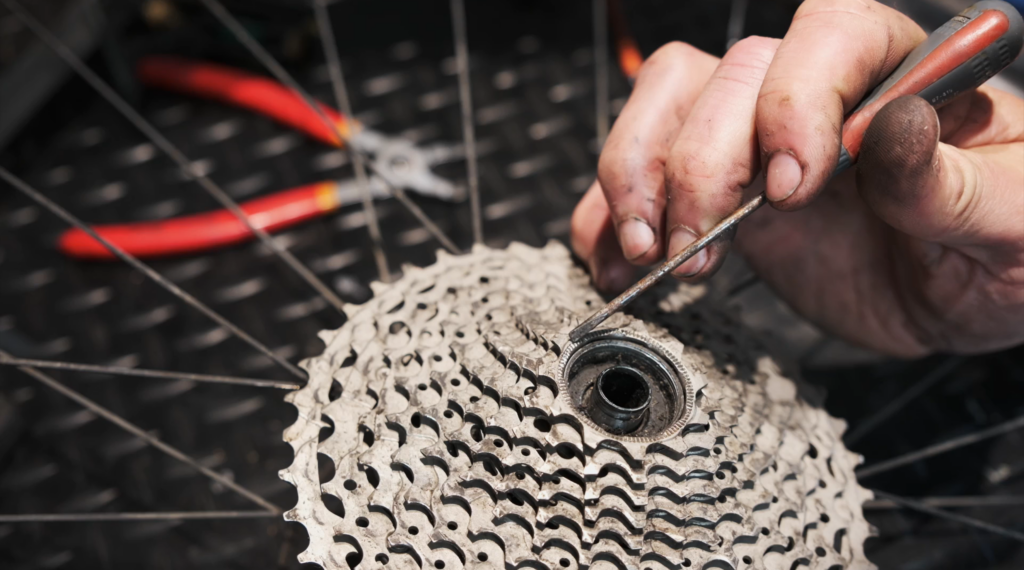
The lockring may be tight, but do the sprockets still wiggle around? If so, it needs your attention – smooth shifting will be impossible until it’s fixed.
Some cassettes need a spacer behind them. Without it, the lockring just tightens against the freehub body, leaving your cassette loose. Another reason for a loose cassette could be that the lockring is cross-threaded, which is surprisingly easy to do.
> Do wide ratio cassettes for lower gears have any place on performance road bikes?
If you have the right tools, remove the cassette, ensure the smallest sprocket sits outside the freehub body as shown in the picture above, then do it back up. We always recommend tightening the lockring by hand for the first few turns to avoid cross-threading. Some of them really are made of cheese, so we’ve heard!
10. Rear wheel not seated properly
Another reason your gears aren’t behaving as they should could simply be because your rear wheel isn’t in properly. While this is unlikely with bikes that have thru-axles – since the wheel can only fit in one place – it’s still important to make sure it’s done up tight.
For bikes with quick releases, make sure the wheel is fully seated in the frame. The best way to do this is to always fit the wheels with the bike on the ground. Apply some downward pressure to ensure everything sits flush. The quick release should be a firm close, but it’s the cam action inside the lever that tightens everything up, so it doesn’t have to be at the limit of your powers to shut it.
What gear issues have you experienced and how did you solve them? Let us know in the comments section below.


22 thoughts on “How to make your bike shift smoother — the main causes of bike gear problems and how to fix them”
‘Here are 10 things to check
‘Here are 10 things to check to get them working crisper than Gary Lineker’..
I’m not sure what that doofus has to do with bicycle gears..
Crisp (adj, vaguely
Crisp (adj, vaguely onomatopoeic); descriptive of good drivetrain setup.
Crisp (noun, fronted by footballers); salty, abrasive, gets stuck in the little crannies, famous for crunching; tasty post-ride snack, metaphorical for a very bad drivetrain setup
It’s tenuous.
It’s tenuous.
He is/was* the poster boy for a heavily marketed brand of crisps (chips in the US).
* Having not watched any TV for a few years now he may have moved on to something further down-market.
Quentin was not available for
Quentin was not available for cycling-drivetrain-metaphor gigs?
I have often found as rear
I have often found as rear derailleurs age the hangar axle bolt (on later Shadow models the bracket axle) can develop play, resulting in poorer shifting as the derailleur can pivot laterally. On the cheaper old outboard design it is not cost effective nor even possible to actually service. The newer bracket design on Shimano’s Shadow+ feature derailleurs are much easier and cheaper to replace.
A hanger alignment tool
A hanger alignment tool shouldn’t be an obscure thing confined to only your LBS. I wouldn’t start indexing before checking the alignment, it’s easy and quick to do, and will save a wasted hour chasing indexing up and down the block.
100% agree 👍. As a bike
100% agree 👍. As a bike mechanic it’s what I was taught ages ago when I did my training. These tools are not that expensive and are a godsend.
Just regarding a loose
Just regarding a loose cassette, this can happen if you have a Shimano 11-34 11 speed cassette (such as CS-HG700-11 or CS-HG800-11) on a Shimano 11 speed freehub, you will need a 1.85mm spacer ring on the inside. Not obvious unless you read the instructions or just know about this, as intuitively you’d only use the spacer for a 10 speed cassette on 11 speed hub. It’s because the 11-34 is based on a MTB cassette design. The upside is that you could use this 11 speed cassette on a 10 speed hub.
Or buy Campgnolo mechanical.
Or buy Campagnolo mechanical. Put it on the bike and adjust it. Clean it and oil it when necessary. Replace the chain when it’s worn. Ditto cassette.
I am surprised at how fault
I am surprised at how fault-tolerant Shimano Sora 9-speed is. I have recently changed the cables into the second (3rd if you count the originals) complete new set in 4 1/2 years and they’re working well despite the history of abuse, the covering of everything with mud when coming out of Settle on the Pennine Bridleway etc. The rear has been pretty good throughout, but the front has recently required me to develop the technique of kicking the mech inwards with my right foot when requiring the small ring. The original outers surreptitiously split because they were the crappy ones with wires running longitudinally instead of in a spiral manner, so they initially bulge then produce longitudinal splits in the plastic cover. For those who, like me, have never ridden cyclo-cross: you just remove the huge lumps of mud from the chain, mechs, chainstays and mudguards with twigs, and it all works again
wtjs wrote:
Mrs H has Sora on her commuter and it’s absolutely bombproof, of the six bikes in the household it’s the one that needs the least adjustment by far: I think in the two years she’s had it, with fairly heavy use (about 6000 km per year in all seasons), I’ve replaced the rear mech cable once and indexed the gears twice.
I have Sora on 2 bikes, one
I have Sora on 2 bikes, one is the all-weather commuter that sees more mud, grit and slop in a couple of wet weeks than most bikes do in a year or more. When the rear derailleur got stiff after its fourth winter I found one that was almost like new on eBay for £20.
I am happy with my SRAM rival
I am happy with my SRAM rival group set on my winter bike. It has never let me down.
wtjs wrote:
I thought the outer of all gear cables were laid longitudinally as opposed to spiral wound brake cables where precise movement isn’t required.
Nokons on two of mine,
Nokons on two of mine, longitudinal XTR on the other.
I see – Nokon avoids the
I see – Nokon avoids the problem of radial or longitudinal wires altogether using short solid segments that are non-compressible.
I see that what I should have
I see that what I should have written is that good quality outers are necessary – the split ones were the originals on a bike which only cost £650 in late 2018, so I have nothing to complain about. You’d guess that spiral wound would be incompressible enough!
wtjs wrote:
Spiral wound cables can expand and contract and possibly help with brake modulation, as well as make tighter bends.
The fundamental issue though is that when a spiral cable is curved the outer length increases as the spirals open up on the outside of curves, and it will also be pulled straight and shorten towards its original length when the inner is tensioned, whereas a longitudinal cable will remain the same length relative to the inner cable regardless of tension and curve radius, which is what is needed for precise indexing.
A little bit of research suggests older Shimano stuff up to 8-speed or so was spiral wound but with 9 or more speeds that Shimano “shifted” to longitudinal-wound outer cable as more precision was required.
It would be an interesting experiment to rig up say an 8- and an 11-speed bike using spiral-wound gear cables to see how well (or not) the indexing worked.
With Nokon outers the circular elements between the tubes allow the tube to bend and approximate a longitudinal-wound cable but there would still seem to be some extension of the outer when making curves, but presumably not sufficient to affect the indexing at high inner tensions?
I imagine this was useful to
I imagine this was useful to many but, as a daily rider (I have no car), not to me particularly; what is interesting to me is the common insistence on cleaning and oiling chains, the only time I’ve ever had seized links/chains is when I got kidded into using one of these ‘special’ liquid lubricants and I departed from my long established method. Generally, liquid lubricants are utterly unsuitable for bikes, they collect dirt/grit etc., wash off in the rain, and get thrown off by centrifugal forces. I use a lithium/molebdinum high melting point cup grease (applied with an old toothbrush), I NEVER clean my chain, it never gives any problems..
That may well be the case but
That may well be the case but I bet it doesn’t last as long due to the build up of crud and muck on the chain.
There’s an easy way to check
There’s an easy way to check your cassette teeth for wear, see the Park video at https://www.youtube.com/watch?v=WGIe7KXWEu8&t=65s
They use a pick tool, I use a fine Bic pen.
Or, you can just look at them
Or, you can just look at them – it’s pretty obvious when they’re not going to work with a new chain. Then you can try them with old lengthened chains which you have kept for the purpose