

Putting on new handlebar tape is a simple way to give your bike a visual lift as well as improving the grip, comfort and ride quality of your bike. It’s a cheap and easy way to treat your bike to some TLC. Here’s how be a wrap star.
Our guide below shows you what we believe is the best method to wrap bar tape. We’ve included a list of the tools and materials that you will need to complete the job and in some cases where you can buy them. If there are others that you prefer then feel free to let everybody know in the comments.
Tools & Materials
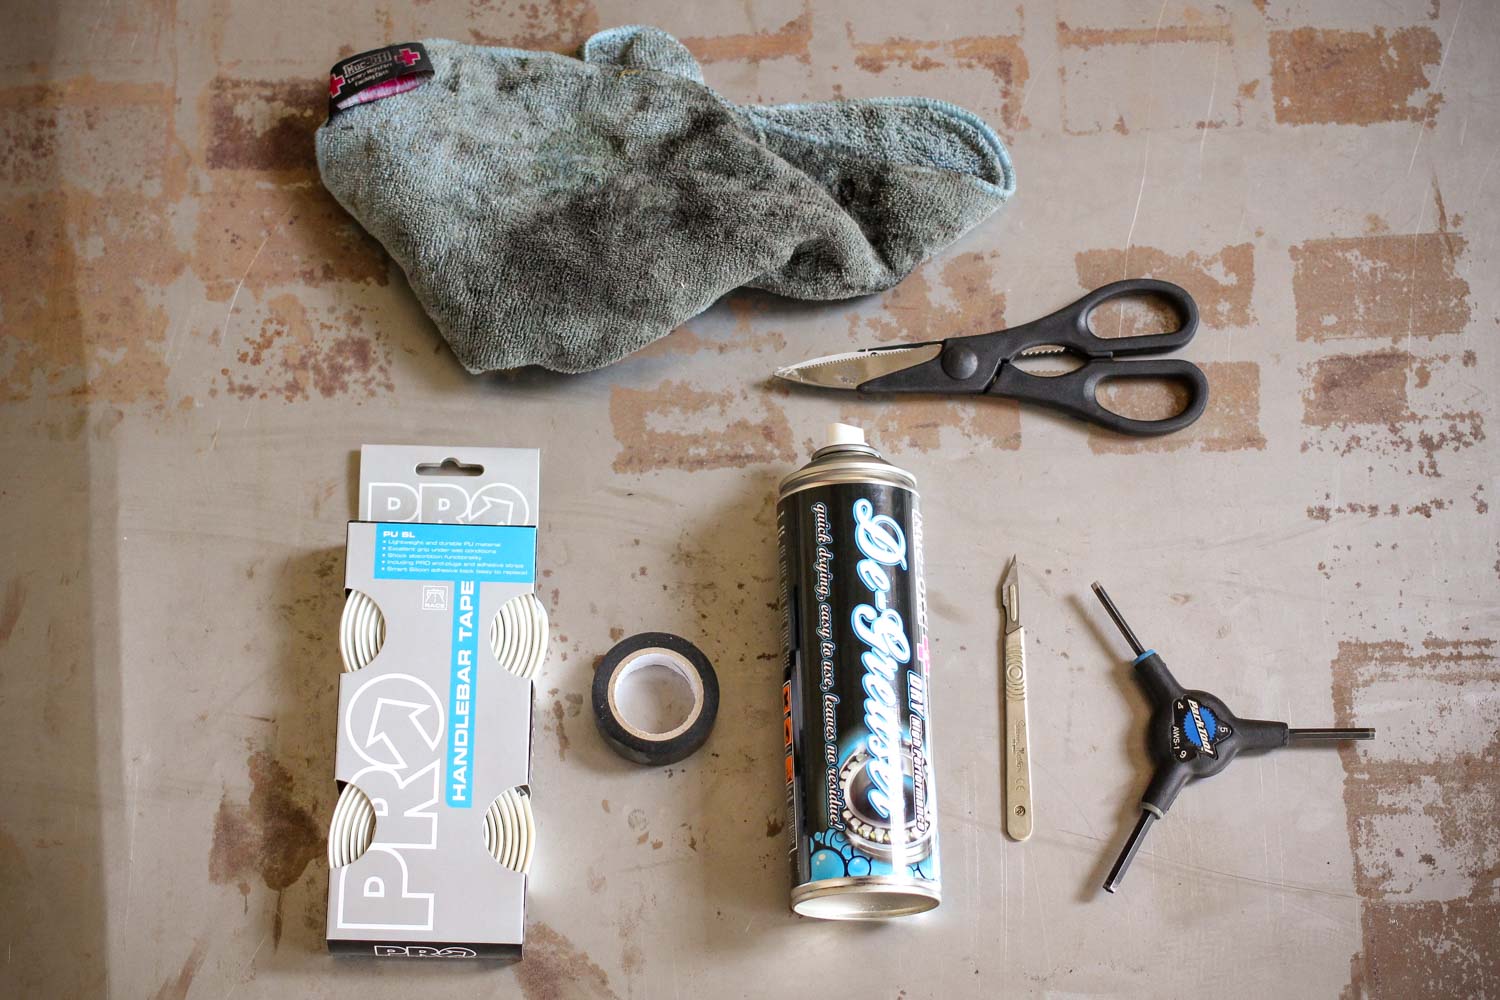
•Fresh tape such as Pro Bike Gear tape
•Degreaser such as Morgan Blue Chain Cleaner or Green Oil Clean degreaser
•Scissors and or scalpel
•Electrical tape
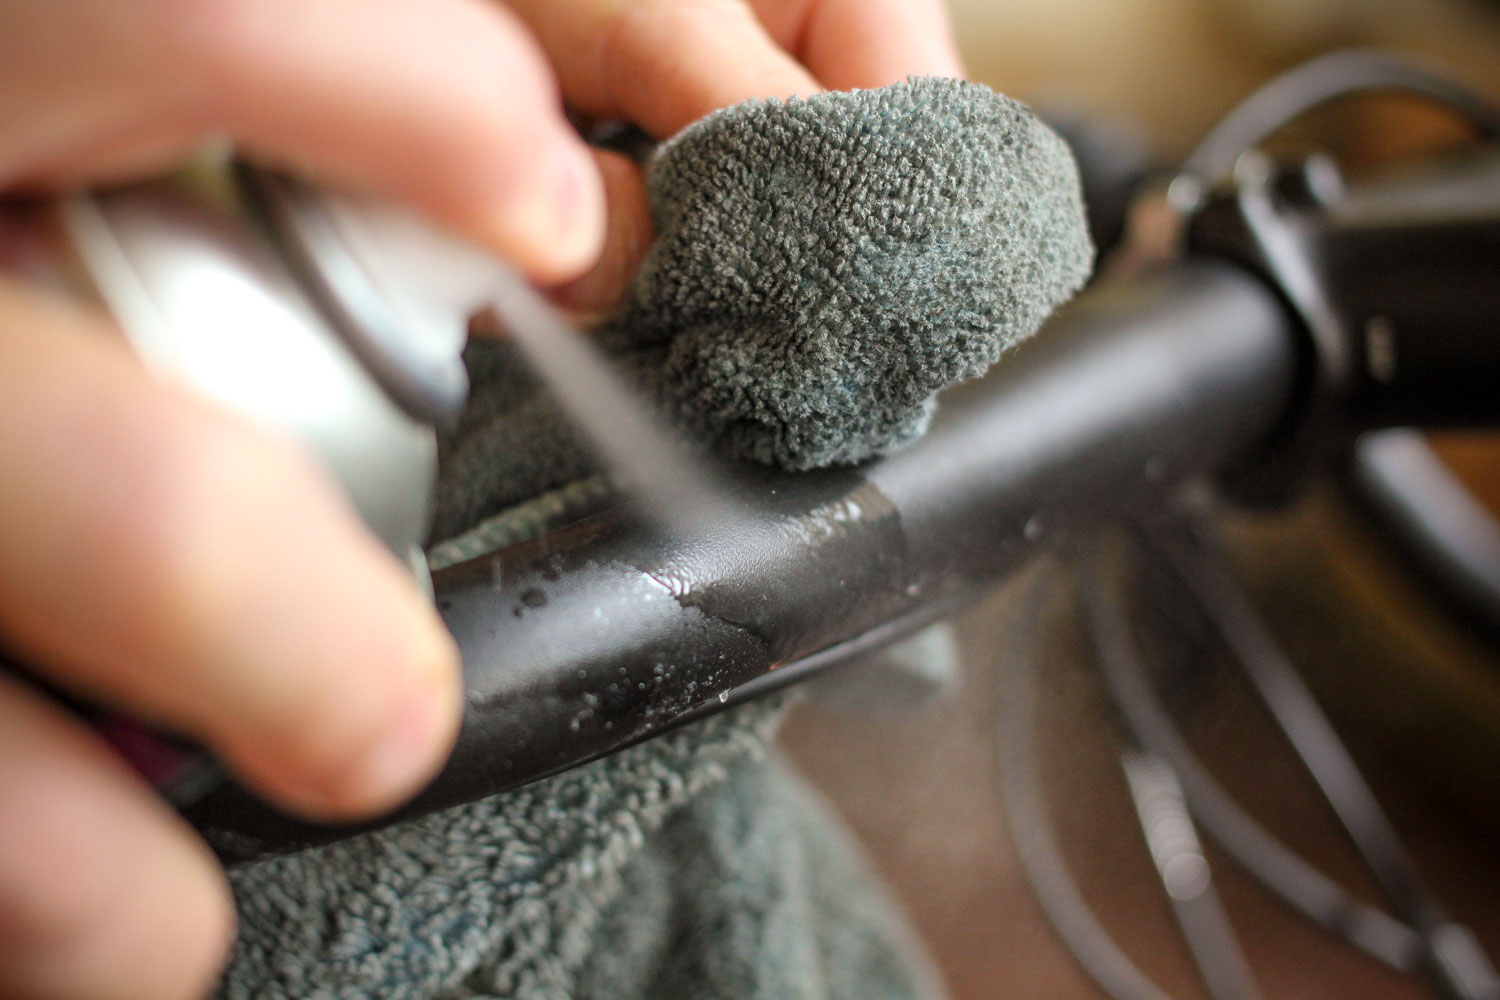
1. Clean the bar. Clean handlebar and ensure there’s no glue residue from the old tape. Tape the control cables to the bars, using the appropriate grooves if your bar has them (or internal ports). Roll back the lever hoods to expose the bar clamps and finally remove the bar-end plugs. Stick the ends of two three inch long sections of electrical tape to the stem (you’ll see why in a moment). You’re now ready to start.
2. Clamp covers. Most tape packs have two spools of tape, one per side. There is usually a couple of short sections for use in covering the clamps of the levers and a pair of branded logo tapes to finish the final end. Opinion is divided over using the clamp cover pieces, some like them, other prefer less bulk behind the lever clamp. Personally, we like using them. Trim them to exact length to and apply clamp cover section.
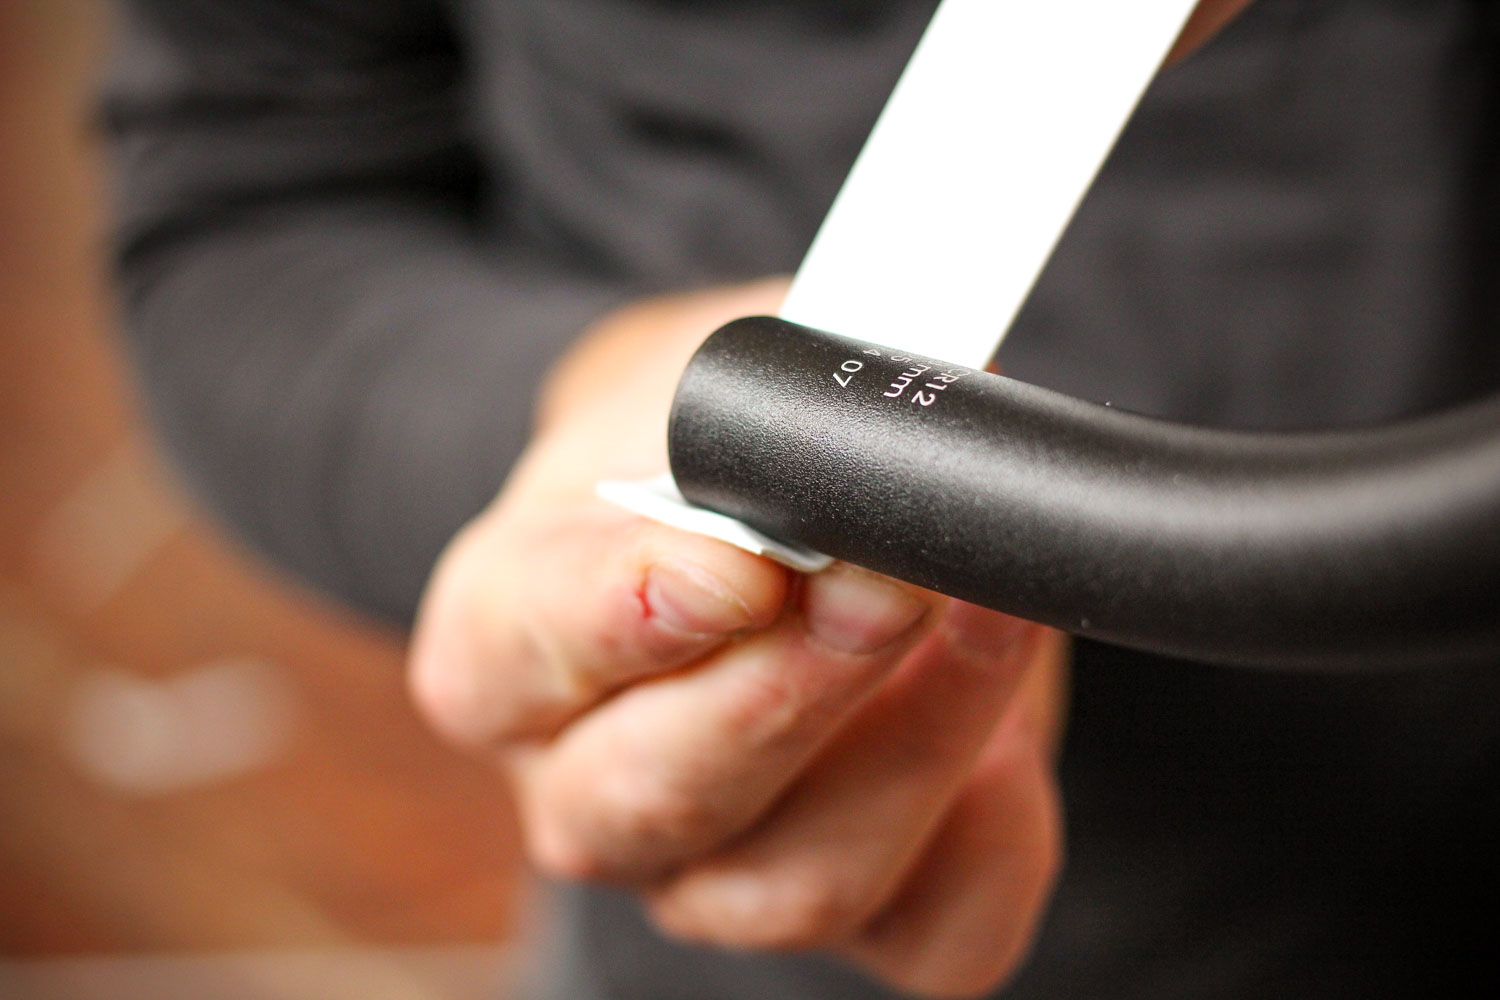
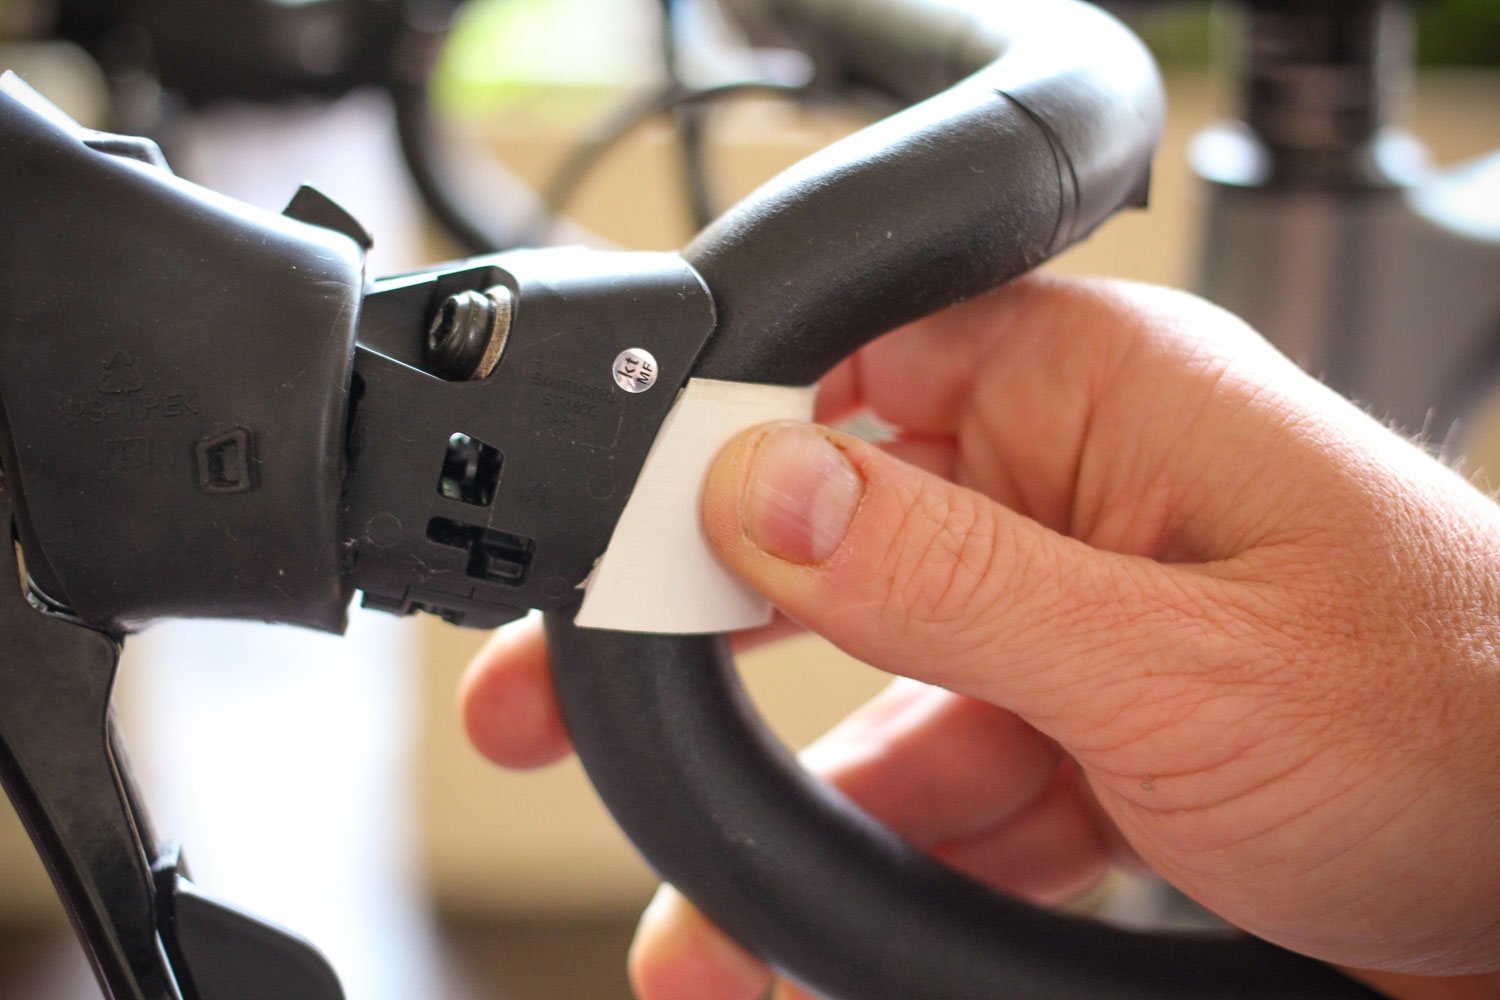
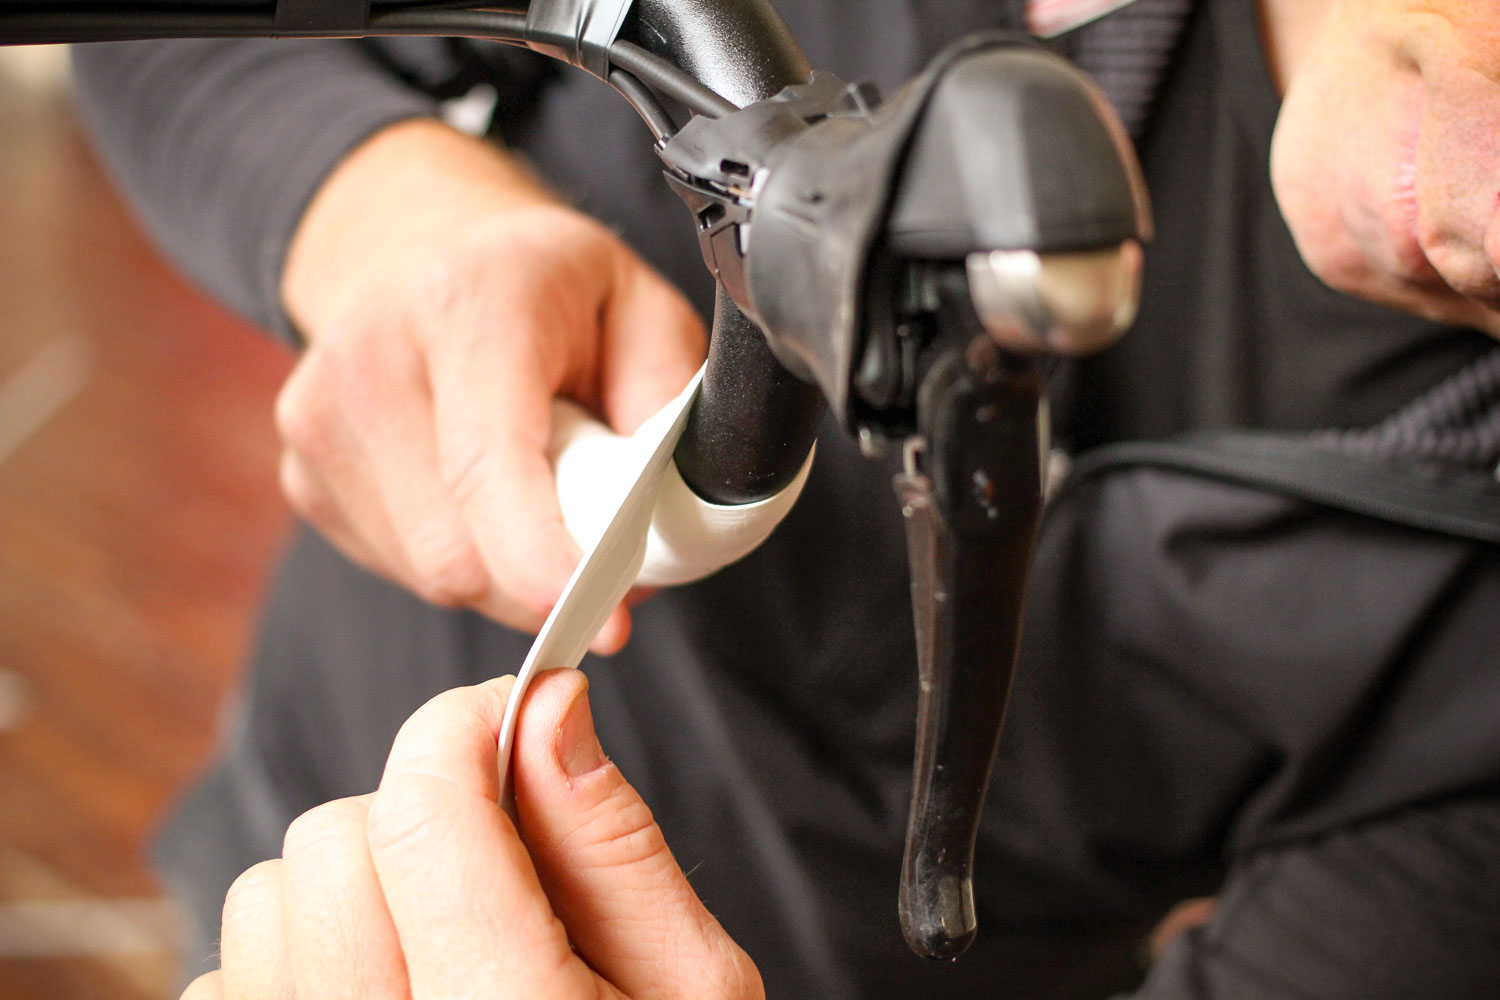
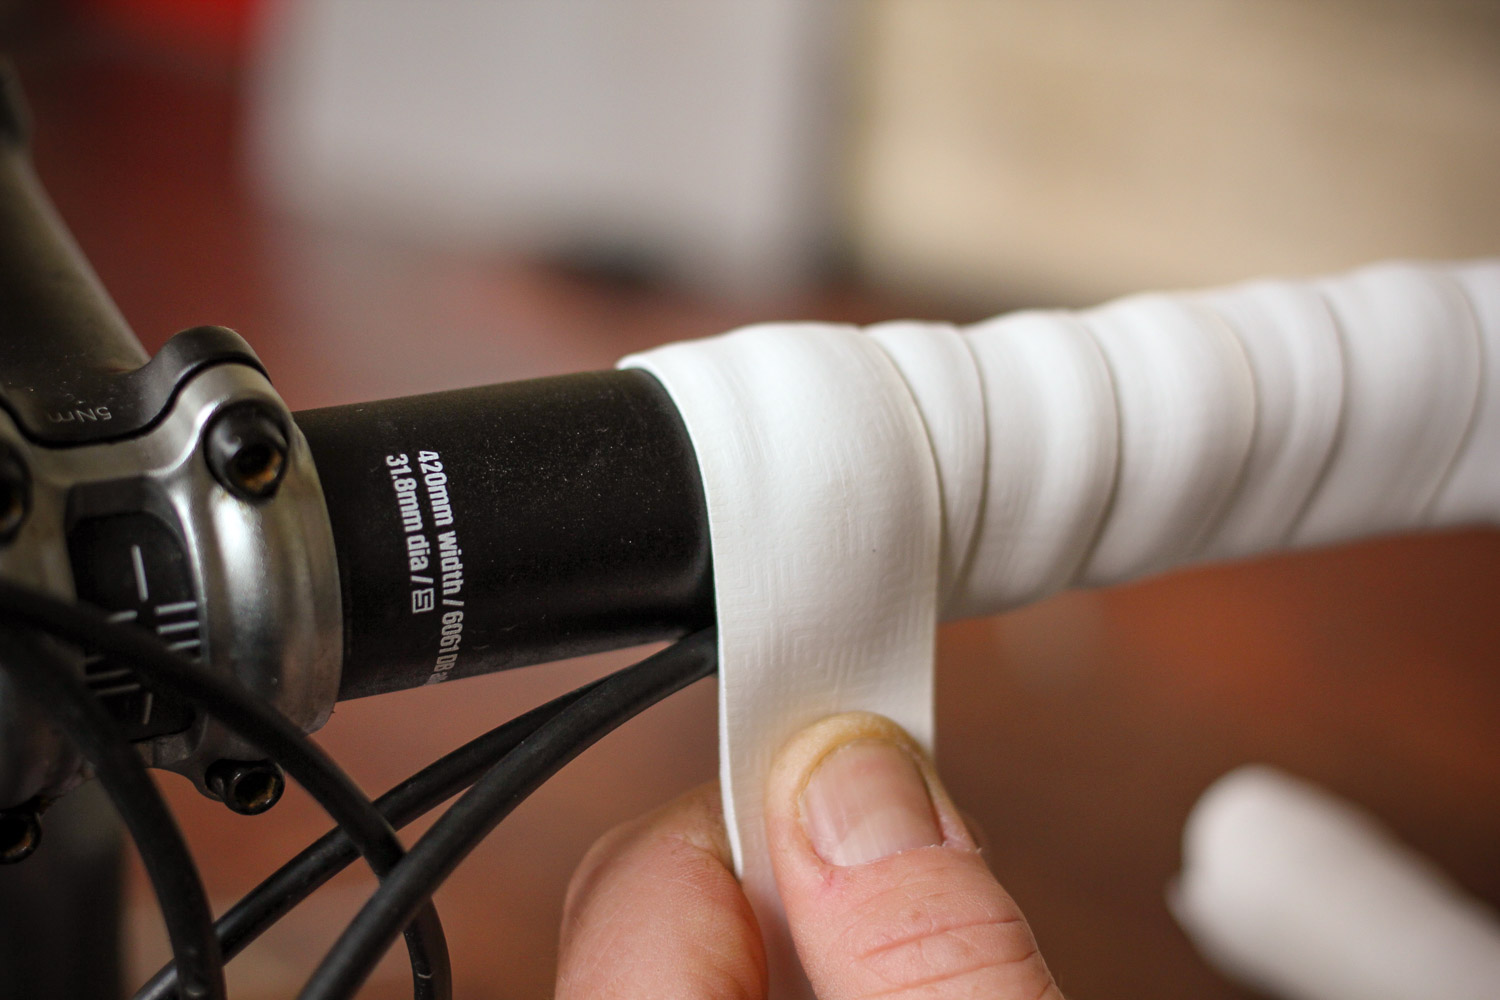
3. Remove tape backing. Peel off half the waxy tape leader which covers the adhesive strip on the underside of the tape. Rip off the bit you’ve peeled off. Beginning on the underside of the open end of the bar and, leaving a half inch over the end put a full turn on the bar. Remember to turn the tape from outside to inside. As you look down at the bars the tape turns should fan diagonally and backwards and outwards.
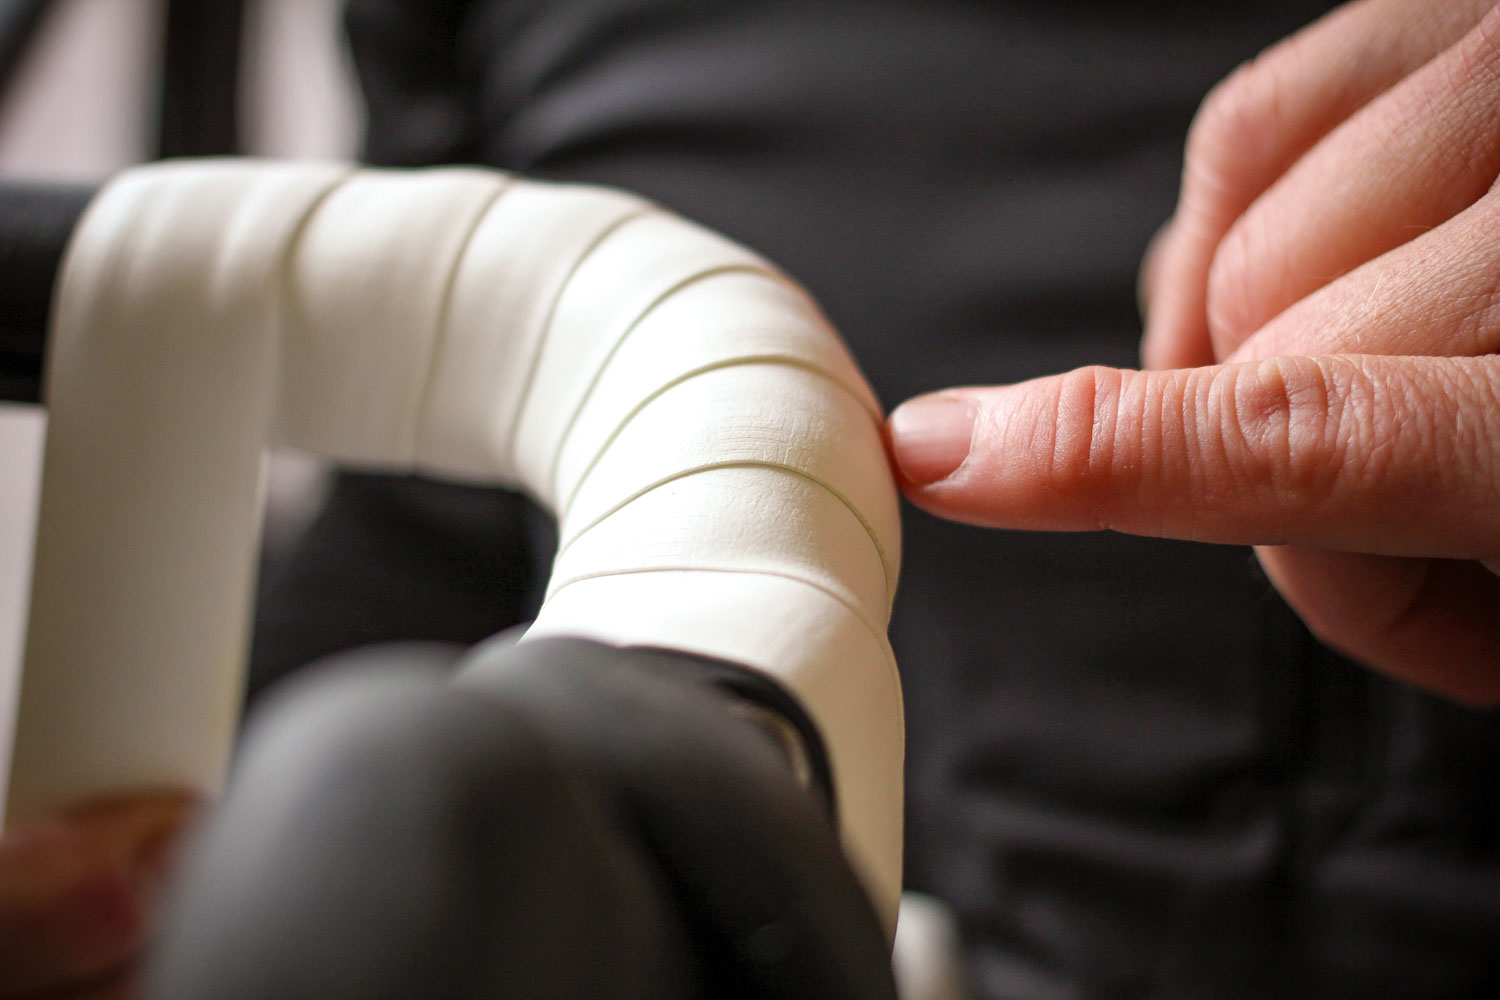
4. Overlap the wrap. As the first turn completes begin to angle the tape up the bar. Each new turn of tape should overlap about a third of the previous turn. Apply an even pull force on the tape (it’s generally made to be a bit stretchy) this will ensure an even thickness and width as the bar begins to curve. Check you’ve not left any gaps or puckers.
5. Perfect wrap. If you’re not happy with a wrap, just back off the tension and unwrap back to the last bit you’re happy with. If everything is good, you’ll get to the lower edge of the lever body. Allow a small overlap of a millimetre or two to ensure there are no gaps.
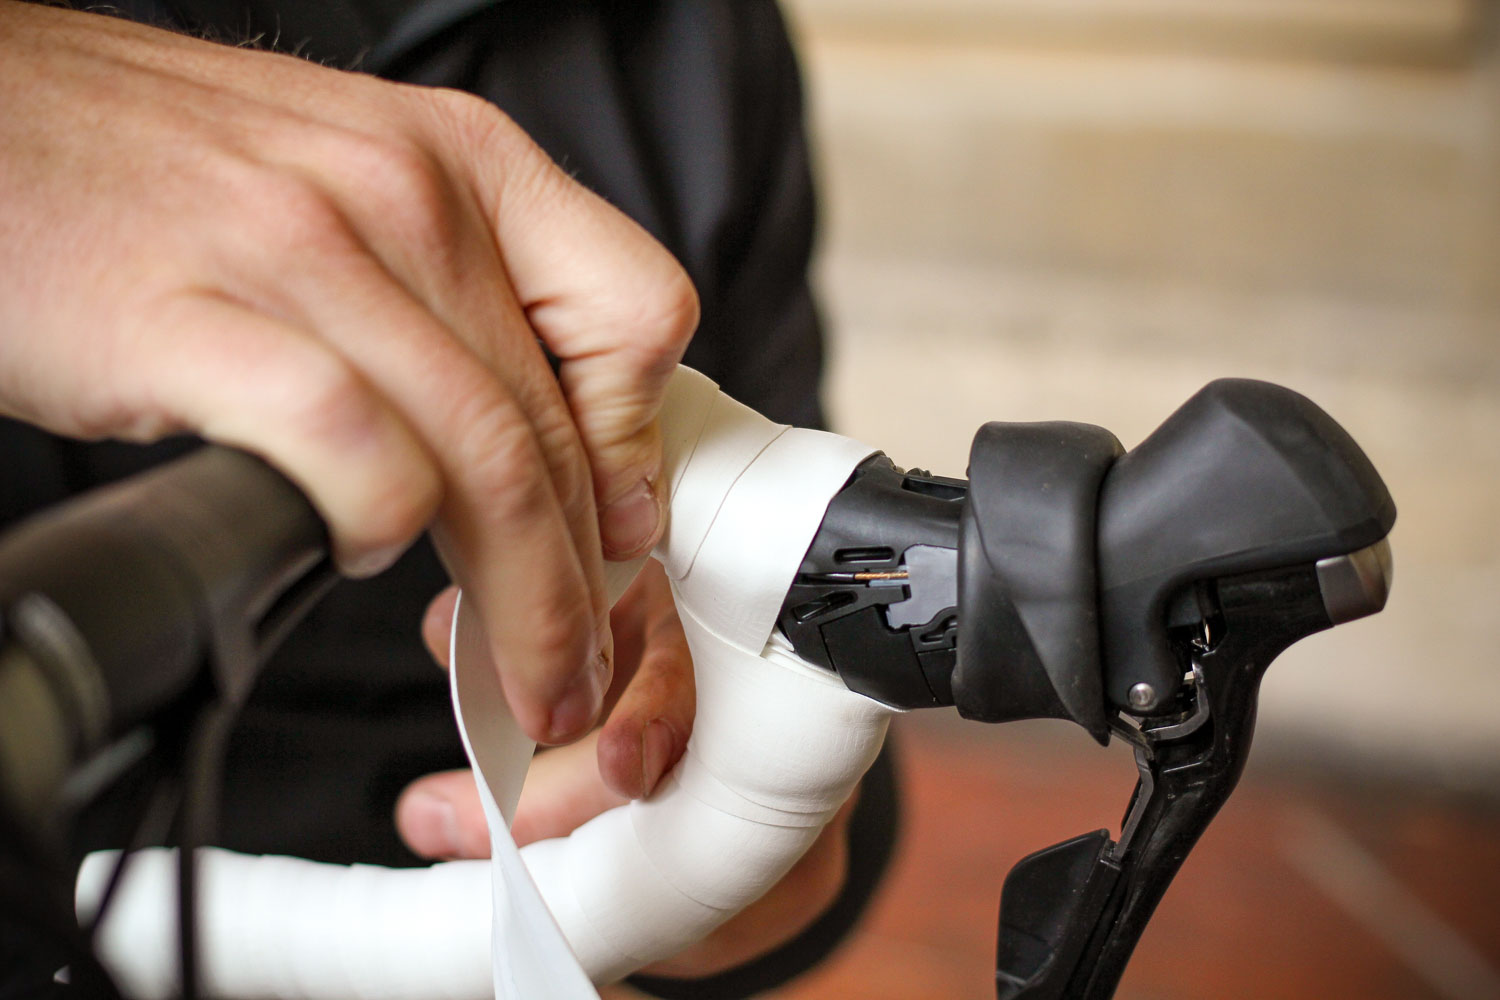
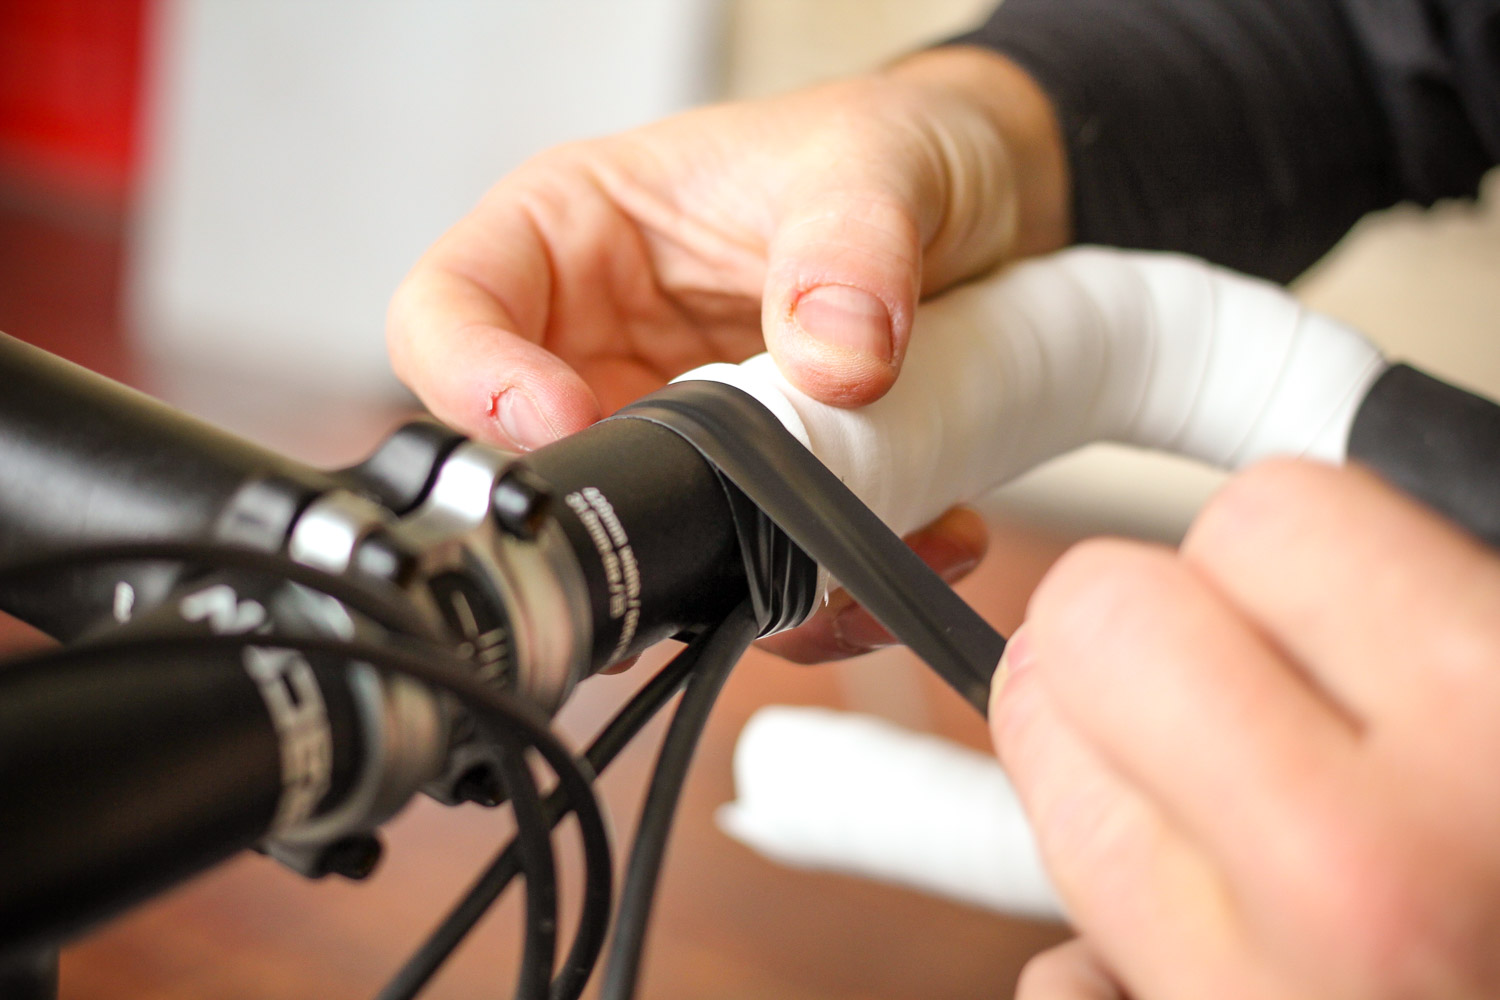
6. Taping around the shifters. Continue by wrapping a figure of eight of tape around the lever body. You’re looking to position the tape, in conjunction with the separate bar clamp cover section to completely cover the exposed handlebar. It can take a few goes to get it just right. Don’t be afraid to undo and reposition for a pro looking finish.
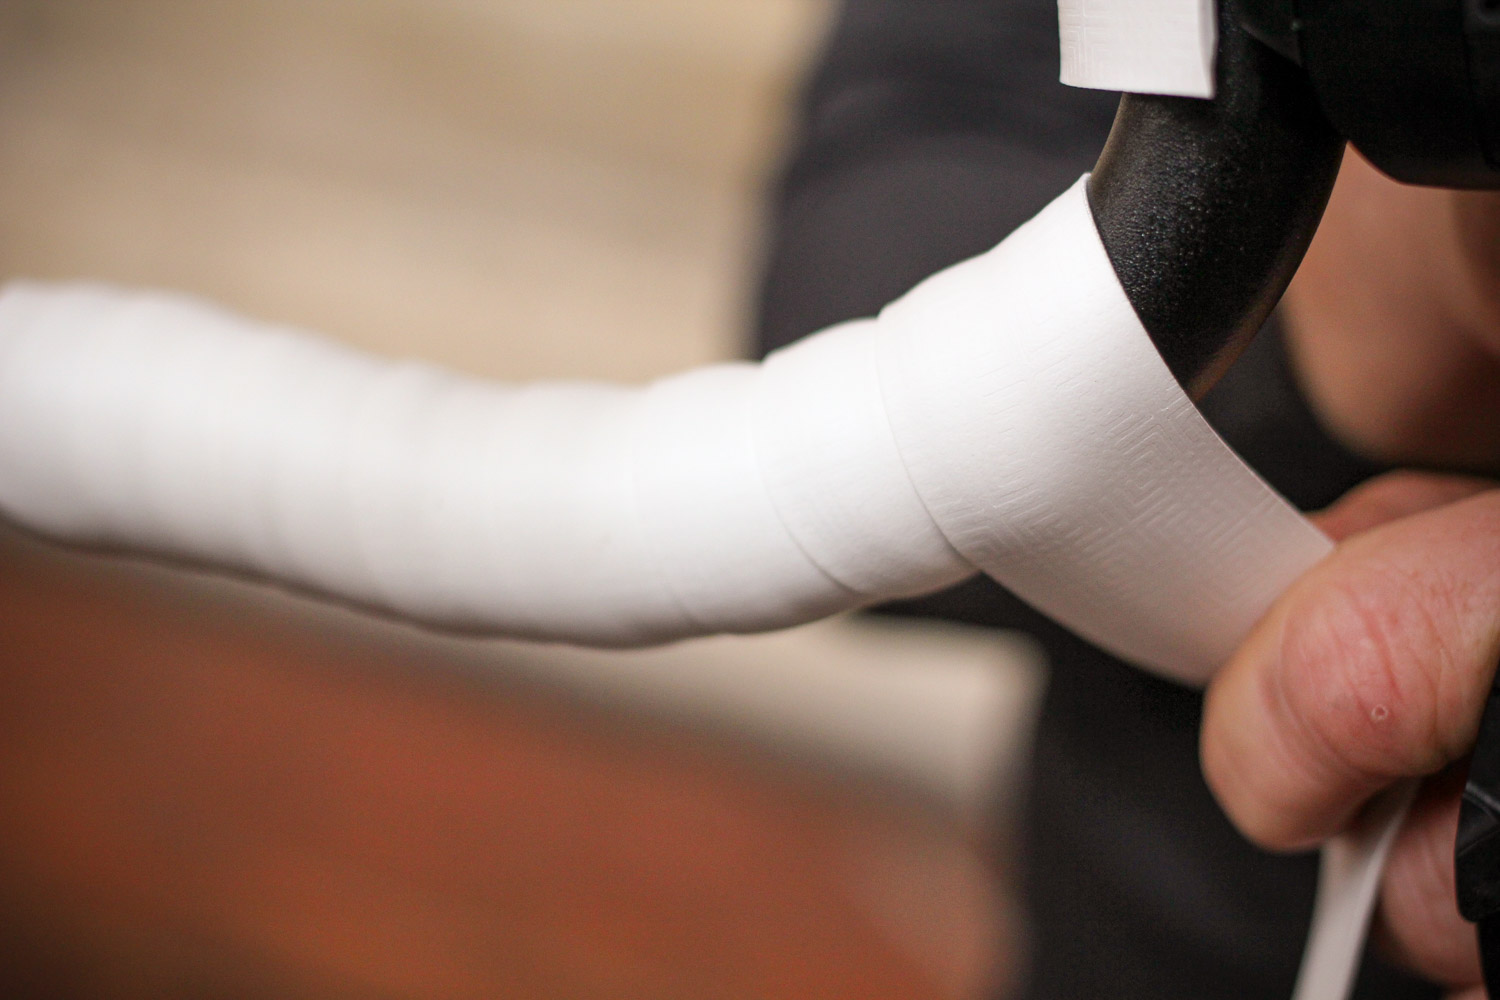
7. Taping the tops. Once clear of the levers, you’re wrapping around the top bend of the bar. Remember to try and make the turn with even quadrants. Too much or too little overlap and the feel of the bar will be off and it’ll look odd.
8. How far to wrap. We wrap either to the bulge of the centre section or to the graphic on a regular road drop bar. On flattened aero bars the trend is to finish on where the forward extension begins. That said we’ve seen them fully wrapped for comfort. Remember it’s your bar and you ride the bike, so wrap it so you’re happy and comfortable.
9. Tape trim. With the last wrap complete, trim the excess with a long diagonal cut to allow the end to finish flush with the end of the last complete turn. Use one of the short sections of electrical tape to secure the trimmed end neatly into the end of the final turn. Finish with the logo tape supplied with the bar tape.
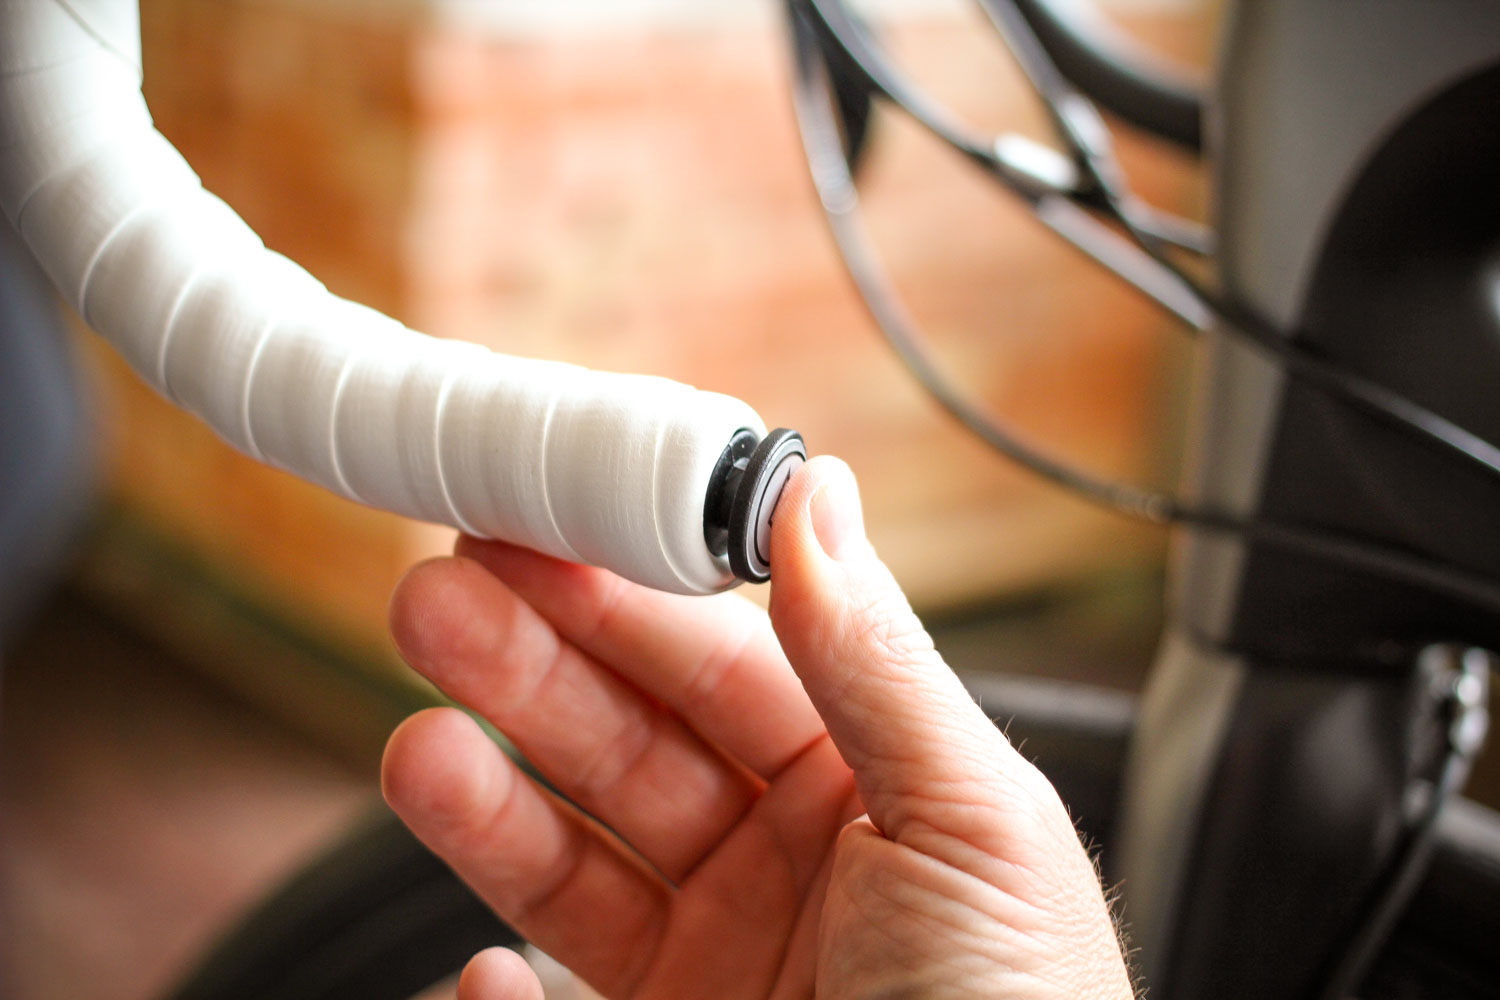
10. Add the end plugs. Now go back to the end of the bar, where you began the taping, and carefully fold the overhanging ends of tape into the open end of the handlebar. Making sure none of them unfolds, use them to wedge the bar end plugs firmly into position. They should make a neat flush fit. Flip the lever hoods back into their riding position.
Repeat the whole process for the other side.


22 thoughts on “Watch: learn how to wrap handlebar tape in 10 easy steps”
Every time you say ‘brifter’
Every time you say ‘brifter’ a teeny baby puppy and seal cub die, I hope you’re happy now…. *sniff*
Should run this story again
Should run this story again in spring, freshen the steed up for the season ahead.
Brifter, that’s a new one to
Brifter, that’s a new one to me.
I am not entirely clear from
I am not entirely clear from your photos, without comparing to my own bikes, but I think I wrap the opposite direction to you. When on the tops your hands tend to drag the tape towards you and I always wrap to ensure that this action tightens, rather than loosens, the tape. I also don’t bother with a figure of 8 around the hoods as I don’t think it is necessary if you are using the extra tape sections to cover the brifter clamps.
Chris James wrote:I am not
With you on this one. Also I never use the logo tape as it’s normally as sticky as a non-stick pan. Leccy tape always does the job fine.
brifter?
brifter? :/ :S ~X( :”( :”( :”(
I thought that was a typo
I thought that was a typo until he used it the second time, then the third.
Don’t think it will catch on 🙂
Brifter. I see it now.
Brifter. I see it now. Brake-Shifter. I hate portmanteaus.
thnurg wrote:Brifter. I see
Alas it’s been around a while, is painful and difficult to completely eradicate – a bit like a verruca but without the glamour.
If you’re into Karma it’s roughly equivalent to saying ‘LOL’ out loud.
It’s also been proven* that people who say ‘brifter’ also will always call that chimeric chunk of camping cutlery a ‘spork’.
* OK, not actually proven as such.
Must have taken you guys ages
Must have taken you guys ages to filter all those pics in Instagram before finally uploading them for the article.
Seriously, is an article
Seriously, is an article needed to show people how to put bar tape on their bike’s handlebars? :))
the bar-end plug should be
the bar-end plug should be the same orientation as the Pro logo, jussayin
VecchioJo wrote:the bar-end
Yup; if the plugs have a logo, its orientation is key to a successful wrap
After doing loads of bars
After doing loads of bars this way I dared to try the old way again from the 70s when we had that thin tape, of starting from the middle and going out towards the ends.
Much neater finish all round.
Feel free to experiment.
I love Pro handlebar tape.
I love Pro handlebar tape. Could never fit it to my Brifter though.
I tend to do mine 70’s style
I tend to do mine 70’s style too, so you don’t get any electrical tape showing. But I am just old fashioned. In the middle you start by fixing with a wee bit of electrical tape and make the first turn completely cover it. Then start to get a bit more stretch into one side than the other so you can start to wrap towards the bar ends. When you get there, keep going, wrapping over space so to speak until all of the bar is covered, then fold the end of the tape into the bar and bung a bung in good and hard to hold it. You may need to trim a bit off the tape. And if it goes a tad pear shaped at any point, a turn of electrical tape over the end of the bar doesn’t look as unsightly as it does in middle.
On my commuter I have two layers of tape: some nice squishy foam first of all, then a layer of some leatherette effect stuff over the top. I needed one and half packets of the last because the thicker bar uses up the length, effecting the join under the figure of eight around the ‘brifters’, as you young folk call them (apparently). This makes a super comfy bar and a bit warmer in winter too, though you might think the looks are affected. Just don’t get it wet, as the foam soaks up the water and it can’t dry out. Pull that cape well over the handlebars when it’s raining. (I mentioned I was old fashioned, didn’t I?)
I never bother securing the
I never bother securing the start with the plug, just double wrap that bit; it is a useful sign that your hand is at the end of the bar when racing…
…or using bar-end shifters.
My first “racing bike” had
My first “racing bike” had this weird foam one piece stuff. If it rained it would absorb so mucg water you had to squeeze it out…
Both my bikes are sub 4 kilo
Both my bikes are sub 4 kilo I use very thin sports tape ( super light) . Just wrap it round . I don’t wrap my bars below the shifters and don’t use plugs . I like to feel the bars . More tape makes me feel less in touch with my bike . I wouldn’t use any tape if I didn’t have to hold my cables down . Tape is also inexpensive so one roll lasts ages . So if I scuff it , I change , if I clean up bike I change it . Any colour other than black looks a mess after a few rides . I have some pink tape I use sometimes and I change it every ride. You can see one of my bikes in the bike photo thread . Video as well . It’s on the newest page or maybe the one before …..
I cringe whenever I hear
I cringe whenever I hear about or see a bike with no handlebar plugs. It’s possible (though very unlikely) to get a horrific injury if you hit the handlebar ends with force.
(Just found your bike – very nice)
Nooooo…… Tops to Drops…
Nooooo…… Tops to Drops…. much neater without the damn tape….
This might be the most
This might be the most confusing video/guide on the interweb. Congratulations!
The person in the video talks about wrapping a figure-of-8 around the brakes/shifters but then doesn’t do it???
The video shows the wrapping on the tops of the bars going TOWARDS the rider as it passes over the bars, but the photos show the wrapping going AWAY from the rider at if passes over the bars???
This is video is more confusing than the Govt advice to stay at home but don’t stay at home…