

Without air-filled tyres, bikes would be much slower and harsher to ride. But the jargon that swirls around tyres and tyre types can be confusing. Let’s try and clear it up.
The vast majority of bikes around the world use the standard tyre and inner tube combination we’re all familiar with, but when you start looking at high-performance and special-purpose bikes, you run into a few other types. In this article we’ll try and clarify the differences for you. But first, a bit of history.
The history of the tyre

Early cycles had solid rubber tyres, which made them harsh to ride on rough surfaces. In 1887, John Boyd Dunlop, a Scottish veterinarian living in Belfast, was the first person to fit pneumatic tyres to cycles, experimenting on his son’s trike before moving to the larger wheels of racing bikes.
The key discovery Dunlop made was that air-filled tyres were not only more comfortable, they were faster. He rolled two wheels across his yard. The wheel without a tyre stopped and fell over while the wheel with a tyre kept going until it hit a gatepost and rebounded. By deforming around the road surface, a pneumatic tyre reduces the wheel’s resistance to rolling to a huge extent. Pneumatic tyres still have rolling resistance, but it’s much less than a solid tyre.
Dunlop was granted a patent on the idea in 1888, but it turned out another Scotsman, Robert William Thomson had patented pneumatic tyres in 1847, invalidating Dunlop’s claim.
The unsung hero of the Dunlop story was the president of the Irish Cyclists’ Association, Harvey Du Cros. After his sons were beaten in races by Willie Hume, using Dunlop’s tyres, Du Cros approached Dunlop and the two created a company to exploit Dunlop’s invention. The withdrawal of his patent was a big blow to Dunlop, but having created a market for their tyres, Du Cros rallied and secured other relevant patents that allowed the Pneumatic Tyre Company to survive.
Dunlop himself retired in 1895, aged 55, while Du Cros remained at the helm of the company under a subsequent change of ownership and a public floatation. In the process, the company’s name became Dunlop Pneumatic Tyre, even though Dunlop himself was no longer involved. The company soon diversified into car tyres and other rubber products to become one of the biggest brand names — and biggest companies — of the 20th century.
The Dunlop name hasn’t appeared on bike tyres for several decades, but the man himself is still remembered as the father of the pneumatic tyre, and he’d recognise its modern versions as the descendants of the tyres he made to make his son’s trike more comfortable.
Tyre construction
Dunlop’s first prototypes comprised a rubber tube, made by gluing the edges of two strips of rubber, held on to the wheel by linen tape that was itself nailed or bolted into place. Today’s tyres are rather more sophisticated.
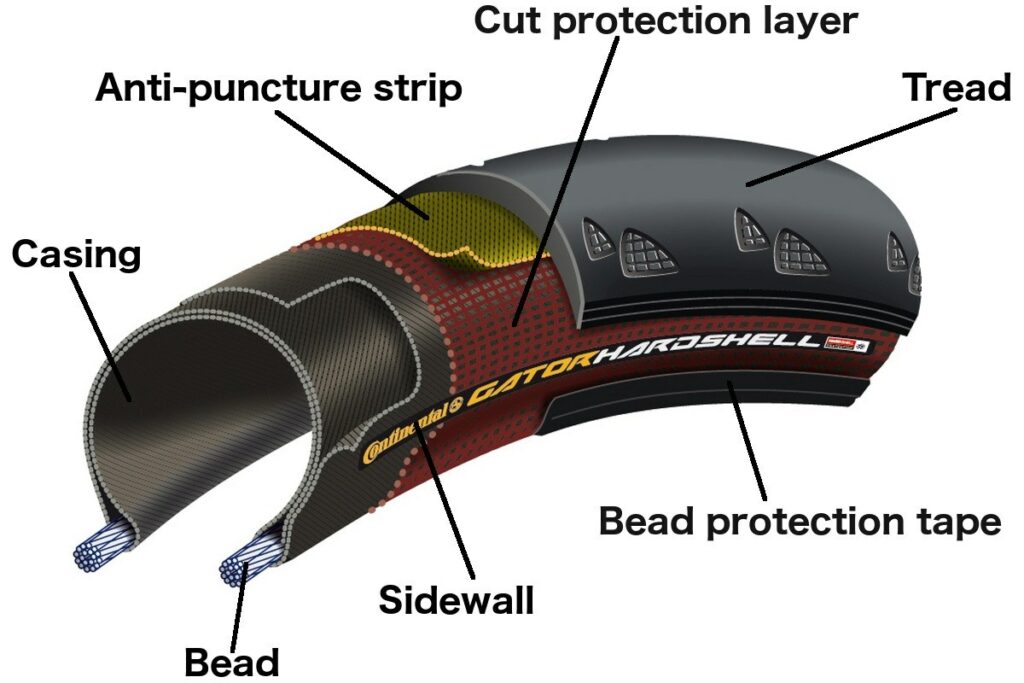
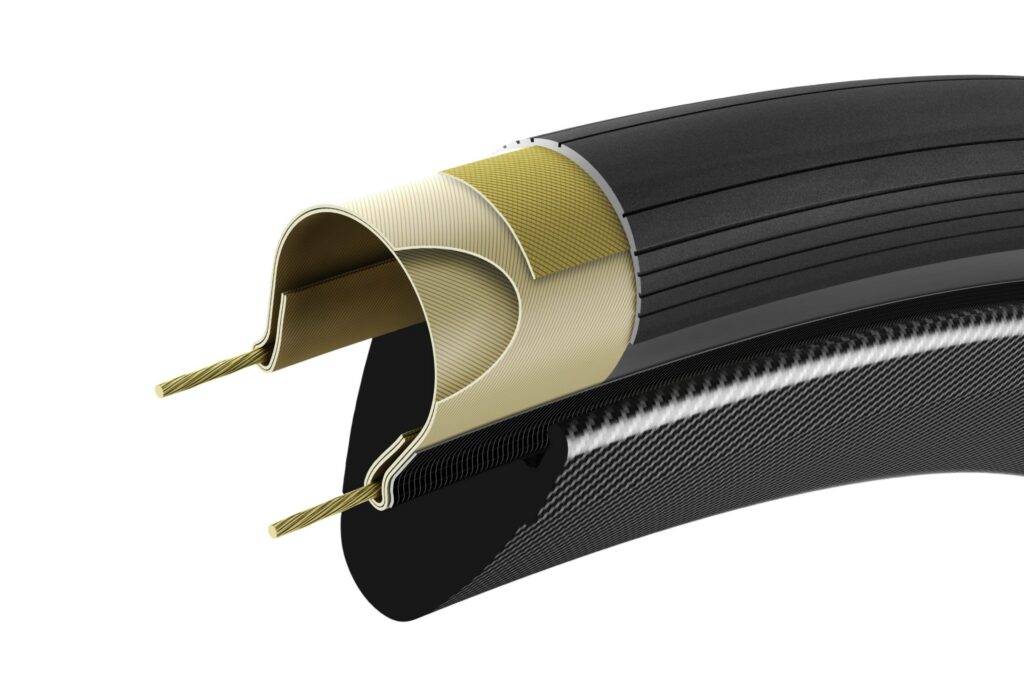
Rubber is still used to hold the air in place, though. Usually this is a tube inside the tyre that can be replaced or repaired if it gets punctured. Tubes are made from either synthetic butyl rubber made from petrochemicals or natural rubber made from the latex of the rubber tree.
The inner tube is held in place by a casing made from layers of cloth, which holds in the pressure. The cloth, which usually has unwoven fibres aligned at an angle across the tyre, may be made from nylon, polyester, cotton, or silk. As a rule of thumb, the finer the casing — it’s measured in threads per inch or tpi — the better the quality of the tyre. Basic tyres have 15 or 33tpi casings, while the cloth used in the best casings usually has 120tpi. Larger numbers than that indicate the manufacturer is adding up the count for each layer.
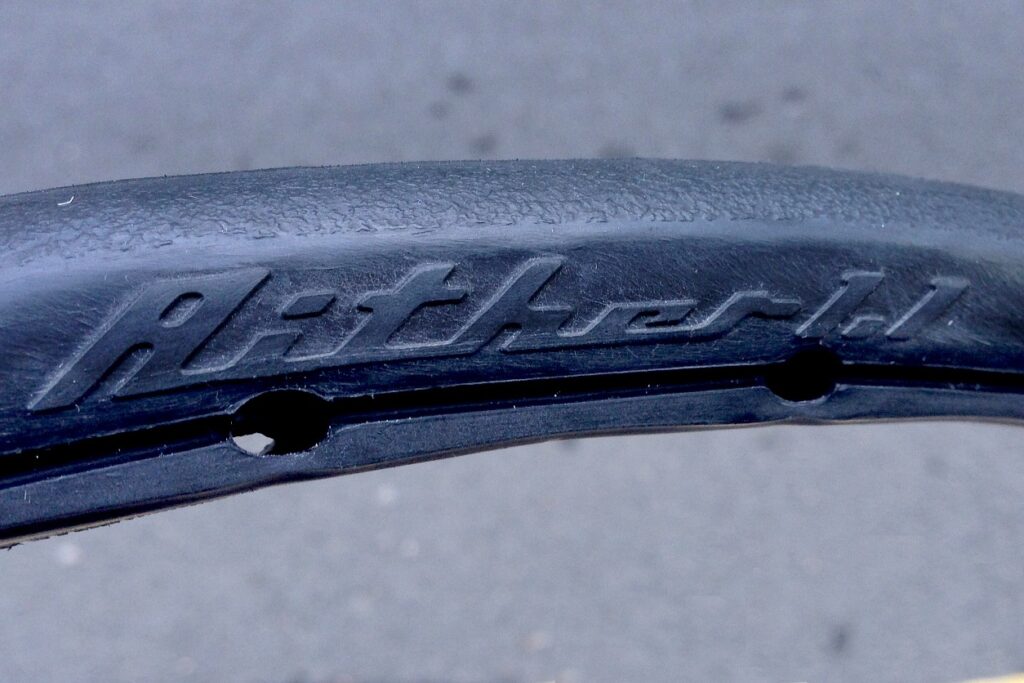
The sides of the tyre, between the bead and tread, are called sidewalls. City bike tyres often have a reflective layer on the sidewalls for night-time visibility.
The tyre also needs to grip the road, and to do this it has an outermost layer of rubber, the tread. That term refers to the rubber itself, not the pattern moulded into it. Tread rubber is mixed with various additives, including carbon black and silica, to improve its grip and durability.
Many tyres also have an additional layer under the tread to reduce punctures.
One of the objectives of a tyre designer is to reduce rolling resistance to an absolute minimum. To this end, top-quality tyres have thin, supple casings and tread.
Almost all tyres share these features, but the details of how they’re assembled vary. Let’s take a closer look.
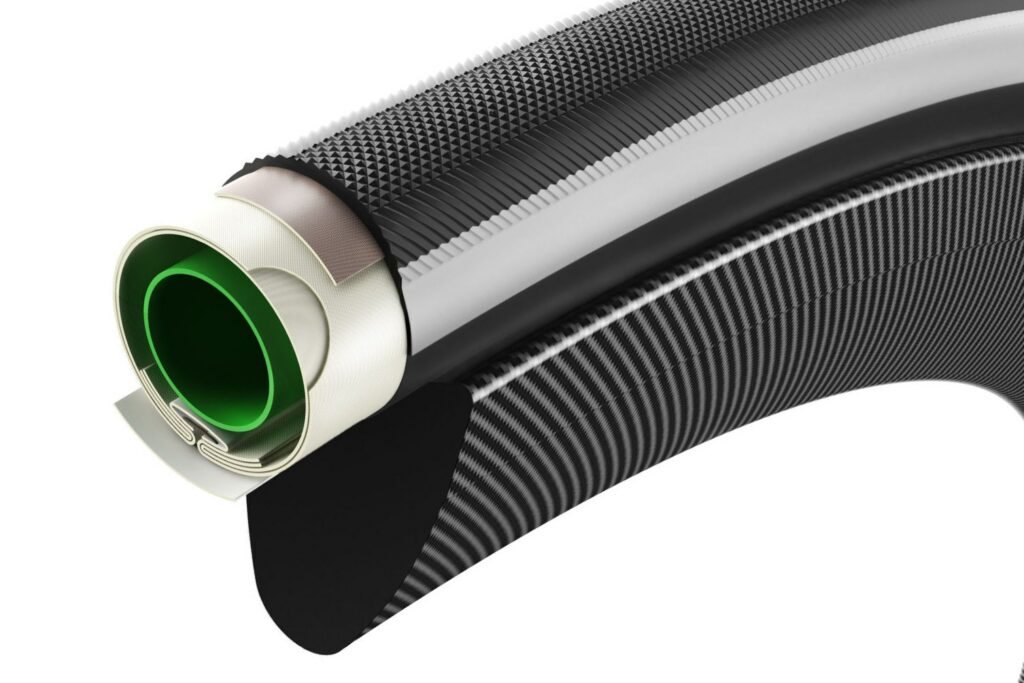
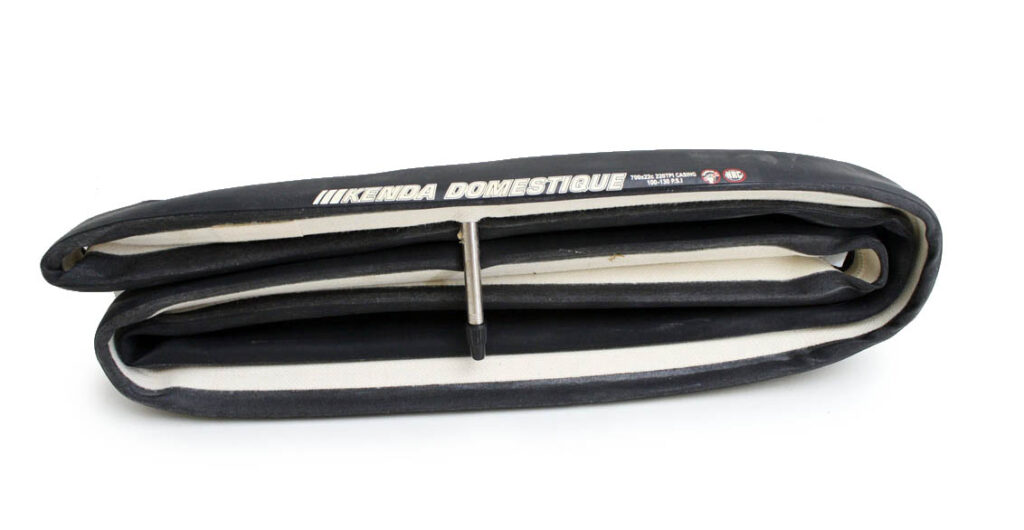
Clinchers
This is the standard tyre we all know, love and curse at when it goes flat. It’s a U-shape in cross-section, moulded into a hoop by machine. A bead at each end of the U hooks into the rim. The casing spans the beads, and wraps round them. The tread is moulded into place when the tyre is made.
The big advantage of this design, and the reason why it dominates, is that fitting and replacing it is a low-skill job so the inner tube can be replaced fairly easily if you get a puncture. The combination of hook on the rim and bead on the tyre provides decent protection against the tyre blowing off too; you can usually inflate a clincher tyre to twice its recommended maximum before it will blow off.
The disadvantages are that it’s inherently heavier than a tubular, because the rim isn’t a simple tube, but needs an extension for the hook, and the tyre has a bead. Inexpensive tyres have steel beads, better ones have beads made of Kevlar or similar, which saves weight and allows them to be folded for storage or to be carried as spares.
A puncture that completely deflates a clincher tyre can be dangerous. The tyre is only held in place by air pressure, and can come away from the rim if it goes flat. That can lead to catastrophic loss of control if it happens to a front tyre at speed.
A disadvantage that’s not inherent to the design but rather a symptom of the slightly anarchic nature of the bike industry is that you can’t be sure just how well any given tyre will fit your rim. The most common tyre size for road bikes is known as 700C, a name that comes from a now-defunct French tyre sizing system. Under the International Standards Organisation system for sizing tyres, all 700C rims and tyres measure 622mm across the bead seat, the section of the rim where the tyre bead sits.
However, if the standard imposes tolerances for this measurement, they’re not widely observed. It’s not unusual to find some tyre and rim combinations go together quite easily, while others are extremely difficult, or even impossible. If you’re fitting new tyres, you’ll find out soon enough if they’re on the tight side. If they’re very hard to fit, they’ll be similarly hard to remove, which can be a big problem if you’re trying to fix a puncture on the way to work on a dark, cold and damp January morning.
Tubulars
This is the modern tyre construction that’s most similar to the tyres Dunlop sold back in the 1890s. The casing is wrapped around the inner tube and sewn together, with a tape over the stitching to protect it. The whole thing is then glued to the rim.
The biggest advantage of making a tyre this way is that it’s light. Without the tyre bead or rim hook of a clincher, a tubular and rim will always be lighter than an equivalent clincher, though the gap is now so small as really makes no difference.
If you get a puncture in a tubular while riding, then you’ll need to replace the tyre. That means carrying a spare, traditionally strapped to your saddle rails with an old toestrap. Your spare needs to have been previously mounted on a wheel so it has some glue to key to the rim when you need it.
This is both an advantage and disadvantage of tubulars. You have to replace a whole tyre because a field-repair isn’t feasible, but swapping a tyre is quicker than replacing an inner tube. To repair the tyre you have to find the puncture, remove the backing tape, unstitch the casing and pull out a section of tube. You patch the tube and reverse the process to put it all back together again. This faff is why tubulars have almost vanished outside of elite racing.
Tubulars are still widely used in pro racing because you can carry on riding with a puncture while a support vehicle gets to you, and of course riders don’t have to repair them, or fit them in the first place.
Nevertheless, some riders swear by tubulars, claiming that high-end, handmade tubulars in particular give a nicer ride than clinchers and get fewer punctures. These tyres get their qualities from their very fine, supple casings — which can be made of cotton, polyester or even silk — and thin tread layers. Instead of the tyre being vulcanised in one piece at high temperature, the tread is glued into place at lower temperature. This is said to make for a more flexible tread because the process doesn’t harden the rubber.
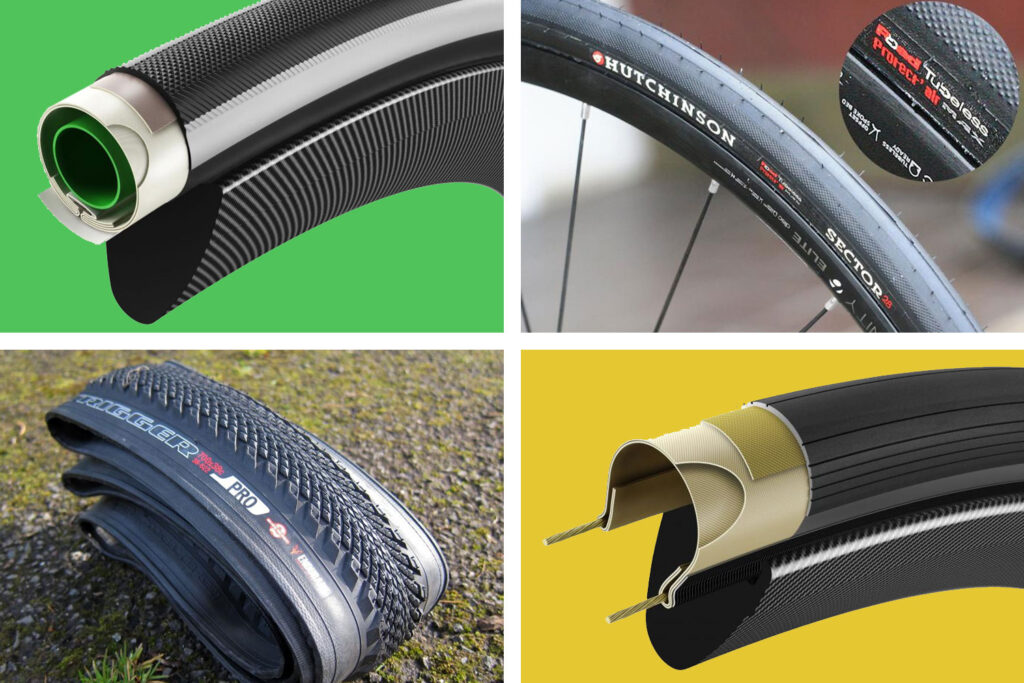
Tubeless
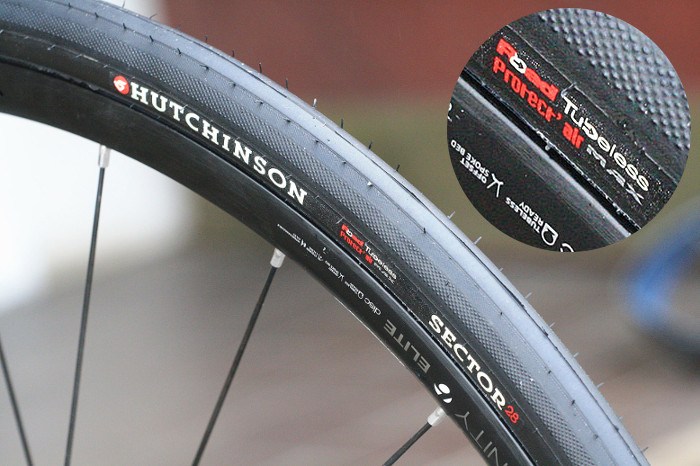
The clue’s in the name: these are clincher tyres that don’t have an inner tube. Instead, the tyre seals against the rim, and the air is held in by either a rubber layer on the inside of the tyre or by a liquid sealant.
The main advantage is that these tyres are immune to a certain type of puncture, known as a snakebite or pinch puncture. A snakebite puncture happens when the inner tube is trapped in a fold of the tyre between the ground and the rim, producing a characteristic pair of holes in the tube. If there’s no tube, this can’t happen.
Snakebite punctures are a big problem for mountain bikers, who usually run their tyres at low pressures for maximum grip, so they’ve enthusiastically embraced tubeless tyres. Snakebites are less of an issue for road cyclists, though the deterioration of the UK’s roads in the last decade has seen riders turning to fatter tyres at lower pressures to improve comfort.
Tubeless tyres need a matching rim, either without spoke holes or with a rim tape that seals the spoke holes. The tyre bead is shaped to seal against the rim, and the sizing is more precise than that of ordinary clinchers.
Tubeless tyres fall into two categories: full tubeless and tubeless ready. Full tubeless have a layer of rubber on the inside of the tyre to retain air. Tubeless ready tyres have the necessary bead shape to seal against a tubeless-compatible rim, but a conventional casing to save weight. With the addition of 30-60g of sealant to keep the air in, this can be lighter than a conventional tyre and tube.
Browse a few mountain bike websites and you’ll likely find instructions for rolling your own tubeless systems using tubeless rim tape and sealant with conventional tyres and rims. This is a bad idea for road bikes. The higher pressures of road bike tyres mean that the accurate fit of a proper tubeless tyre is crucial to success. Without it, a bodged-up system can fail in use.
Hutchinson and Shimano created the original Road Tubeless tyres and rims, and other manufacturers have produced their own interpretation of the idea. Most recently, Mavic came up with a range of wheels and tyres under the Road UST brand, and submitted the specification to the International Standards Organisation and the European Tyre and Rim Technical Organisation for ratification as a standard any tyre and rim maker can use.
Open tubulars
An open tubular is a clincher that’s made with the same construction methods as a handmade tubular. The term is part marketing, part description, as it’s a way of explaining why some high-end clinchers are rather expensive.
Fans of these tyres say they have the ride quality of a tubular, which is what you’d expect as they use the same high-thread-count casing materials and thin, hand-glued tread.
A few years ago it was almost a sure bet that a tyre labelled as an open tubular would be among the fastest, smoothest-rolling tyres.
Solid and foam tyres
Over the years there have been many attempts to market puncture-proof tyres that fit conventional rims. These have usually involved tyres made from solid rubber, or tyres with a very thick layer of rubber round a hollow core, or tyres made from some sort of foam.
Without pressurised air in them, such tyres usually give a very harsh ride. In order to keep them on the rim they have to be a very tight fit, which makes them very hard to mount too.
Solid and foam tyres are not made of the same rubber as tyre tread, but are moulded from other materials like polyurethane. However, that can lead to problems with grip, as a slipperier tyre surface won’t stick to the road as well.
The only tyre maker that seems to have overcome some of these problems is Tannus, a Taiwanese division of a chemical company that among other things makes shock-absorbing sole components for sport shoes. Tannus has a proprietary foam it calls Aither 1.1 and claims tyres made from it ride like good quality city bike tyres.
However, Tannus has only partially solved the fitting issues, using plastic pins through the tyre to hold it in place. This makes for a time-consuming mounting process best left to a bike shop that has Tannus’ special tools.
road.cc tyre reviews
More road.cc articles on tyres
Road tubeless: everything you need to know
Your guide to road cycling tyres + 17 of the best
Buyer’s guide to tubeless tyres — your options in new technology rubber
The best tyres to keep you cycling through winter


4 thoughts on “Beginner’s guide to bicycle tyres: find out everything you need to know about tyre types”
Tubeless vs snakebites is
Tubeless vs snakebites is just marketing billshitism at its best. First I only had one snakebite with tubes very very long ago. Second if you run a too low pressure with tubeless you won’t damage the tube, obviously, but the tyre. This happened to me quite recently when the tyre also unsealed and it was quite a bitch to get a proper seal again due to latex trapped between the tyre and the rim. I am going on with tubeless though because of the very avantageous protection / weigth ratio.
A very good synopsis types of
A very good synopsis of types of tyres.
Since my comment 2 weeks ago
Since my comment 2 weeks ago on tubeless, I had a puncture in the rear tyre that would not seal. So for me road tubeless is over. It holds none of its promises: protection against snakebites, and puncture proofness.
In the era of tubeless
In the era of tubeless sealant, tubular punctures became simpler than the article suggests. Remove the valve core, pour in some sealant, replace the valve core, spin the wheel around, and put in air. If the puncture isn’t catastrophic, it seals just fine. In real life non-pro racing, there aren’t fleets of team cars following you around. This allows you to ride back to the start line and extend the life of a very expensive tire for another couple of races. I mention this for the very few people this might be relevant to.
Tubeless itself is OK, but I ultimately went back to normal clinchers for every day rides. Pro: lower pressure, and a slightly simpler on-road flat repair (you still have to add air after getting sprayed with sealant.) Cons: without an air compressor it can be a real challenge getting a new tire to seat. The other drawback is that sealant eventually forms a solid glob (a “Stan’s baby”) and stops working after a few months. Tubeless wasn’t a huge net win, and the tire selection isn’t as good. Sorry, tubeless marketing guys.