Support road.cc

Like this site? Help us to make it better.

How to fit and set up your saddle - get your position right

Here's how to adjust your saddle so you're sitting comfortably

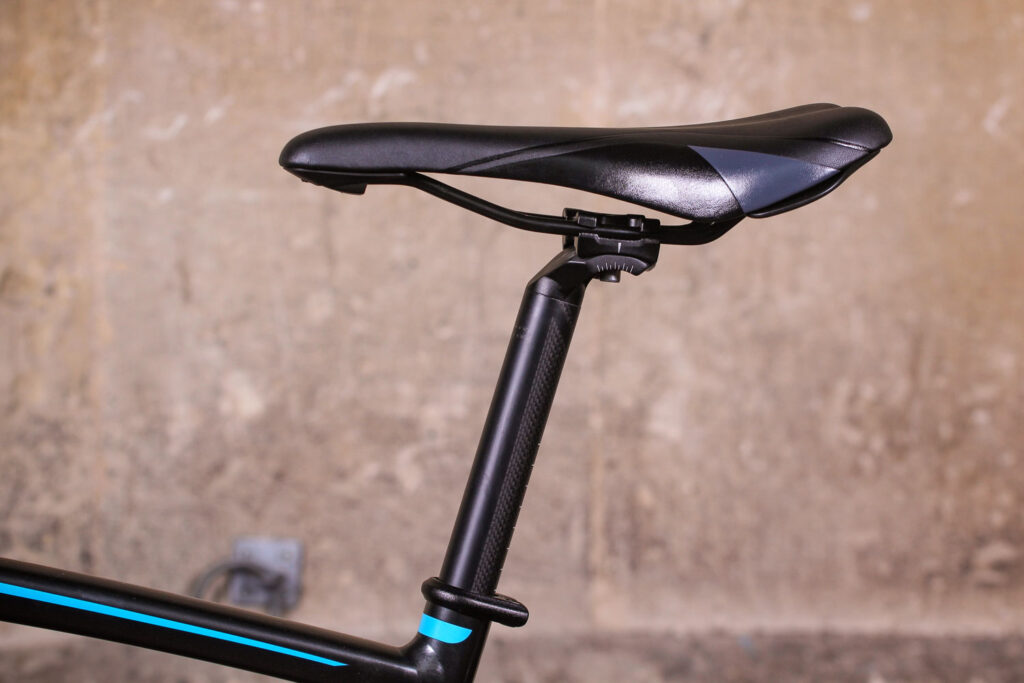
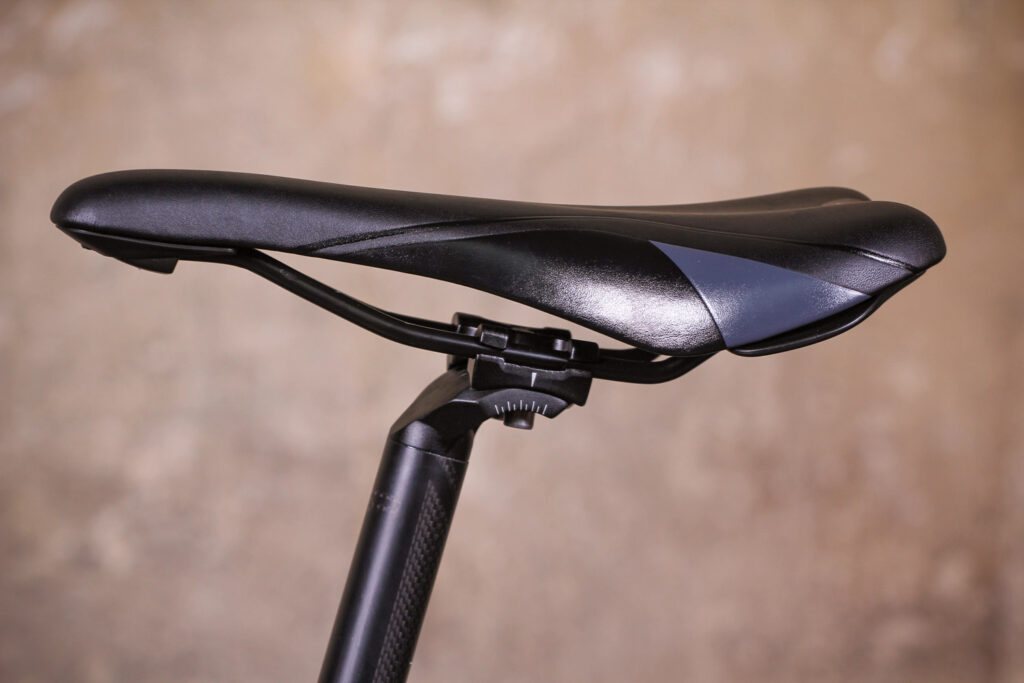
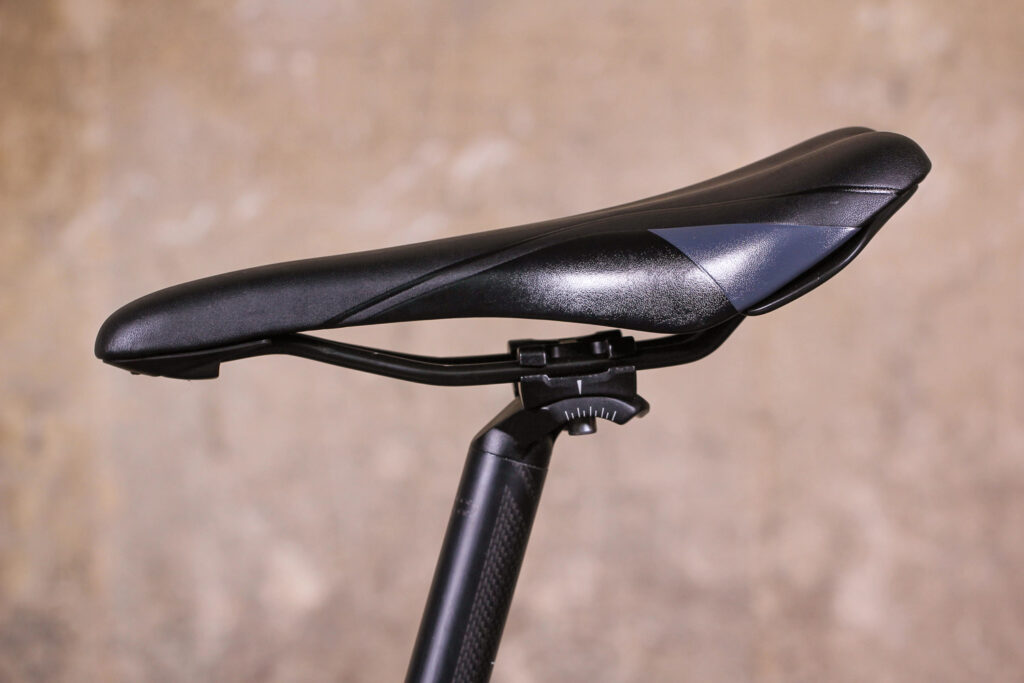
The saddle is where you sit on the bike. It can be a lazy couch, your office chair or a seat in the confessional. Making sure that it's fitted correctly to your seatpost and angled to suit your needs is essential. Here's how.

Our guide below shows you what we believe is the best method to fit a saddle. We've included a list of the tools and materials that you will need to complete the job and in some cases where you can buy them. If there are others that you prefer then feel free to let everybody know in the comments.
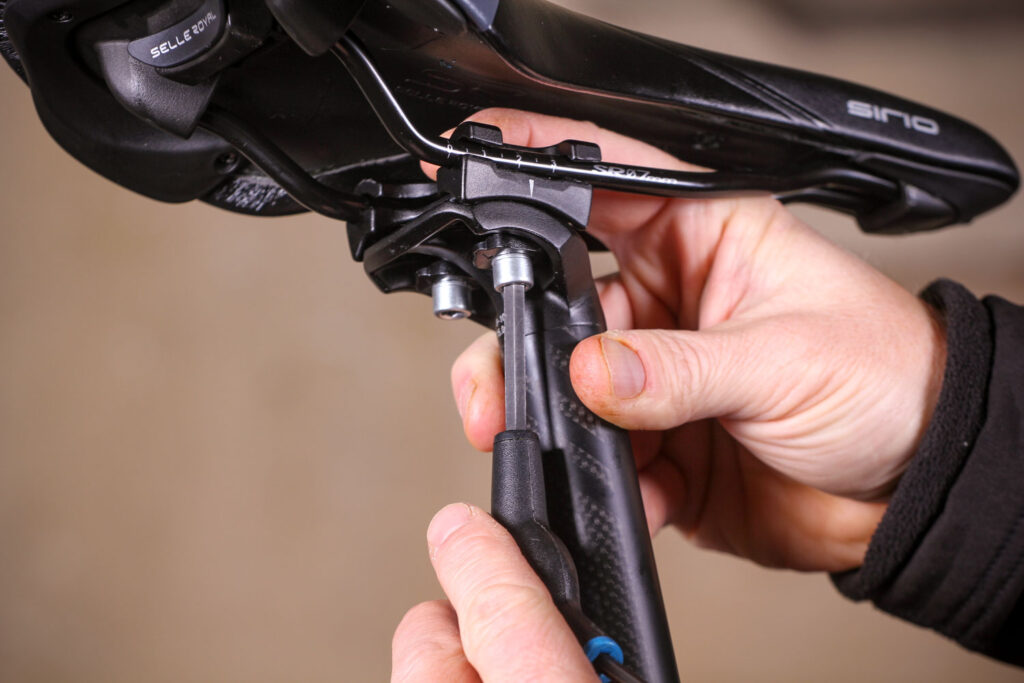
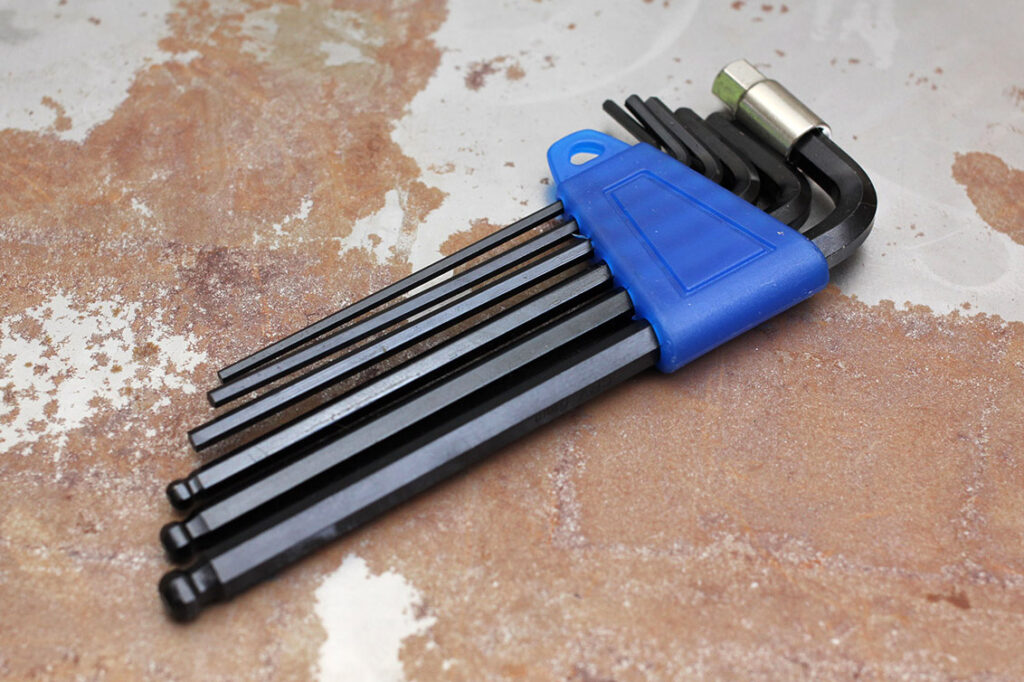
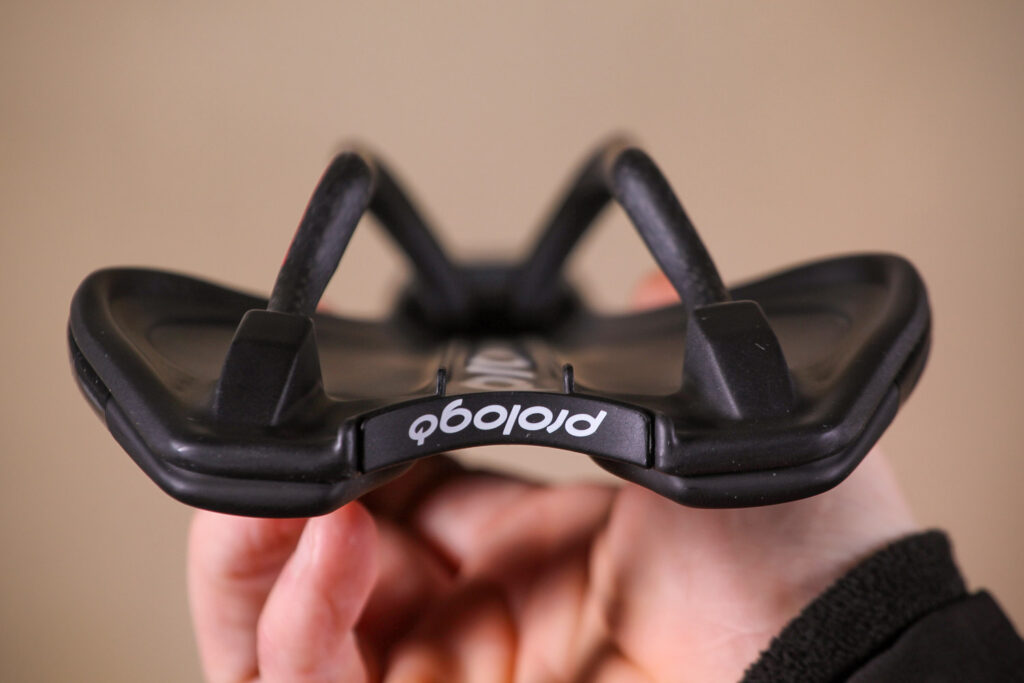
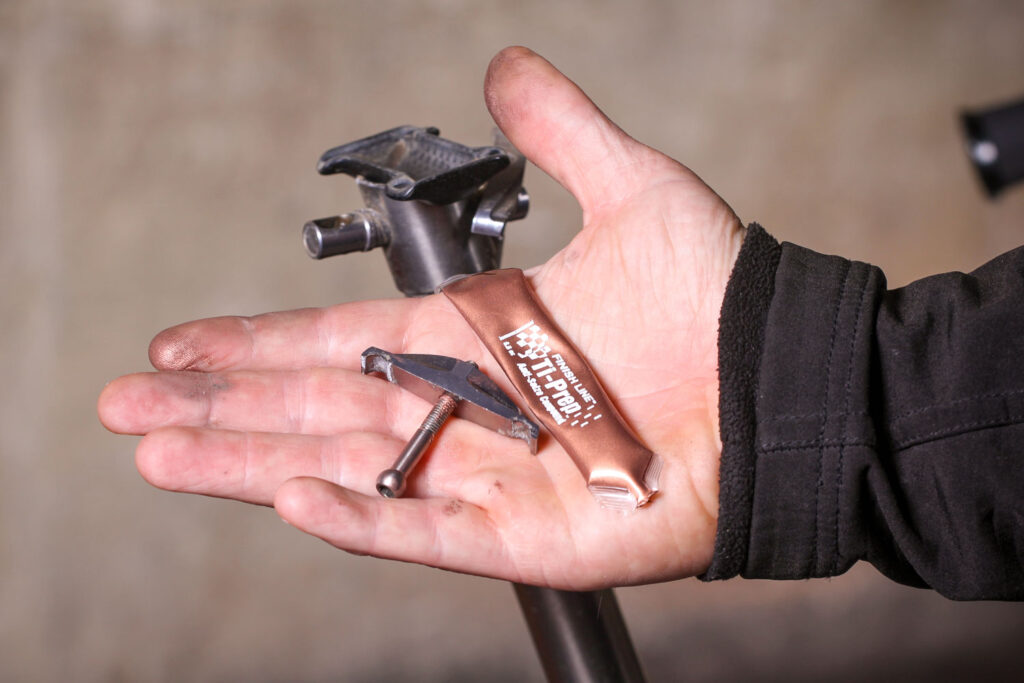
Tools & Materials

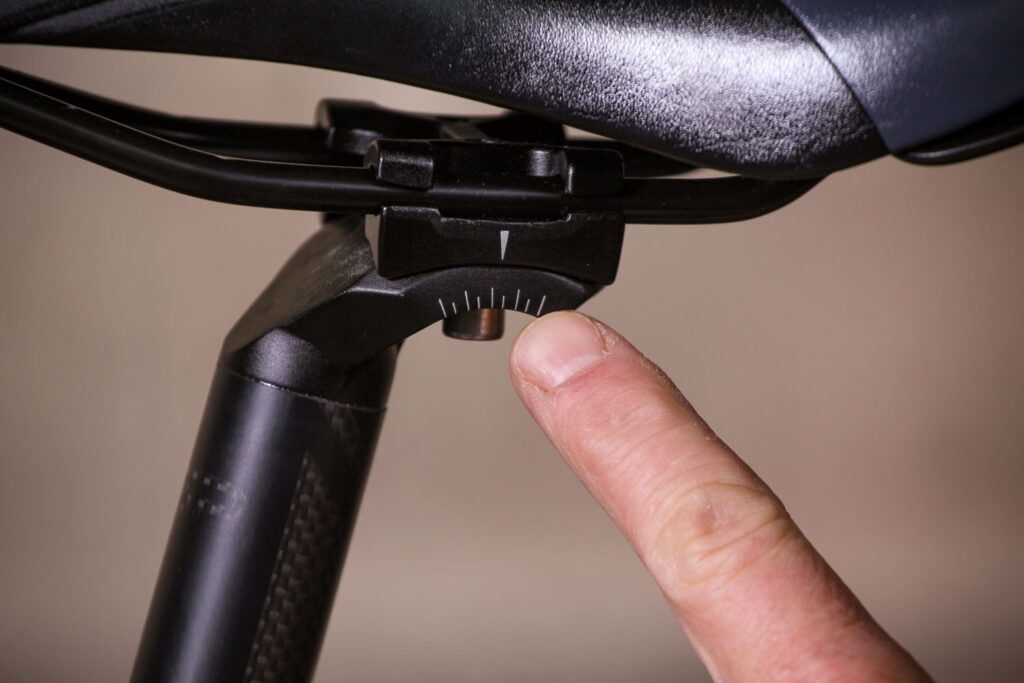
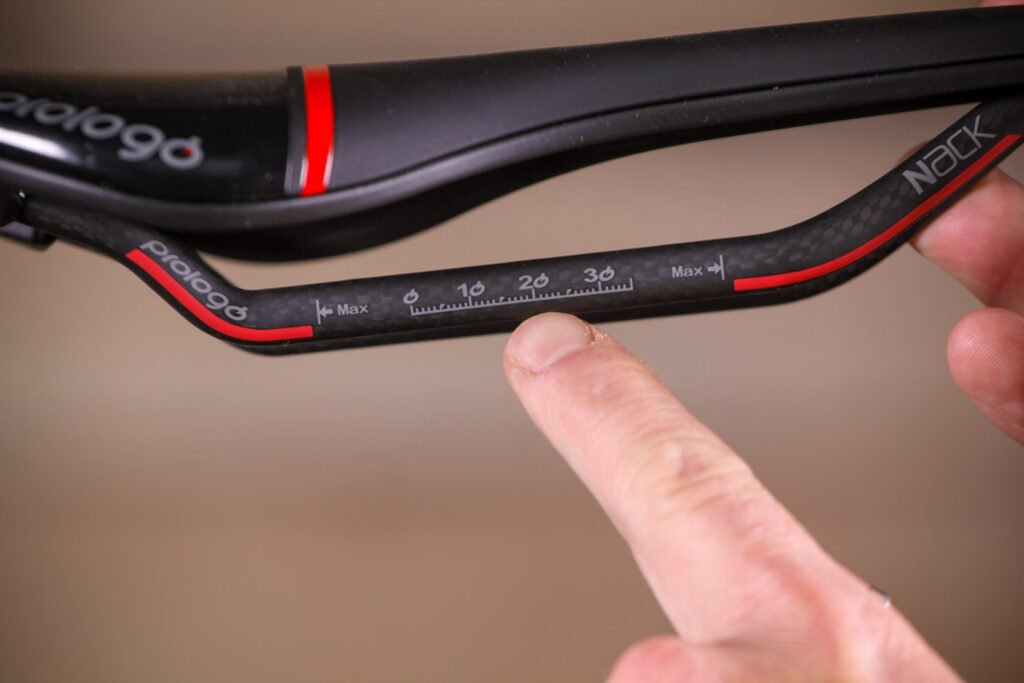
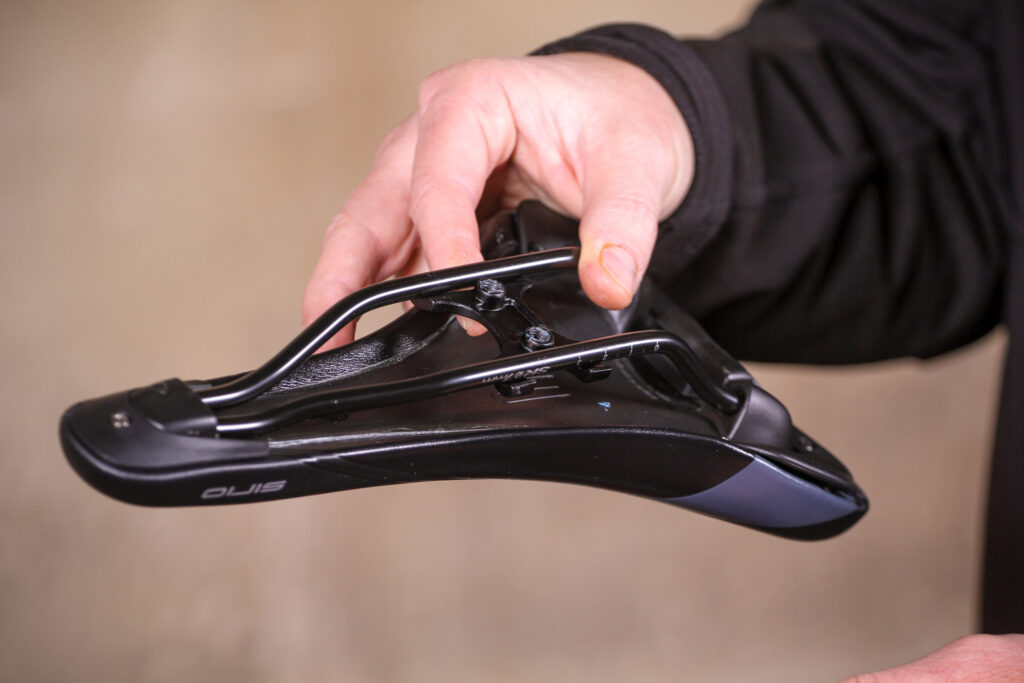
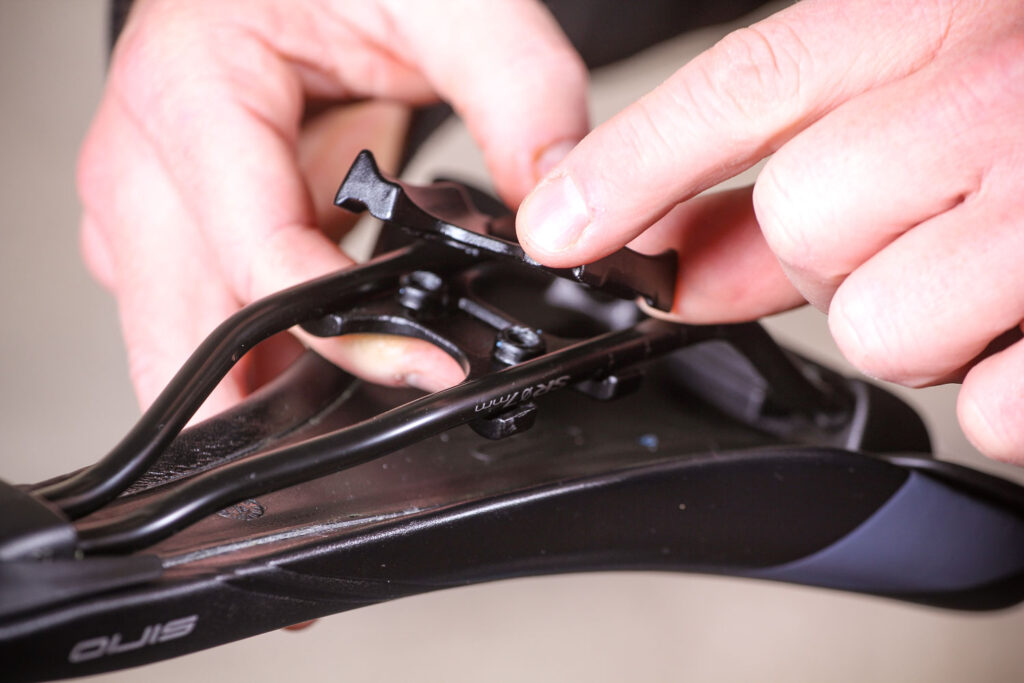
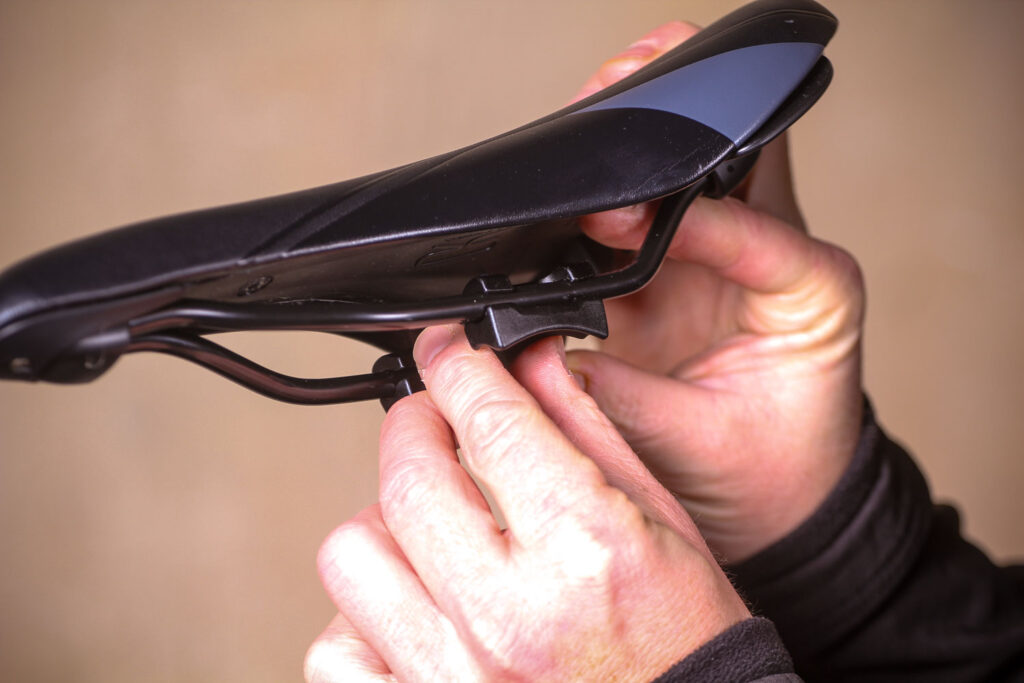
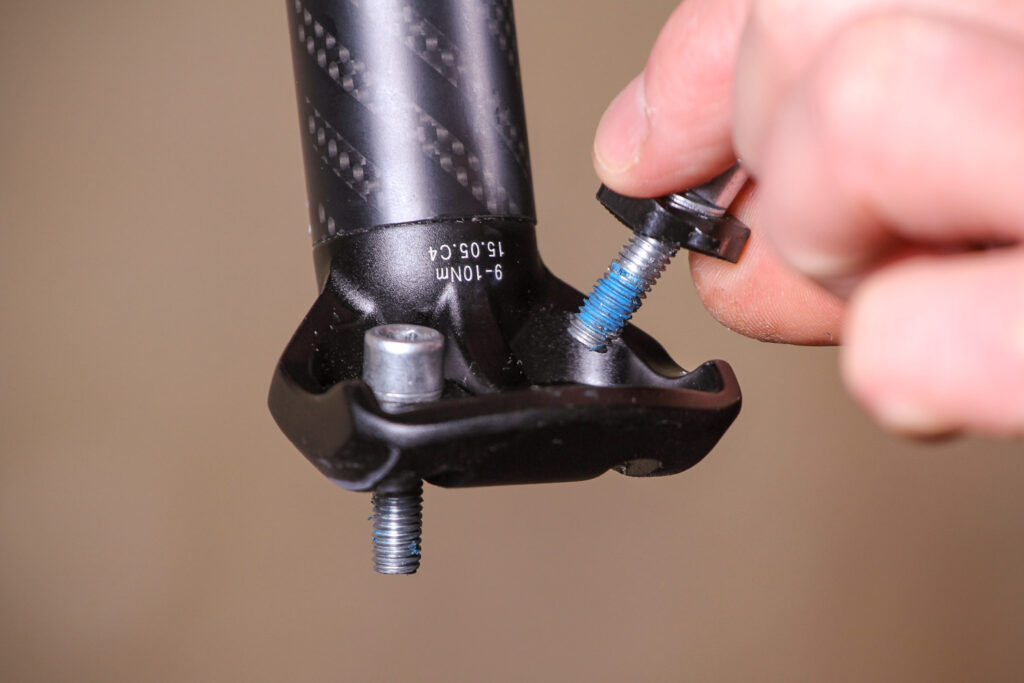
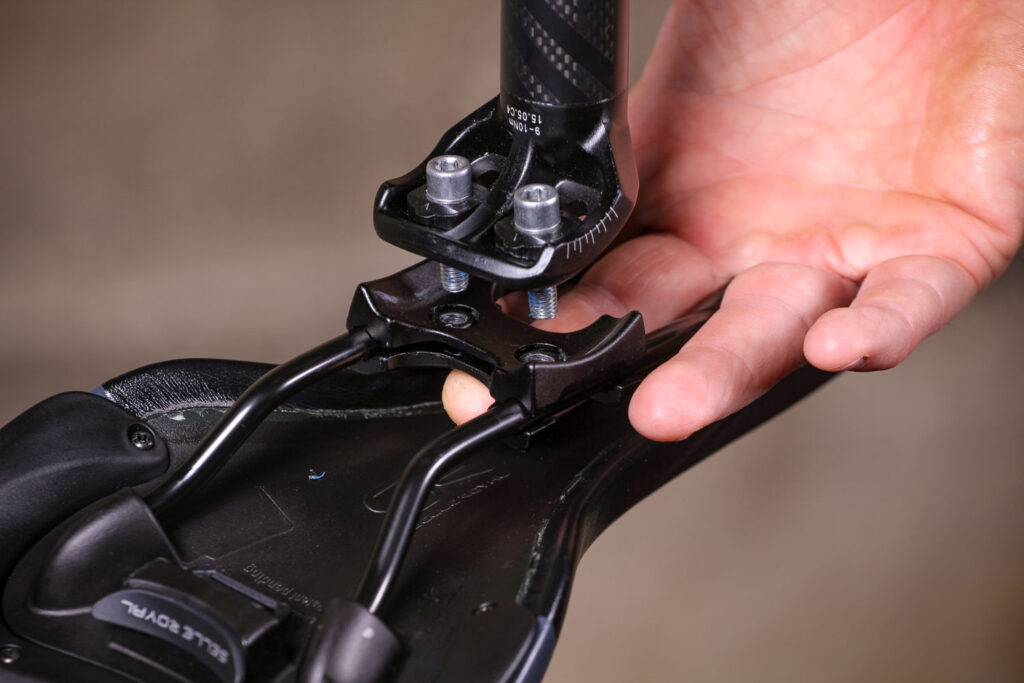
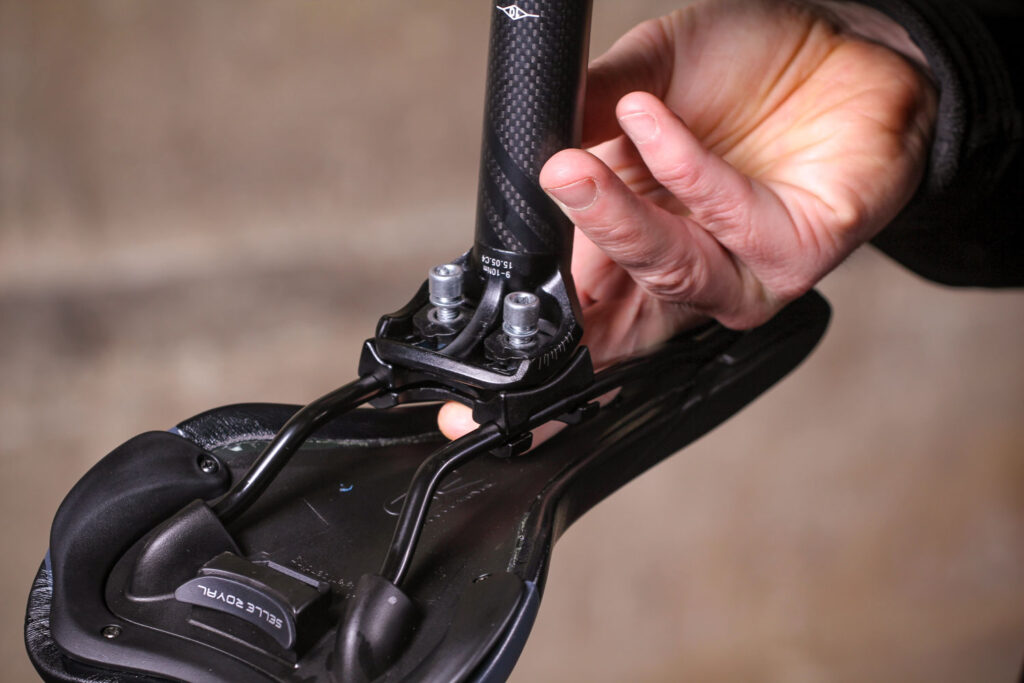
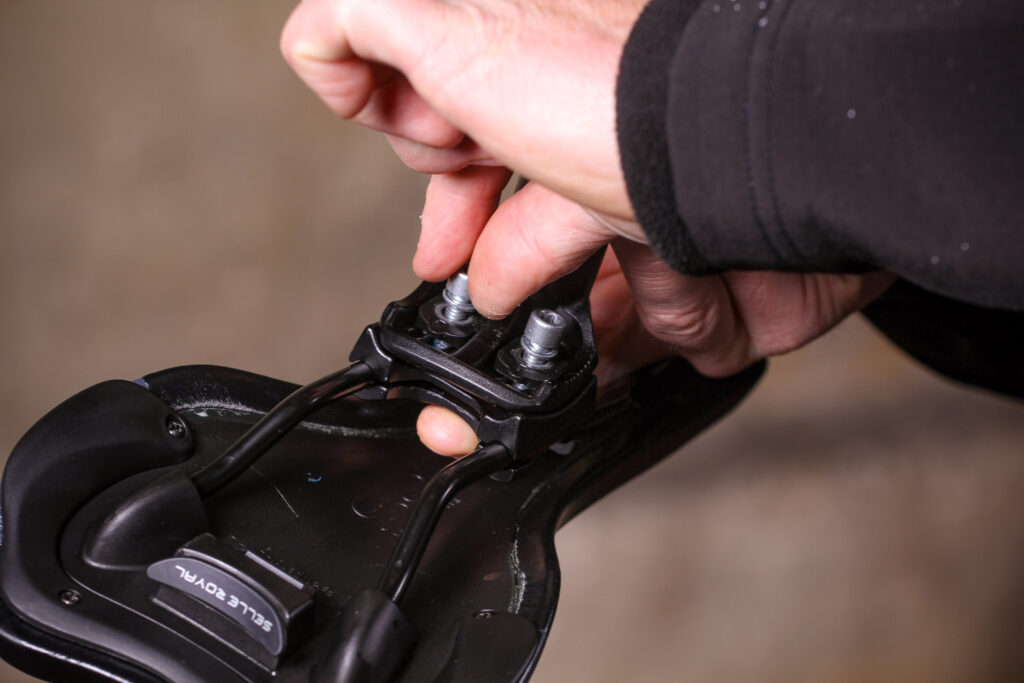
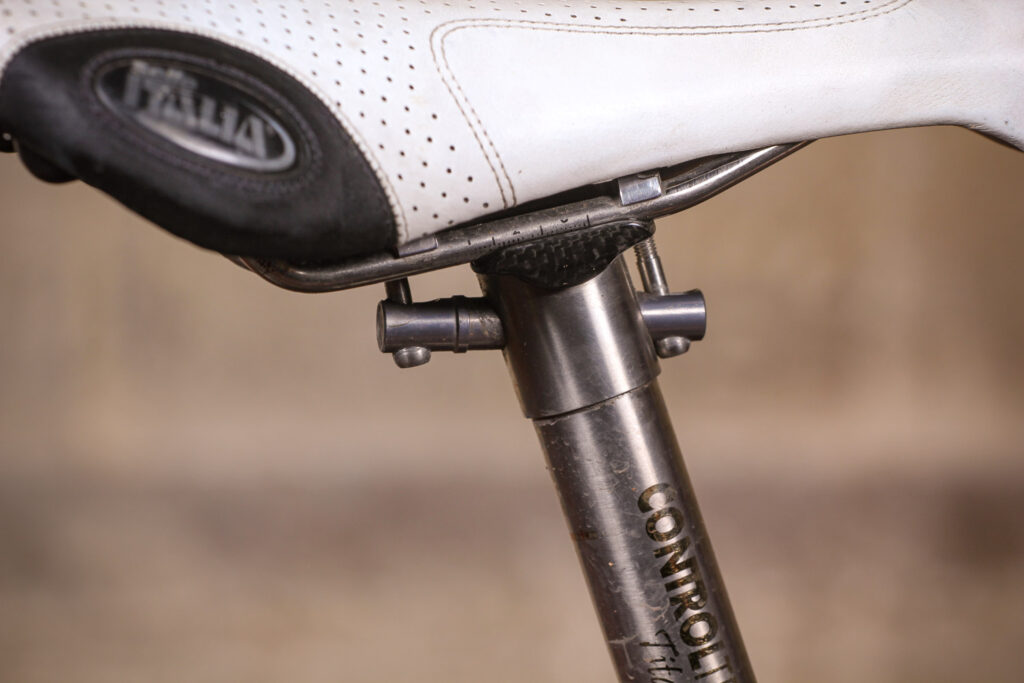
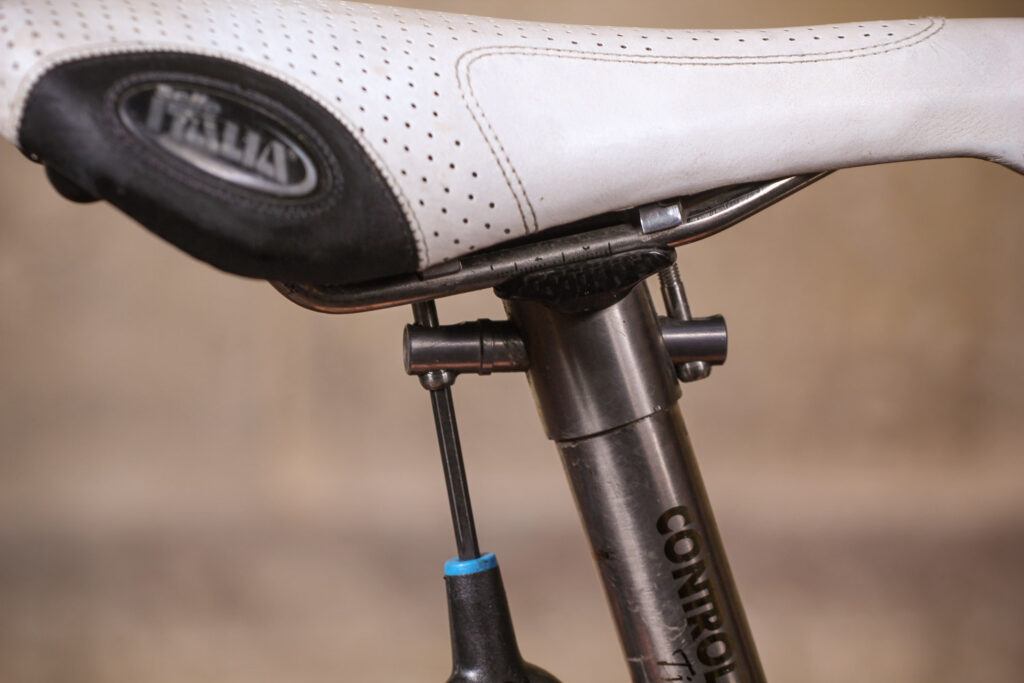
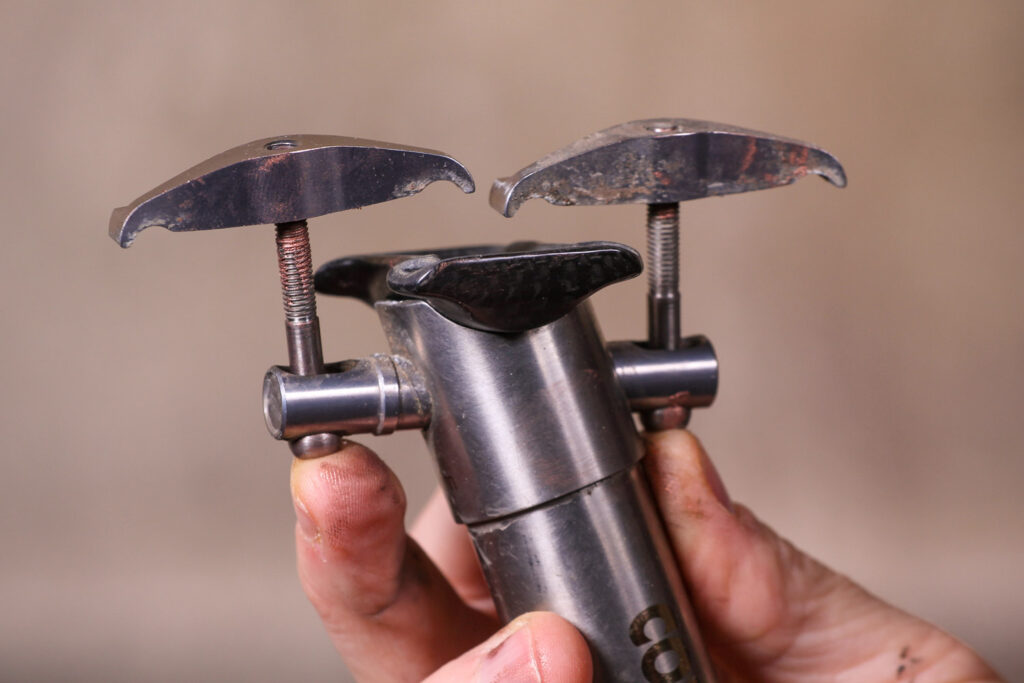
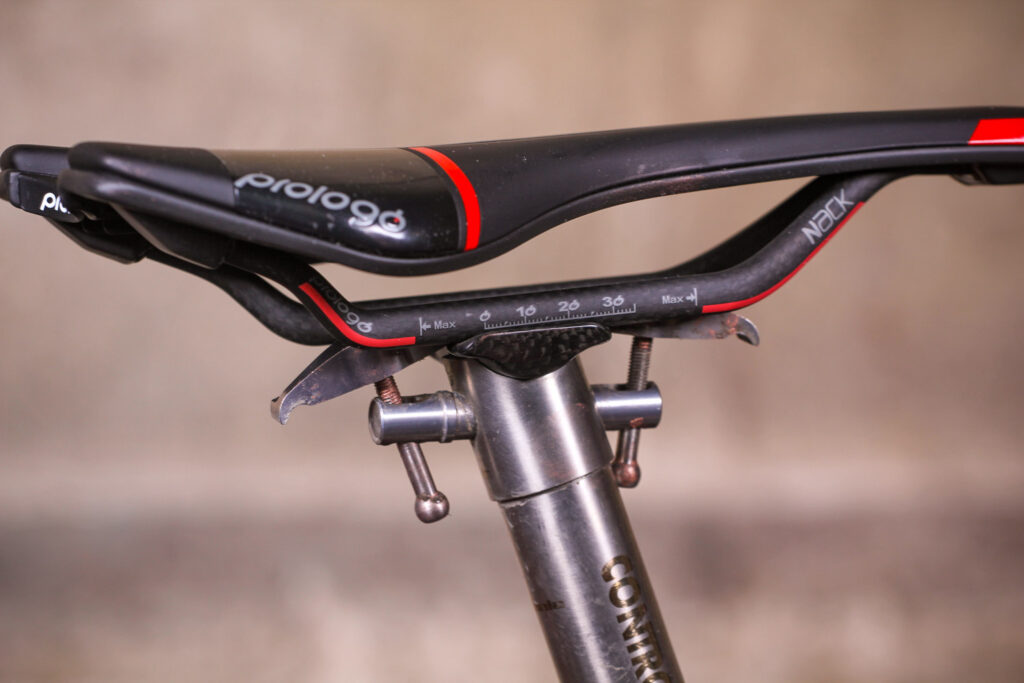
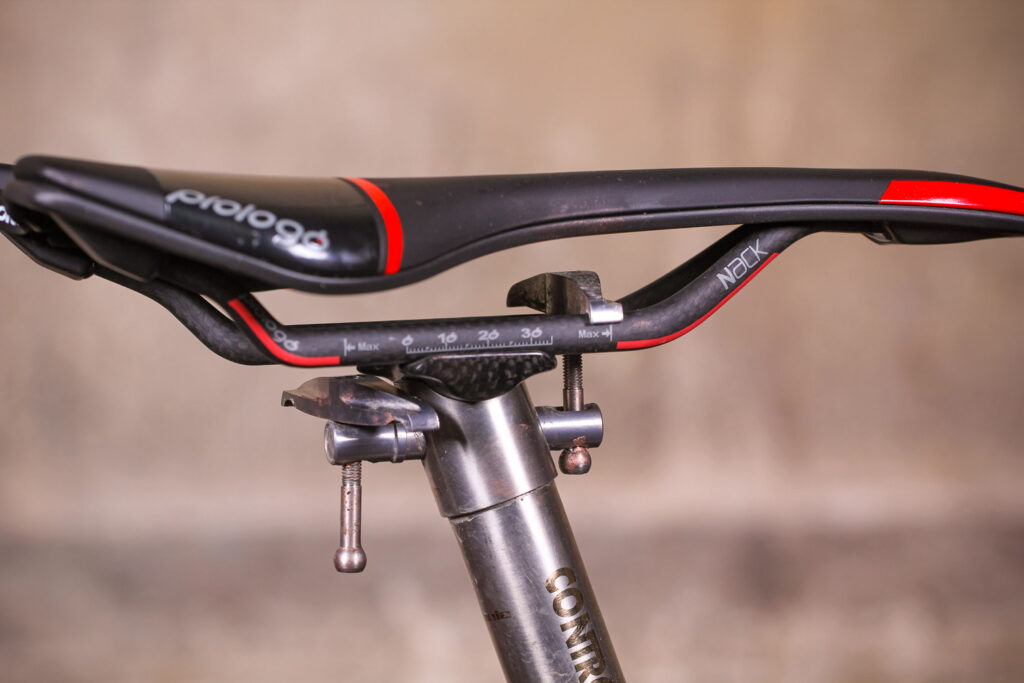
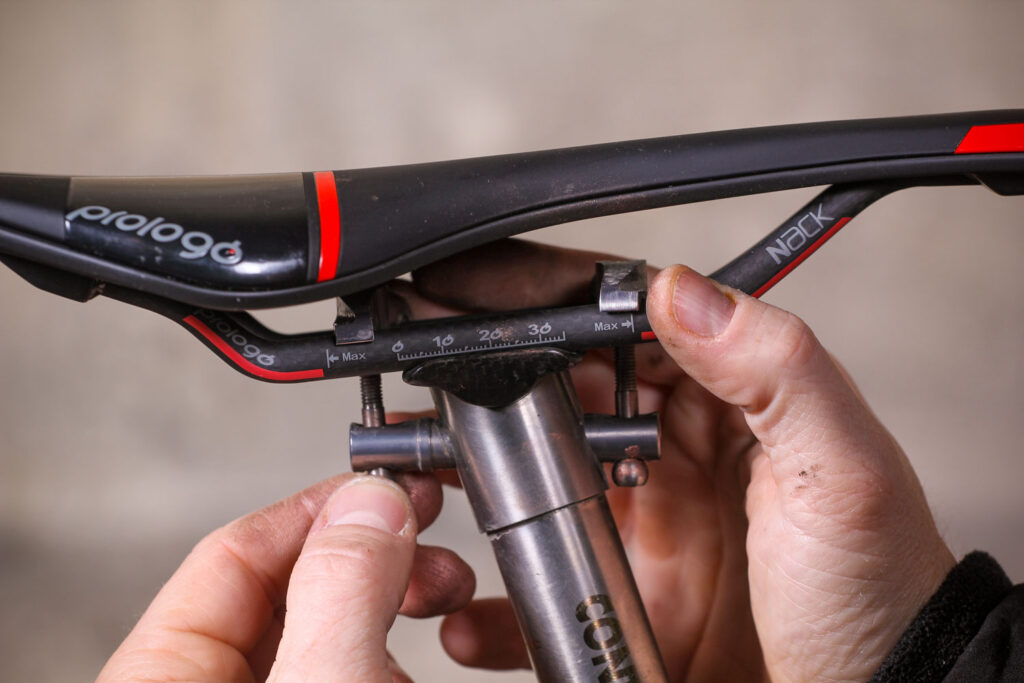
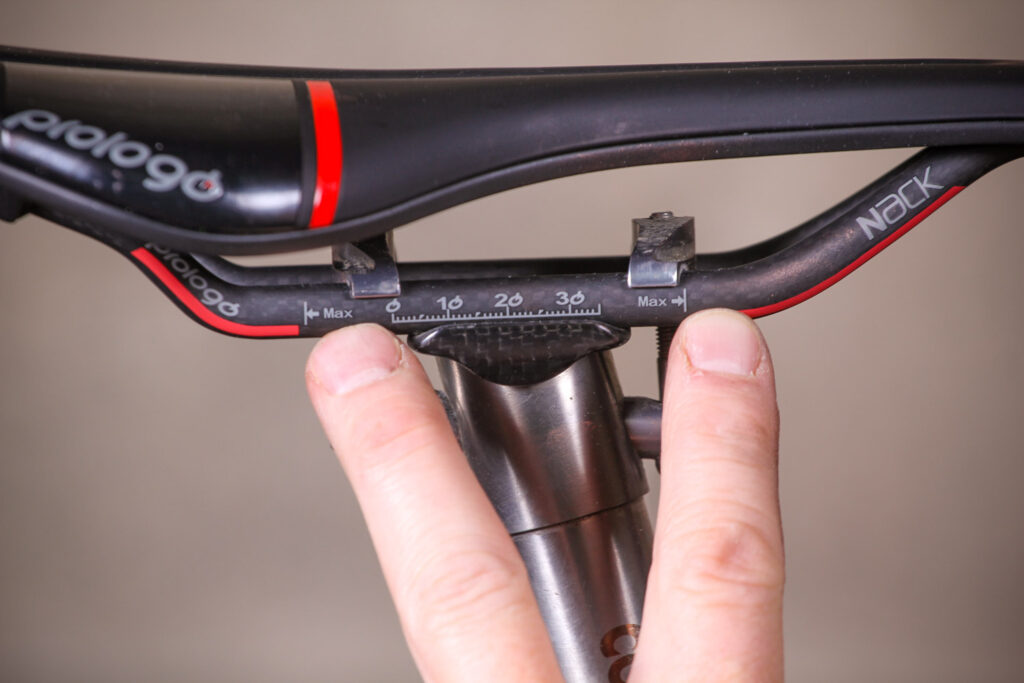
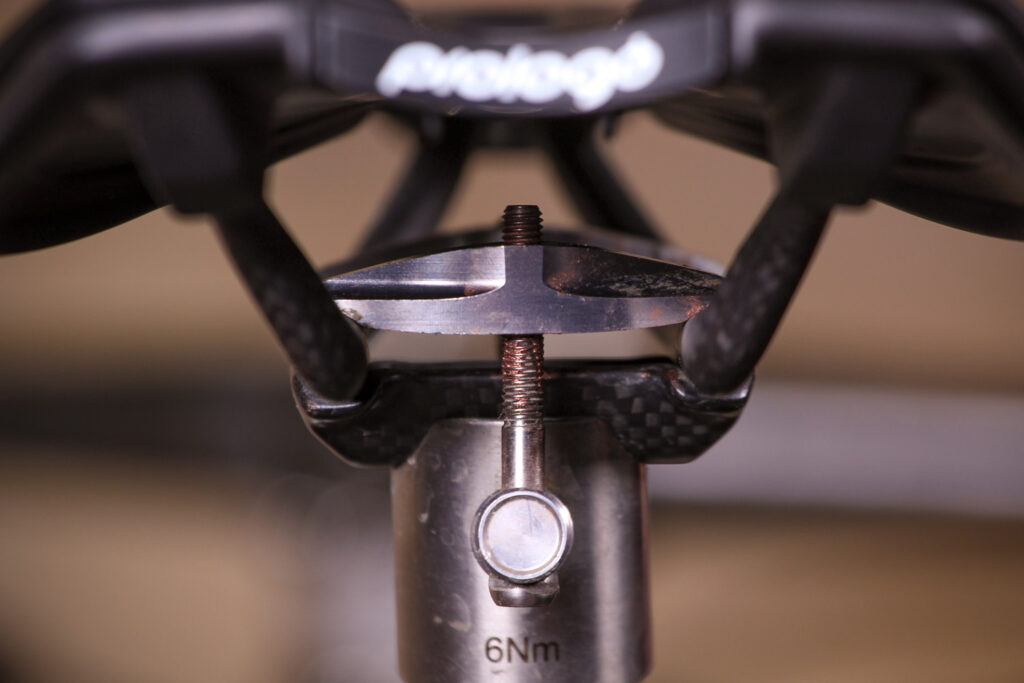
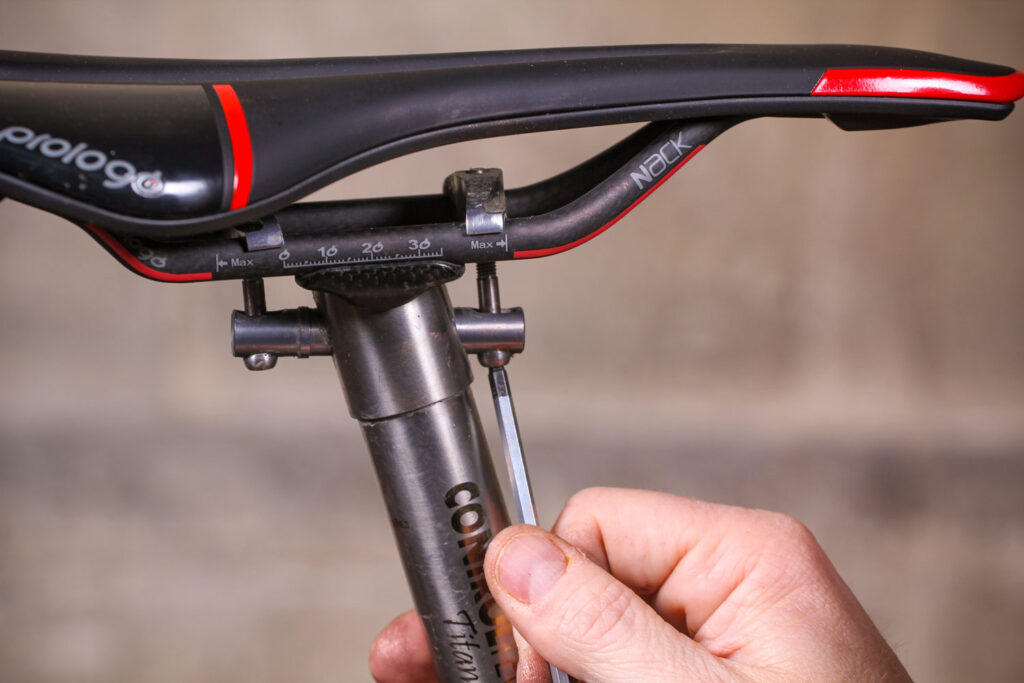
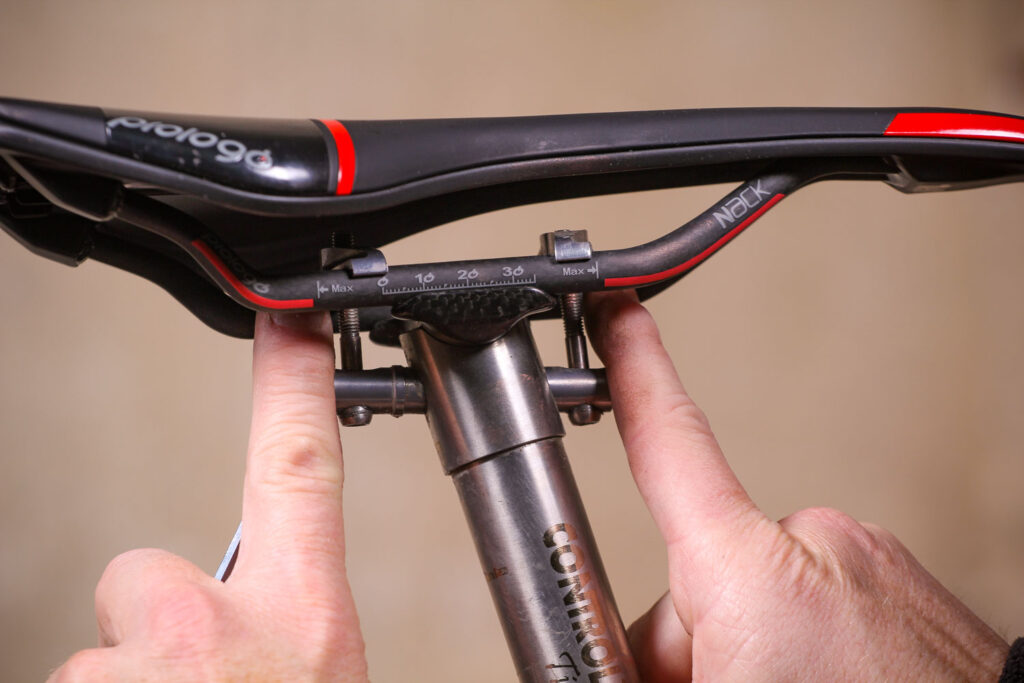
Saddle angle adjustment

Step1
Most riders look for a saddle position that allows them to apply strong consistent pressure to the pedals through the entire pedal stroke. This goal is usually achieved with a saddle angle that is more or less horizontal front to rear. However, this is just a guide. We've seen riders obsess over a single degree when setting up a new saddle, with out having first ridden it to determine what angle it actually required. Let your backside and legs tell you what's right, not a spirit level bubble.


Step2
The angle of the saddle is adjusted via the saddle clamp on the seat post. Seat post clamps come in many designs, some of which make fine adjustments easier than others. This seat post (above) is a traditional one-bolt clamp on an integrated lay back head. The bolt tightens the clamp to hold the saddle in place; you adjust the angle and fore-aft position by moving the saddle before tightening the bolt. In this case the clamp has angle guide marks to help you see (and possibly note) your saddle clamp angle. Not every post has these, but they're useful.Some single-bolt seatposts have serrations on the clamp to help keep everything in place, but that limits how finely you can adjust the angle. Without those serrations it can be necessary to tighten the clamp so hard it deforms slightly and the angle is then impossible to change.Posts with two bolts alleviate these problems. If the bolts are fore and aft they provide a firm hold on the saddle and fine adjustment of the saddle angle. If they're side-by-side angle, it's not quite as easy to fine-tune the angle, but the saddle is held firmly and the cradle retains its original shape.


Step3
You quite often see riders of bikes that are slightly too short run their saddles slightly nose up, as it curves the spine, shortening it and fractionally reducing the riders reach. Off road, gravity enthusiasts often use a low saddle height and nose up saddle position as it helps allow them to control the bike as much with their legs as with their backsides, when they're pointing down 30-40 degree slopes.


Step4
More common than a nose up saddle attitude, is a nose down one. This promotes an over the cranks pedalling position, and relieves some pressure on the rear of the perineum at the expense of added pressure on the feet and the hands. It can also give riders some 'tail' to push back against and more easily develop a lower torso angle, for an aggressive aero position. Czech Olympic mountain bike champion Yaroslav Kulhavy is a successful pro rider who runs an extreme nose down saddle angle, if you're after some nose-down proof.


Step5
As with virtually every component genre in cycling, saddles have a range of sizes and dimensions for the parts that attach to the bike. In this case it's saddle rails. They're usually 7mm rod or tube, but carbon fibre rails have to be bigger. This must be taken in to consideration when buying to ensure the rails and the seat post's saddle clamps will work together. An incompatibility can cause damage to the rails and even failure.


Step6
When selecting your saddle, it's important to note the range of adjustment marked on the rails. The markings aren't for fun. Lightweight alloy or carbon rails don't like being clamped near their corners, so don't choose a saddle with a narrow range of adjustment if you know you need your saddle racked completely forward or backwards. If you do need to attain an extremely forward or rearward position, consider a seat post with more or less clamp lay-back rather than relying on the saddle rails.


Step7
Sometimes seat posts have more clamp parts to wrangle into position than fingers can manage, especially you try and assemble them the right way up. We often turn the saddle upside down to keep the heavy part (the saddle) at the lowest and give a clearer view of how the clamps parts fit together. Here we've got the top plate of the clamp in position on the saddle rails.


Step8
By holding the weight of the saddle by the upper clamp plate we can balance it more easily allowing us to introduce the lower clamp plate.


Step9
Here you can see the seat post's upper and lower clamp plates, both lined up opposite each other. The saddle rails are sandwiched in the saddle rail channels of both upper and lower plates. When you're assembling the clamp components be sure to check to see if they have a front and rear specific orientation.


Step10
Again, holding the seat post upside down as you introduce the clamp bolt(s) allows you to use gravity to hold everything in position as you fit the parts. Some lay-back style posts use a single clamp bolt, others (like ours here) use two.


Step11
With gravity holding the bolts in the clamp you can steady and lift the saddle and clamp plates to meet the bolts and the head of the post. Lining everything up this way is far easier.


Step12
As the clamp bolt(s) touch their respective holes in the clamp plate they stand up in the post head.


Step13
Give them a turn or two with your fingers, just to make the whole affair a single unit.


Step14
Now you can flip the seat post and saddle up the right way and fit it to the frame. Take the Allen keys and wind on a little tension to the bolt(s), just enough to stop the saddle rails sliding back and fore in the clamps, not so much than you can't make the saddle rails move in the clamps with your hand.


Step15
Make fore and aft rail adjustments using the saddle grooves, and make saddle angle tweaks using the rounded shape of the seat post head/lower clamp plate, to suit your particular requirement. When you're happy with the provisional adjustment, tighten the bolts.


Step16
The twin bolt clamp design (above) sets up a different way. Each bolt not only pulls its respective clamp bracket down on to the saddle rails, but the two act in concert to allow fine angle adjustments. The downside is they can be tricky to set up as the clamp parts are all a bit floppy as you try to fit the saddle rails, and some designs put the clamp in line with the seatpost, with no layback. The upsides are they can be light and most importantly, they make very fine adjustments much easier, which is handy if you, like us, are detail-obsessed with position.


Step17
The twin bolts tighten against each other and because tightening one without adjusting the other means you'll change the angle of the saddle, you do need to spend a little longer making counter adjustments until you get it just so. For example, tightening the rear bolt, as shown here, would not only tighten the rear clamp, but also raise the nose of the saddle. You'd need to add tension to the front bolt as well, if you wanted to retain the original attitude of the saddle.


Step18
All saddle bolts take quite a lot torque and leverage, having a rider sat on the saddle effectively trying to rip it off the top of the seat post. They're also very exposed to the ravages of road water, dirt and in winter, corrosive road salt. Be a friend you your seat post bolts and use grease, or with titanium bolts like these here, some Ti-Prep or Copaslip. You'll be glad you did when you decide to change or adjust your saddle next spring.


Step19
Here are the two upper clamps, with some Ti-Prep on the bolt threads. The lower rail cradle is in position on top of the seat post shaft. You'll need to unwind the upper clamps most of the way, especially if you're using chunky carbon saddle rails, in order to make room for them to fit over the rails.


Step20
Sit the saddle on the lower cradle; the upper clamps can just drop down for the moment.


Step21
Lift the front upper clamp and turn it in line with the saddle rails until it is positioned above the rails (in the gap under the saddle hull), then turn it back ninety degrees to its proper position and let it down so the upper clamp rail channels are resting on the top edges of the rails.


Step22
Follow the same procedure for the rear upper clamp. You'll need to hold the front of the saddle steady as you do this, other wise it can all be a bit wobbly. Finger tighten the bolts just to hold the component parts in position.


Step25
​Take care to observe the marked rail limits.


Step26
The upper clamps and the cradle beds should both be fully seated on the saddle rails.


Step23
Use the Allen keys to make the appropriate angle adjustments.


Step24
There is usually a bit of leeway in the clamps and it is possible to do them up so they feel tight, but to have the bolts at an angle and the upper clamps not fully seated. Once this is checked, the saddle is ready for riding.

Add new comment

5 comments

Avatar
brooksby | 7 years ago
1 like

Sorry for resurrecting, but this seems an appropriate place to post.

My bike (Mongoose hybrid) has a single bolt for the saddle clamp: I've been trying to get the saddle a bit more nose up (ideally level, but y'know...).  So I undo the bolt, adjust the saddle, then tighten the bolt again.  Except as I tighten the bolt, I can actually see the nose of the saddle move down again.

Is there something blindingly obvious that I'm missing here?

Avatar
Altimis | 7 years ago
1 like

Take my advice

No matter the setup your saddle was, if its not suit your "riding style"

Its ruined your ass for entirely of life . . .

Choose saddle base on your riding style and you will find heaven, your ass will thanks you for that as well

Me too, been setting saddle for 3 months with Astute Skyline VT Taca saddle, I can't sit on it comfortable, my riding style is aero specifically, elbow 90 degrees bented, sphinx position, flatted back with extreme pelvic tilted forward

I just can't get it right forever so I give up, I go to LBS and found Fizik Arione "clone" (its copycat saddle that looks like Fizik Arione shape but its not Fizik own product, AKA, copy and paste product sell in other name and brand) named "S" saddle, I find its so cheap and saddle shape looks interesting, I also heard "Fizik Arione" design is suit my riding style from what I do a research so I bought one and test it out

Know what? I got jaw dropped how performance gains by just swapping saddle to the correct one that suit my style, I can pelvic tilted so that my back level to the ground like I do Time Trial without pains and numbass

My cadence also increases significantly, its so smooth and I can keep 100 RPM without tiring, I know its sounds irrelevant but let's me explain why . . .

With Astute Skyline VT Taca, since I can't get it comforts right, its end up pains on my soft tissue even its have cut out at the center of saddle, its not help me at all . . when I do 90-100 cadence, I could spin for 1-2 mins and STOP for a bit then continue spin, its been like this whole 3 months while I try to setup saddle which I fails at it

As I mentioned above, I swapped to "Fizik Arione" copycat saddle name "S" saddle, I could do 100 cadence forever til I getting tires, that's . . . . amazing! I never felt great like this, things I can't do with Astute before, I could do it easily without problems!

I LEARNED this HARD WAY

BUY THE ONE THAT SUIT YOUR STYLE! now I planned to buy a real Fizik Arione soon!


NOTE: I didn't say Astute Skyline VT Taca is bad but its just not for me, I think its for upright position preferred rider, I am aero TT style rider with elbow, pelvic and back 90 leveled to the ground and Fizik Arione shape is my answer

Avatar
pruaga | 7 years ago
1 like

My Canyon Ultimate has the most complicated seat post arrangement I've ever seen.  

Something like this http://brimages.bikeboardmedia.netdna-cdn.com/wp-content/uploads/2016/02/MovistarCanyon2016-9.jpg

The whole fitting assembly is on rails on top of the seat post which can be adjusted fore/aft and this then attaches to the rails which are also fore/aft adjustable as well as angle adjustment.  Basically if you loosen any one of the bolts the whole thing very quickly becomes floppy, so making adjustments is a very careful game.

Avatar
macrophotofly | 7 years ago
2 likes

I've read in a couple of fitting books that the "majority of riders would benefit from a typical saddle to be pointed (nose) downwards by upto 5 degrees from flat". It tips the pelvis very slightly forward; reduces back pressure slightly; and giving the rider something more to push against. As a result I tend to set my seats pointing nose downwards by about 3 degrees from horizontal. Everyone is different, so this may not work for you, but wanted to suggest that for anyone wanting to try something different to just buying another seat.

Other things the above article could mention which would be helpful for some people (i) UCI regs on seat angle and particularly where/how you measure a seat angle if the seat is curved like many are (e.g. Fizik Aliante)  (ii) How to set up an SMP - the curved shape makes it a lot more tricky (iii) If you are buying carbon rails then in what direction the ovality is to help people understand if their seat post is viable or not

Avatar
TypeVertigo replied to macrophotofly | 7 years ago
1 like

macrophotofly wrote:

Other things the above article could mention which would be helpful for some people (i) UCI regs on seat angle and particularly where/how you measure a seat angle if the seat is curved like many are (e.g. Fizik Aliante)  (ii) How to set up an SMP - the curved shape makes it a lot more tricky (iii) If you are buying carbon rails then in what direction the ovality is to help people understand if their seat post is viable or not

Too many people making fun of SMP saddles on the road.cc readership I'm afraid.


Seriously, though, I'd agree. I have a Selle SMP Hell. Fitting it to my seatpost was pretty strange, particularly because when you attempt to set it level, the rails are actually angled upward when viewed from the side.

I run mine around 2 degrees down from horizontal. This gives me good clearance for my man-junk when in an aero position, and provides a firm base for my glutes to push against while on seated climbs riding on the bar tops.

Latest Comments